Each post will have a permanent web address, called URL. As you create a post - your permalink will be automatically generated by WordPress.
There are permalink options you want to consider before you write your first post. You want to set up the way your links will look for all your future posts.
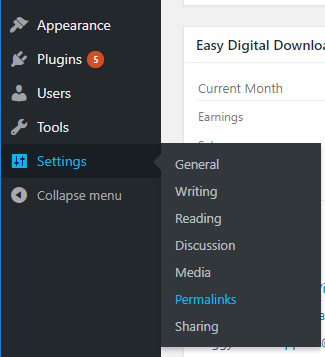
Go to Settings > Permalinks
Quick note:
If you do not see this option in your menu - you might be using a free version of WordPress hosting. That is fine, you will be set to use the default setting of Day and Name option.
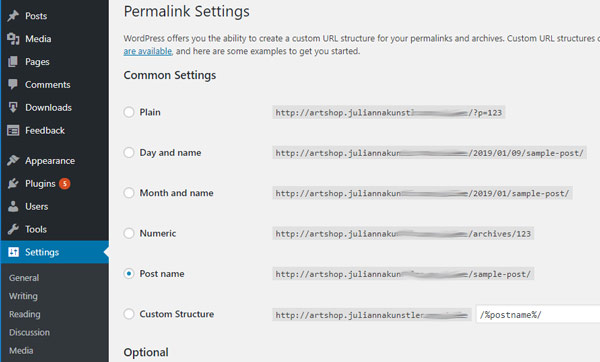
There are SEO friendly and not-so-friendly options.
You want the search engines to be able to find your site and your post by relevant content - that's why you need to have the URLs to be descriptive and reflect the content of your post.
That's why I vote for post name option.
If the date of a post is important to you - you can choose other options.
Plain and numeric options - are less SEO friendly. I do not recommend them unless you have a specific need for this type of a structure.
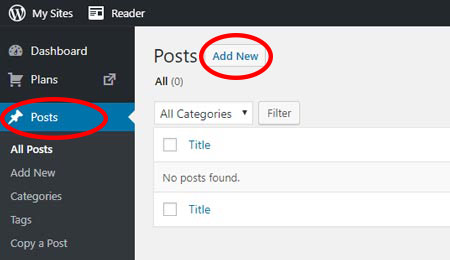
So... If you're ready to get started - click on Posts button, then click Add New.
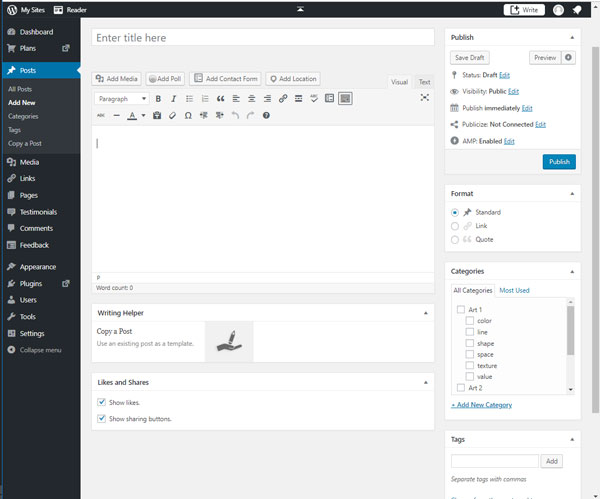
There are two columns inside the Post Writing area.
The left column is a wider one as this is where all your content goes.
The right column holds some tools and settings that you will need to address as you add (or edit) a post.

Blog title.
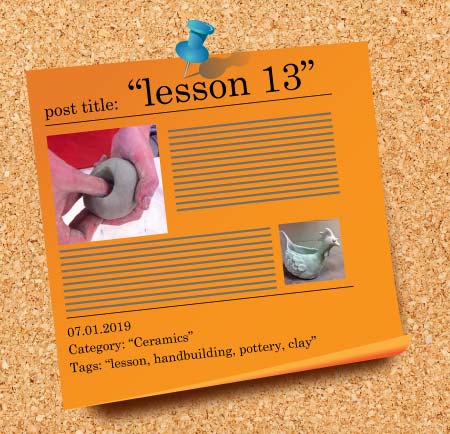
Be descriptive and to the point. Think of posts uniform approach - do you want to include lesson number, lesson unit, or other common feature.
All my lessons start with course name (art1, art2, etc). It makes it easier for me to keep them organized.
As you type a title - WordPress automatically generates a permalink for your post.
Permalink (permanent link) is a URL address of your post. Once you create it - you do not want to change it (you can, but not a good idea as your visitors can get confused if the link would stop working).
Post's title will be added to your site URL, adding dashes between words. URLs do not take spaces.
For better site performance (part of SEO) you want post's URL to be descriptive, but not too long. That's why you can edit the way permalink looks by clicking on Edit button.

Depending on your preference, edit (or not edit) the permalink.

Content Area.
If you are just starting - stick to Visual Editor, if you are familiar with HTML - then you can use the Text Editor.
The content area is where you write your post, add images or image galleries, contact and other forms.
The formatting buttons are self-explanatory.
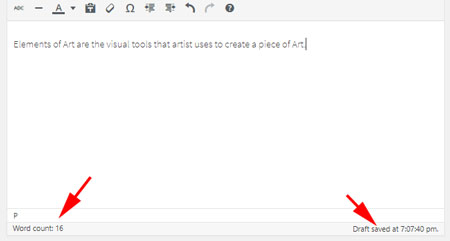
As you start typing in the content area - note word count and auto-save indicators at the bottom.
As you write, WordPress will automatically save a draft of your post.

Add Media.
Click on Add Media button if you want to upload or use an image (or other media file) from the Media Library.
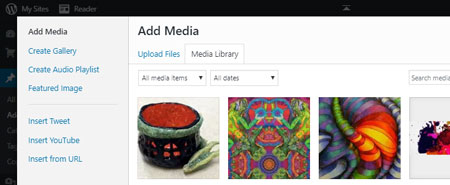
If you want to upload an image - click on Upload Files tab.
Then follow the steps in the Insert Media uploader.
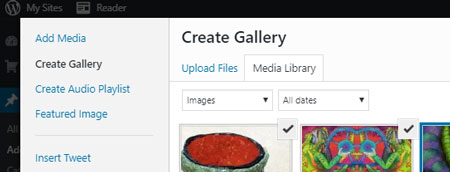
To insert an Image Gallery (with thumbnails previews) - select Create Gallery button.
Then select (or upload) the images you want to use.
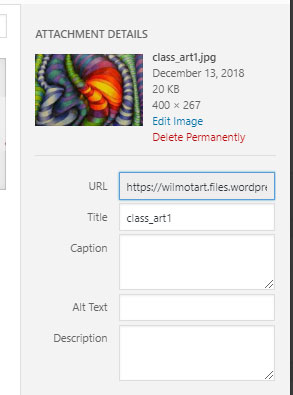
Make sure you fill in all fields, including Alt text and Description. This will help your SEO.

You can add or remove images from galleries.
Click on Create a new Gallery button when you are done.
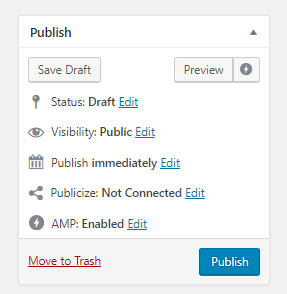
Publish options.
This is where you manage all the publishing options for your post.
You can expand some options for more choices if you click on Edit links.
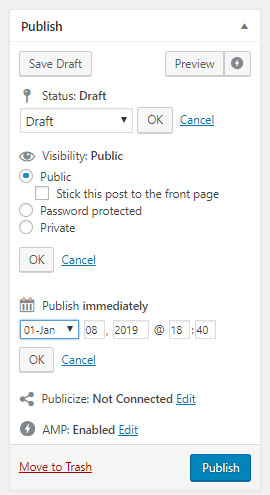
1. Save Draft button stores a draft of the post or page that you are working on.
2. Preview button shows a live preview of the post. This is what it will look like after publishing.
3. Status of the post (most likely you want to keep it public, but you can choose to protect a post with password or keep it private)
4. Publish date. You can schedule a post publishing or change back dated posts.
5. You can completely remove the post.
6. Finally, clicking on Publish button makes the post appear on your site (or schedule its publishing).
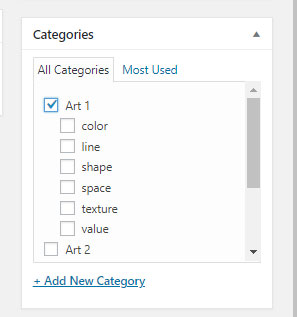
Select a category.
Very important!!!!!!
Do not forget!!!!!!!
Check the category button. Categories organize your posts within the site.
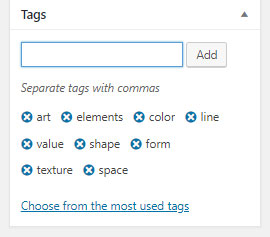
Tags.
Tags are also very important.
They will help Search engines to locate your post.
Write a list of related words and separate them with commas.

Featured image.
Most WordPress themes support featured images.
Featured image will serve as a thumbnail for your post to make it more visual and easy to find.
It will also show (usually at the top) of your post when published.
Not required though.

There are few hidden options that you can use when publishing a post.
Click on Screen Options tab at the top of the area (above the Post Title).
Select options that will work for you.

Time to publish your post!
Just click Publish button!
