Site navigation is the most important feature for the visitor experience.
in this section:
- navigation
- main menu
- additional menus
- links
by JuliannaKunstler.com

Site navigation is the most important feature for the visitor experience.
Navigation affects your site traffic: how high you’ll rank, how much traffic you’ll get from search is based on how easy and logical your navigation is set up. So here are some thoughts for you to consider:
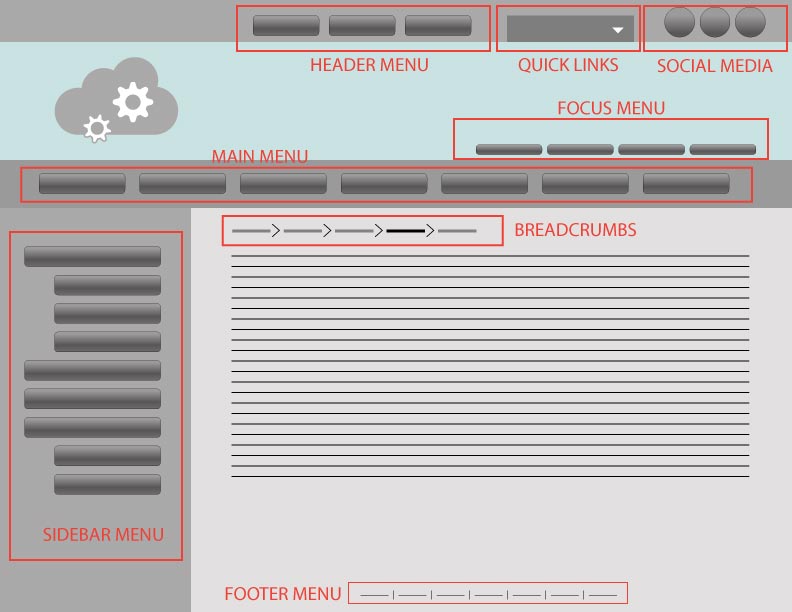
There are a number of accepted menus and links that you can find on websites. Some of them you can find available in your Theme template, and some not.
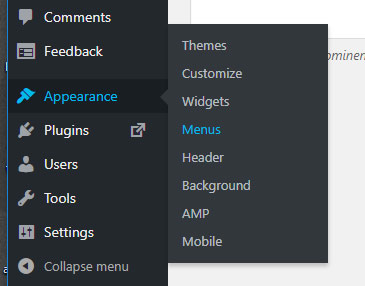
You can add and edit menus from the Appearance tab in the Dashboard.
Appearance > Menus
Do not overdo menus! Stick with a few.
Otherwise your visitors will get overwhelmed and confused.
Place additional menus into appropriate pages -
some menus do not need to be visible on every page.
Menus editor will open.
This is where you add a new menu or modify an existing.
We are going to start with main menu - your primary menu that is visible in every page. It displays all top level pages and categories.
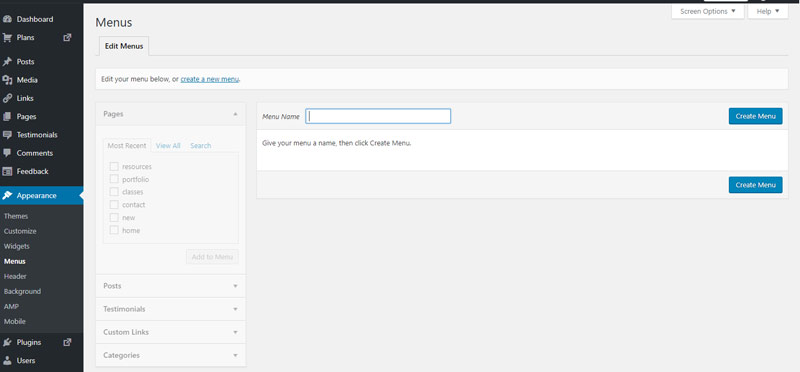
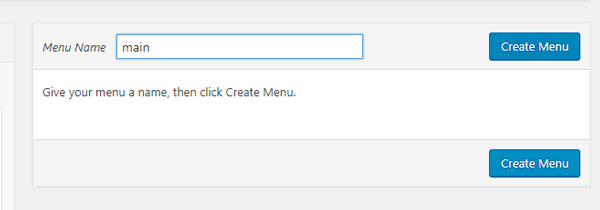
Once you are in Menus Editor:
Start with creating a main menu - the one that will show links to your top level pages. Enter the menu name.
Click Create Menu button.
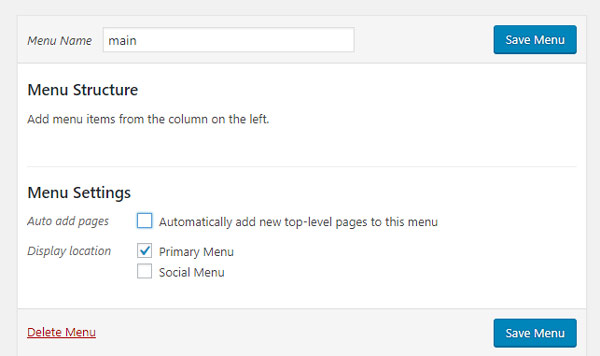
Check Primary Menu button.
Your Theme templates will use it as your main menu.
Save Menu.
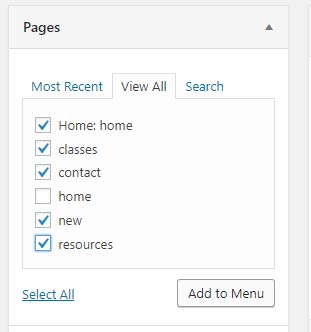
Check all pages that you want to add to the menu.
Do not worry about the order - you can reshuffle them at any time.
Click Add to Menu button.
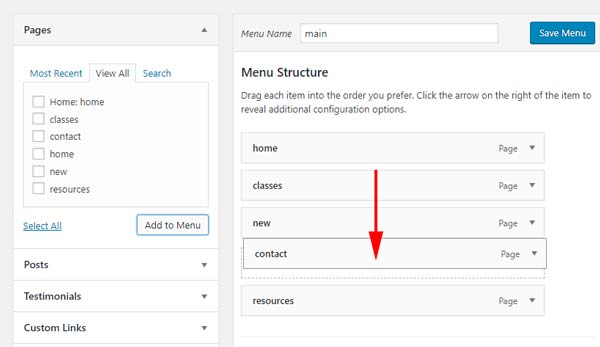
Once the pages are added to the Menu Structure - you can drag them up or down.
Do not forget to click Save Menu button after you are done.
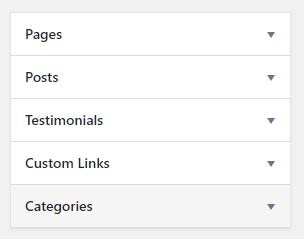
You can add categories, individual posts, Custom links, or Testimonials to you main menu (or any menu).
Just remember to keep it short (about 7 links).
Expand Categories tab.
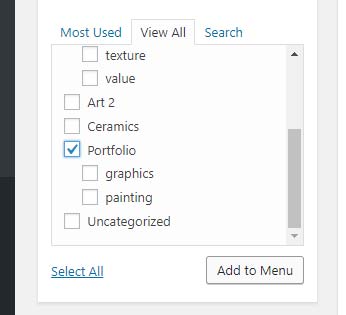
Select categories that you want to include in your main menu.
You could include sub-categories here - they would show in a drop-down menu, but I don't want visitors to miss on my Portfolio page first. So it's just Portfolio for now.
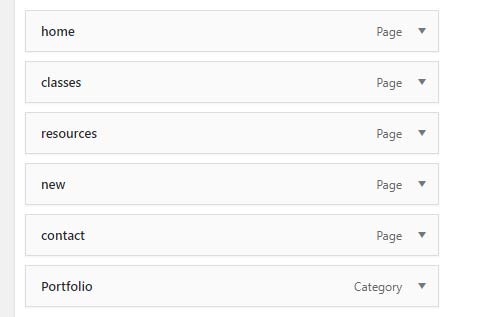
You category will be added to the Menu Structure area.
It also shows you which page is a page and which one is a category.
You can reposition them in a different order if you wish to.

You can also create a sub-page by dragging a page block to the right.
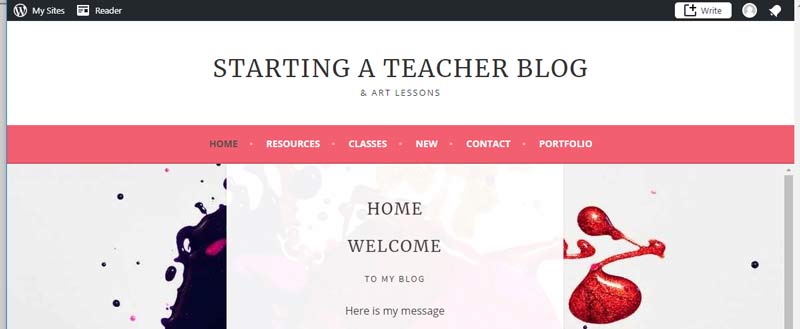
Preview your page at this point to check on your main menu.
In the example below: the menu looks fine, but I don't like that my home page has the "Home" title below the main menu bar.
I think I should replace this title with a "Welcome" line.
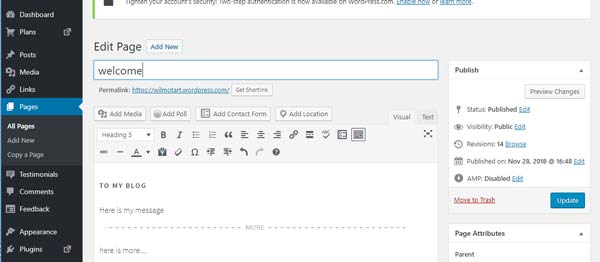 From Dashboard:
Pages > All Pages > Home .... Edit
Change the title.
Then I removed my previous "Welcome" heading.
Update.
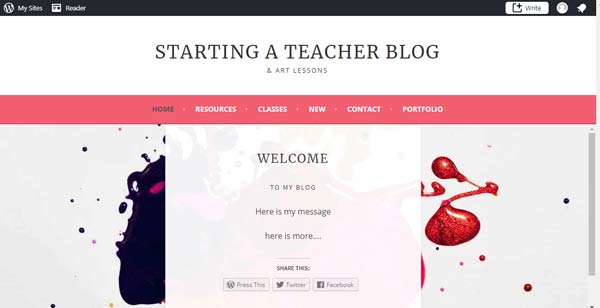
Now it looks better.
As you can see - the link to mu home page still reads as home.
Cool!
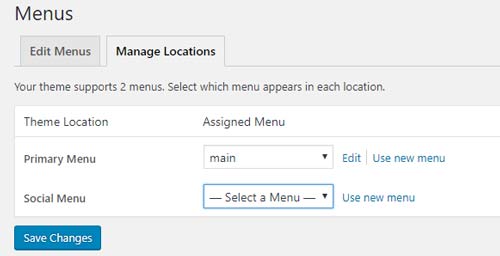
Most free Themes support only two menus:
Primary menu is the main menu you just created.
Social menu will hold links to your social media profiles.
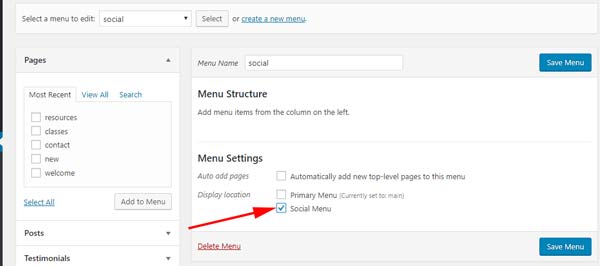
Create a new menu.
Name it social.
Check Social Menu option.
Save.
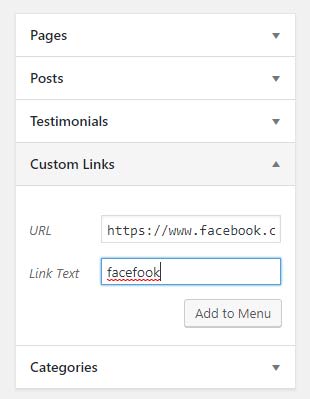
Add a link to your account to the Custom Links form.
Click Add to Menu.
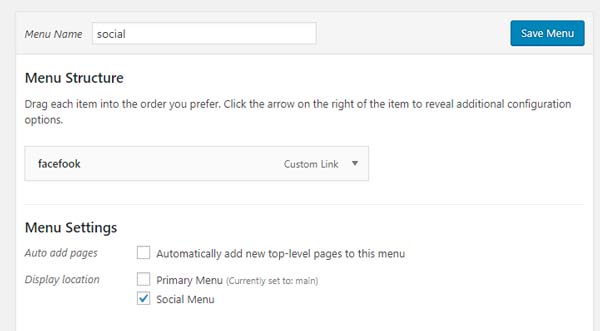
Your link will appear in the Menu Structure.
You will be able to edit or remove it at any time.
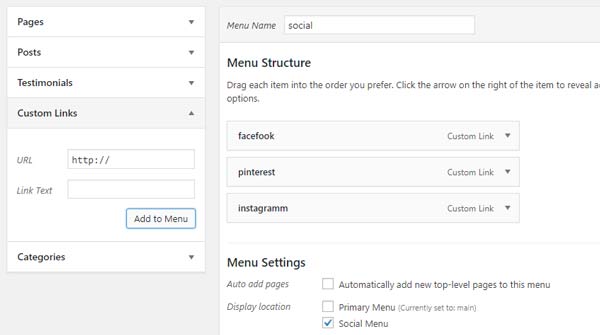
Add all of your social media accounts.
You can reorder them the same way you did for the pain menu.

Preview the page to find your social menu.
This Theme template has it at the bottom of the pages.
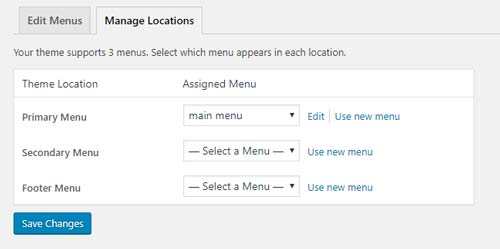
Some Themes support multiple menus.
All menus work the same way - select and add links, then choose menu location.
Even though there might not be a specific menu locations for secondary menus, you can still create them, just skip "Display location" option. You can use them as navigation widgets.
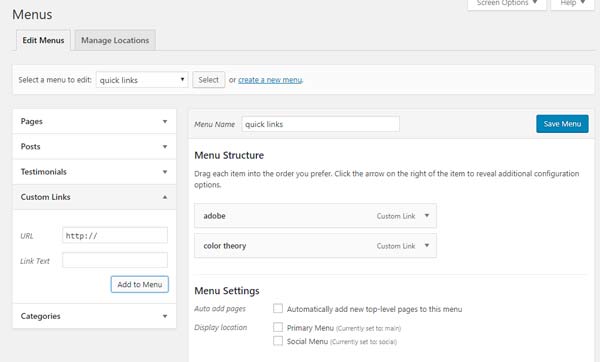
I created a Quick Links menu for important outside links. You do not have to add another menu at this point if there is no need for you.
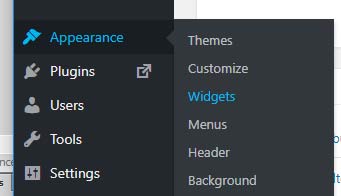
You can add an extra navigation by inserting a widget.
A WordPress Widget is a small block that performs a specific function. You can add these widgets in sidebars also known as widget-ready areas on your web page.
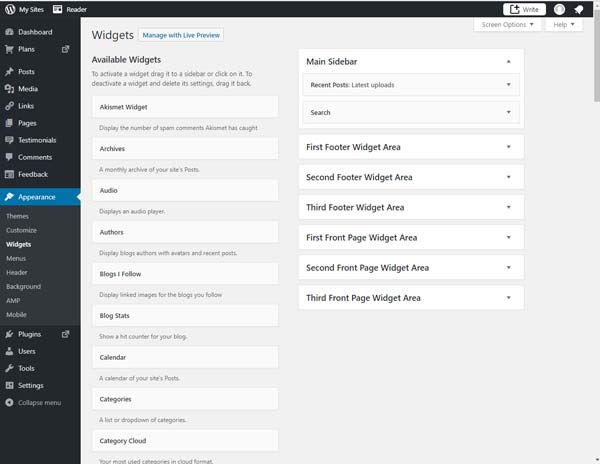
Most WordPress themes are widget ready and have multiple widget areas.
However themes are NOT required to have widget areas.
If you do not see any widget areas, then it means that your theme does not support widgets.
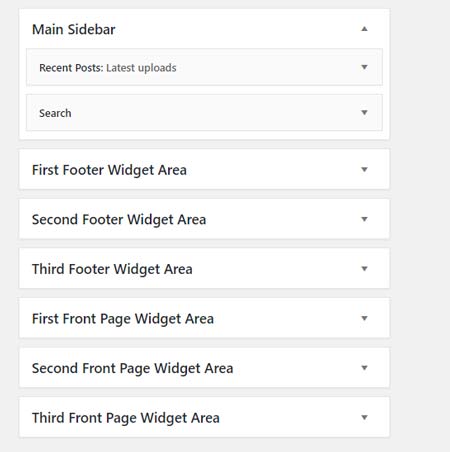
This particular Theme supports a good number of widget areas.
I suggest you experiment with the locations to determine how your specific Theme handles the widgets.
The most common area is a sidebar.
Choose the location for your navigation widget. The chart below is relevant to my Theme template, variations are possible for different themes and templates within themes.
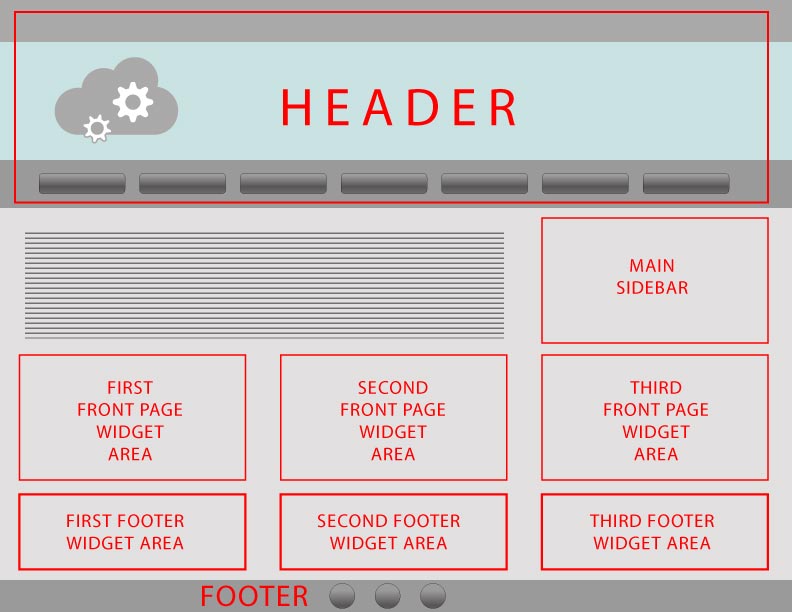
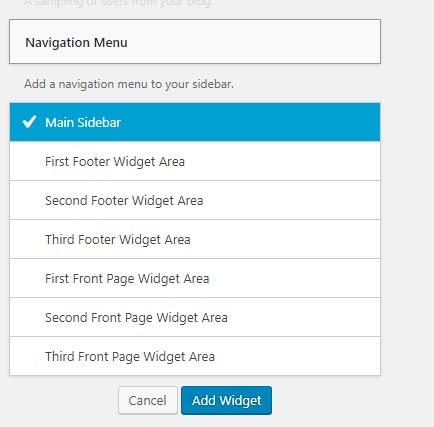
Choose a Navigation widget in the left column;
Select location
Click "Add Widget".
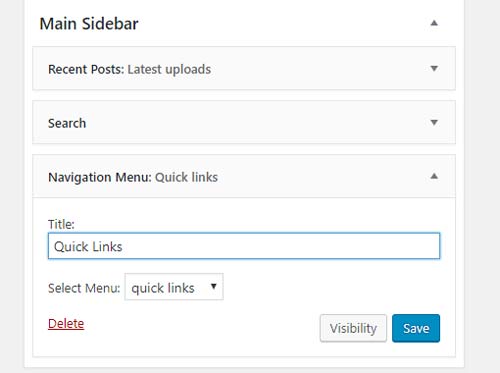
Once the widget is added and active - you can modify it to suit your blog.
Make sure you give it a descriptive title.
Select a menu from your list.
Click Save.
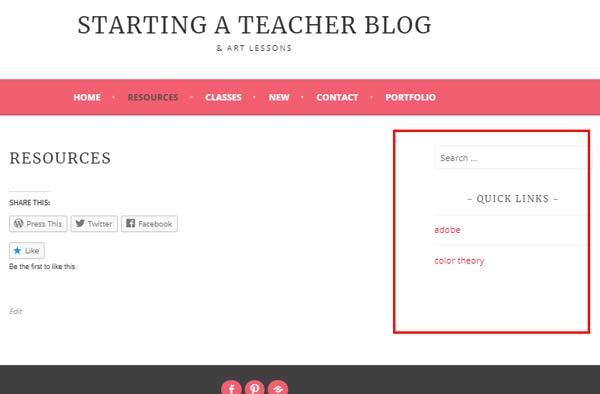
Preview page to see the widget navigation widget.
There are more widgets out there that can assist in the site navigation and other helpful links.
For example:
Links, Categories, Events, Gallery, Pages, Recent Posts, Recent Comments, and more
We will cover widgets later.
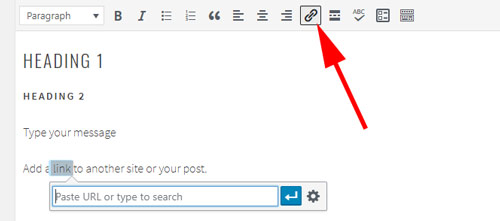
You can add links to any post, page, category, or an outside web-page.
The simpliest one is a text link.
Just highlight text, click on link button, enter page's URL.
Done.
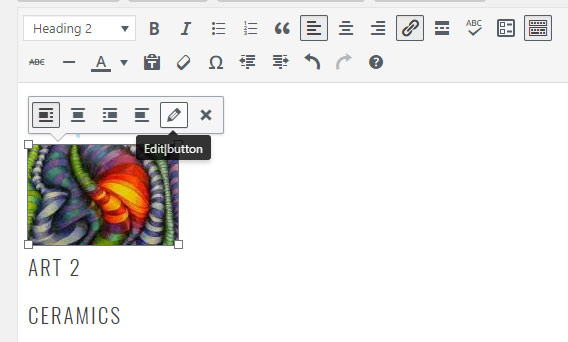
You can insert an image and use it as a button with a specific link.
Place an image, select it, click on Edit button icon.
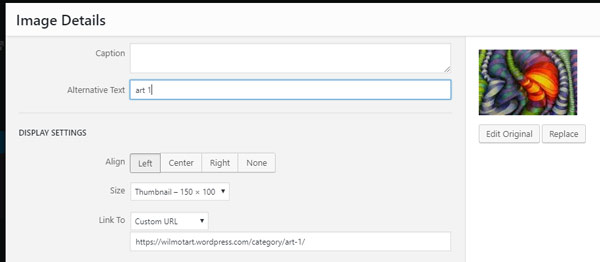
In the Image editor window:
add alternative text (where the link will be pointing to).
Choose alignment
Choose size
Choose where you want the link to point
Click Update.
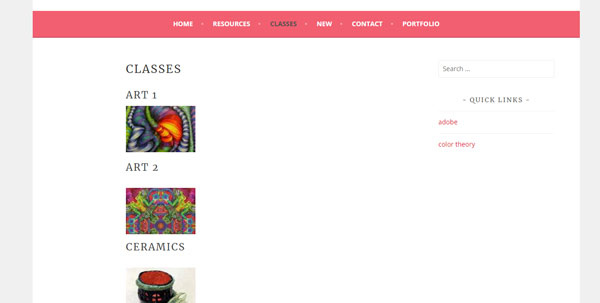
Now each image will be linked to a specific page (in my case - a specific category).
Preview.
There are also other options available to add links in WordPress, but most of them are for premium plans.
So far you know how to create a main menu and any additional link you might want.
Next step is writing a post!