Objectives:
- Explore Layers palette
- Reorder, hide, delete layers
- Layer styles and effects
- Layer modes
- Add-on layers
- Type layers

by JuliannaKunstler.com

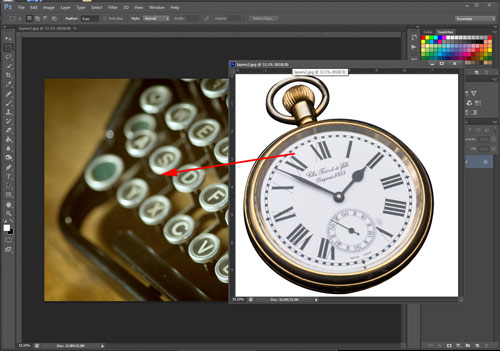
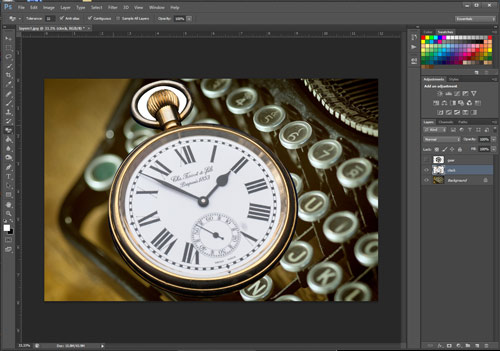
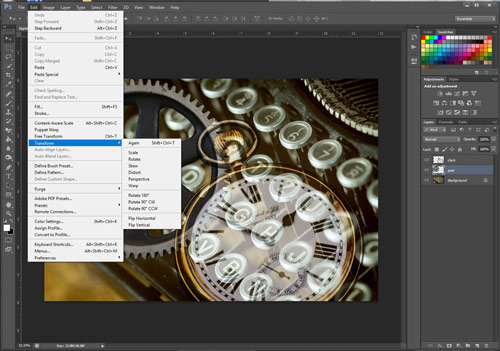
Open typewriter and clock image files in Photoshop.
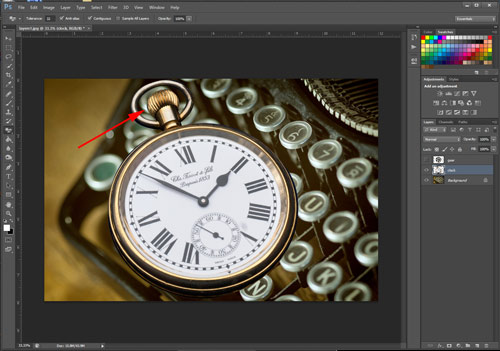
Choose Move tool.
Grab the Clock tab from the tab pane and "un-nest" it by dragging it away.
Now combine the typewriter and the clock:
Drag the Clock onto the typewriter image while holding SHIFT key down to center the new layer.
That will add the Clock to the original file..
Close the Clock file. You won't need it anymore.
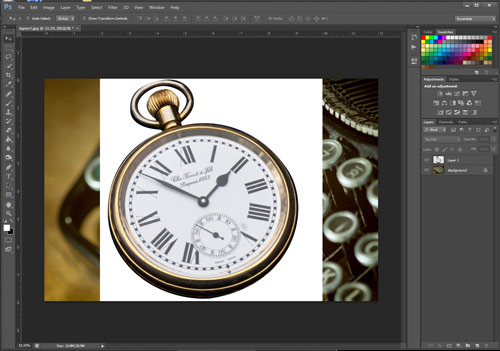
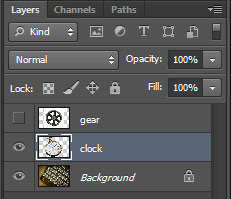
Look at the Layers Palette.
What you see - is a stack of two images
Clock image being on the top.
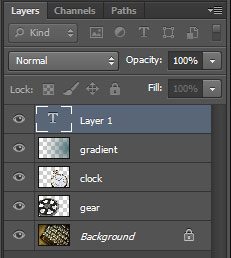
Photoshop named this new layer "Layer 1".
New layers are always placed above selected layer
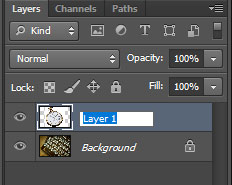
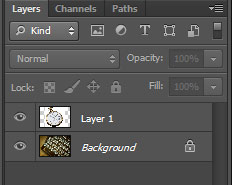
Each layer has a thumbnail - a small preview window.
Most of the time you can see what is on each particular layer, but when the image is too small - you cannot rely on a thumbnail.
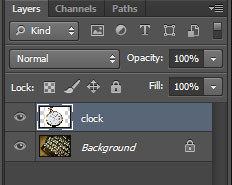
You need to name each layer that will give you all the information you need.
Double-click on "Layer 1"
Type "clock". Try to be as descriptive as you can when name the layers.
Enter
Save. Now this file will be saved as a .PSD file (Photoshop format) because you have more than one layer in it.
.JPG format does not support multiple layers.
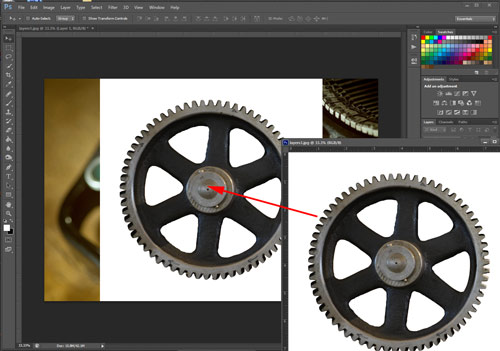
Open gear image.
Shift-Drag it onto your project.
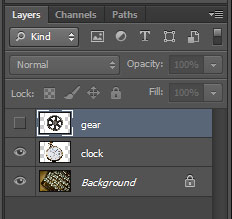
Rename the layer: gear
Hide the new gear layer by clicking on the eye icon
Select the clock layer again.
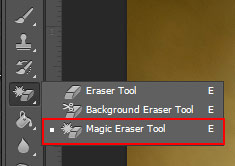
Let's get rid of the white background on the clock layer.
With the clock layer selected, choose Magic Eraser tool
Click on the white area.
It will delete the solid white background.
Click inside the clock ring to remove the rest of the background

Repeat the steps to delete the white background around the gear image.
Select the gear layer,
Make it visible again,
Choose Magic Eraser,
Click on all white areas
Save.

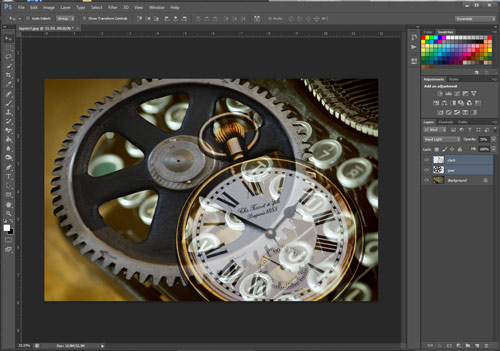
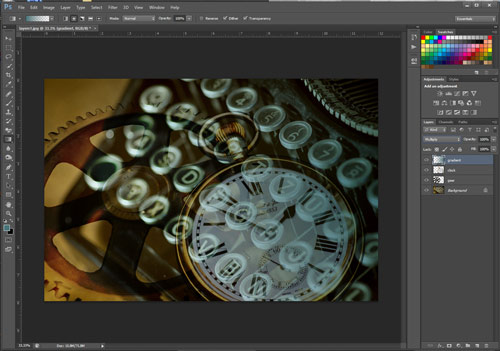
Drag the clock layer above the gear layer.
Always pay attention to the Layers palette to be aware of which layer is currently selected.
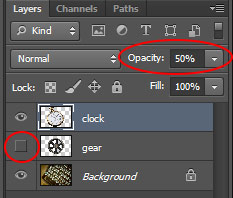
You can change transparency (opacity) of each layer.
Just go to the Layers palette and move the slider or type in the numerical value.
Hide the Gear layer for now.
Change Clock's opacity to 50%
Working with blend modes is almost always an experimental process. Because it’s nearly impossible to predict the results.
A layer’s blending mode determines how its pixels blend with underlying pixels in the image.
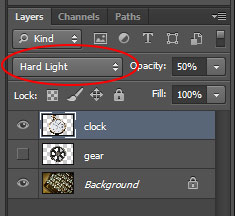
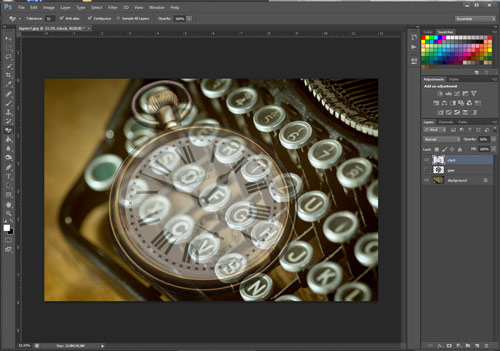
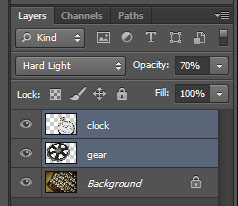
With clock layer being selected, experiment with different layer modes.
Change clock layer's mode to Hard Light
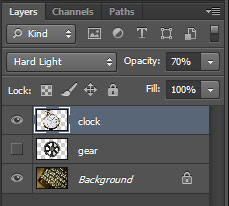
Increase opacity to 70%.
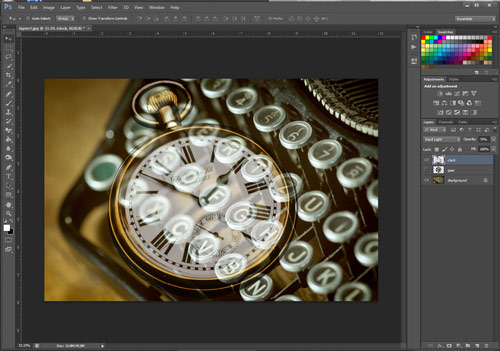
Your image should look something like that.
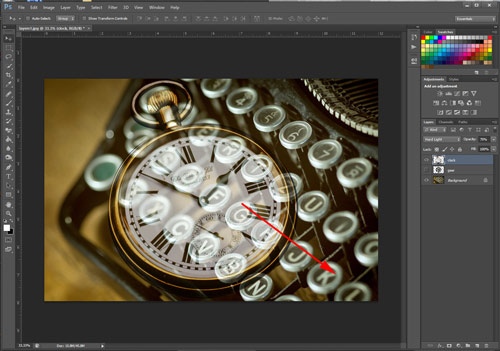
Use Move tool and reposition the clock to the bottom right corner.
Make gear layer visible.
We are going to resize and reshape the gear image now.
First - we are adding some perspective to the perfectly round wheel.
In the Menu bar:
Edit > Transform > Distort
You will see the bounding box appeared around the gear - the same bounding box as we saw when we used Free Transform command (Command/Ctrl T) before.
There is only one difference though - you can drag the handles individually to reshape the image.
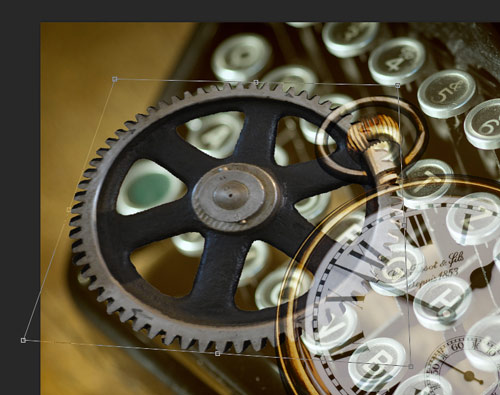
To add the feel of depth to the gear we need to add width to the front of the image (bottom part) and narrow down the back of the image (top part).
Hit Enter when you are done to apply the transformation.
Free Transform (Command/Ctrl T) to resize the gear as shown.
Enter.
Save.
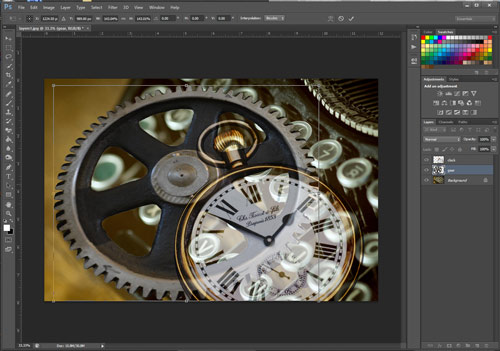
In case you need to move or edit multiple layers simultaneously - you can select these layers in the Layers palette by holding Shift key (the layers that are next to each other) or Ctrl key (if they are not next to each other).
Move both - clock and gear - layers up, as shown.
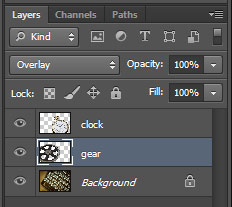
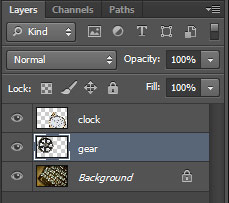
Now let's change the appearance of the gear layer.
Select it.
Change layer mode to Overlay.
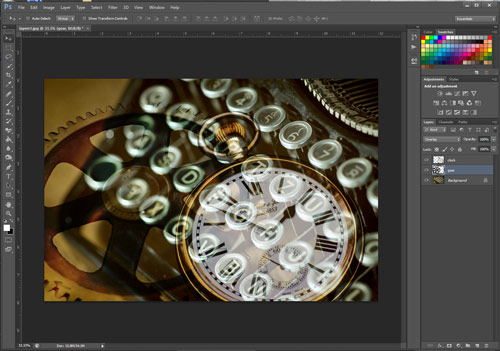
Move the gear down a little (as shown).
Save.

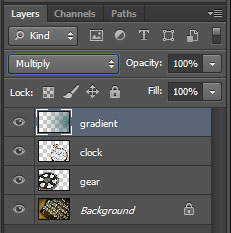
To add a new layer to the top of the stack:
Select your currently top layer (clock).
Click on "New Layer" icon at the bottom of the palette.
New "Layer 1" will be place at the top.
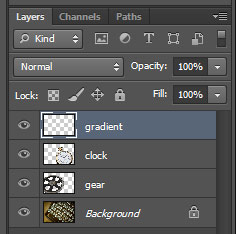
Rename this layer "gradient".
We are going to apply a color effect to the image.
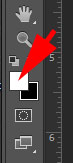
Double-click on the Foreground swatch in the Tool box.
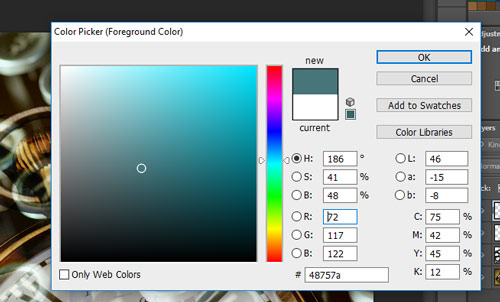
Choose a nice blue color from the Color Picker
Click OK.

You can also choose a color from Swatches palette
(Window > Swatches)
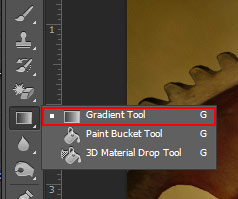
Choose Gradient tool from the Tool box.

In the Options bar:
Choose Linear Gradient option.
Choose "Color to Transparent" option (#2).
This option sets the gradient to blend from your Foreground color (in our case - blue) to fade.\
Grey checkers pattern represents transparency.
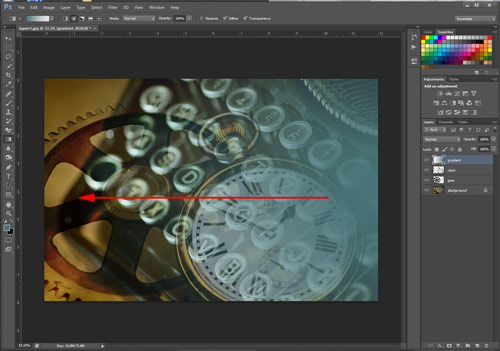
Click on the right side of the image window and drag towards the left side.
The gradient option is called :Color to Transparent" - which means:
where you click - is where your color starts
where you let the mouse go - is 100% transparent
the distance that you drag - is the area of the gradual fading.
Change gradient's layer blending mode to Multiply for more vibrant effect.
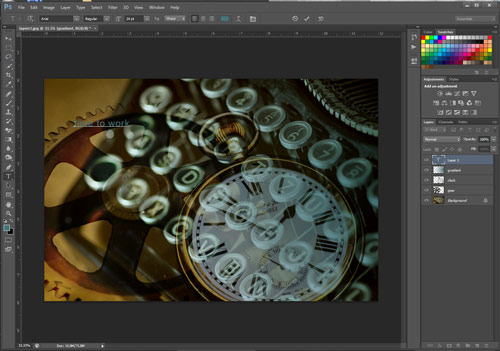
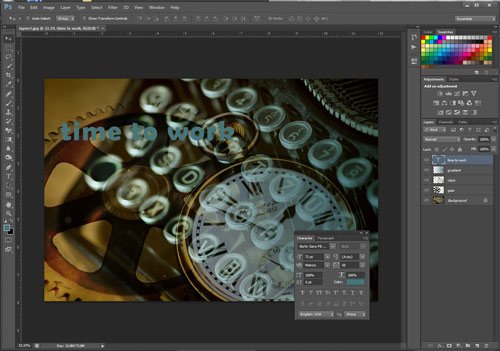
Let's add some text to the image.
Choose Type tool from the tool box.
Click and start typing. (Do not drag a text box, just click).
As you start typing - a new layer will be created in your Layers palette.
You will see letter T instead of a thumbnail. That will show you that this layer is strictly a text layer.
 With your text layer still selected - you can change the appearance of the text.
From the menu bar:
Window > Character
This is where you can change the font, size, color, letter spacing, and other settings for your text.
You will see the changes right away in your image window.
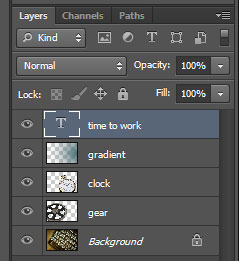
Once you're done typing - the Type layer will pick up the name from your text.
Let's add a few effects to the text.
In the menu bar:
Layer > Layer Style > Bevel & Emboss
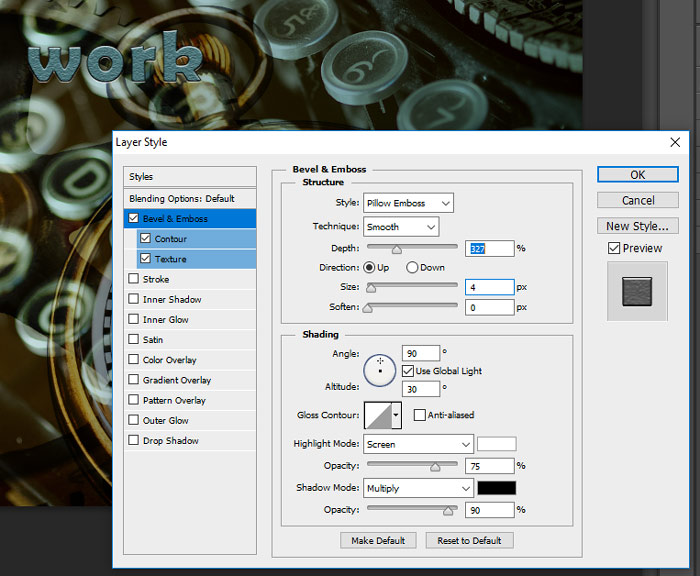
In the pop-up window:
Check Contour option
Check Texture
Choose style: Pillow Emboss
You can experiment with the settings.
OK
Save
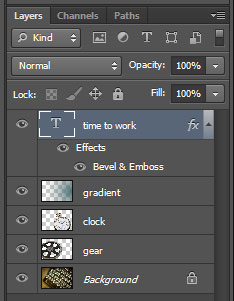
After applying a Layer style (layer effect) your Layers palette will show "fx" symbol on that layer.
It will also show which styles were applied to the layer.
You can hide the style, copy and paste to another layer, or completely remove it
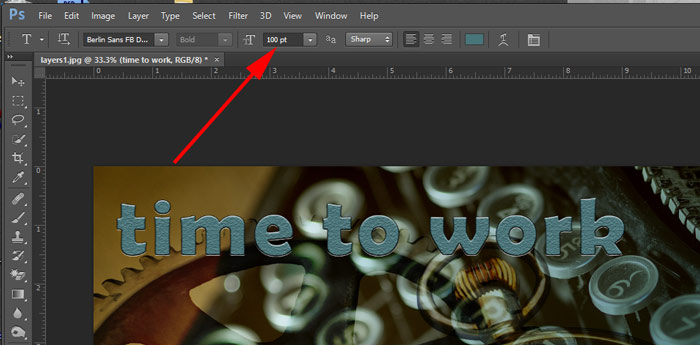
You can change text settings in the Options bar in addition to the Character palette. Click on Type tool. Then change the font size to a bigger number. You can also edit or completely change the text at any time. The layer style will stay.
To reduce the file size - we can merge the layers. You can choose to merge selected layers.
Layer > Merge Layers (reduced file size)
... or all layers
Layer > Flatten Image (smallest file size)
Please note:
After you merged the layers and closed the image - you cannot work on individual layers or undo the action.