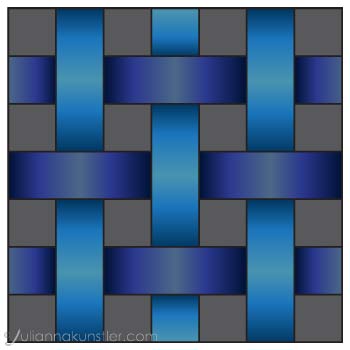
Choose one of the designs. Draw it on a worksheet.
Next is shading. You can choose between colored pencils and Ebony pencil.
Focus on shading technique: small strokes, smooth value transition, correct value placement for a 3-D effect.


by JuliannaKunstler.com
Choose one of the designs. Draw it on a worksheet.
Next is shading. You can choose between colored pencils and Ebony pencil.
Focus on shading technique: small strokes, smooth value transition, correct value placement for a 3-D effect.

1. Divide each side of a square into 7 parts.
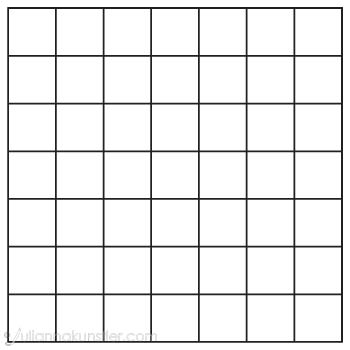
2. Connect the marks.
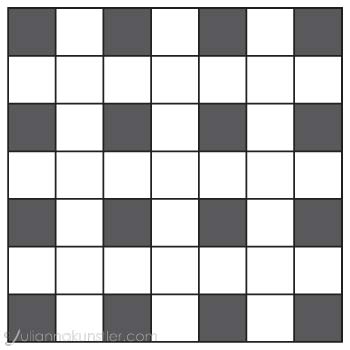
3. Fill in the background areas as shown
(every other square in every other row).
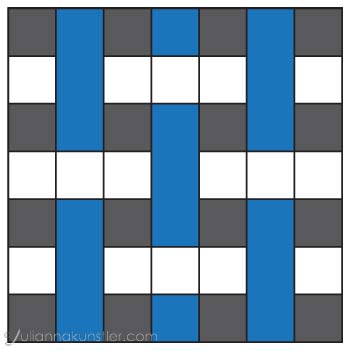
4. Combine squares into visible vertical units as shown (three squares, skip one, three squares, etc.)
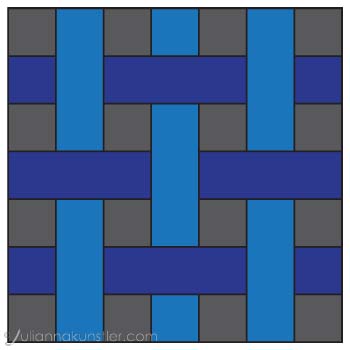
5. Combine squares into visible horizontal units as shown - same ratio - three squares to one.
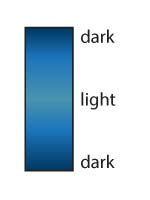
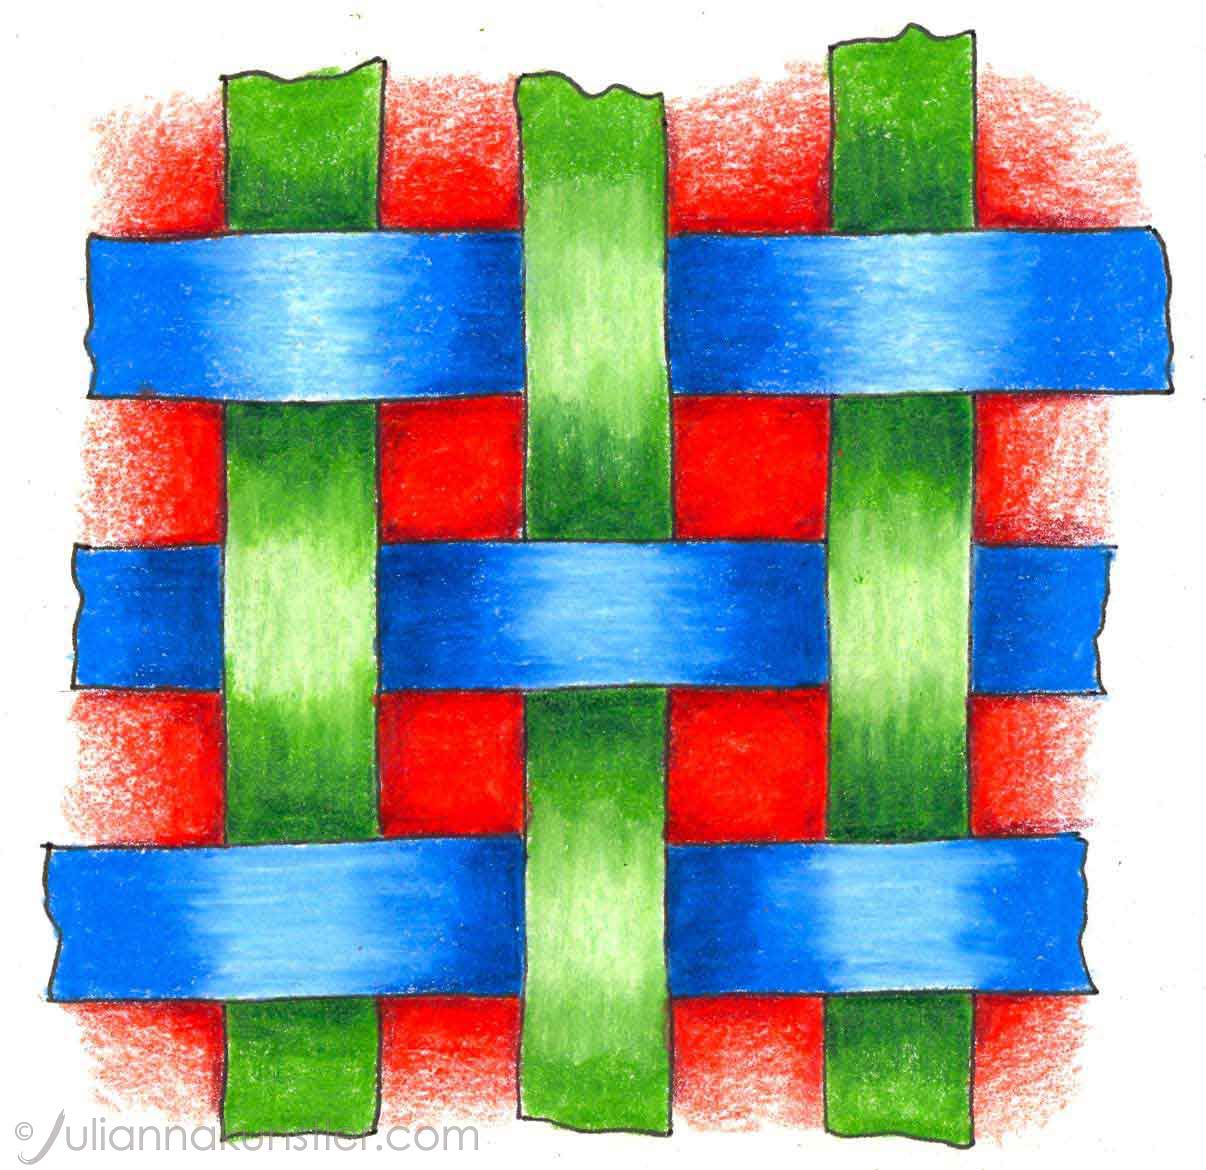
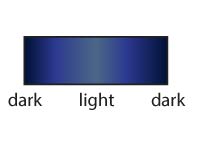
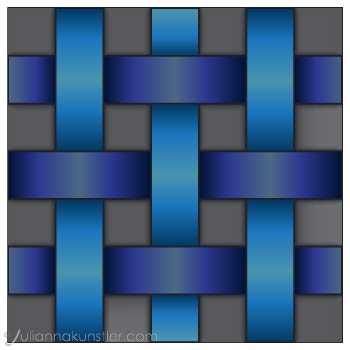
6. Shade the vertical stripes.
7. Shade the horizontal stripes:
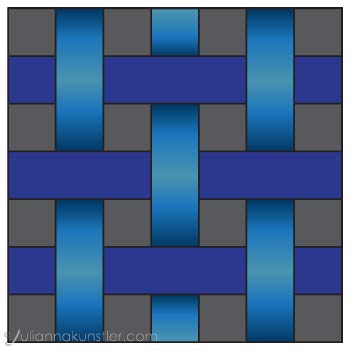
This is what it looks like by now.
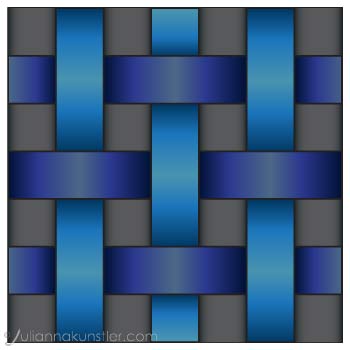
8. Add background shadows on both sides of the vertical stripes.
9. Add background shadows on both sides of the horizontal stripes.
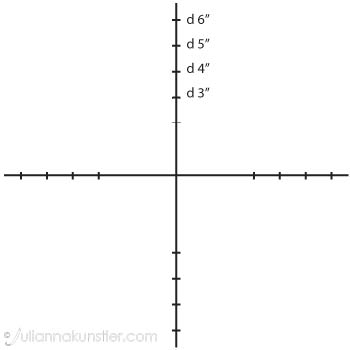
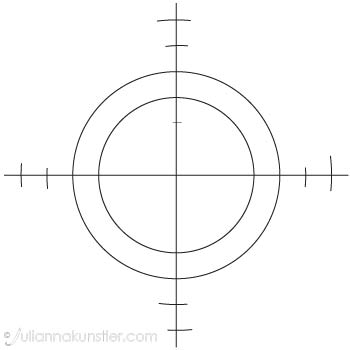
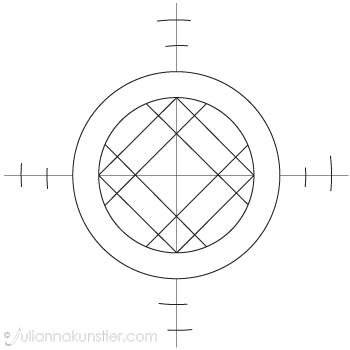
1. Draw two circles:
d=3” and d=4”
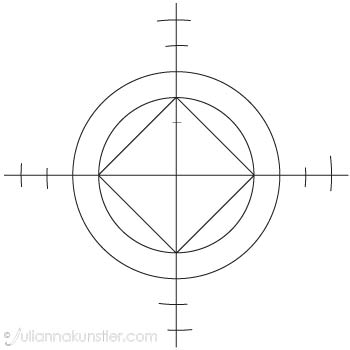
2. Draw a square inside the smallest circle as shown.
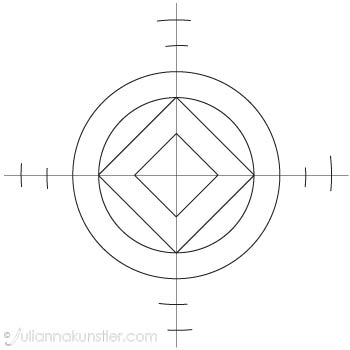
3. Draw a smaller square inside.
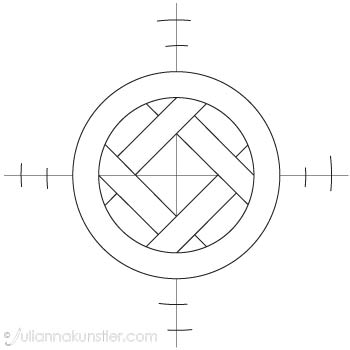
4. Extend the lines
5. Erase the lines to reveal the weaving pattern
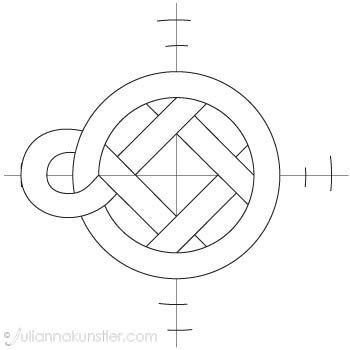
6. Draw the first loop as shown
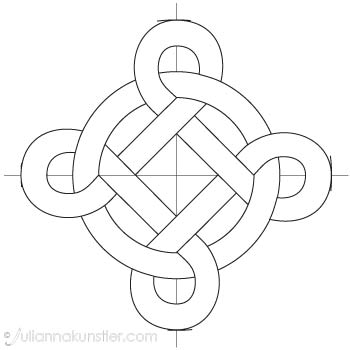
7. Draw the other three loops - all loops are identical
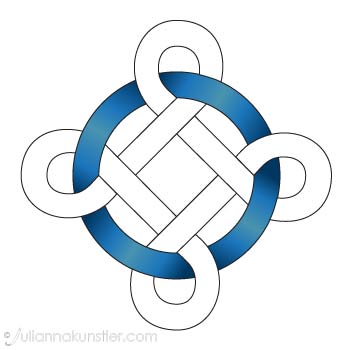
8. Shade the circle:
the value is darker next to the loops.

9. Shade the ribbon:
the value is lighter if the ribbon is on the top, and gets darker as it goes under another ribbon
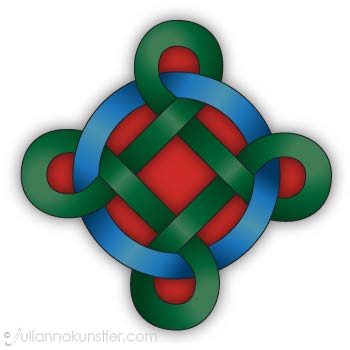
10. Finish shading the ribbon, add background shadows next to the circle and the ribbons.