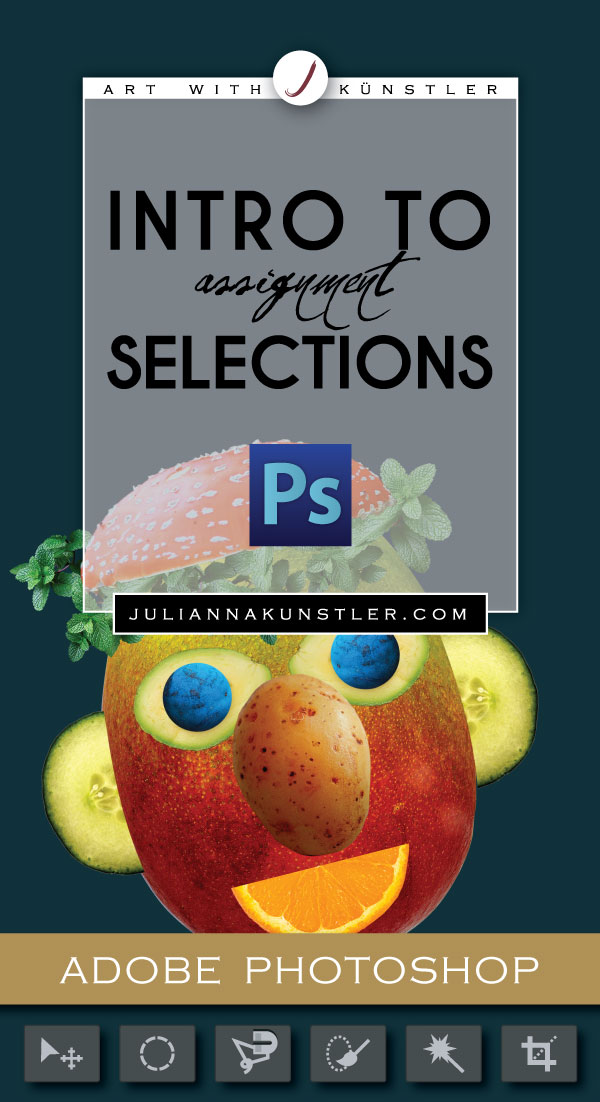
Learning objectives:
Students learn to use Selection tools:
- Move tool
- Marquee tools
- Lasso tools
- Magic Wand tool
- Quick Selection tool
- Crop tool
by JuliannaKunstler.com

Students learn to use Selection tools:
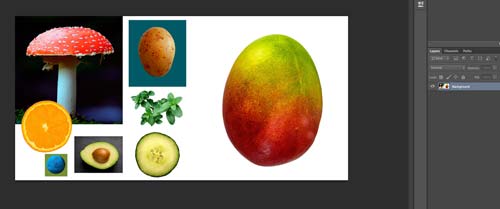
Download the work file and open it in Photoshop.
These are the pieces you are going to put together to create a face.
Focus of this assignment is to practice the use of selection tools.
Selection tools are grouped together.
We are going to use many of them in this project.
Some of them will be much easier than the others. But it is really important to try them all.
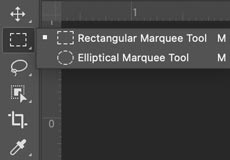
The first group of selection tools is called "Marquee Tools".
Rectangular and elliptical marquee tools will let you make rectangular or circular selections.
Single row and Single column tools will let you select a row that is 1 pixel high or a column that is 1 pixel wide.

Select the Elliptical Marquee tool.
We are going to make a circular selection to select a blueberry for an eye.
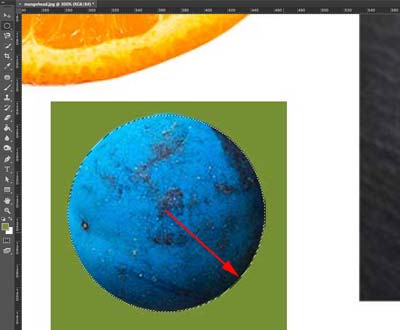
To make a round selection you just click and drag the cursor over the area that you want to select.
Try it.
If you want to select a perfect circle (or a perfect square) - hold SHIFT while dragging.
If you want to start your selection from the center - hold Option (Alt) button.
If you want both of these options (perfect circle/square drawing from the center) hold both keys (Shift + Option (Alt)) while dragging.
Try it!!!
Now zoom in the area with the blueberry. Select it.
The next step is to move the blueberry over the avocado.
Move tool is for moving!
Select the Move tool.
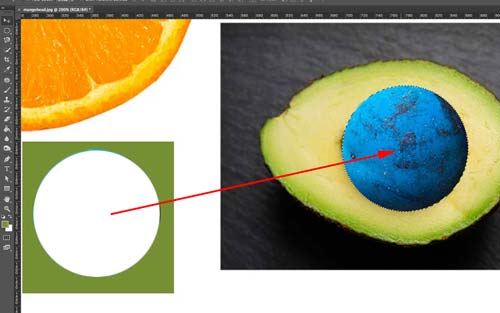
Place the cursor inside your selection. Do you see the cursor changed to scissors? By using this tool right now you are cutting the blueberry out of the background in order to reposition it.
Drag the selection over the avocado.
While your blueberry is still selected, you can adjust its position (with a mouse or using the arrow keys on the keyboard)
Once you deselect it - it it permanently embedded into the image.
Deselect:
Select > Deselect on the menu bar
or Command D (Ctrl D)

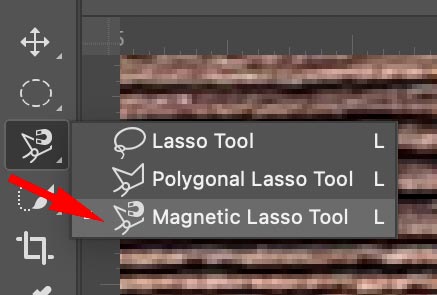
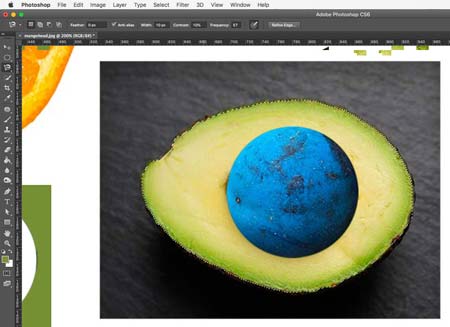
Use Magnetic Lasso tool to select the green shape..
Magnetic Lasso will snap to the edges of the objects that you draw. Actually, it snaps to the biggest contrast between the colors (values). Usually, the biggest contrast is the edge of an object vs. the background.
Double-click the Hand Tool.
It will zoom out the image so you are able to see it all.
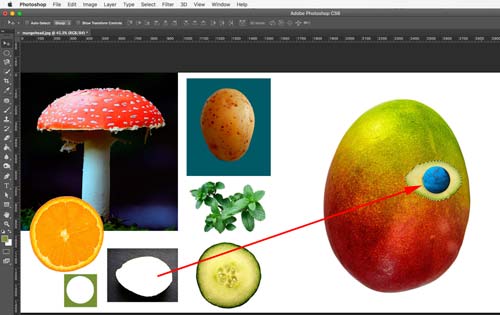
Use the Move tool to drag the avocado over the mango.
See? It looks like an eye....
DO NOT DESELECT YET!!!!!!
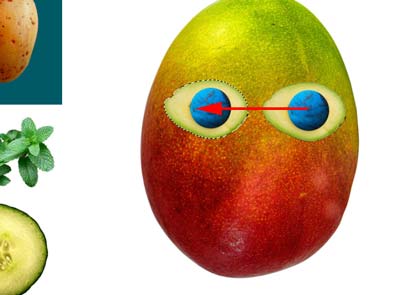
Let's add the second eye.
It is important that the first eye is still selected.
There is a way in Photoshop to duplicate selections and move them at the same time.
Choose the Move tool.
Place the cursor inside the eye selection.
Hold Option (Alt) key. See a small plus sign? Keep holding it down.
Now drag your eye selection to create another eye.
Position the second slice.
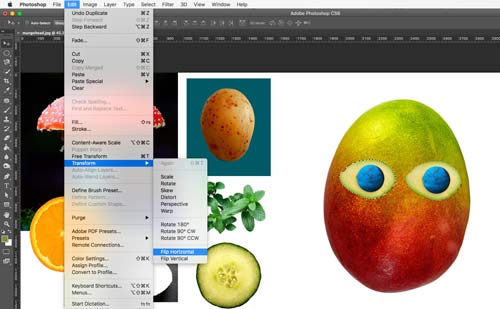
To flip the second eye:
Edit > Transform > Flip Horizontally
Now you can deselect.
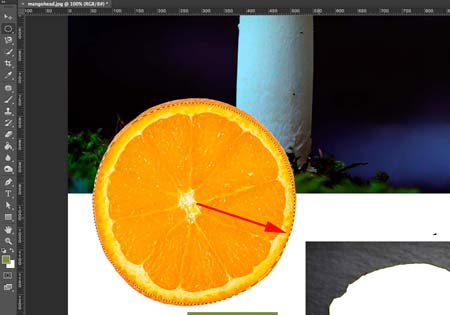
You can add to or subtract from a selection.
We will practice that by creating a mouth out of an orange slice.
Drag a circular selection using Elliptical Marquee tool.
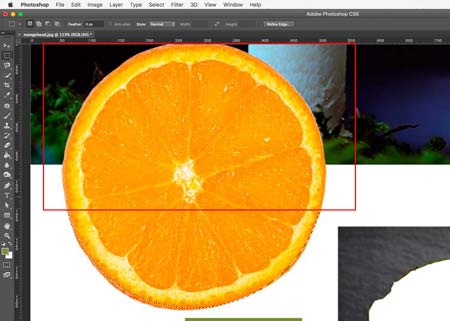
Switch to the Rectangular Marquee tool.
Hold Alt (Option) key.
Drag an area that you want to subtract from the orange slice.
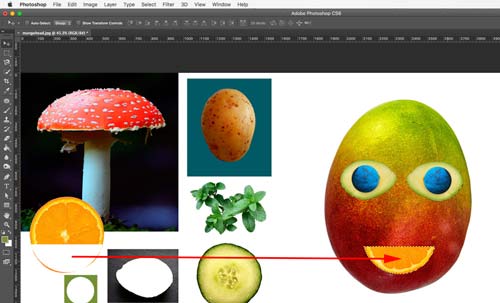
With the Move Tool:
Drag the mouth over the mango face.
Deselect.
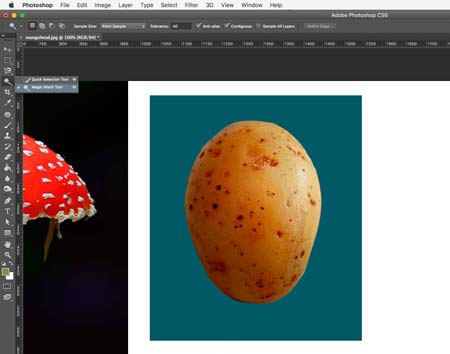
Magic Wand selects pixels that are of similar color.
It works better to select objects and areas that are of a uniform color. We are lucky to have a solid blue background here.
We will extract the potato in just two clicks.
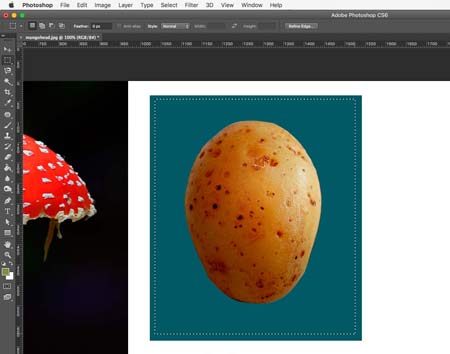
Let's define the area that we are going to work with:
Use Rectangular Marquee tool and select the area inside the blue rectangle.
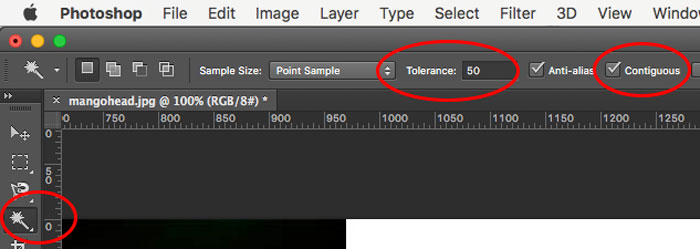
Choose Magic Wand tool.
Then look at the Option bar.
Set Tolerance to 50.
That means that the Magic Wand will select all pixels within the range of 50 shades darker than the initial color and 50 shades lighter than the initial color.
Check Contiguous option to select only pixels that are connected to each other.
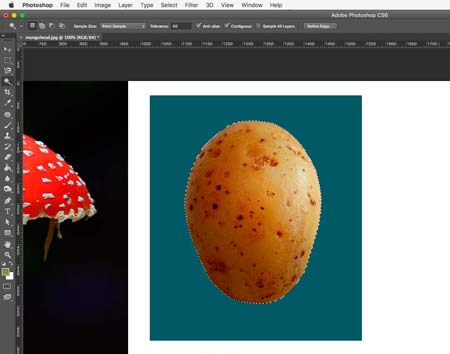
Alt (Option) click on the blue background within the rectangular selection.
This will subtract from the selection all blue pixels - leaving only the potato selected.
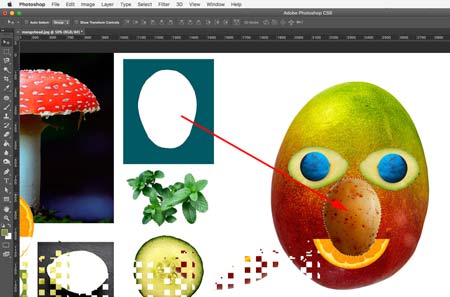
Choose Move Tool.
Drag the potato over the mango.
Looks like a nose?
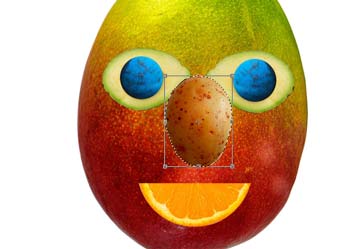
To resize it:
Edit > Free Transform (or Ctrl/Command T)
Hold Shift to constrain proportions as you are resizing.
Hit Enter to apply transformation when you are done.
Deselect.
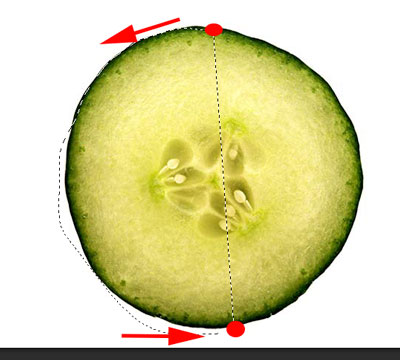
We are using a cucumber slice for an ear.
Choose Lasso tool. Lasso is a freehand selection tool. It selects pixels as you drag it.
To select a shape - draw the selection around it. Try to stay close to the shape. But if you don't - not a big deal. We'll fix it.
Remember - drawing your own selection - you need to return to your start point. Selection is a closed shape. So you need to end at your start point. Once you stop and release the mouse - it connects the start and the end points with a straight line. This happens because selection can be only an enclosed shape, not an open end line.
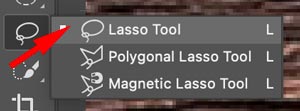
For this particular purpose - we are selecting only a part of the shape.
So do your best to draw the selection line around the left side of the shape.
Start at the top, follow the outline, stop at the bottom and release the mouse.
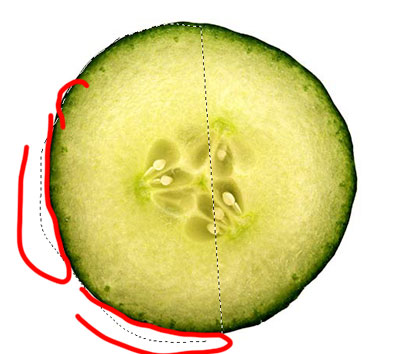
To fix the mistakes, use Shift (to add to selection) or Alt/Option (to subtract from selection).
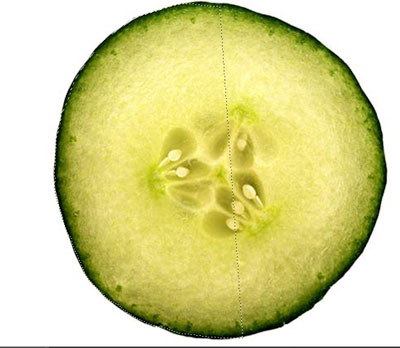
Zoom in the area with the mushroom.
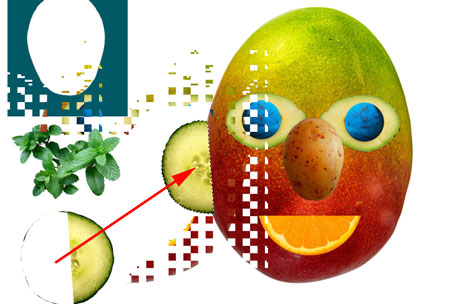
Drag the ear.
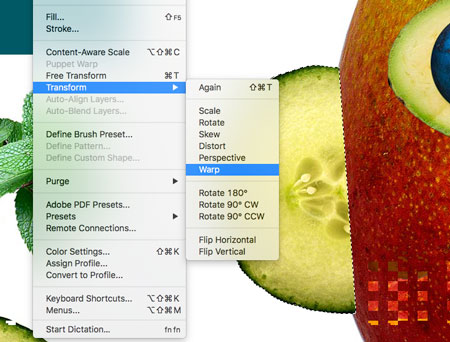
To curve the right edge - Edit > Transform > Warp
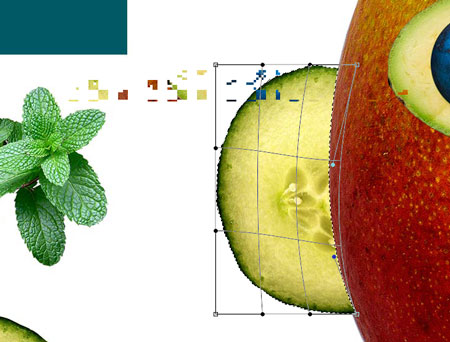
Push the straight edge to create a smooth curve.
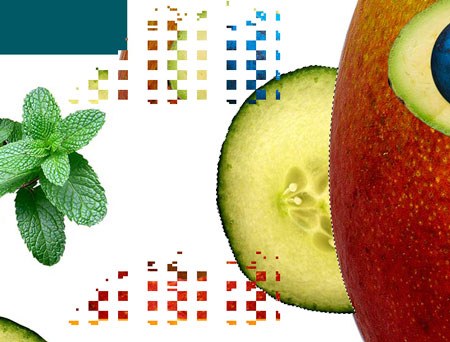
Hit Enter to apply transformation.

Duplicate the ear with Alt/Option dragging the selection.
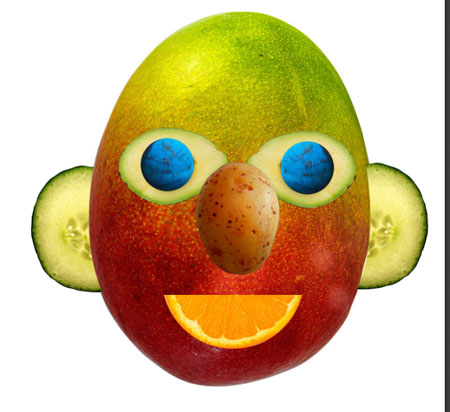
Flip Horizontally.
Deselect.
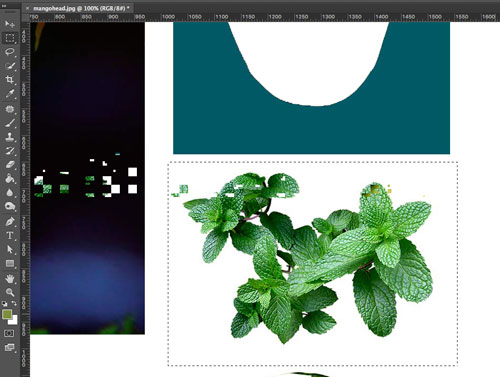
To select the basil bunch - use Rectangular marquee tool and select the area. Make sure there is only the basil and a white background in the selection outline.
Next step is to get rid of the white background within the selection.
Switch to Magic Wand tool.
Set tolerance to 12.
Uncheck Contiguous option to remove all while pixels.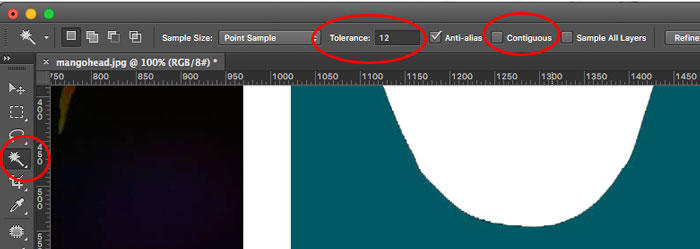
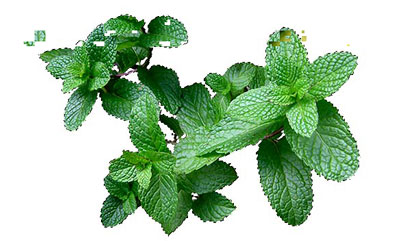
Alt-click on white background inside the selection.
This will leave only basil selected.
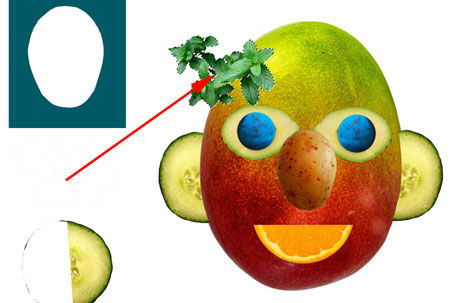
Use Move tool.
Drag the herbs as shown.
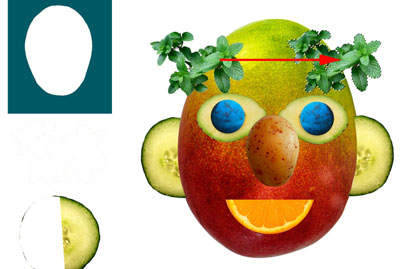
Duplicate the bunch.
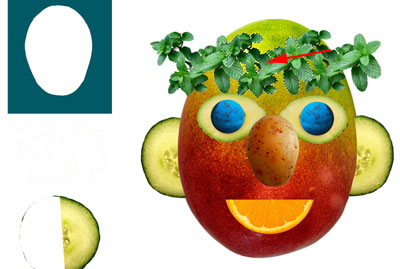
Duplicate it again.
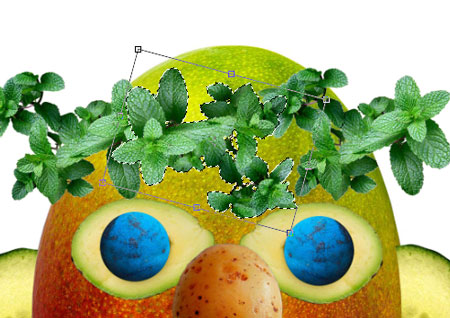
To rotate the selection:
Free Transform (Ctrl/Option T)
Rotate.
Deselect.
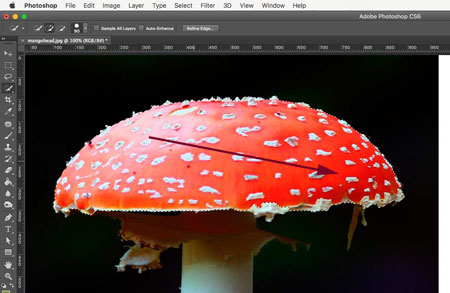
To select a contrasted area (does not need to be a solid or similar colors) use Quick Selection tool.
Draw a quick stroke across the mushroom.
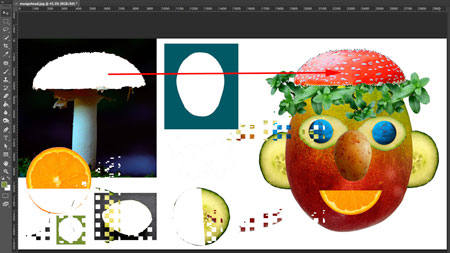
Once it is selected, drag it over the head.
Deselect.
![]()
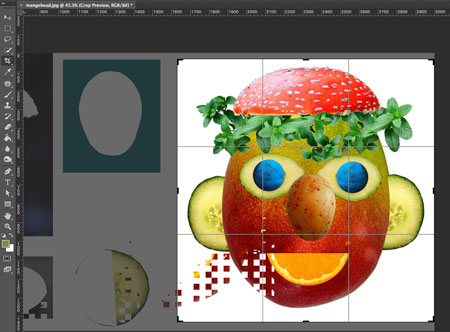
Now let's get rid of the left side of the image!
Choose Crop Tool
Draw a box around the mango person.. :)
You can adjust the size of it (and even rotate)
Press RETURN (ENTER)
File > Save
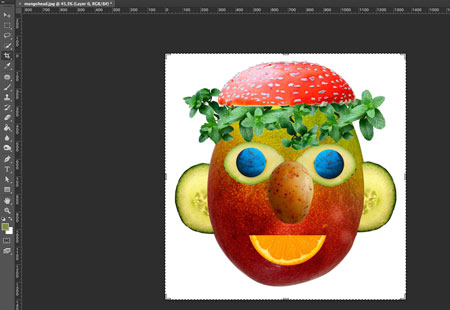
Your project is done.
Save.
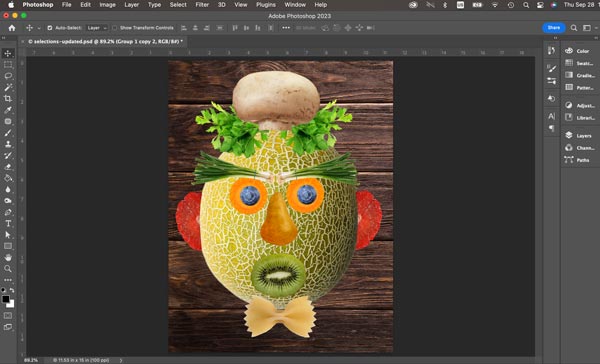
Add your name before you print.
Choose Type tool.

Select font, font size, and font color.
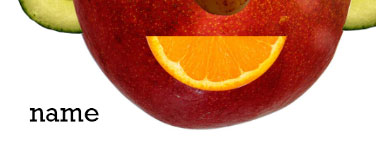
Click on the image and start typing.
(Do not drag with Type tool)
Switch from the Type tool.
Save.
Print.