Sometimes you need to extract an object from a background to place it into a different setting.
Below are a few very basic ways to do so.
For more in-depth techniques see my Computer Graphics tutorials.
by JuliannaKunstler.com

Sometimes you need to extract an object from a background to place it into a different setting.
Below are a few very basic ways to do so.
For more in-depth techniques see my Computer Graphics tutorials.
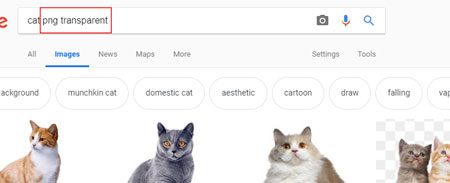
The easiest way is to look for an image with no background. Meaning that someone has already removed it for you.
There are limitations on the variety of images to use, but if you are not fussy - this might work for you.
All you need to do is to add "png transparent" after your search word in the search window ....
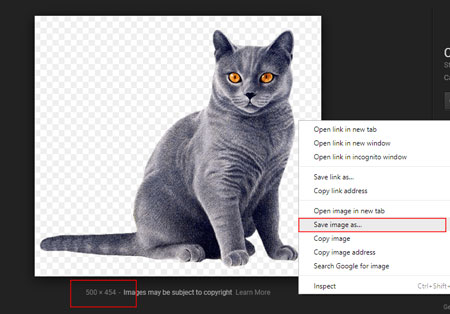
When selecting an image:
Checkerboard pattern as background shows that the background is transparent.
Check the size of the image. Aim for bigger numbers.
Right-click. Save As....
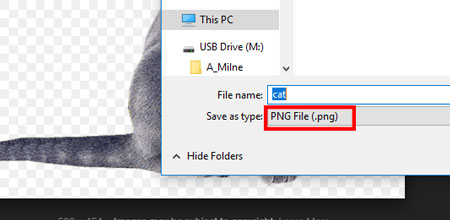
Before you click "Save" - make sure that the image is being saved as PNG File.
Other extensions (except for .GIF) do not support transparency.
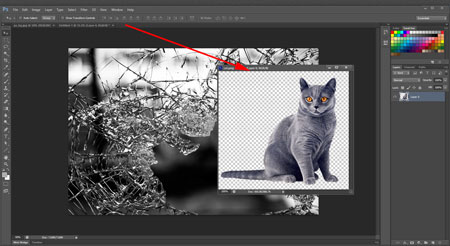
Open your background file.
Then open cat.PNG file
Grab the image tab and drag it off the tab group.

Select Move tool from the Tool box
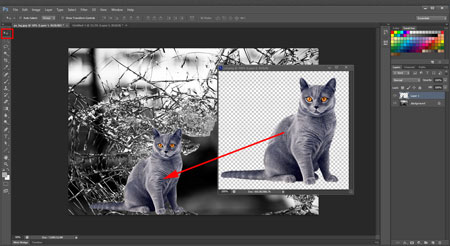
Drag the cat onto your background.
Done!
Now you can move it, resize and rotate, etc.
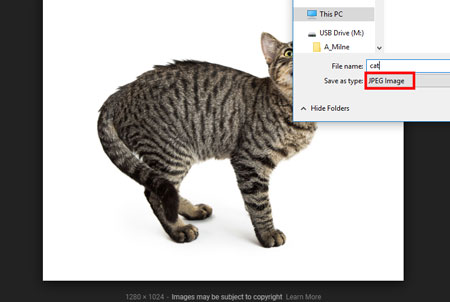
Your second best (easiest) option is a solid color background image (.JPG or any other format).
Save the file. Pay attention to the file type.
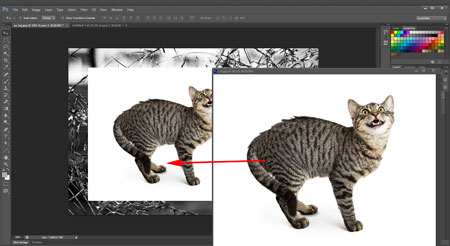
Open the file in Photoshop.
Detach from the tab group.
Use Move tool and drag it onto your main image.
The new layer will have a white background.

Select Quick Selection tool from the Tool box.
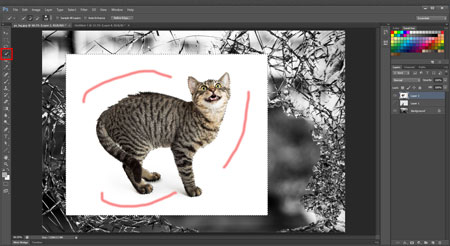
Apply a few strokes over the white background.
It will select all similar pixels.
Hit Delete button (or Edit > Clear)
Important: Deselect the area (Ctrl / Command D)

You can also use Magic Wand tool from the Tool box to select a solid color background (white or any other color).
Then Delete
Deselect

Select Magic eraser from the Tool box.
This tool combines the ability of Magic Wand and function of Delete button.

All you need to do is to click on the white background.
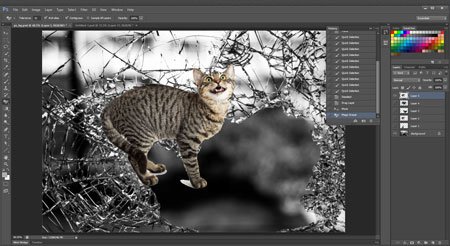
Done!
Most of the background will be removed.
But...
Sometimes you might have a few "leftovers" - parts of the background that are slightly different in color or value.
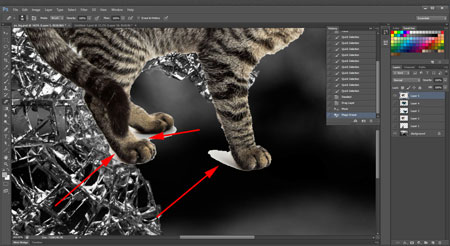
Zoom in the area. Use regular Eraser tool to clean the outlines.


Select Background Eraser tool from the Tool box.
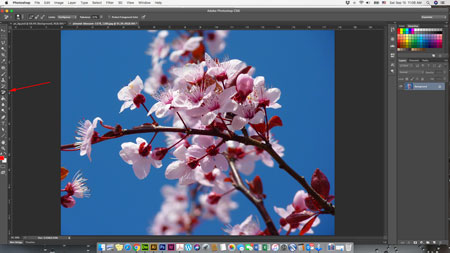
If you want to quick remove a background around an intricate shape - background Eraser tool is your choice.
Works good on contrasted backgrounds.
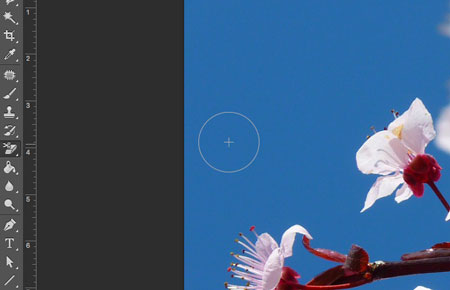
The cursor looks like any brush or eraser tool.
The only difference is the crosshair in the middle of the circle.
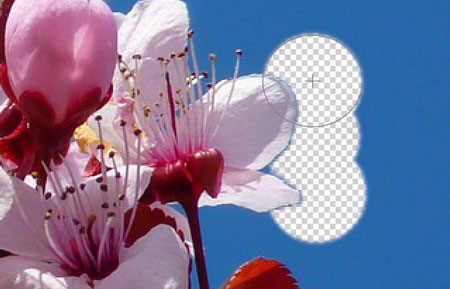
The crosshair should point on the background color that needs to be removed - it samples the background color to define it as a background..
The tool will remove every similar pixel inside the circle that matches the sampled color..
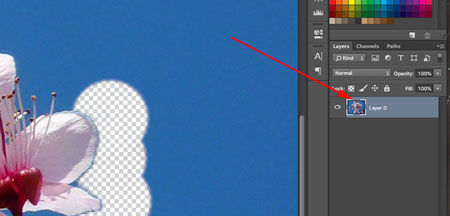
Once you start using Background Eraser tool - it converts the locked background layer into a regular layer that supports transparency.
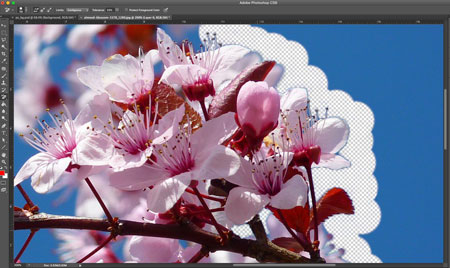
Continue erasing keeping the crosshair on your background colors.
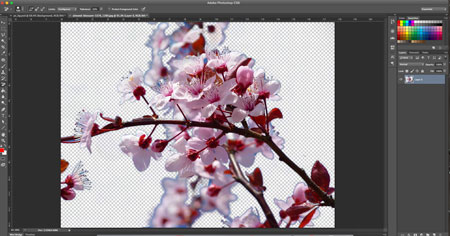
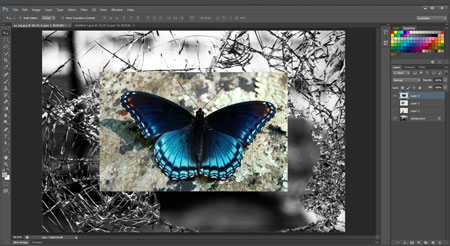
In case you need to remove an object from more complex background here is what you do:

Select Zoom tool from the Tool box
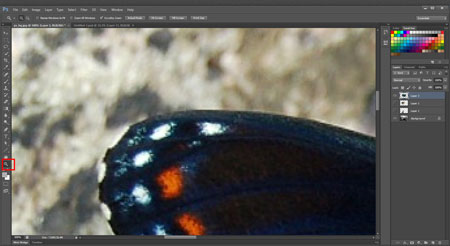
Zoom in the area you would like to start with.
(If you hold Spacebar on your keyboard, you can navigate inside the image).

Select Eraser tool
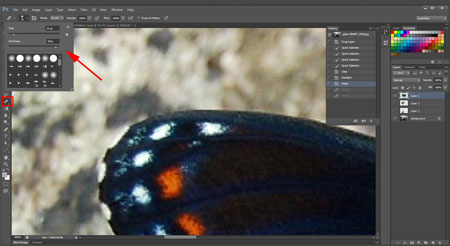
Set options:
hardness is slightly below 100%
size depends on your image size. You can always adjust it later with [ ] keys.
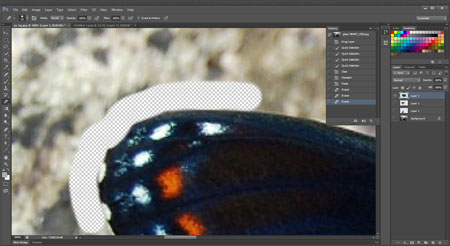
Carefully start erasing the background around your object.
To undo the last action you can use Ctrl/Command Z shortcut.
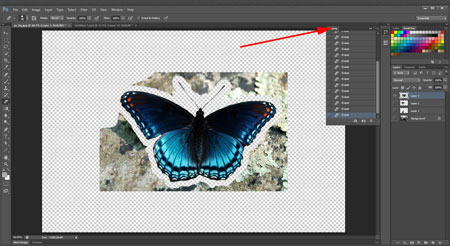
You can also use History palette to undo multiple steps:
Window > History
Change the size of the Eraser as you work to get into the smaller areas.

Now you know how to do it!
To learn other, more accurate ways to remove a background - join Computer Graphics class.