julianna kunstler logo
notebook problem

expressive lines
Instagram icon

by JuliannaKunstler.com

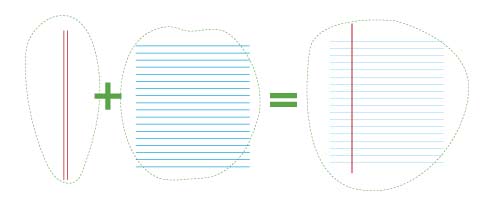
A standard notebook page is a sheet of white paper with printed lines.

If you were to describe the characteristics of that page - you would probably come up with a short list:

1. white background

2. blue horizontal lines, evenly spaced

3. vertical double-line red margin

Use a notebook page design as a starting point. How would you alter these elements to convey 7 different human characteristics?

Examples:

Average , Loud-mouth, Smartest, Unbalanced, Shy, Empty-headed, Day-dreamer, In love, Introverted, Extroverted, Frustrated, Slob, Lazy, Nervous, Lethargic, Clown, Tall, Tired, Bully, Substitute (teacher), Confused, Aggressive, Nearsighted, Tardy, Absent, Timid, Computer Wiz, Egocentric, Rigid, Nerd, Bashful, Tease, Copy-cat, Precise, Doodler, Absent-minded, Expelled, Class pet, On-a-diet, Virtual learner, etc.

Problem to solve:

Using the basic elements of a standard notebook page, alter the page design to communicate each personality. The personality that you create should reflect emotional or physical characteristics.

Start with sketching (use worksheet). Complete one personality for a teacher and 6 personalities for students.

Then pick the best 4 and execute them in Adobe Illustrator.

You can:
  • Alter space between lines;
  • Change the direction of the lines;
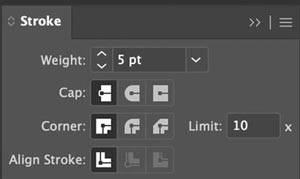
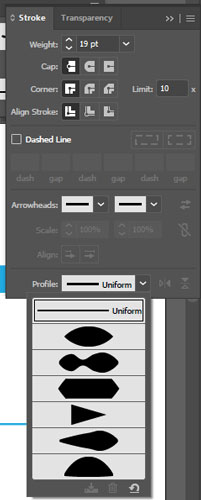
  • Change the thickness of the lines;
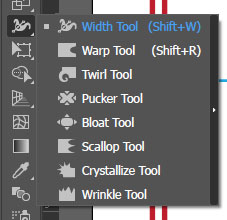
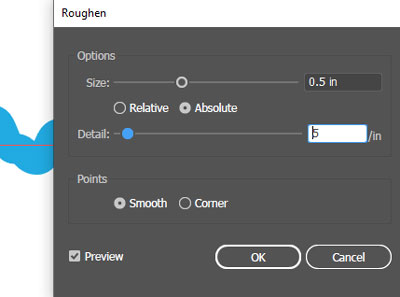
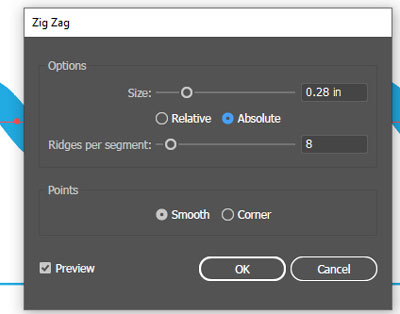
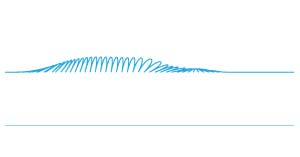
  • Bend/twist lines;
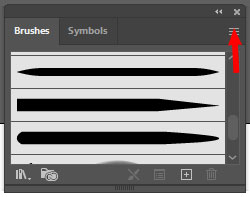
  • Convert lines to shapes;
  • Experiment with blue and red colors;
  • Add greyscale shading/elements
You can't:
  • You can not completely destroy the identity of the page

resource:

visual basics

R. & J. Wilde
Visual Literacy
ISBN 0-8230-5620-1

GALLERY

tired

anxiety

bully

lazy

virtual learner

empty-headed

unbalanced

shy

in Illustrator:

Open the work file.

There are 4 artboards there. One per page design.

There are already pre-made lines and margins that are groupped together for each page (plus a spare one on a side).

Before you start:

1. Make sure you are set to Essentials Classic workspace. If you are not - go to the menu bar: Window > Workspace > Essentials Classic.

2. Set your units to inches in Preferences > Units

3. Set your grid to 0.5" with subdivision: 2 in Preferences > Guides & Grid

4. If you want to see the grid: View > Show grid.

5. For easy alignment: View > Snap to grid.

There are 3 groups of lines in a page design:

  • 1st group: the two red vertical margins
  • 2nd group: the 18 horizontal blue lines
  • 3rd group: group 1 + group 2

To ungroup: select the group and Object > Ungroup

Basic line manipulation:

1. change direction

You can move one end of the line or of multiple lines.

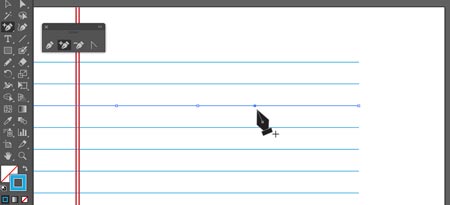
Use Direct Selection tool and select the needed anchor point(s).

2. curve lines (edit anchor points)

Convert straight path into a curve by changing anhor point type.

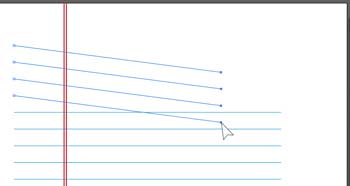
Use Anchor Edit tool, click and drag on a point.

3. add/delete anchor points

Add anchor points or delete them to create more segments in a line.

How to....

1. to change thickness (uniformly)

Use Stroke panel (Window > Stroke) or the Options bar to change stroke settings.

You can change the Weight (thickness) setting or the Cap setting (line ends).

2. change thickness (gradually)

use width tool
width tool

The Width tool lets you create variable-width strokes, and create stroke profiles so you can apply styles consistently.

  • Drag an anchor point to expand or contract the stroke.
  • To make pointed ends, drag the points at the ends of the stroke
Use Brush options

Open Brushes panel (Window > Brushes).

Scroll through preset brishes to apply to a stroke.

If you do not see what you like - click on the menu button in the upper right corner to add more brushes from the Brush Library.

These particular brushes you can find:

Open Brush Library > Artistic > Artistic Ink

Use Stroke panel options

You can manipulate the line by changing the line profile in the Stroke panel.

If you do not see that option in your panel - click on the menu button at the top right corner and choose Show Options.

You can fine tune the thickness with the Width tool.

Distort lines

Effects: Roughen

Effect is a temporary modification that can be adjusted later or removed completely.

In the Menu bar: Effects > Distort & Transform > Roughen

Make sure the Preview box is checked.

Play with the settings. Experiment!!!

Change the coints from corner points to Smooth.

Effects: Twist

Effects > Distort & Transform > Twist

Effects: Zig Zag

Effects > Distort & Transform > Zig Zag

Modifying tools

Tear off the modifying tools panel.

These tools can be modified by double-clicking on a tool. This will allow you to change the "brush" size as well.

Warp tool (2)

Based on the brush settings you can bend a path where you want.

Twirl tool (3)

You can use the Twirl tool anywhere on the path. You can change the brush size or complexity of the spirals.

Pucker tool (4)

This is a fun tool!!! Make sure to experiment with it!

Bloat tool (5)
Scallop tool (6)
Crystallize tool (7)
Wrinkle tool (8)

Stylize lines

Brushes

Library: Artistic Chalk Charcoal

Library: Artistic Ink

Library: Artistic Scroll Pen

Library: bristle brush

Library: Watercolor

make your own brush

...