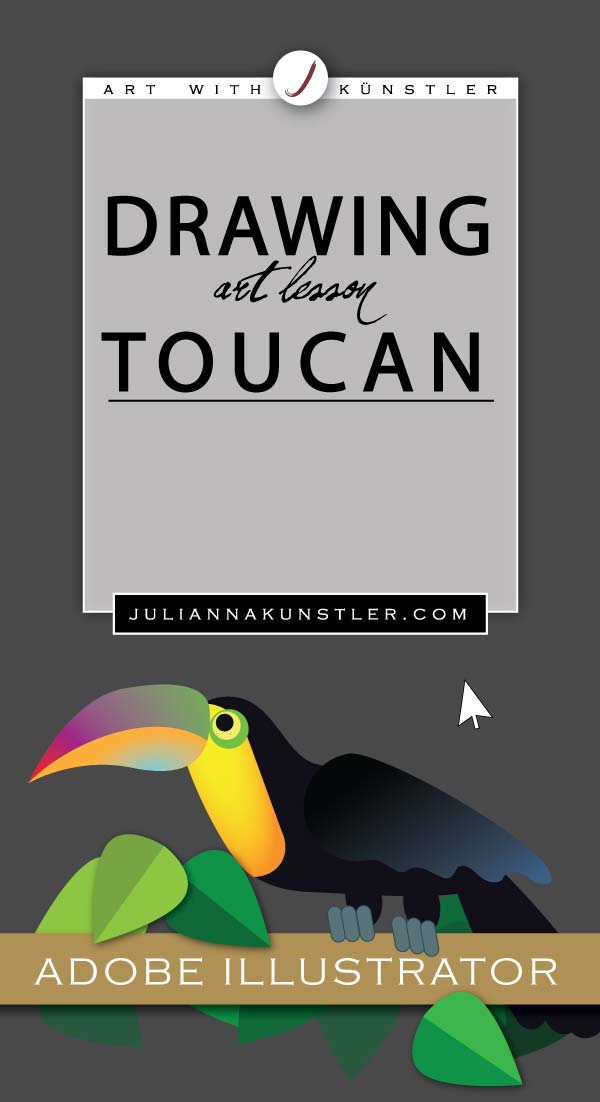
In this lesson:
- Drawing shapes
- Modifying paths
- Pathfinder
- Gradients
Recreate the image following the steps below.
Pay attention to how everything is done. Do not skip steps.
by JuliannaKunstler.com

Recreate the image following the steps below.
Pay attention to how everything is done. Do not skip steps.
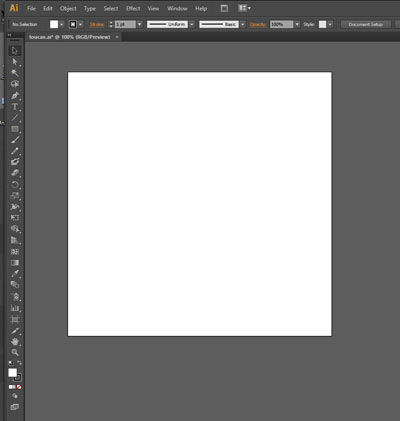
File > New
8" x 8"
![]() Use Rectangle tool, hold Shift and draw a square that is slightly bigger than the artboard.
Use Rectangle tool, hold Shift and draw a square that is slightly bigger than the artboard.
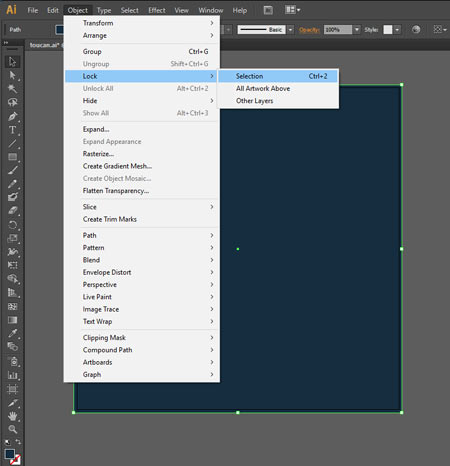
Lock the square so you don't accidentally move it or edit:
Object > Lock > Selection
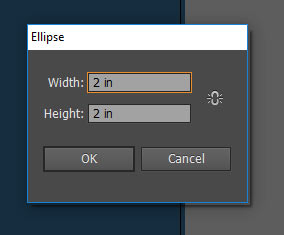
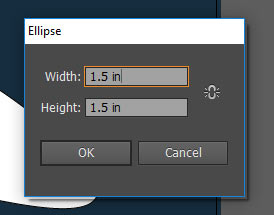
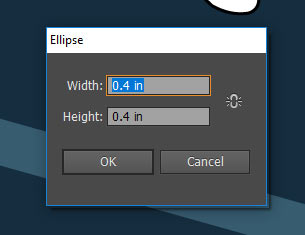
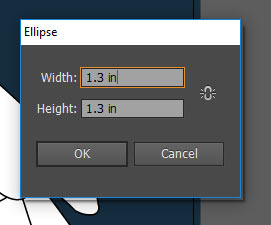
Click on the artboard with Ellipse tool.
Set the dimensions as shown
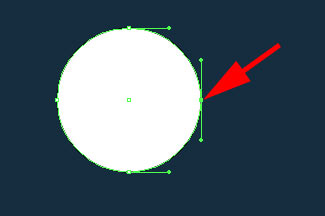

Select the right anchor point with Direct Selection tool.
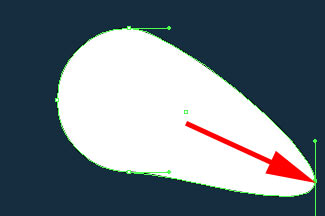
Drag it as shown.
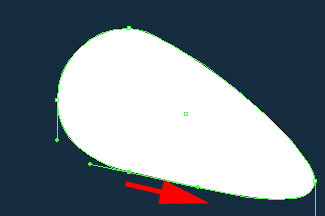
Manipulate the bottom anchor point's handles to smooth the shape.
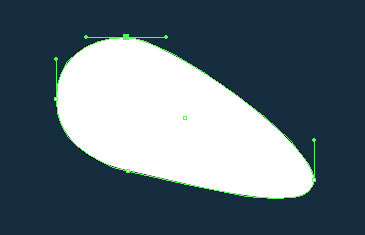
Adjust the top anchor point if needed.
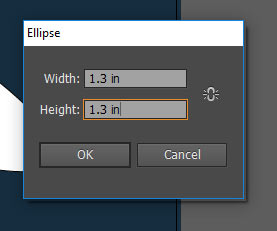
![]() Click on the artboard with Ellipse tool.
Click on the artboard with Ellipse tool.
Set the circle dimensions.
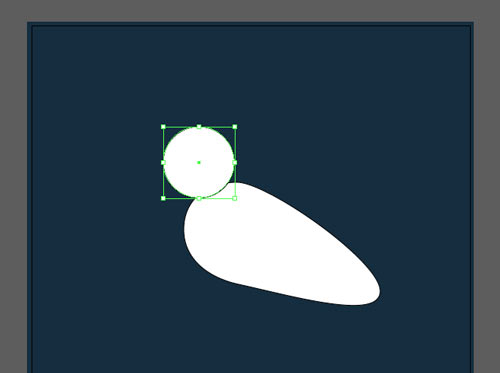
Position the circle as shown.
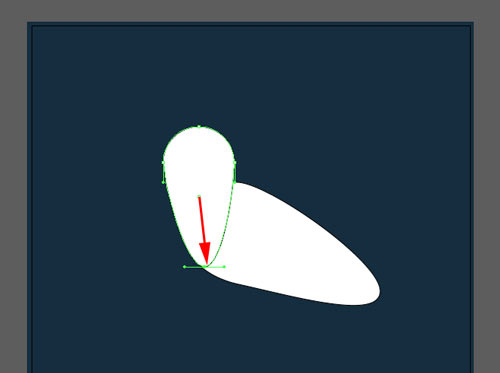

Drag the bottom anchor point down until you reach the previous shape outline.
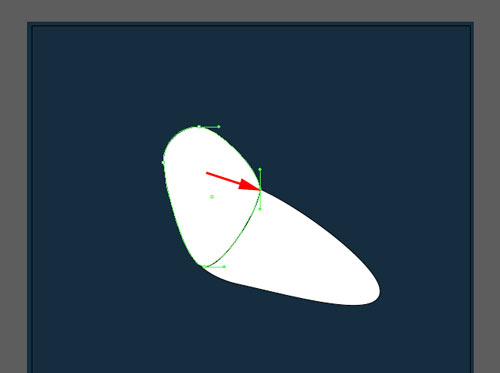
Drag the right anchor point to the previous shape outline.
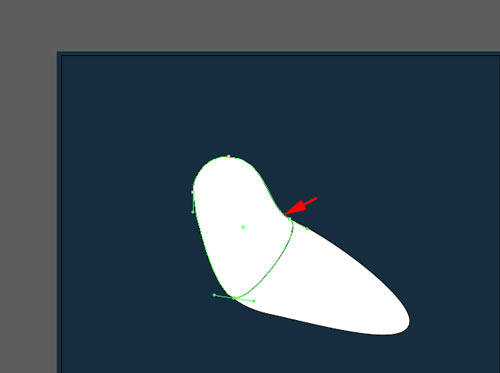
Manipulate the direction lines for a nice curve.
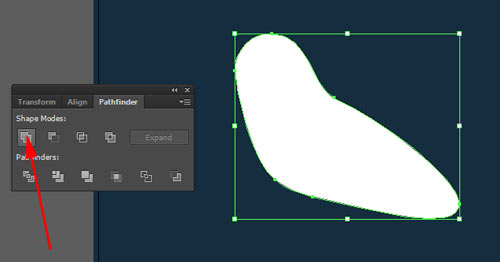
Select both shapes.
In Pathfinder palette:
click Unite button
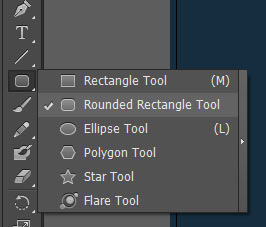
Add a shape for the bright colored chest part.
Choose Rounded Rectangle Tool
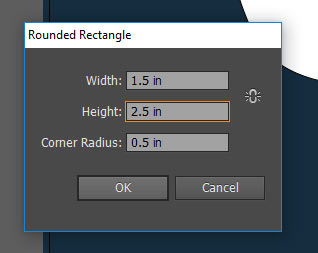
Click on artboard.
Set the dimensions.
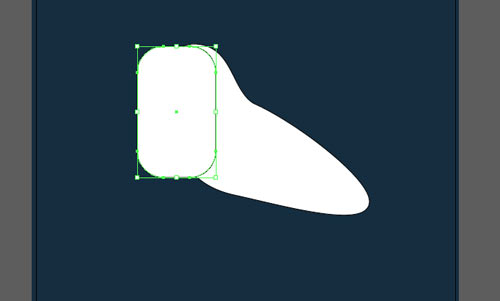
Position as shown.
The top of the chest shape should be close to the top of the body.
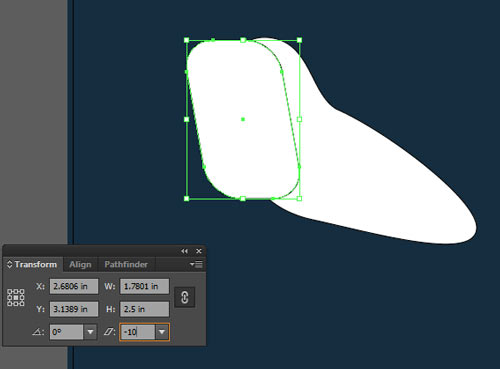
To tilt the chest shape:
Go to Transform palette.
Type -10 in Shear Setting.
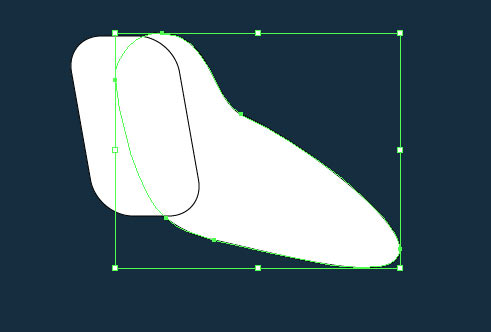
Cut the top shape to match the body shape:
1. Select the body shape
2.Copy (Command/Ctrl C)
3. Paste in Front (Command/Ctrl F)
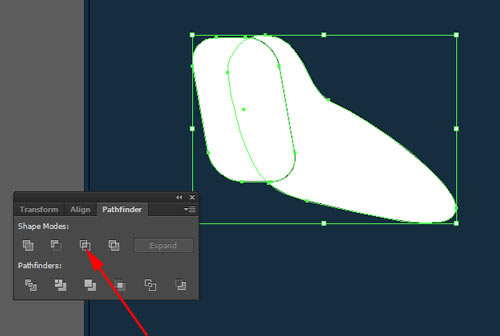
Shift-click on the chest shape to add it to selection.
Now you have 2 shapes selected (the copy of the body and the chest).
In Pathfinder palette: click on Intersect button.
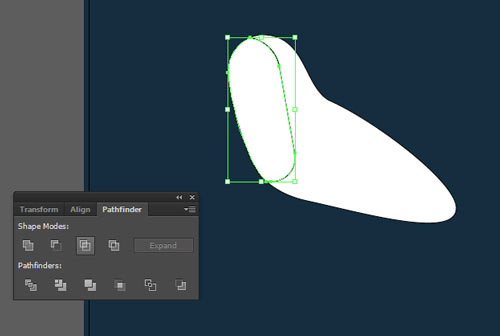
It will keep the shape that is a result of overlapping of these two shapes.
The parts that are not overlapped will be gone.
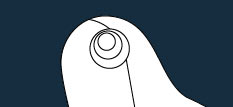
![]() Draw 3 circles as shown.
Draw 3 circles as shown.
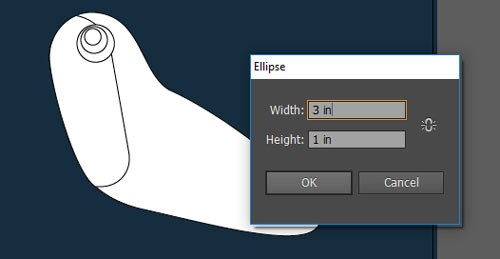
![]() Click on the artboard with Ellipse tool.
Click on the artboard with Ellipse tool.
Set dimensions.
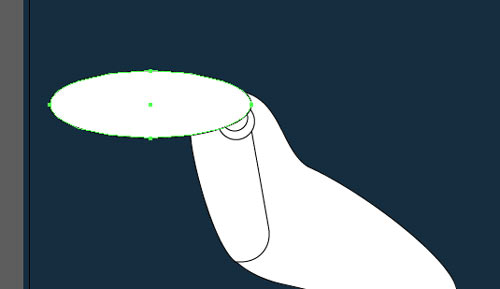
Position the oval as shown.
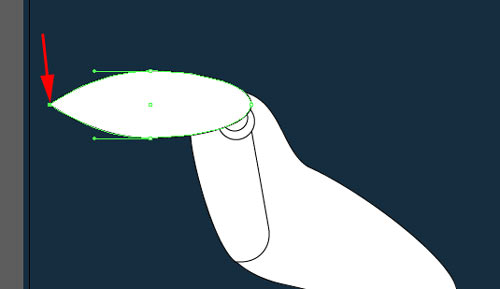
Use Convert Anchor point tool and click on the left point.
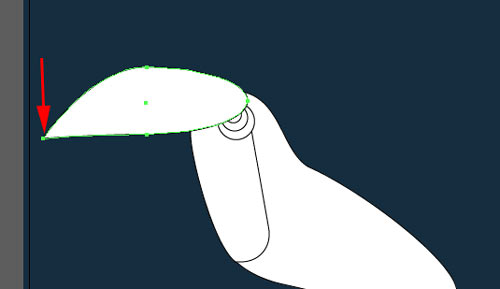

Use Direct Selection tool to drag the left point down.
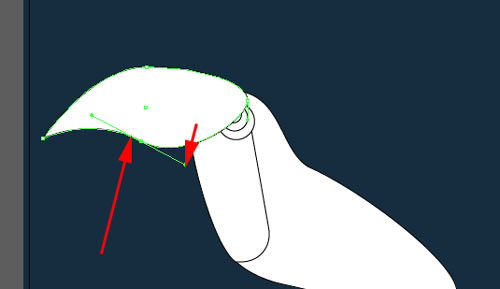
Adjust direction lines for the bottom anchor point.
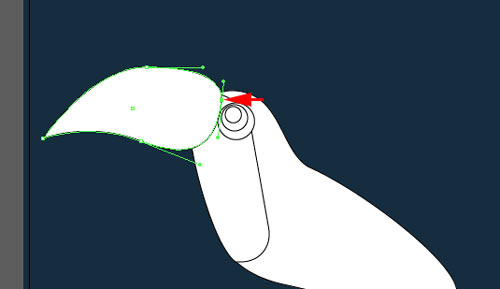
Move the right anchor point to the left.
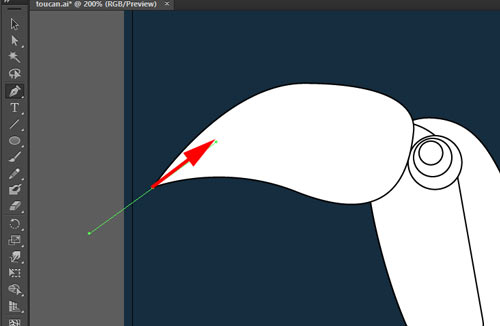
 To split the beak shape into two parts:
Use Pen tool and start a path from the left point as shown.
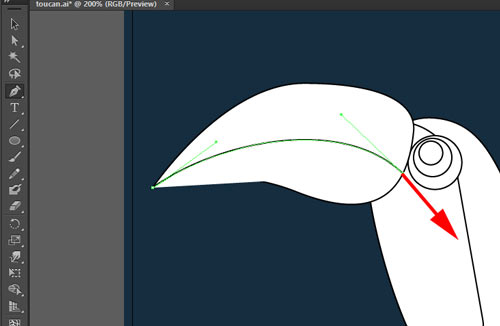
Second anchor point.
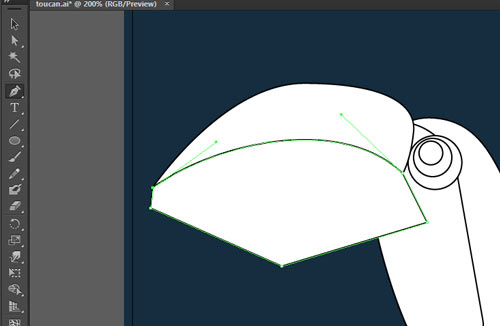
The next few points need to be placed outside of the beak shape.
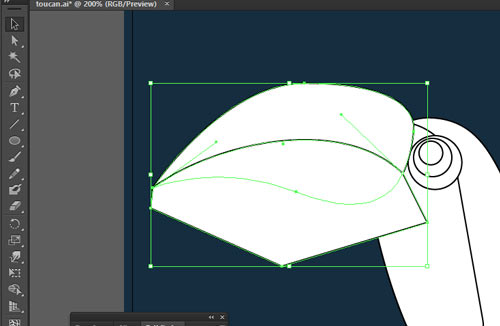
Select the beak and the new shape (use Shift).
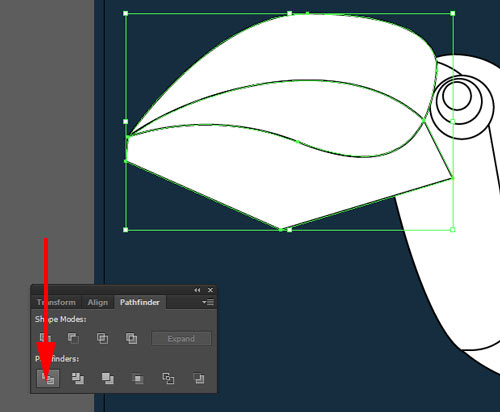
In the Pathfinder palette:
Click Divide button.
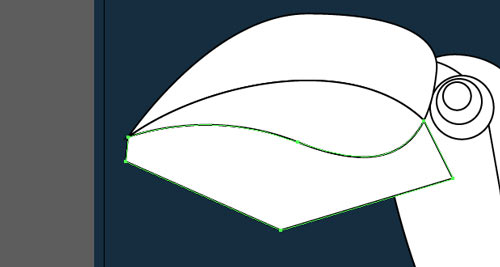
Then select the extra shape below the beak.....
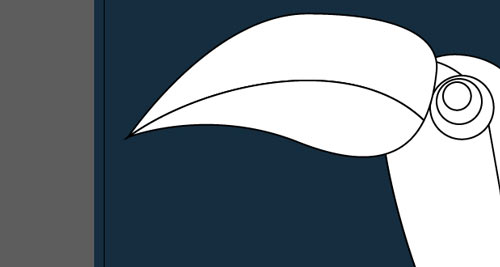
Delete it.
![]() Start with a circle.
Start with a circle.
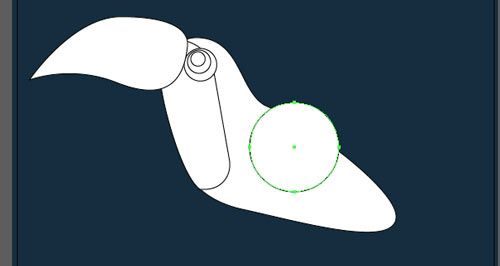
Position it as shown.
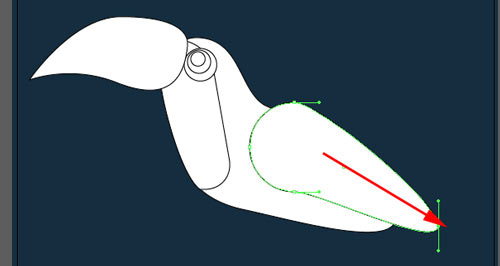

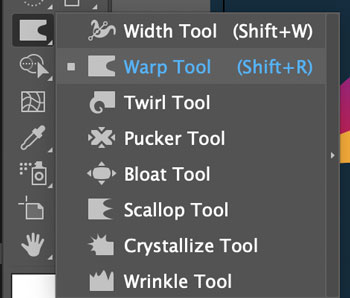
To distort the bottom part of the wing - we are going to use Warp tool.
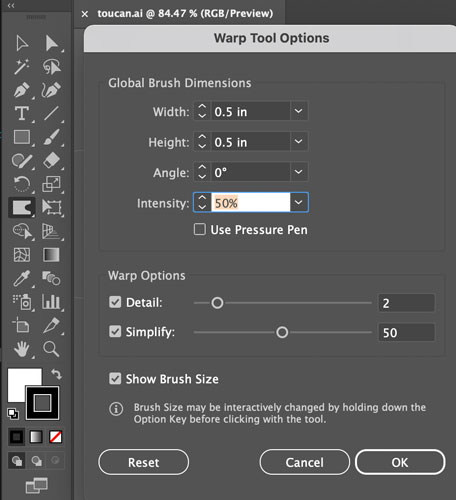
First we need to set the size option for the tool.
Double-click on the tool to get options pop up.
Set the brush size to 0.5" x 0.5"
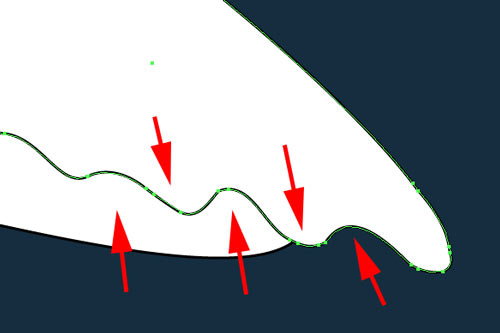
Push the outline in and out for a nice wave.
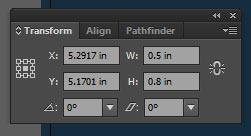
Start with drawing an oval.
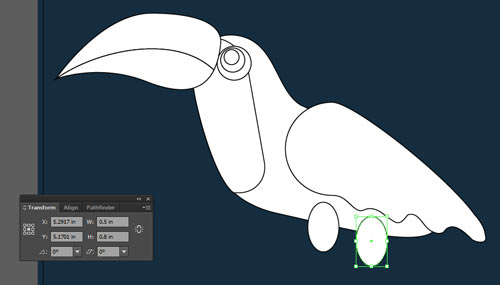
Duplicate the oval.
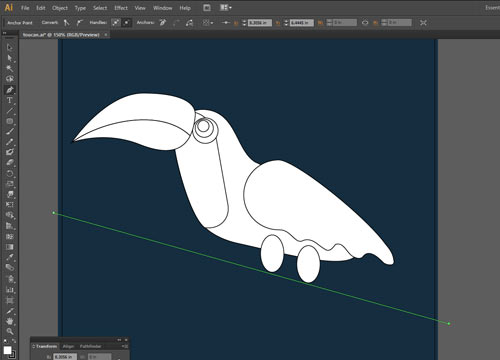

Use Pen tool (or Line Segment tool) to draw a path as shown.
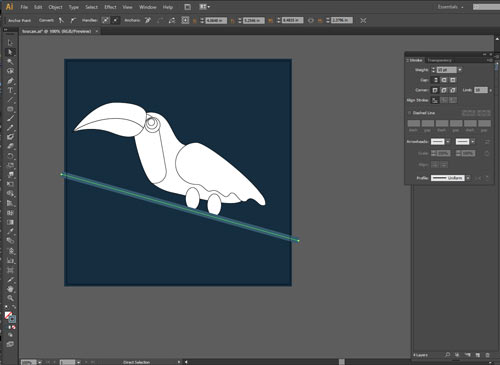
Apply a stroke to the path.
Pick a color (Color Picker or Swatches palette)
Set a weight for the line (Options bar or Stroke palette).

Select Rounded Rectangle tool from the Tool box.
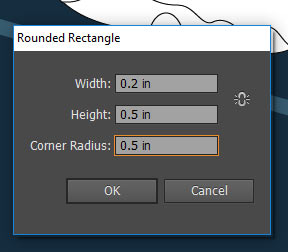
Click on the artboard.
Set dimensions.
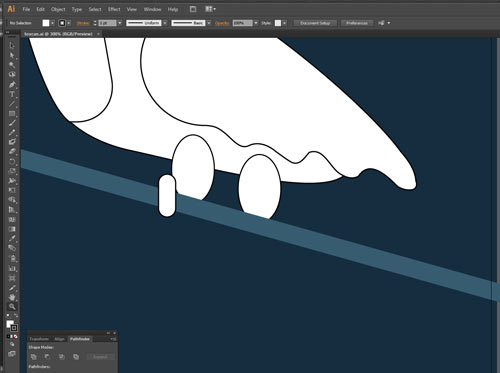
Position as shown.
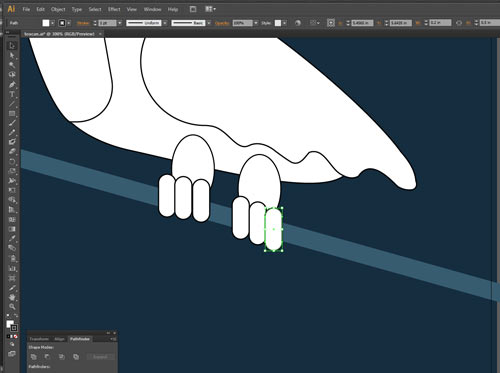
Duplicate (Option/Alt drag)
File > Save
Start with a circle.
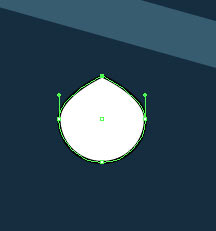
Convert the top anchor point.
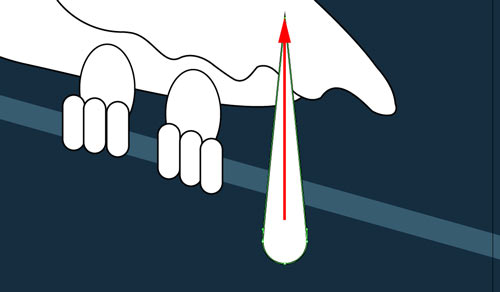
Drag the top point up.
You can use arrow key on the keyboard.
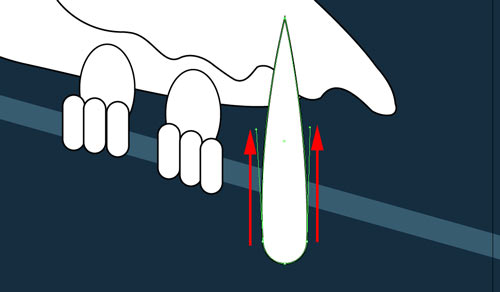
Adjust the side points by dragging direction lines up.
This will make the feather wider.
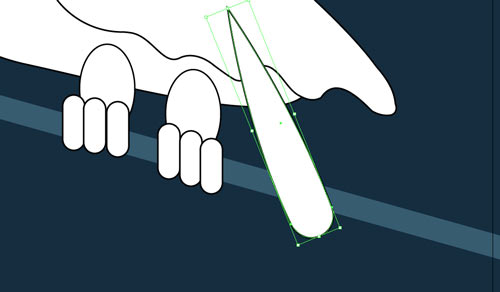
Select the feather with Selection tool.
Rotate the shape.
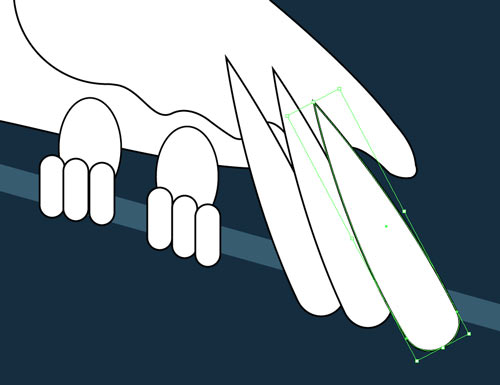
Duplicate feathers.
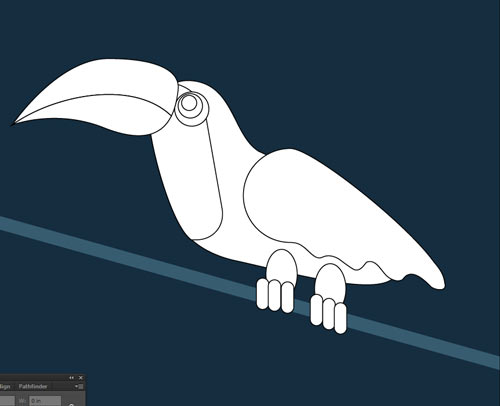
To place the tail behind the body:
Select all three feathers.
Edit > Cut (Command/Ctrl X)
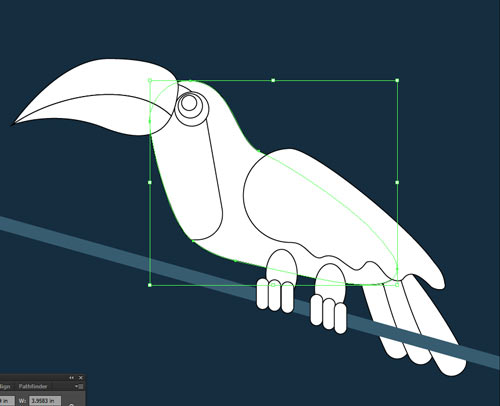
Select body shape.
Edit > Paste in Back (Command/Ctrl B)
File > Save
Start with a circle.
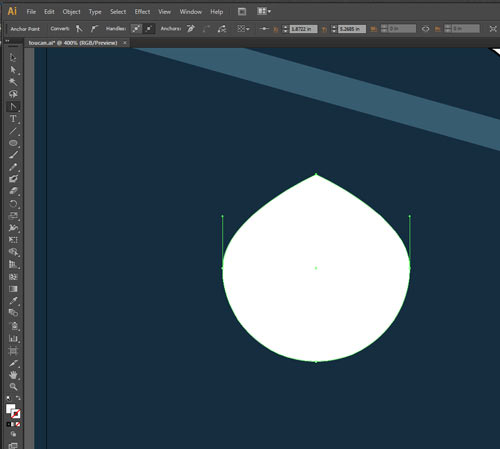
Zoom in the area.
Convert the top anchor point.
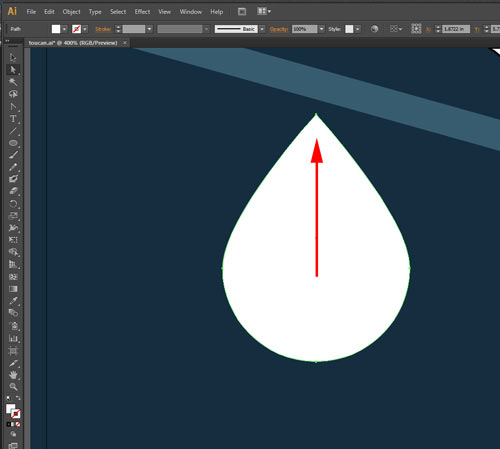
Drag the top point to form a leaf shape.
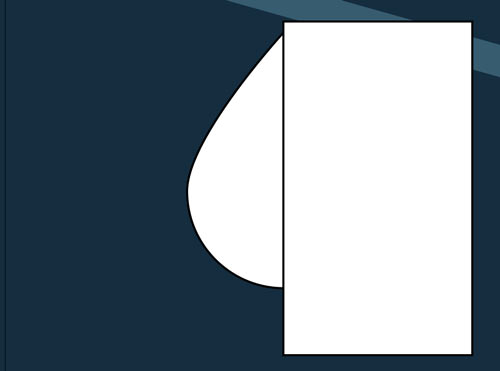
Draw a rectangle over one half of the leaf.
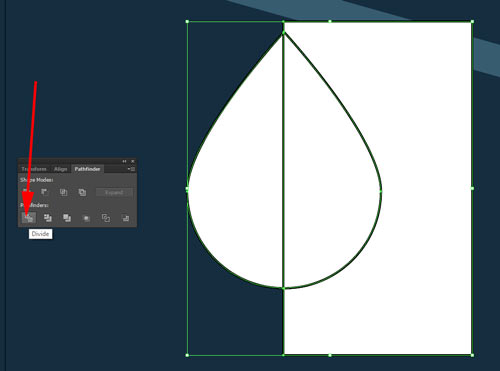
Select both shapes.
In Pathfinder palette:
Click Divide.
All three shapes are grouped.
To select just one of them - use Direct Selection tool.
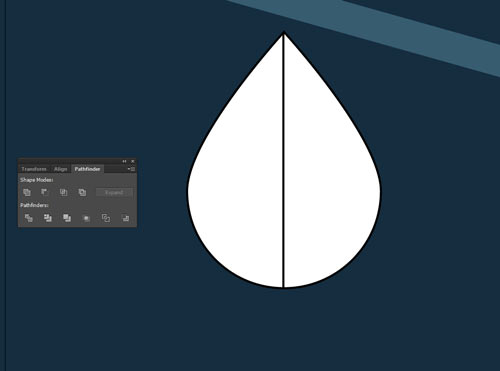

Select the extra shape .
Delete it.
File > Save
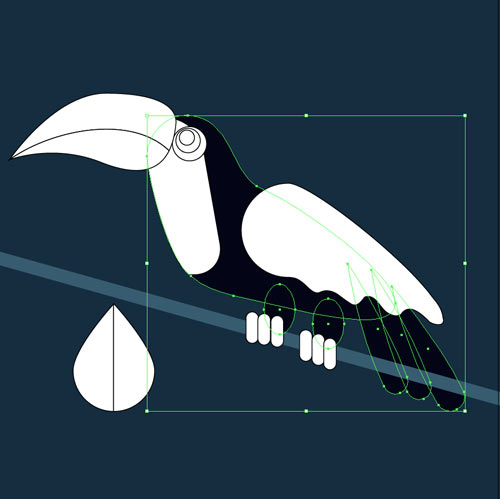
With Selection tool: select body, tail, and legs.
Select Black for fill color
No stroke.
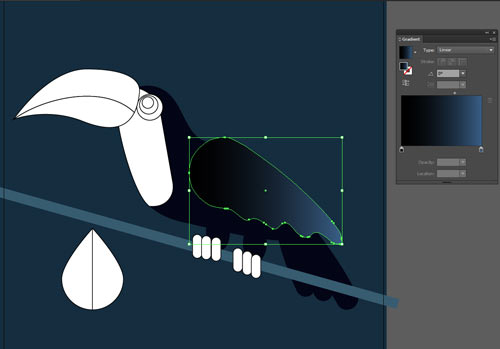
Select the wing.
Set fill option to Linear Gradient.
In Gradient palette set colors to Black and dark Blue.
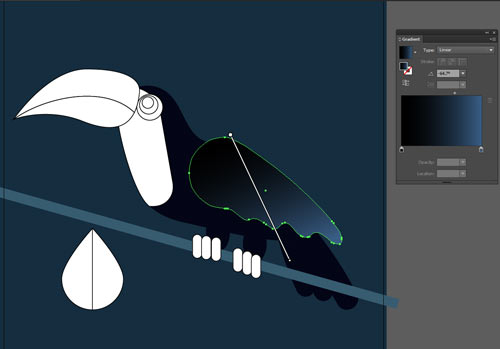

Choose Gradient tool.
Click and drag the gradient at a slight angle (as shown).
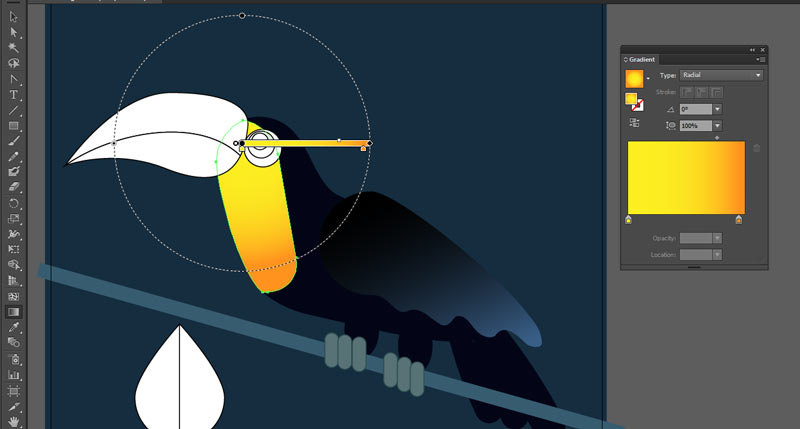
Select the chest shape.
No stroke.
Fill type: Radial Gradient.
Colors: Yellow to Orange.
With the Gradient tool: resize the gradient.
Select feet shapes:
fill: solid color
stroke: yes, darker shade
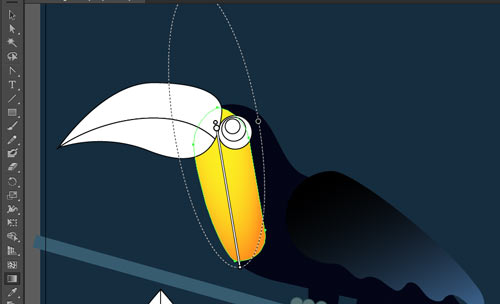
Modify gradient to an oval shape.
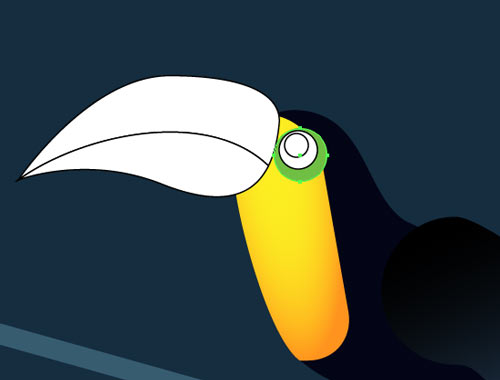
Eye:
bottom circle - yellow-green, no stroke.
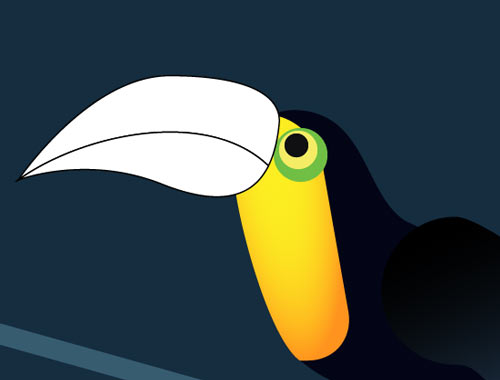
middle circle - yellow fill, no stroke
inner circle - black
The beak will be more complex:
Select the top part with Direct Selection tool.
Choose Radial gradient fill, no stroke
Create custom gradient as shown
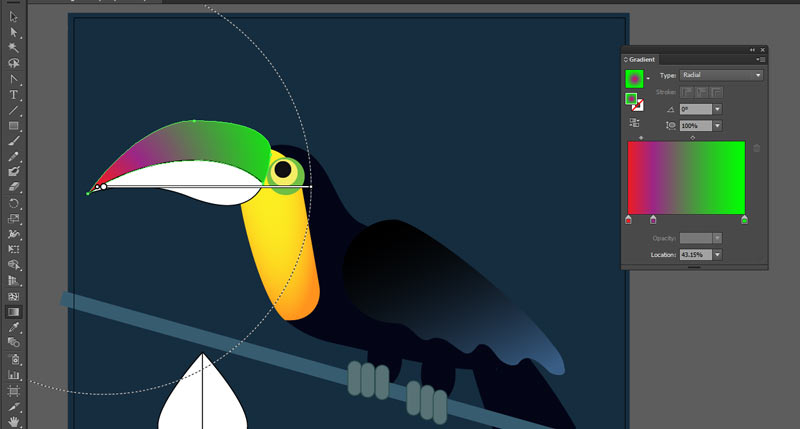
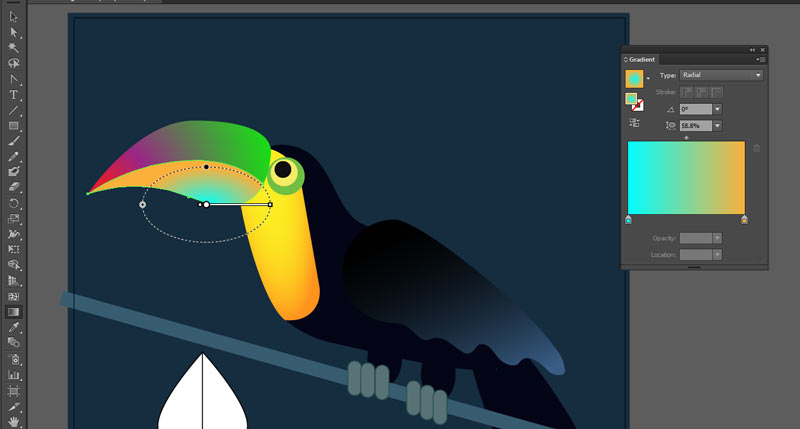
Apply gradient to the bottom part of the beak.
Use settings as show.
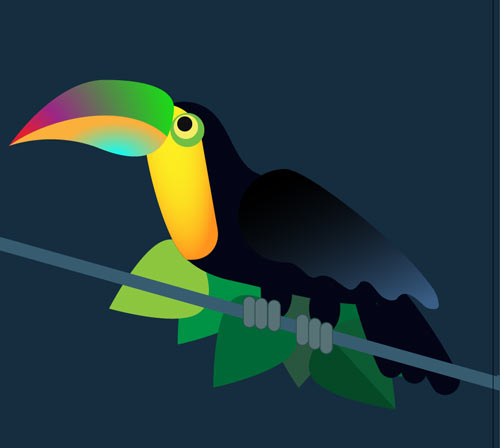
Duplicate the leaves.
Rotate them.
Place them behind toucan:
1. Select all leaves except one (keep it in front for the foreground)
2. Cut
3. Select feathers (these are the shapes that are the furthest)
4. Paste in Back
Apply different shades of green.
Leaves in the background can be simplified by having both sides be the same color.
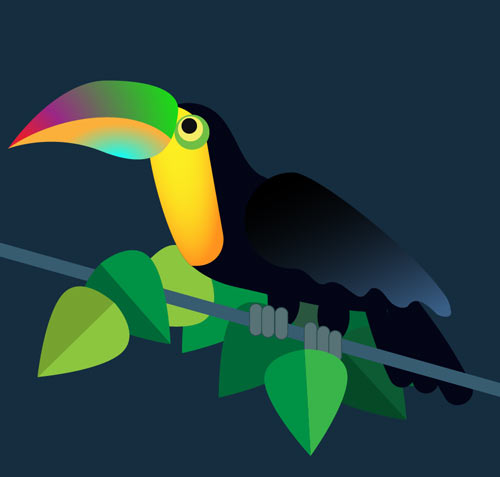
Add a few leaves in the foreground.
You are done!
File > Save
Don't forget to sign!