Application: Adobe Illustrator
In this lesson we'll learn:
- basic shape drawing
- shape combining and manipulation.
- colors: fill and stroke
- shape order
- brush strokes
- gradients
- alignment

intro to AI

by JuliannaKunstler.com
Application: Adobe Illustrator
In this lesson we'll learn:
intro to AI


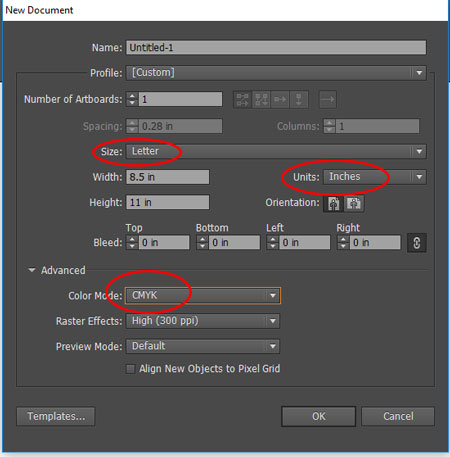
File > New (letter size)
Units….. inches
Color mode: CMYK (because you are going to print it)
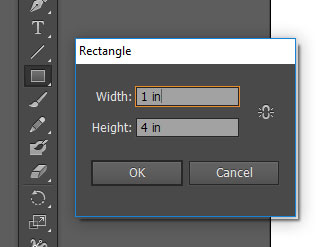
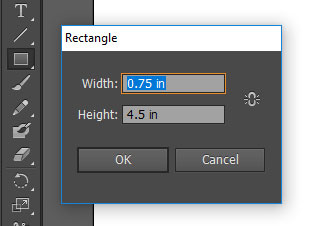
Draw a rectangle
 Click with the Rectangle tool on the Artboard.
In a pop-up window type in the dimencions: 1"x4".

Center point inside the rectangle is used for alignment.
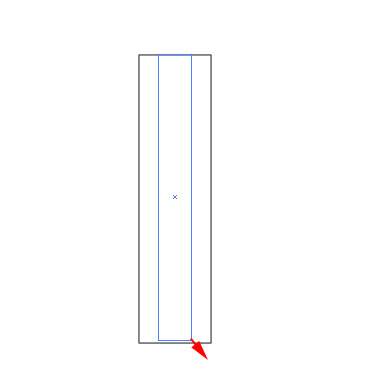
Option-drag another rectangle from the center point.
The height should be the same as the first rectangle (4 in).
The width is as shown - should be more narrow.
Every new shape that is drawn is arranged on the top of the previous one.
You can rearrange the order of the shapes when needed.
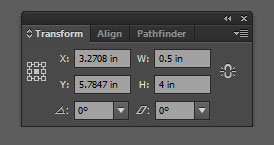
Open Transform palette (Window > Transform)
Adjust width and height to 0.5" x 4"
The chain link should be unchecked.
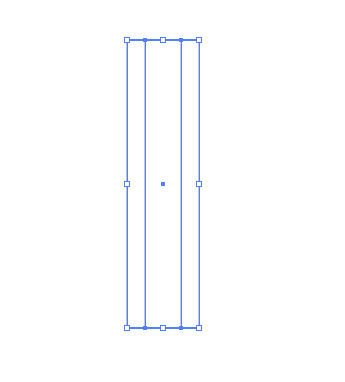
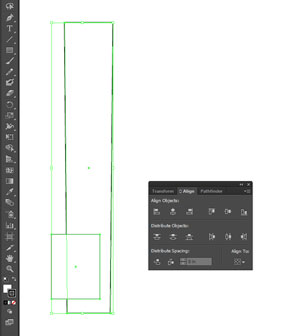
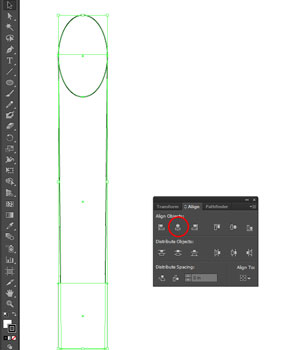
Align both rectangles:
 Select them both with Selection tool.
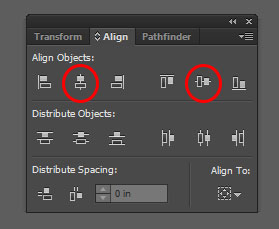
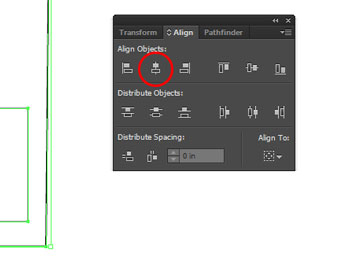
Then open Align palette (it is in the same tab group as Transform panel)
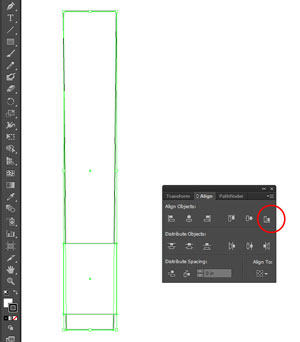
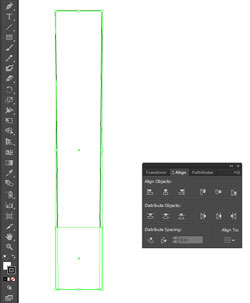
Alegn both shapes vertically and horizontally.
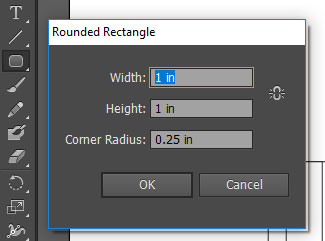
Click on the artboard with Rounded Rectangle tool.

Type in the dimensions.
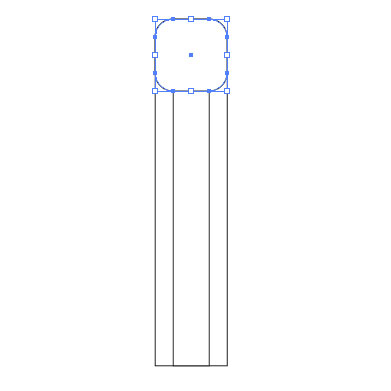
Place the eraser shape at the top of the pencil body.
Keep it selected.
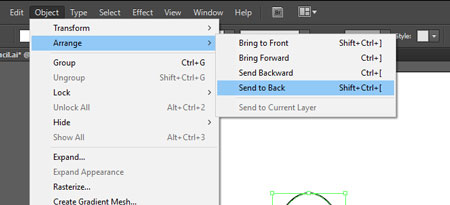
Next: we need to place this shape behind the two rectangles that represent the body.
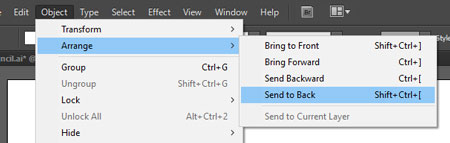
Object > Arrange > Send to back.
This will place the eraser at the very bottom of the stack of shapes.
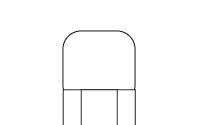
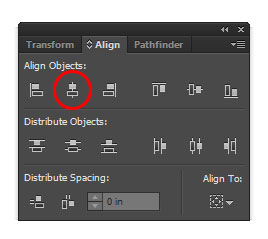
Select all shapes (Command/Ctrl A)
Align them by vertical axis.
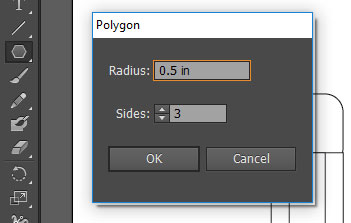
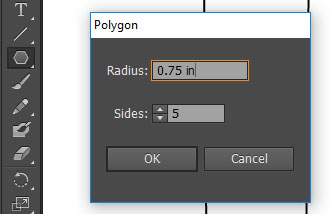
There is no "triangle" tool in the Tool bar.

We are going to use the Polygon tool.
Click on the artboard
Specify the number of sides.
Type in the radius.
Keep in mind that radius is not the wight of the shape, but a distance from the center point to a corner... We will adjust the width later.
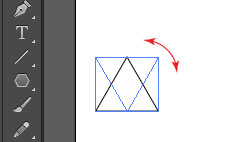 Rotate the triangle at 180 degrees:
Select it .
Place the cursor at the corner until it turns into double-headed arrow.
Hold Shift key (to rorate at 45, 90, 180 degrees)
Rotate.

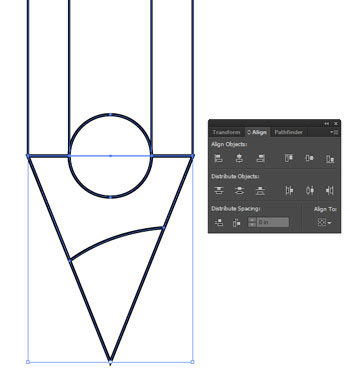
Place the triangle at the bottom
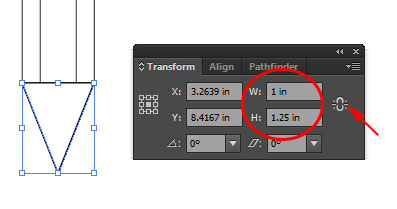
Specify width and height.
Select all.
Align.
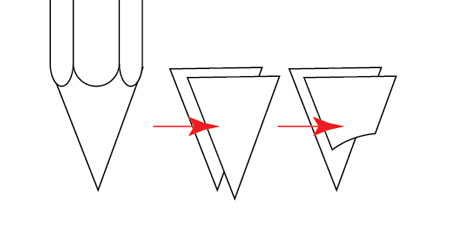
To create the cut of the pencil - we need to duplicate the triangle and then cut it.
Here is the process:
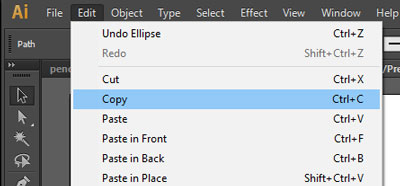
Select the triangle
Edit > Copy
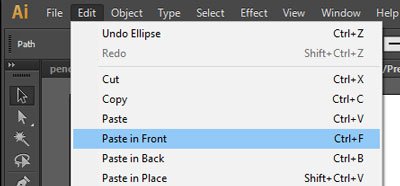
Edit > Paste in Front
"Paste in Front" command places the copy directly above the original shape.
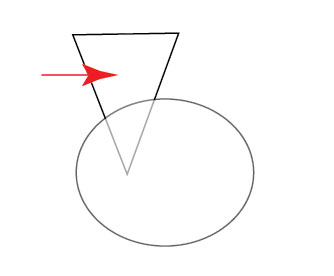

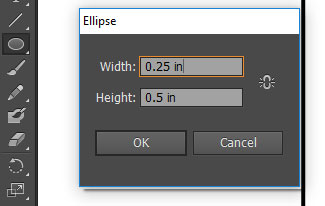
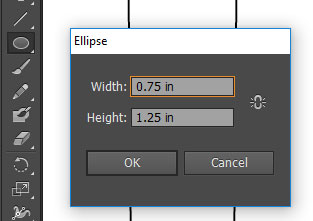
To cut the bottom part of the triangle - we need to draw a shape that will serve as a "cookie cutter".
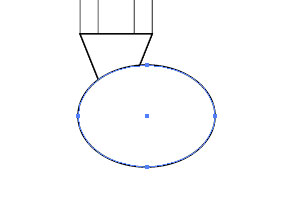
Use Ellipse tool.

Hold Option/Alt to draw a shape from the center point.
Drag an oval as shown.
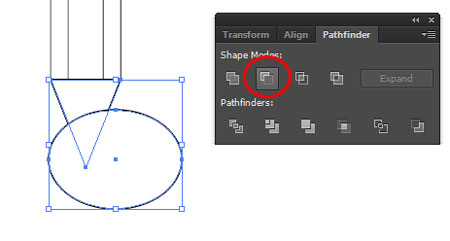
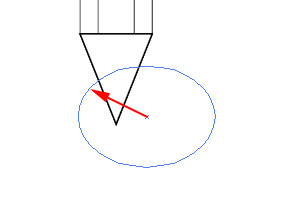
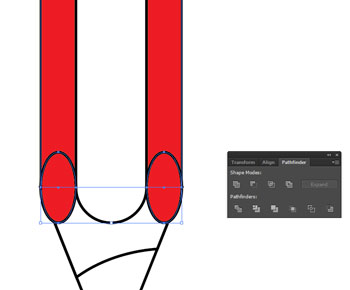
Select two shapes: The top triangle and the oval.
Use Selection tool.
Click on one shape, then hold SHIFT and click on the other.
Then use "Minus Front" buttin in Pathfinder palette.
Pathfinder pallet is in the same panel group with Align and Transform.
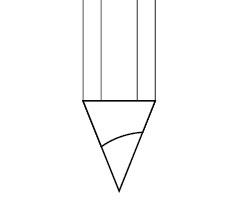
Done!
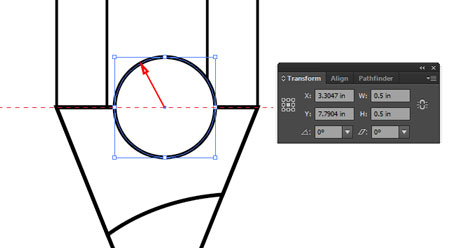
To add a round edge to the pencil body, use Ellipse tool.
Hold SHIFT (for a perfect circle) andOption/Alt to draw fron the center point.
Place the cursor on thebottom edge of the two rectangles.
Drag a circle that is the same width as the narrow rectangle of the pencil body.
In Transform palette, set width and height to 0.5 in.
Select all shapes (Command/Ctrl A)
Align all shapes.

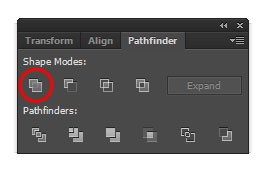
Now select the circle and the narrow rectangle.
(Hold Shift to select the second shape).
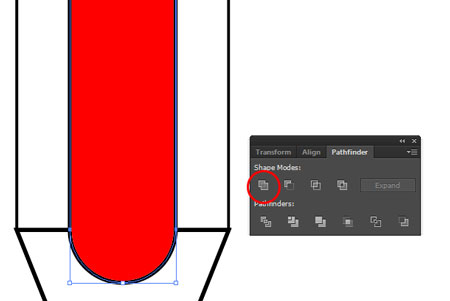
In Pathfinder palette:
Click on Unite button.
Now we have one shape made out of two simple shapes.
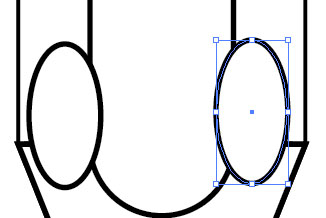
To add the two curves to the big reactangle: start with Drawing two ovals.
Use Ellipse tool.
Click on artboard.
Enter dimensions.
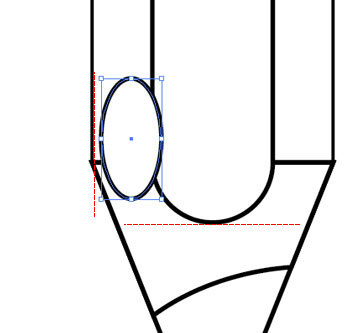 Place the oval as shown:
above the 1st curve
to the right of the left edge
We need this for aligning the pieces later.

Option/Alt drag the oval to the right.
This will duplicate the shape.
Place the second oval to the left of the right edge.
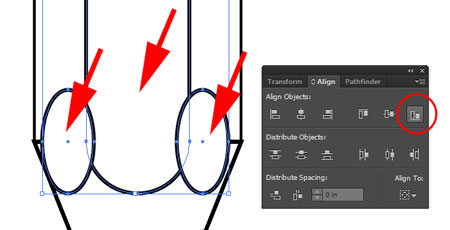
Select the two ovals and the previous shape that you created.
Align them by the bottom edge in Align palette.
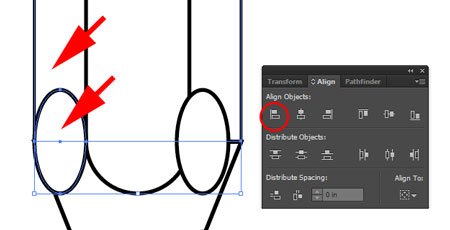
Now select the left oval and the big rectangle.
Align by left edge.
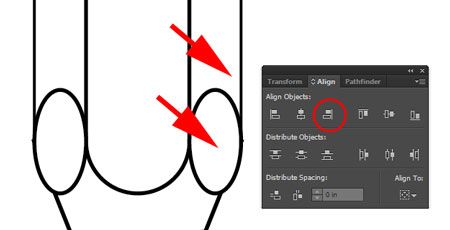
Select the right oval and the big rectangle.
Align them by the right edge.
Now select all three shapes:
both ovals and the big rectangle.
Click Unite button in Pathfinder palette.
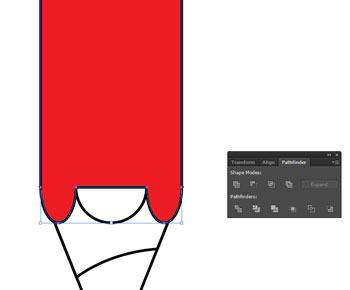
A new shape will be created.
The new shape will appear on the top of all other shapes. That is because it takes placement of the top shape from the group. And the top shape was the right oval.
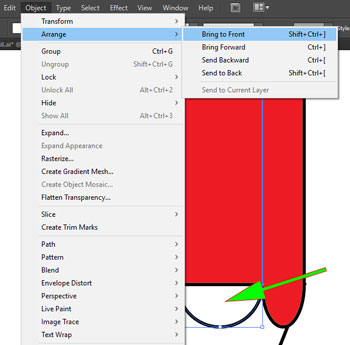
We will need to bring forward the middle shape.
Select it.
Then go to Object > Arrange > Bring to Front.

Now everything looks right.
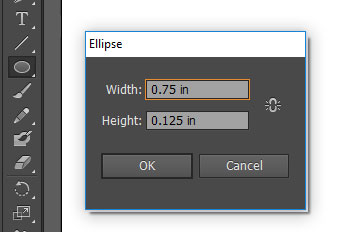
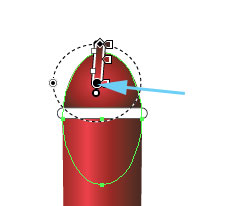
To add an eraser top, choose Ellipse tool.
Click on artboard.
Type in the values.
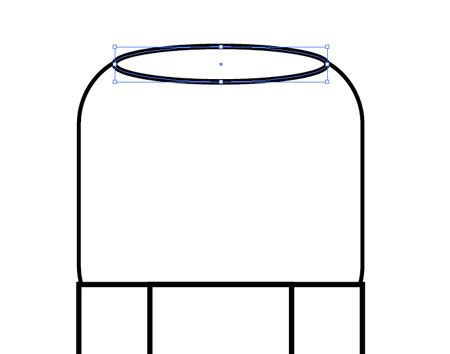
Place it as shown.
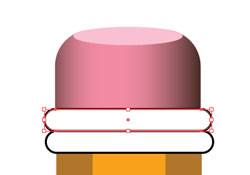
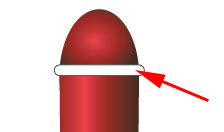
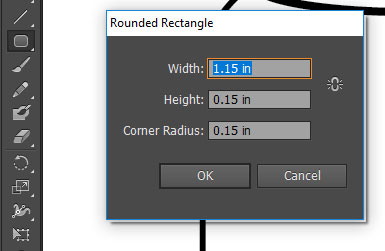 To add the metal bands that hold the eraser in place, use Rounded Rectangle tool.
Click and enter values.
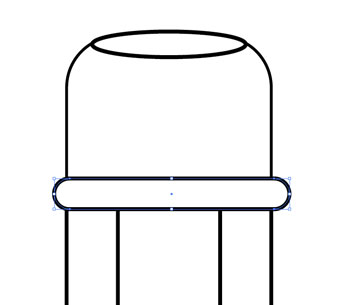
Place the shape between the eraser and the pencil body.
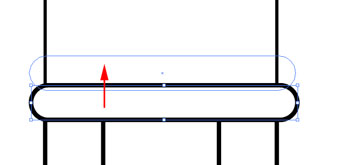
Option/Alt drag the shape to duplicate.
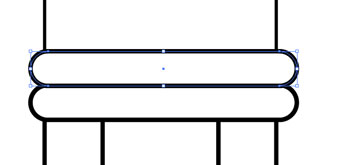
This was the last shape for the pencil.

The last alignment:
Select all shapes.
Align by vertical axis.


You can apply color to shape itself (fill color) and the outline (stroke color).
Whichever swatch is on the top in the Tool bar or Color palette.
Start with selecting the pencil main body shape.
Have the Fill color swatch selected in the Color palette Window > Color).
Choose the closest color to what you think will work in Swatches palette (Window > Swatches).
Click on Stroke swatch and choose "none" option.
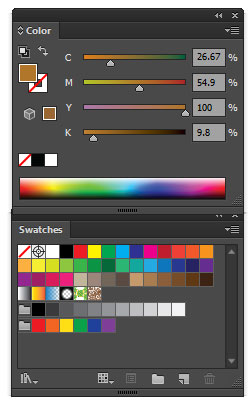
Click on Fill swatch and adjust colors by dragging the color sliders.
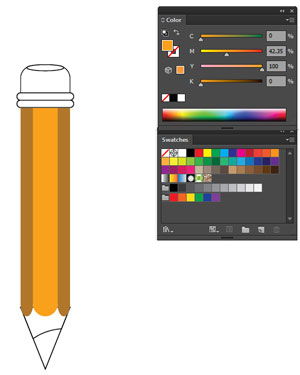
Select the middle shape.
Choose a lighter color for the shape fill.
Remove stroke..
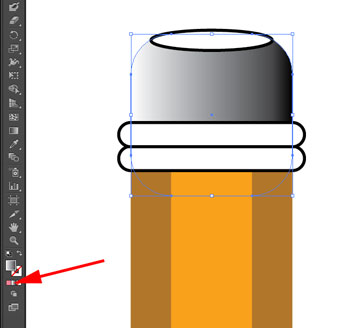
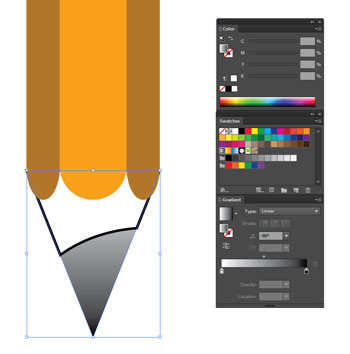
Select the eraser shape.
Remove stroke.
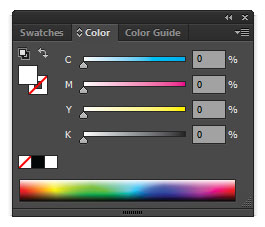
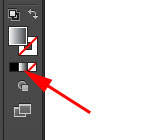
Choose Gradient option for the fill property.
The default fill (White to Black) will be applied to the shape.
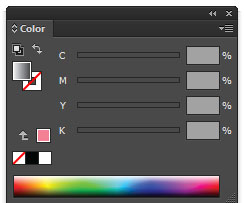
Your Color palette will look like this.

Open Gradient palette (Window > Gradient)
Type: Linear
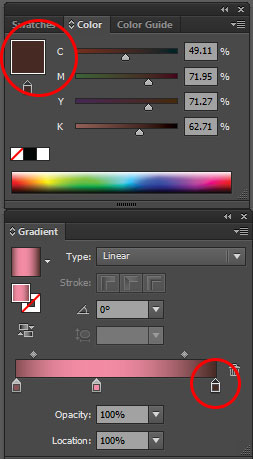
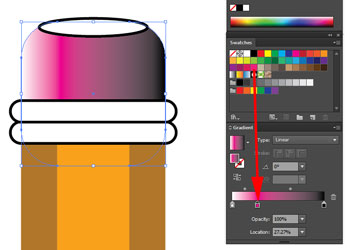 Let's add somo colors to the gradient!
Drag a pink swatch from Swatches palette onto the gradient annotator.
That will add a "Color Stop" to the gradient.
You can slide it right or left.
If you wish to remove a color stop - drag it outside the annotator.
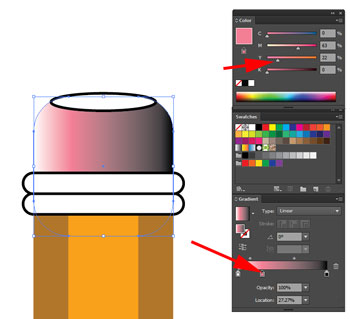
With the pink color stop selected, you can use the Color palette to adjust the color.
A added more yellow to the mix.
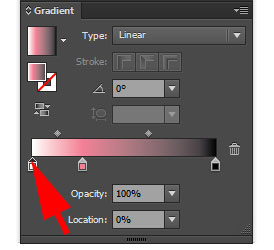
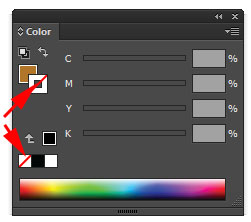
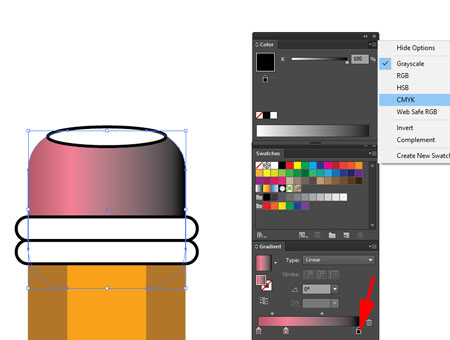
To replace the White color stop, select it.
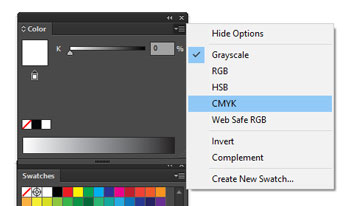
By default, White and Black colors have only value properties (Greyscale).
We need to convert them into CMYK color mode.
Now you can manipulate the color sliders to achieve a darker pink tone.
Select Black color stop.
Convert it into CMYK.
Use Color palette to create a dark pink shade.
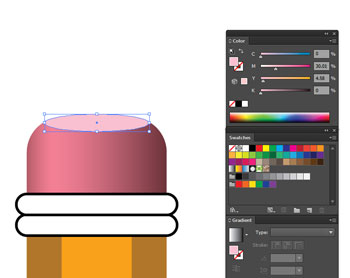
Select the top oval shape.
Remove stroke.
Apply a light pink color.
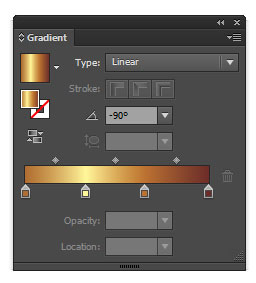
Select a band.
Remove stroke.
Choose Gradient fill option.
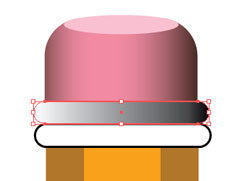
Linear gradient will be applied from left to right.
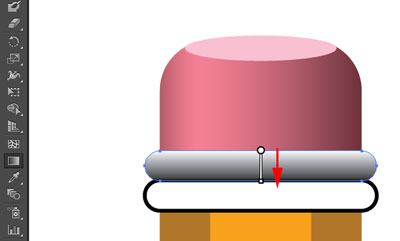
To make the gradient go in a different direction - from top to botton - choose Gradient tool in the Tools bar.

Click and drag from top to bottom edge.
Repeat the steps with the other band.
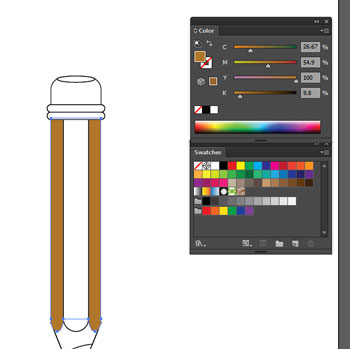
Select the graphite part.
Remove the stroke.
Apply gradient fill.
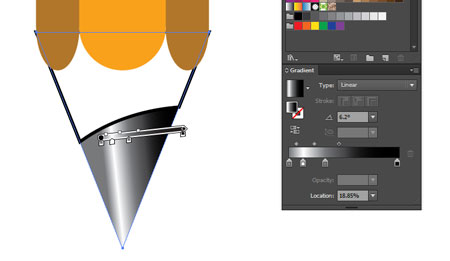
Add more grey color stops to your gradient:
Light Grey - White - Light Grey - Black
Choose Gradient tool.
Move the gradient annotator as shown.
Move the first three color stops closer together.
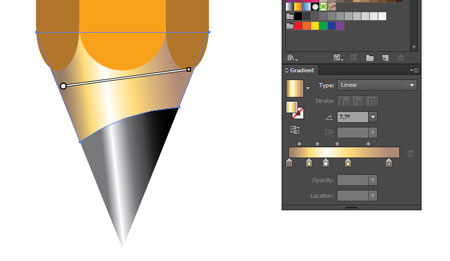
Select the area above the graphite.
Remove stroke.
Apply gradient.
Place color stops as shown.
Using the gradient tool, change the gradient direction.
The pencil is done!
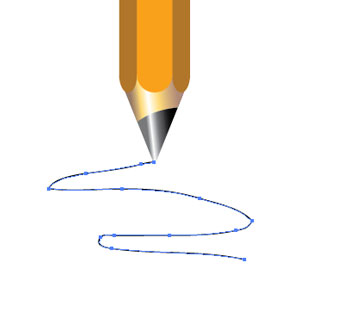
The last step here is to add a pencil stroke.
In Color swatches:
no fill,
stroke: black.
Use Pencil tool.

Draw a line.
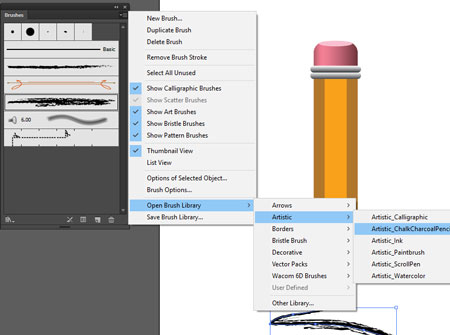
With the line selected, go to Brushes palette.
(Window > Brushes)
Brushes add different stroke effects.
From the top right corner, click on drop down menu button.
Open Brush Library > Artistic > Artistic_ChalkCharcoalPencil
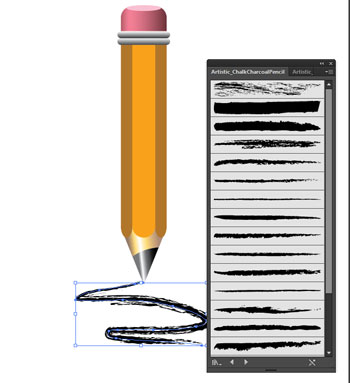
In the new Brush group palette, choose a stroke type you like.
Click on it to apply.
Done!
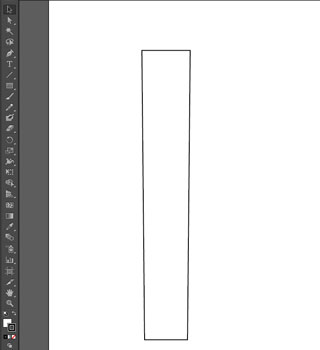
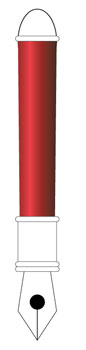
Let's start with the pen body.
Place a rectangle with the shown settings.
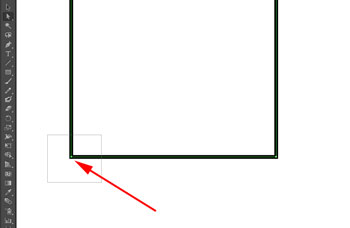
Now you are going to make the bottom part of the ractangle more narrow.

Choose Direct Selection tool.
Drag around the bottom left corner to select just that corner.
Use Right Arrow key on the keyboard.
Hit it 3 times.
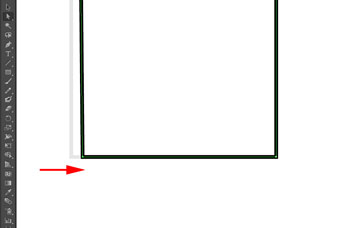
Select the right corner.
Hit Left Arrow key 3 times.
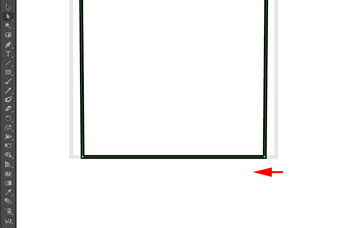
Your pen should look something like this.

We are going to add another rectangle for the bottom part.
Insert rectangle with the shown values.
Select both shapes with Selection tool.
Align the shapes vertically....
... and bottom alignment.
This is what it looks like now.
Let's do the top round part.
Use Ellipse tool.
Insert oval.
Align all 3 shapes.
Select just the oval now.
Arrange it behind all shapes:
Onject > Arrange > Send to Back
Now the pen part itself.
Choose Polygon tool.
Insert the values.
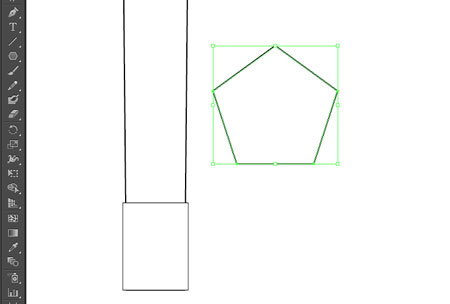
Obviously, it does not look anything like a pen.
Let's modify it.
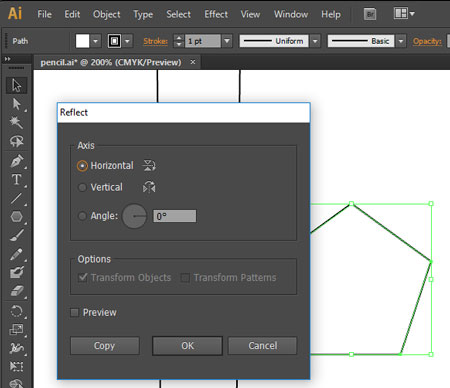
Object > Transform > Reflect
Choose Horizontal axis.
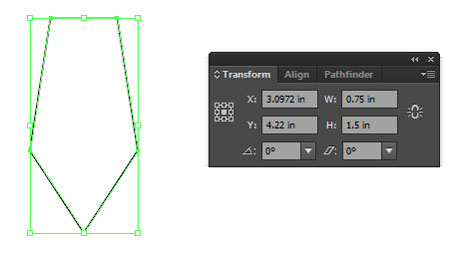
Open Transform palette.
Change Width and Height.
Now it's more like it!
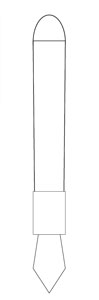
Place the pen tip all the way behind all shapes.
Object > Arrange > Send to Back
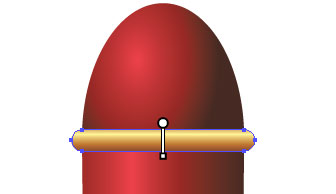
For the bands:
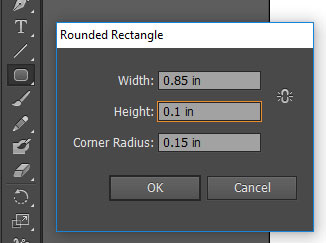
Use Rounded Rectangle tool.
Insert the values.
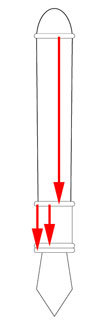
Duplicate the bands:
Option/Alt drag with Selection tool.
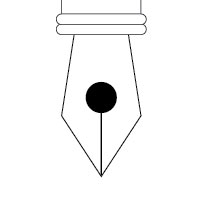
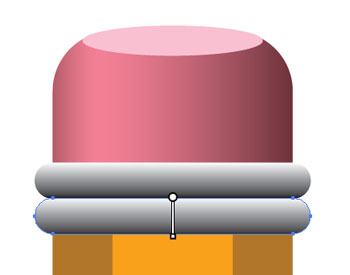
Draw a small circle (Use Ellipse tool, hold SHIFT for perfecr circle).
No stroke, black fill
Use Line tool to draw a short vertical line
No fill, black stroke
Hold SHIFT as you draw the line for a perfectly vertical line.

you can find stroke thickness (weight) and other line properties in the Options bar at the top.

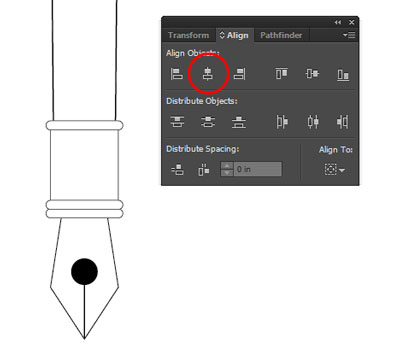
Select the entire pen, then align them.
Select the pen shape.
Remove stroke.
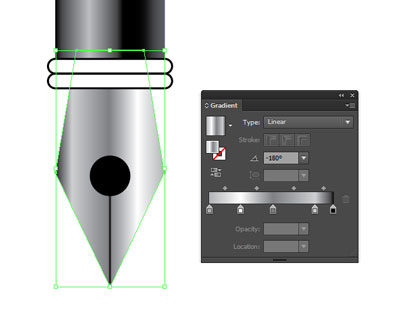
Apply gradient to the shape fill.
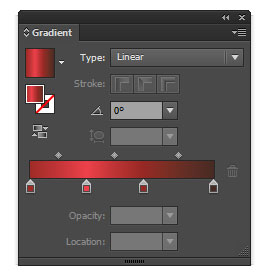
Create a gradation from dark - to light - to dark.
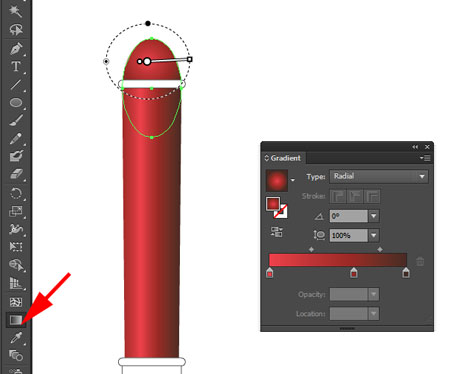
Apply gradient fill to the pen top.
Change gradient type to Radial.
Choose Gradient tool.
Move the gradient ring towards the top part (as shown).
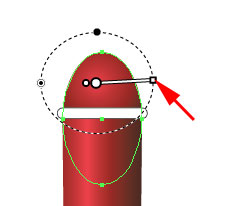
Grab the end point and resize the gradientto a smaller ring.
Grab the annotator and reposition it to visually match the lightest values of the pen body and the top part.

Remove stroke and apply a linear gradient to the bottom part of the pen.
 Remove stroke from the pen piece and apply a gradient fill.
You can male the fill more complex by adding more color stops to the gradient.
Select a band.
Remove stroke.
Apply fill gradient.
Use Gradient tool
Drag the gradient from top down.
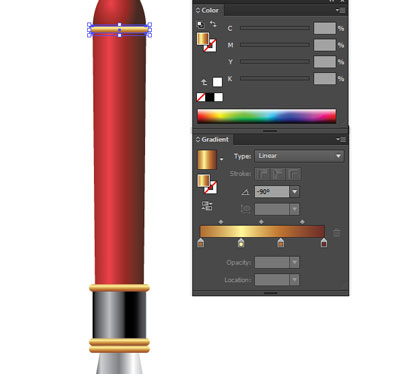
Repeat the steps for other bands.

Use Pencil tool.
Draw a pen stroke.
Apply brush effect (Brush palette).
You are done!