straight
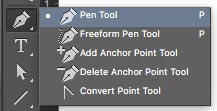
Most of the drawing and editing of paths can be done via the tools under the Pen tool icon in the Tools palette.
Click and hold the mouse button on this icon to view all tools.
Select the Pen tool.
Pen tool options - keep default

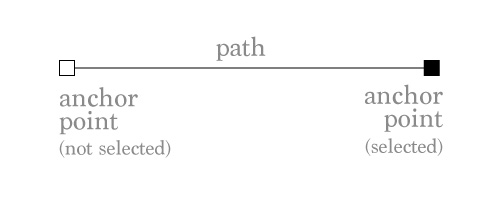
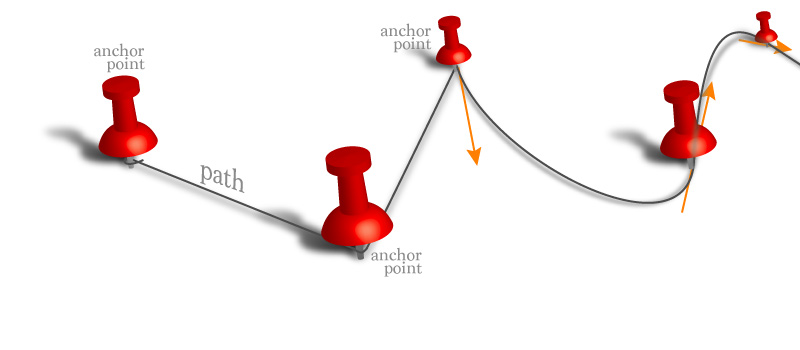
Path is an invisible line that connects two points. It holds information about the direction, the curve, and the length.
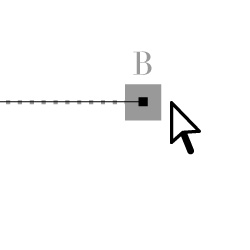
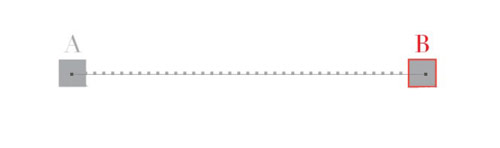
To draw a straight path you need to place the start point and the end point - they are called anchor points.
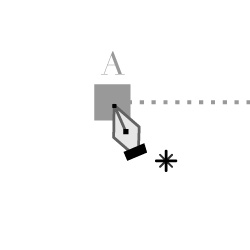
To draw a straight path AB:
click on A
When you click with a Pen tool - you are creating an anchor point with a straight path property.
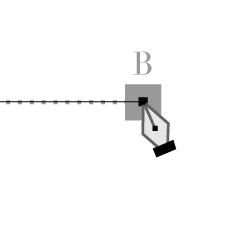
click on B

After you finish a path - you need to end it.
In other words - you need the tool "know" that the next anchor point will start a new path.
Unless you finish the path - Pen tool will continue to add segments to the existing one.
Command (Ctrl) click outside the path.
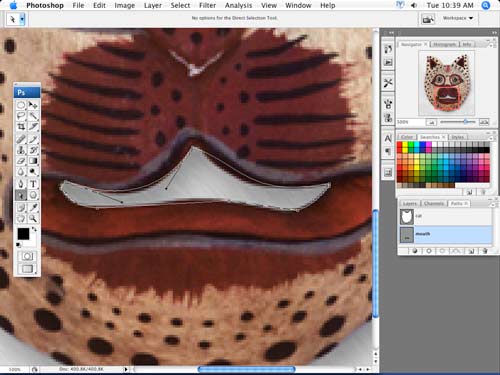
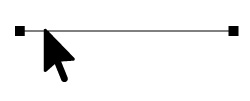
Your Pen tool will temporarily switch to Direct Selection tool.

Now you are ready to start a new path.

Paths are stored in Paths palette. When you place your first anchor point - a new Work Path will be created.
Check the Paths palette:
The Work Path thumbnail should change as you add more paths.
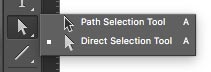
There are two selection tools for paths:
Path Selection Tool - selects the entire path with all anchor points.
Direct Selection Tool - allows you to edit a path by selecting and (or) moving one or few anchor points, one or few segments of a path.

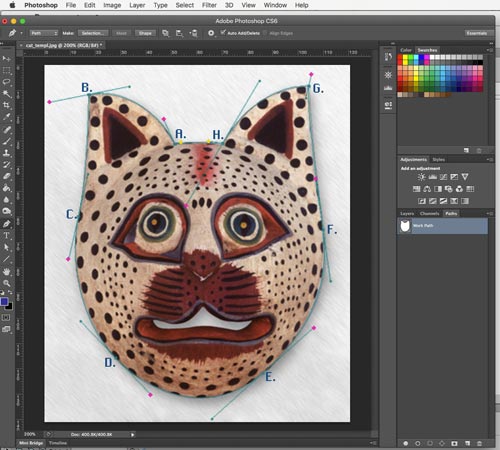
Follow the rest of the template and draw the paths.
Don't forget to end paths!
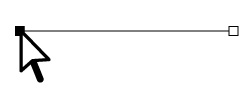
Select Path Selection tool.
Select AB path.
You are going to apply a stroke (color) to the path.
After a stroke is applied to the path - it becomes visible and will stay visible after printing.
There are a few things you need to do before applying a color:
1. Choose a nice bright color in Swatches palette.
2. Select Brush Tool. Set the brush size to 5 or bigger.
3. Back to Path Selection tool
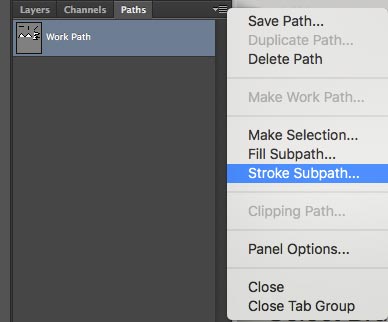
4. Go the Paths palette and click on the Options menu (upper right corner).
Choose Stroke Subpath.

Select Brush as a tool to apply stroke.
Click OK.
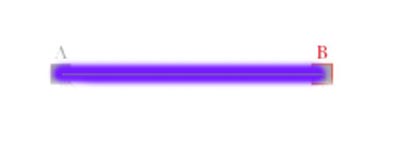
This is what your path should look like.
You can move or delete the path, but the stroke that you applied will stay.
You can apply different colors to the same path as you move it around.
Try that!
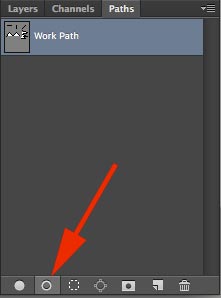
There is an easier way to apply a stroke:
Click on this button.

Apply different color strokes to the paths.
Select (with Path Selection Tool) the G-K path.
Choose a color from swatches palette.
Go to Paths palette. Click on Options menu.
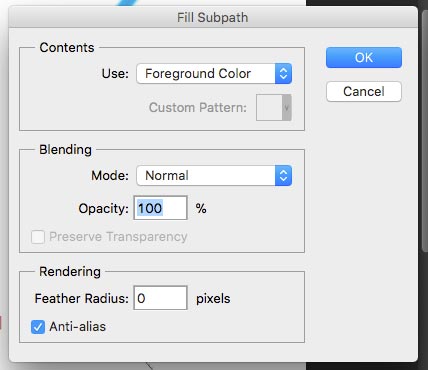
Choose Fill Subpath.
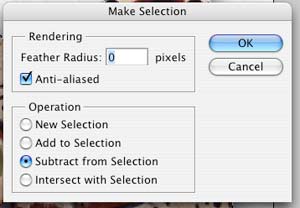
This window will pop up.
Click OK.
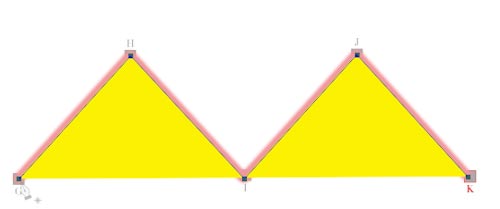
This is what it should look like.
The fill color covers a part of the color stroke - all the way to the path itself.
Even though the path is not a closed shape, the fill was applied. The closest sticking out anchor points were connected with straight lines (G and I; I and K).
The fill did not create extra paths between the points. It is still a zig-zag line, not a closed shape or two triangles..
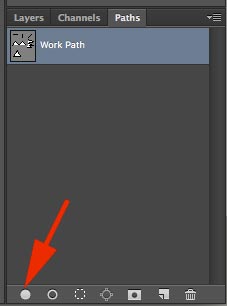
Here is another fast way to apply fill to a path:
The first button on the bottom of the paths palette.

Apply a fill color to the last path.
Apply a stroke color.
Stroke will be applied on the top of the fill color.
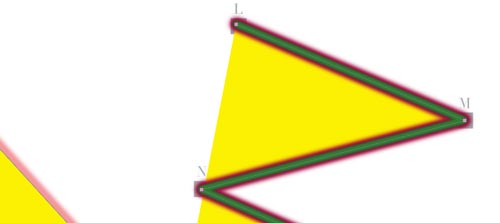
If you change Brush size option and color - you can apply another stroke on the top of the first one.
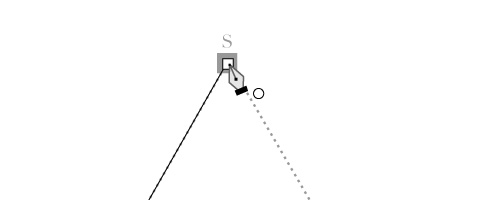
Draw a closed path S-T-U.
When you are closing a path (return to the start point), a small circle appears next to the cursor. That tells you that you are creating a shape.
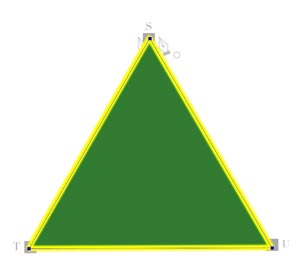
Apply a fill color.
Apply a stroke.

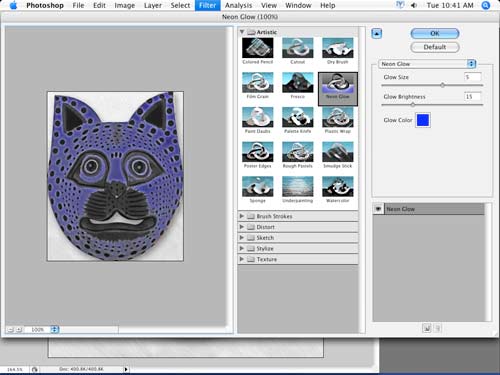
Repeat the steps with the Star design.
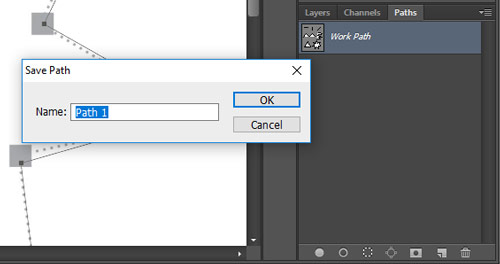
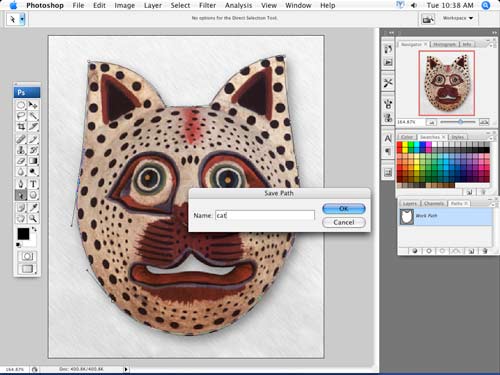
To save a Work Path:
Double-click on it in the Paths palette.
Give it a name or keep is as default Path #.
Click OK.
Now the information about the paths you've made will be saved.

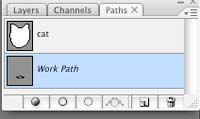
This is what your Paths palette looks like.
Next time you click with a Pen tool - you'll create another Work Path.
Close the file.
curves
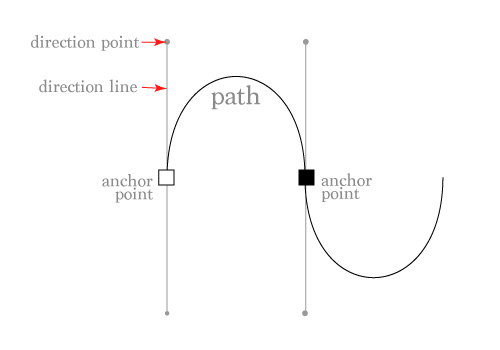
When you click and drag - you create an anchor point with direction lines.
Direction lines go in two directions.
Direction that you drag the direction line will be the direction the curve will go through this point.
When you click-and-drag with a Pen tool - you are creating an anchor point with a curved path property.
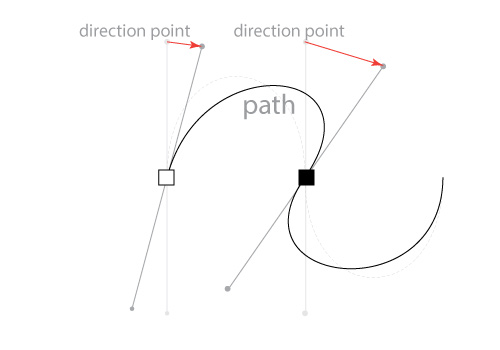
You can reposition the direction points and that will change the slope of your curve.
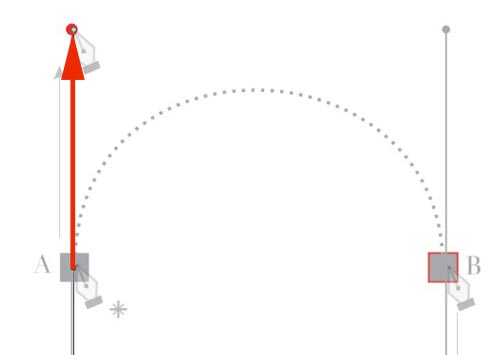
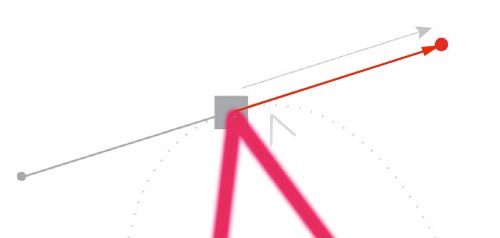
Drawing curves with the Pen tool requires some practice. Click on point A and drag up to the red dot.
This is how to start a curve that will go up through the anchor point.

To set the curve to go up through point A - you drag the direction line up; to set the curve go down through point B - you drag the direction line down.

Finish the curve CF. Drag the direction lines to the red dots.
Don't forget to end the path (Command/Ctrl click).
Use Direct Selection tool to see how you can edit the curves by moving the direction lines.

Draw the path GH
Note: The curve goes up through both anchor points.

Complete all paths.
Apply stroke color to all.
combination

Look at this path.
Note that the curve goes down through point B; then it goes up through the same point B.
How is that possible? The answer is Corner Point!!!
By creating a corner point you stop one segment and start the next one fresh.
This is how you do it:
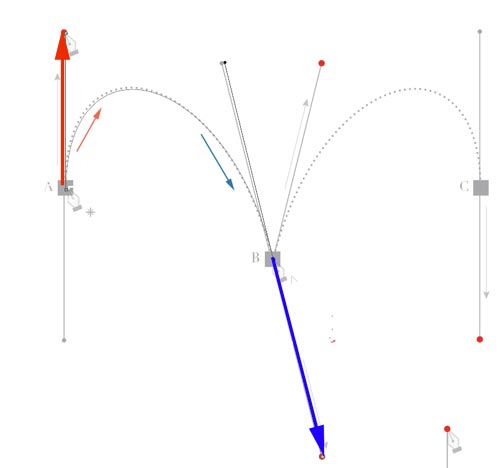
Click and drag up on A
Click and drag down on B

Option/Alt click on B (this stops the first segment and transforms B into a Corner point)
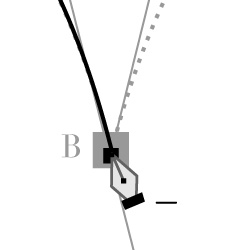
Click and drag up from point B
(The cursor like this one shows that you are picking up the same path).
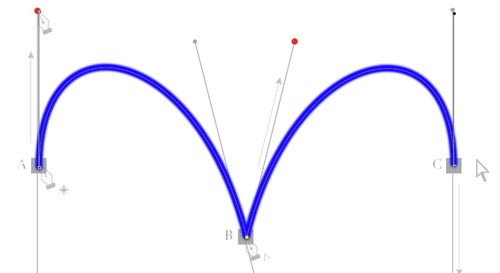
Click and drag down on C
End path by Command/Ctrl clicking outside the path.
Apply a nice stroke to the path.
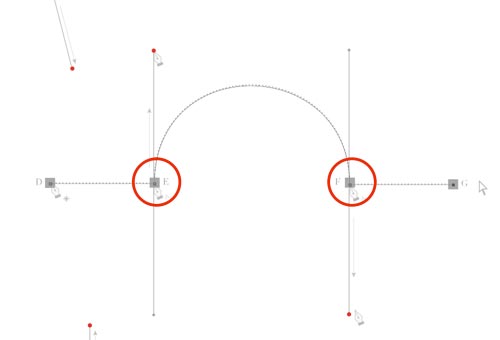
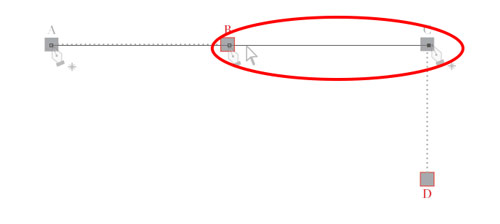
Create a path DEFG.
Note that there are two corner points there!
Click on D (don't drag - the first segment is straight!)
Click on E (don't drag - this is the end point for the straight segment)
Option/Alt click and drag up on E (to start the curve up)
Click and drag down on F (to have the curve go down through F) Option/Alt click on F to create a corner point for the next straight segment.
Click on F (don't drag - it's a straight segment again!)

Apply a stroke
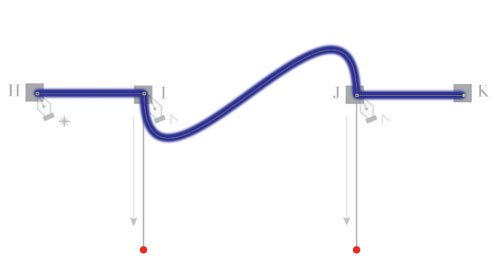
Draw a path HIJK.
Apply a stroke.
File > Save
Close the file.
edit

Draw the path.
End it (Command/Ctrl click)
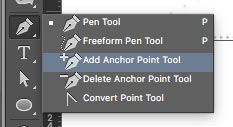
You are going to add an anchor point to this path.
Choose Add Anchor point Tool
Click in the red dot (on the path).
You just added a point to your path. The Cursor changed to the Direct selection tool.
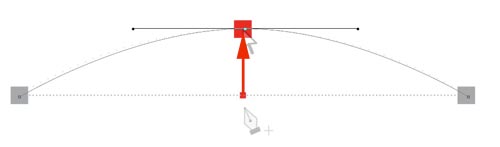
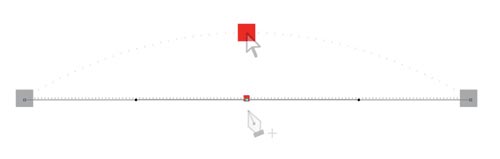
Grab the new point and drag it up to create a curve.

Apply a color stroke.

Draw the next path (three anchor points).
You are going to delete one anchor point from the path.
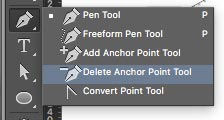
Choose Delete Anchor Point Tool.

Click on the center (red) anchor point.
Now it's a straight line
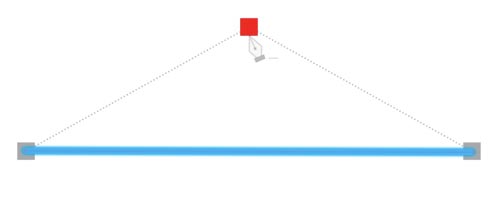
Apply a color stroke.

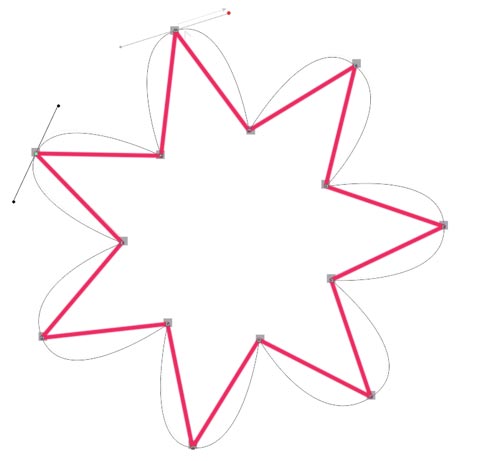
Use Pen tool to draw a Star.
You are going to convert corners into curves and curves into corners.
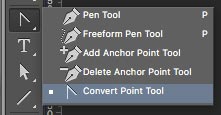
Choose Convert Point Tool.
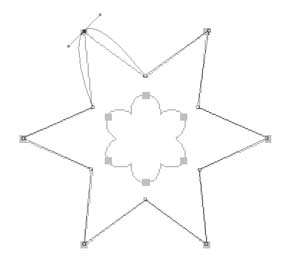
Place the cursor over an anchor point.
Click and drag it.
You just converted the corner into a curve!
Repeat the steps with the rest of the corners and transform the star into flower.
You can apply some fill color.
To convert a curve back in a straight corner - click on the anchor point with the Convert Point Tool.

File > Save.
Close the file.