
Objectives:
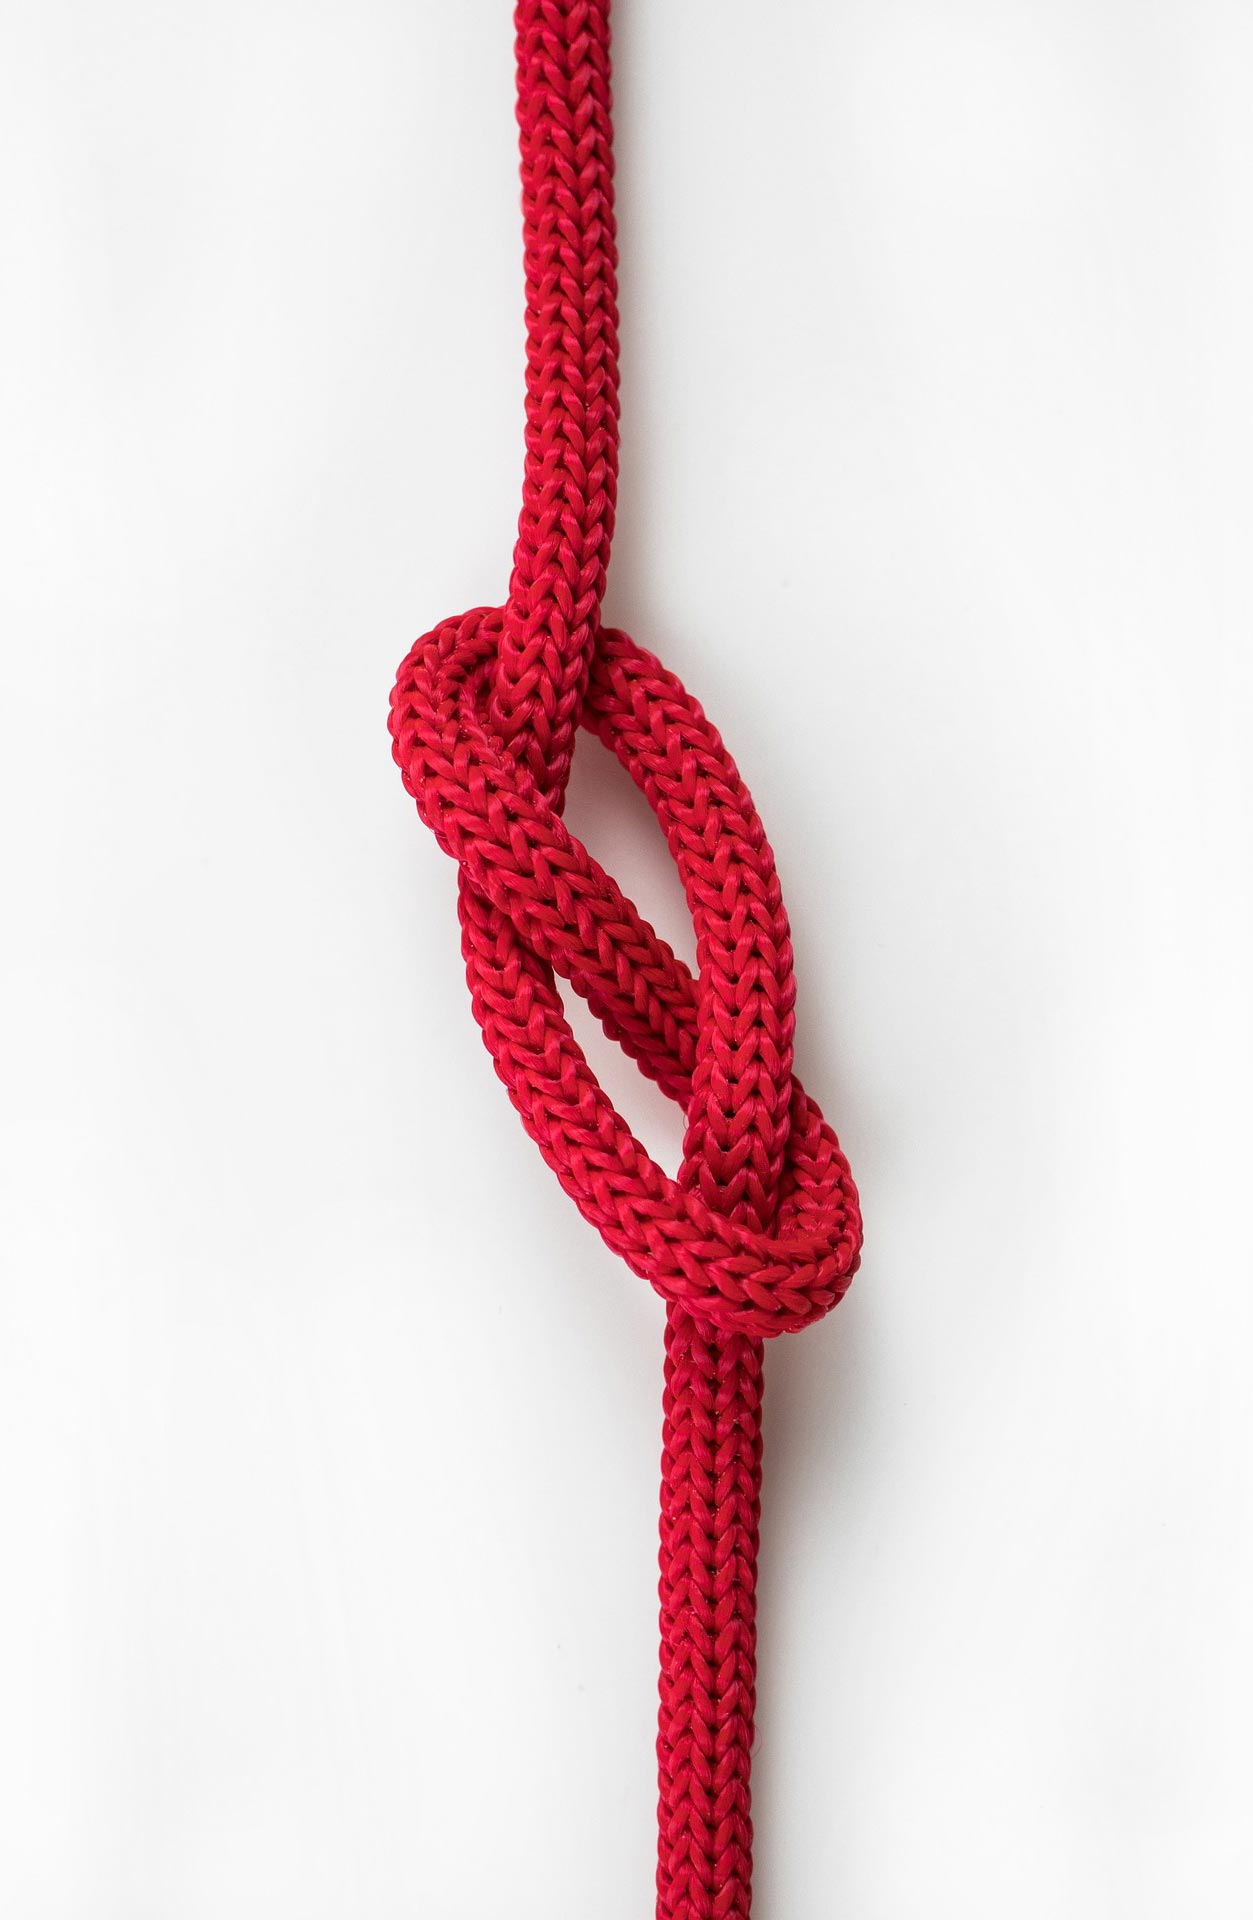
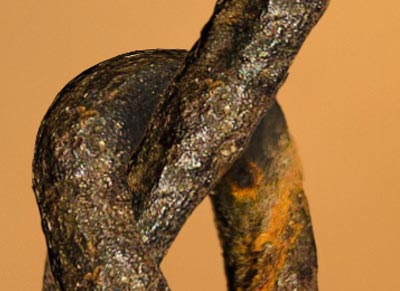
Using a template image of a knot: bend and transform a nail.

by JuliannaKunstler.com
Objectives:
Using a template image of a knot: bend and transform a nail.
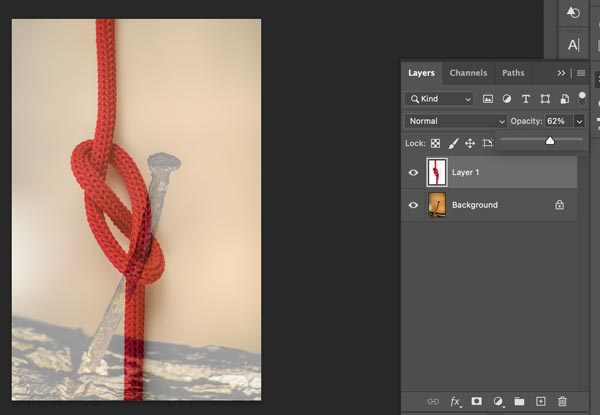
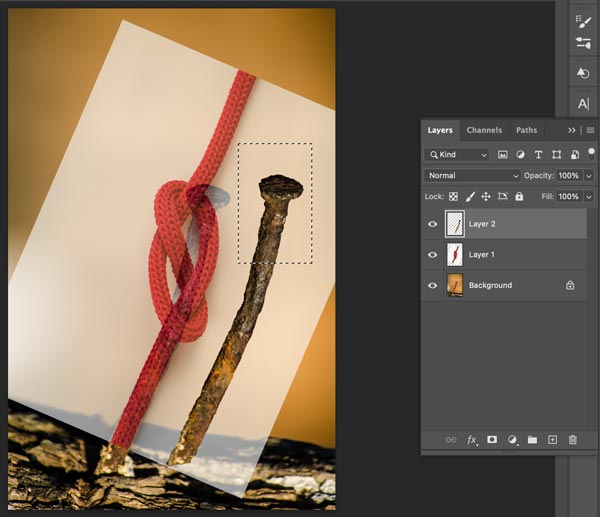
Place both images in one document.
Drop the opacity of the knot image to 60% (more or less depending on your sources) so that you can clearly see both the knot and the nail.

Rotate, resize and position the knot so that one end of the rope aligns to the nail shaft.

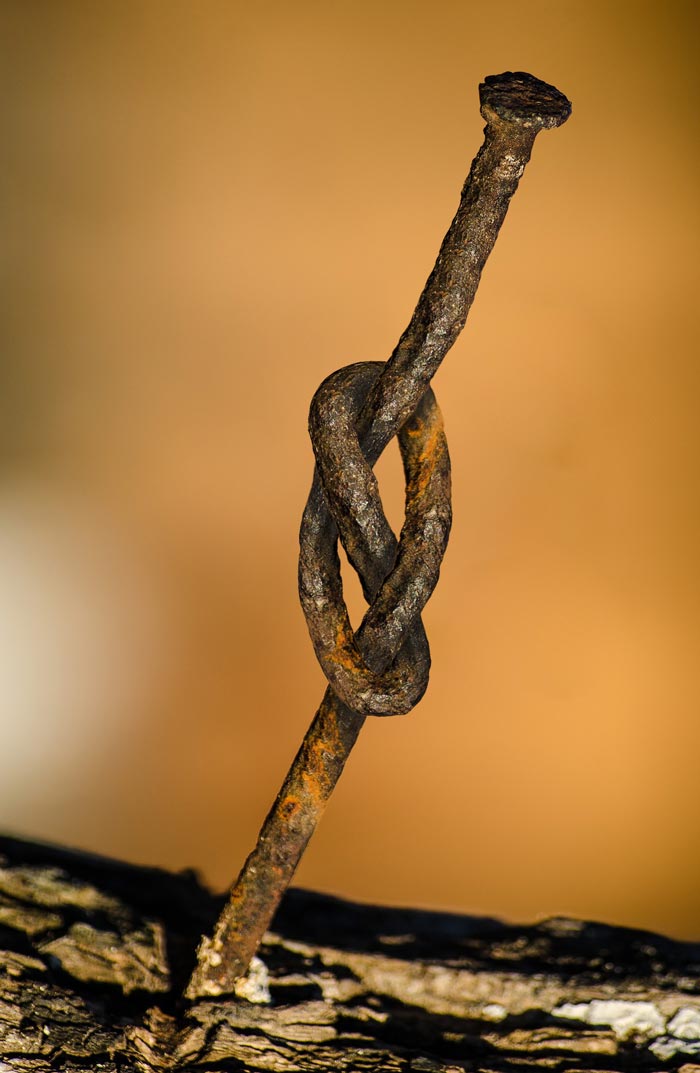
Hide the knot layer and select the nail.

Isolate the nail using Object Selection tool. Draw a selection around the nail and make the Photoshop figure out the rest.
The selection will be pretty accurate, but you might need some adjustments as the nail is close in color to the wood.
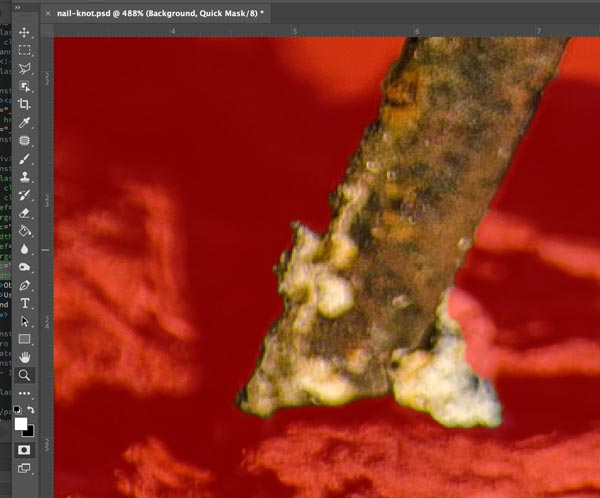
Switch to Quick Mask mode.
Cover the missing areas. Use Brush tool. When done - exit the the Quick Mask mode.


Ctrl (Command) J to copy and paste the selection on a new layer.
Then move the nail to a side.
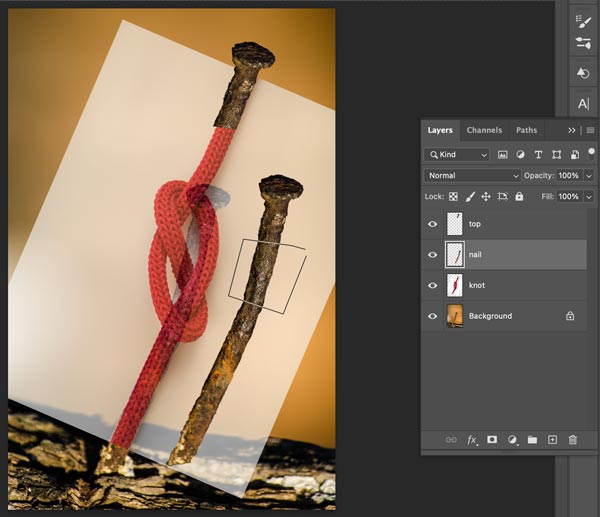
Use Marquee tool to select the top of isolated nail layer, Ctrl/Command J to copy and paste.

Then position it in alignment with the top of the rope in your template image.
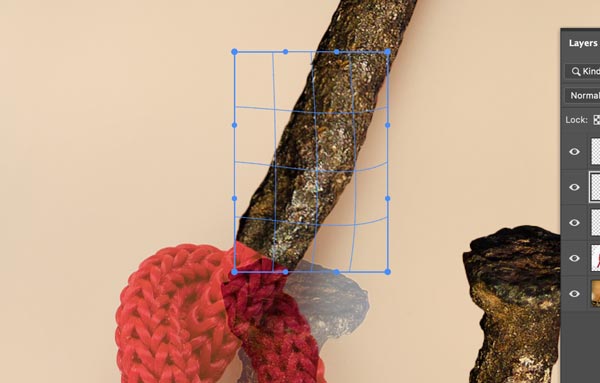
Use Polygonal Lasso tool to select a small chunk from the nail.
Ctrl/Command J
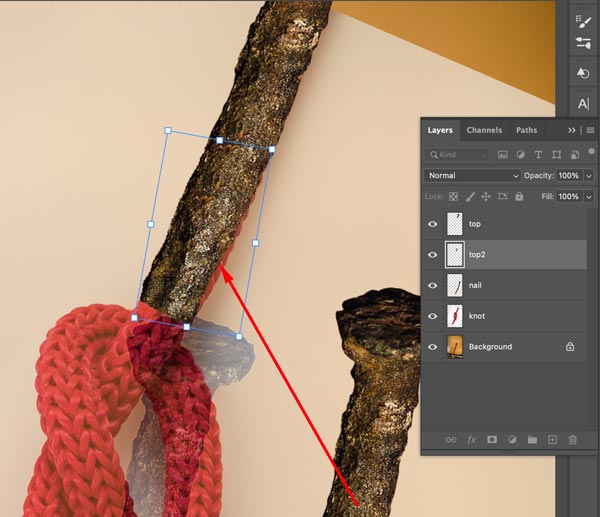
Position it over the rope.
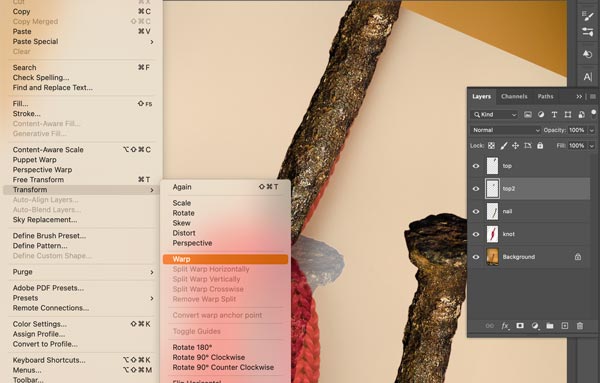
Edit > Transform > Warp
Use the Warp tool to adjust the nail so it follows the path of the rope, by dragging the handles and grid to align with the flow of the rope.

Continue this process until you have completed the knot.
I wouldn't worry about blending pieces together or masking out overlaps just yet, but do remember to keep your light source in mind.
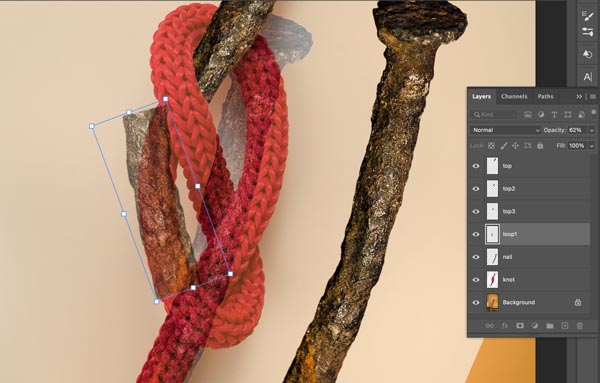

You might need to change nail pieces opacity to better see the direction of bending.

You will need to change the order of the layers as you progress with following the knot.
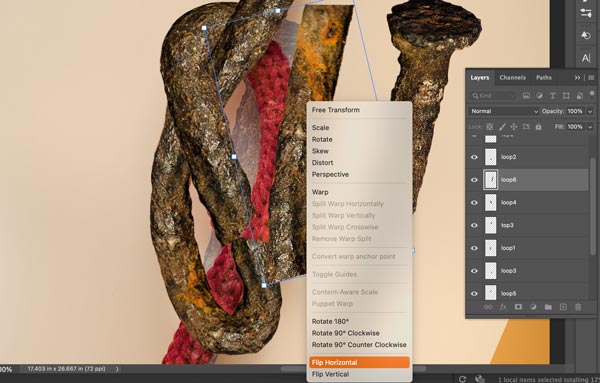
In some cases rotating a nail piece is not enough.
Right-click on it ant Flip Vertical or Horizontal.

Do the final layer order check.
Zoom into the knot and double-check if the pieces match.
You might need to erase a few areas here and there for a smooth outline.
Hide the template rope knot layer.
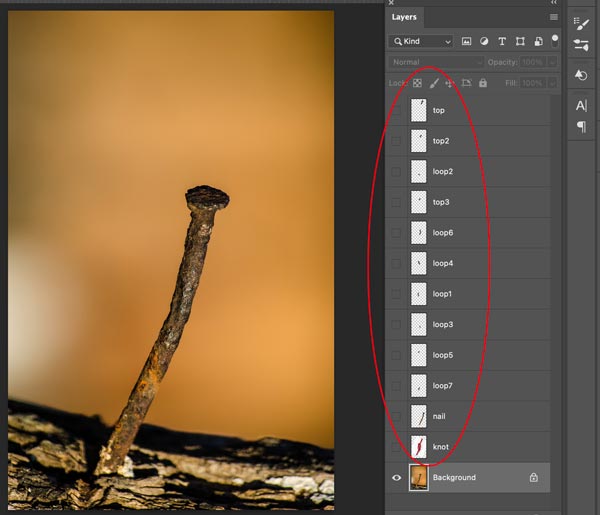
Then hide all layers except for the background.
We are going to remove a part of the original nail by painting the background.


Use Clone Stamp tool and start painting the background.
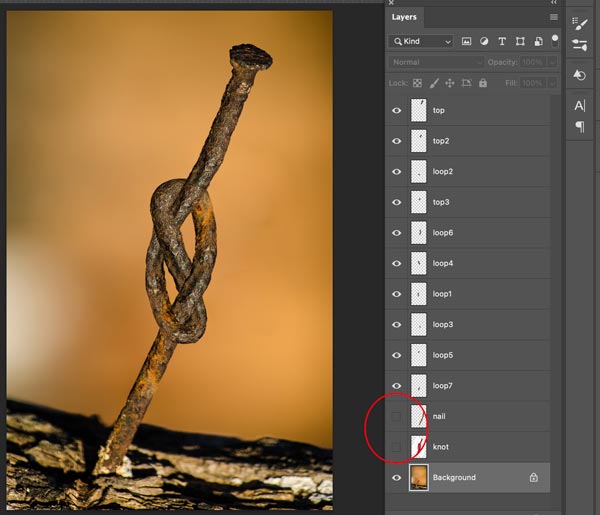
Restore layers visibility except for the knot and nail layers.
Actually, you do not need them anymore.
Zoom into the knot. Darken the areas of the knot that are overlapped by other nail pieces.
Use Burn tool.
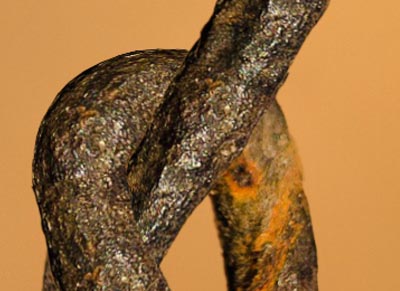

Make sure to darken all areas where the drop shadows fall.

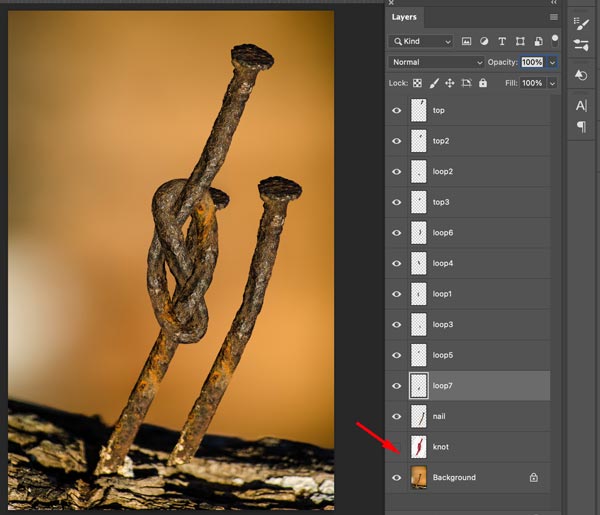
Select all layers that make up the knot.
Merge them: Right-click on the layers and choose Merge Layers.
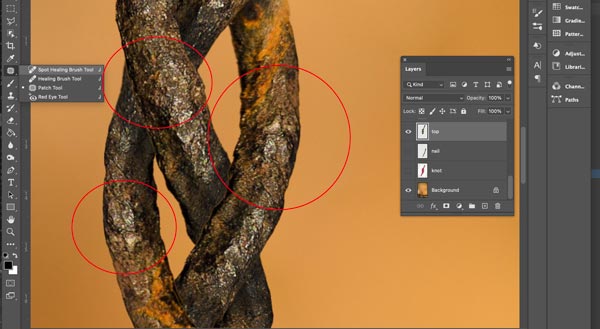
Now that the knot is a single layer - you can use any of the editing tools (Healing brush, Patch tool, etc.) to blend the segments together.
That's it!