A gradient is a graduated blend of two or more colors or tints of the same color.
by JuliannaKunstler.com

A gradient is a graduated blend of two or more colors or tints of the same color.

Open a new page in Illustrator.
Choose any of the shape tools. I used the Star tool.
Draw a shape. Any shape…..
Open Gradient palette. If you still don’t know where to find palettes – go to Window>Gradient

Look at the Tool box:
by default all shapes come with solid fill and solid stroke.

Click on the gradient fill

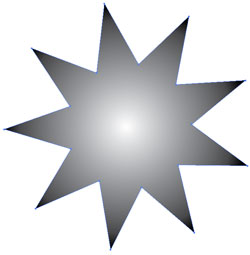
This is what will happen to the shape and to the Gradient Palette
By default the gradient is applied across the shape. The first color (white) is at the far left point of a shape, and the end color of a gradient is at the rightmost point.

If your Gradient palette looks like this one - click in the top right corner to show options.

The default gradient is a White-to-Black gradient
The Gradient color sliders define the colors of the gradient.
The Gradient center slider defines the center of the gradient…. Dah…..

 Gradient can be applied to strokes too.
Just select the stroke swatch in Tools panel.
Choose gradient style.
You can control gradient options in Gradient palette.

Switch back to gradient fill style.
Remove stroke.

Open palettes that will be helpful (in addition to Gradient palette):
Color Palette (Window > Color)
Swatches palette (Window > Swatches)
Keep the shape selected.

Gradients can be linear...


... or radial
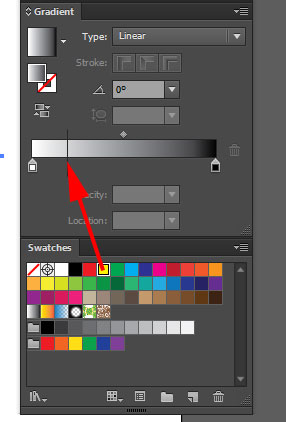

Add a color to gradient by dragging a swatch into gradient annotator.


You can add as many colors as you want.

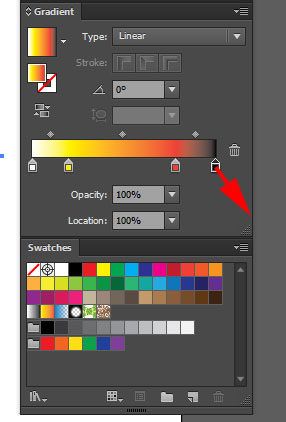
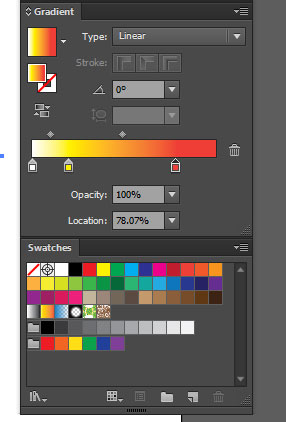
To remove a color - drag it away from annotator.

Reposition color sliders.
Notice how the gradient changes.
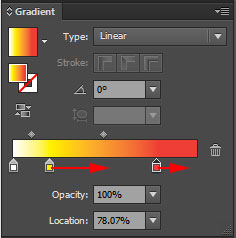
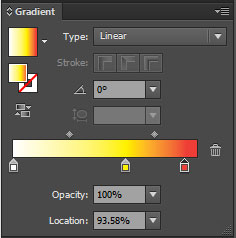

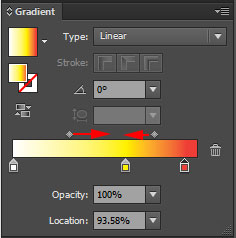
By dragging mid-points you can minimize or maximize the appearance of a color.
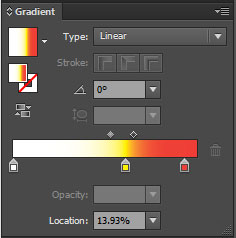
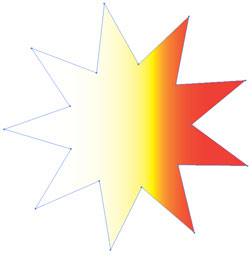

Choose Gradient tool from the Tools panel.
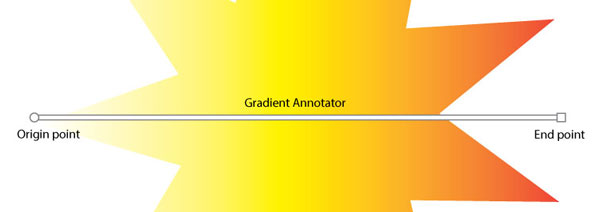
Once you selected the Gradient tool, you will be able to see the gradient annotator right in the selected shape.
If you do not see it - go to the menu bar:
View > Show Gradient Annotator

If you roll over the annotator - it will expand and you will be able to adjust the color sliders and mid-points in place.

All adjustments will be reflected inside the Gradient palette.
By dragging the origin point you can reposition the gradient inside the shape.

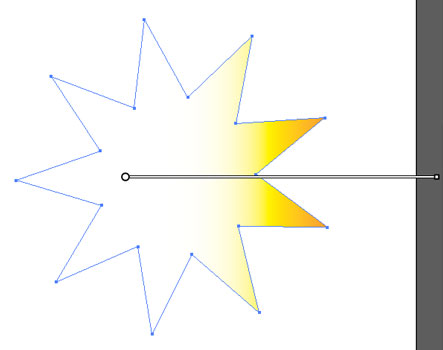
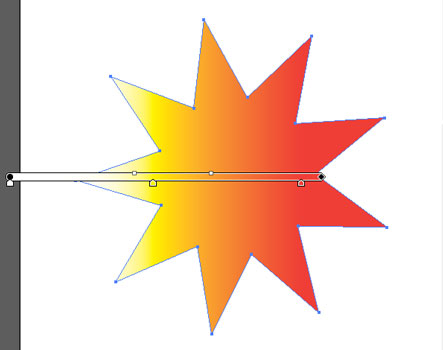
You can drag the annotator outside the shape as well.

You can drag the annotator at any angle and any length.

As a final touch, add more colors to the gradient.
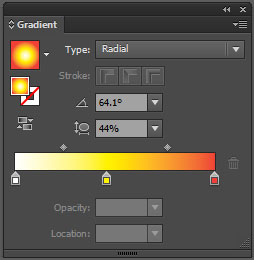
Duplicate the shape.
Change the gradient type to radial.
The first color is in the center, the last color is at the end point and beyond.

Select Gradient tool.

Roll the cursor over the shape.
In addition to gradient annotator, you will see a dotted circle around it with a few marks on it.
Gradient annotator works the same way as in linear gradient - it expands to allow you to manipulate with color sliders and mid-points.
In addition to that, will see a circled dot - this is the point that you drag to resize the gradient.

The solid dot on the gradient circle is in charge of gradient aspect ratio (width to height.
You drag it if you want to change the shape of the gradient to an oval or back to circle.

If you roll over the dotted circle, the cursor will change into this round arrow.
Now you can rotate the gradient.

This is what the annotator looks like when you roll the cursor over it:


If you grab the gradient annotator by its start-point, you can move the gradient inside the shape.

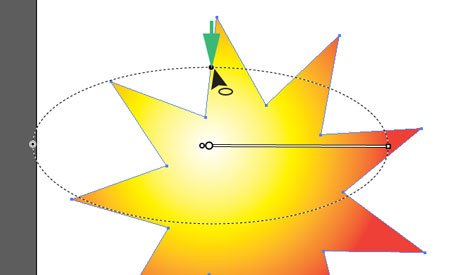
Ratio point can be dragged to change the appearance of the radial gradient.
Experiment with it.

The color of end point extends past the gradient outline.
If you roll over the dotted line, you will be able to rotate the gradient and the direction of the annotator.


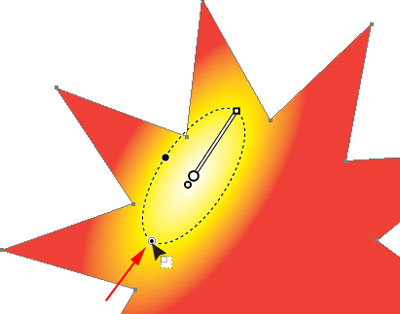
You can resize the gradient by dragging the resize point.


You can also manipulate the gradient within its outline.
You can click and drag the origin point to shift the center of the gradient .

This is what the gradient with shifted center looks like.

Experiment with the radial gradient.

You are done!