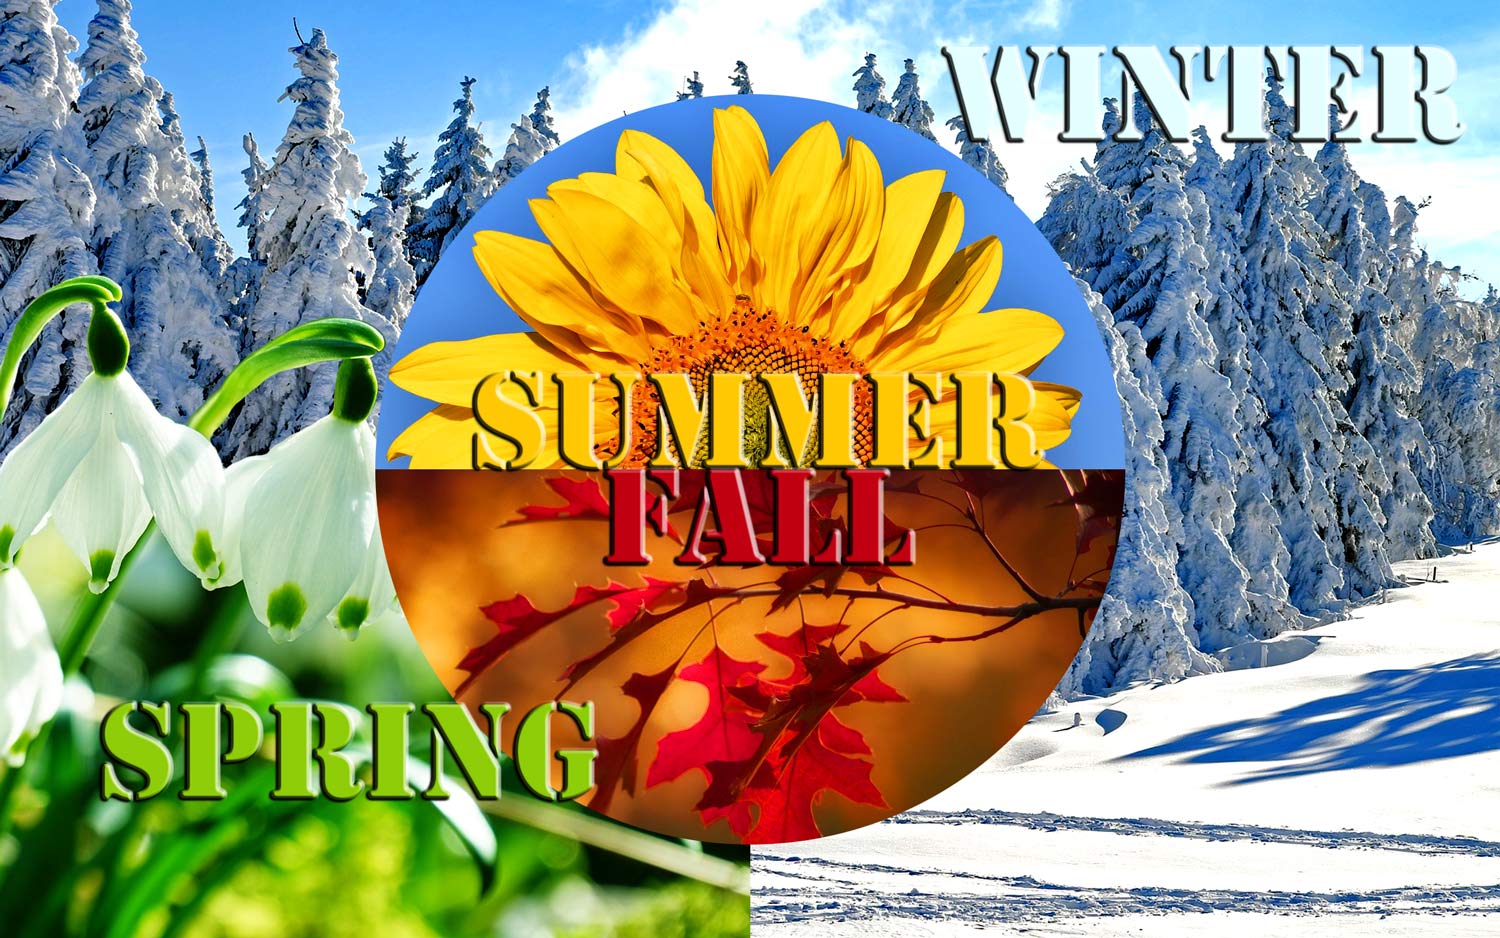
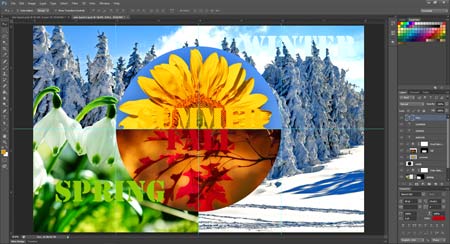
In this collage project: all original images stay unmodified.
In this lesson:
- Guides
- Layer mask (create and edit)
- Clipping group
- Adjustment layers
- Layer styles (special effects)
images credits: pixabay.com

by JuliannaKunstler.com
In this collage project: all original images stay unmodified.
In this lesson:
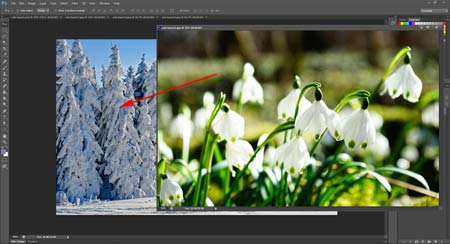

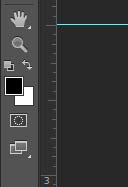
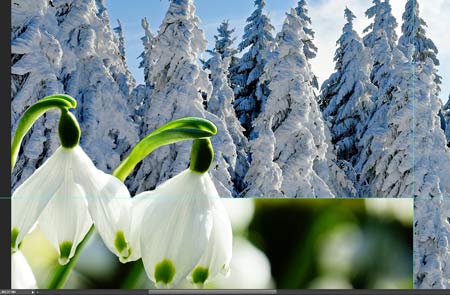
Open image 1 and image 2
Choose Move Tool from the Tool Box.
Shift-drag the flowers onto the winter image. (Hold Shift to perfectly center it)
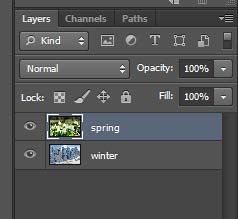
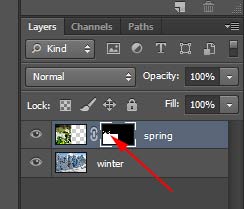
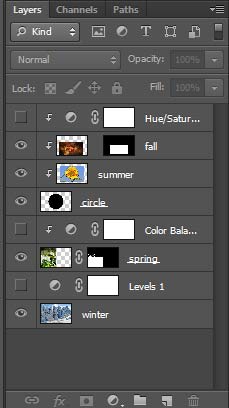
Rename the the layers.
Your Layers Palette should look like this.
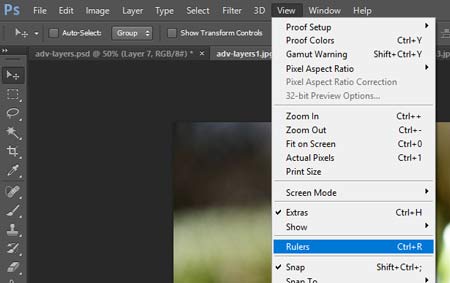
First - bring up the rulers:
View > Rulers
While you are at that - check Snap option (in the same menu) to have selections and other tools snap to the guides when you get close to them.
You are going to divide the image into four quadrants with the guides.
Guides are non-printing lines that float over the image.
You can move and remove guides.
You can also lock them so that you don’t move them by accident.
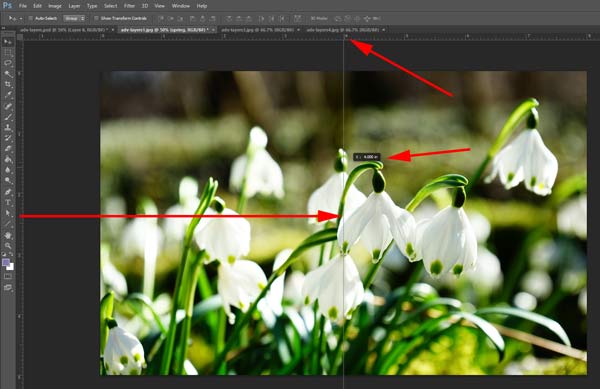
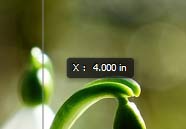
Position your cursor on the left ruler, click and drag the guide to the 4" mark. Release the mouse.
Notice that the guide gives you a hint for precise placement.
Use the Rectangular Marquee Tool to select the bottom left quadrant.

Position the cursor over the top ruler
Click and drag the guide to the 2.5" mark.

Move the flowers to the left half way.
The layer will snap at the guide.


Select the lower left area of the flowers.
We are going to keep that selection and hide the rest of the layer without deleting pixels.

Make sure the spring layer is active.
Layer > Layer mask > Reveal Selection
It will hide the rest of the layer.
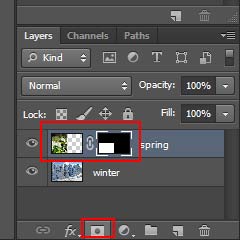
You could also do that by clicking on Layer Mask button at the bottom of the Layers palette.
Note the Layers Mask thumbnail linked to your image thumbnail.
When IMAGE THUMBNAIL is selected - you can edit the layer pixels
When LAYER MASK THUMBNAIL is selected - you can edit the shape of the mask (the shape of the layer's visible area - in our case it is a rectangle in the bottom left side of the image).
That is what we are going to do next.
You can edit the Layer mask shape by painting on the mask (with Brush tool) with white color (to add more reveal areas) or black color (to cover some areas).
You can also use Eraser tool and use White and Black colors to hide or reveal the image.
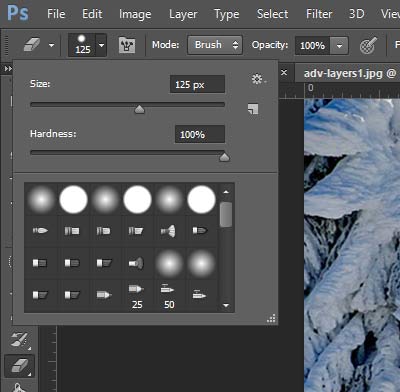
In this assignment we are using Eraser tool. Set its hardness to 100% and choose a size between 100 and 125 px.

Stay on the Layer Mask thumbnail (in the palette)
Make sure you have Black as your Foreground color.
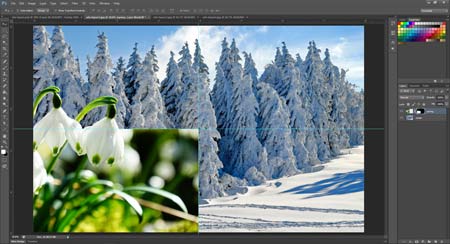
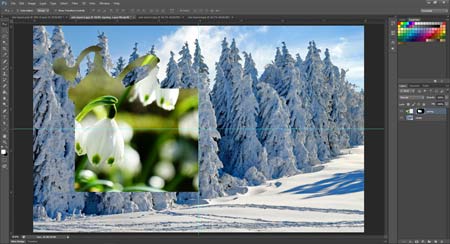
We are going to erase some of the mask to reveal the two flowers.

Start erasing the mask above the flowers.
Don't worry if you erase too much - you will fix it later.
Have both flowers fully visible.
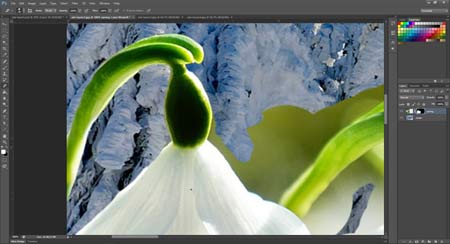
Now swap Black and White color swatches in the tool box.
Start placing the mask back on with a smaller brush size.
Carefully hide all background around the flowers. Remember that you can change the size as you work with [ and ] keys.
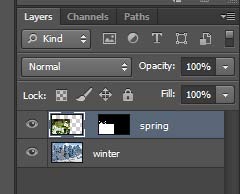
This is what it should look when you are done.
See how the shape of the layer mask has changed in the Mask preview thumbnail.

image and mask are linked.

You can unlink them by clicking on the link symbol.
The mask thumbnail is currently selected.
That means - if you use the Move tool and move the layer - the mask will move, but the image will stay in place.
You can select the image thumbnail,

The mask will stay in place, but the image will move.
Do not forget to link them back together!
To view the Mask alone:
Alt/Option click on the thumb
To redisplay the artwork:
Alt/Option click again
To turn off Layer Mask:
Shift click on Mask thumb
To turn it back on:
Shift click again

Create a new layer and name it circle.

Drag guides from the left ruler to 2 inch and 6 inch marks.
Use Elliptical Marquee tool. Make sure all settings are default (feathering:0, etc). Place the cross-hair in the center of the image.
Hold SHIFT and Alt (Option)
Drag a circle to reach the two guides. This will create a round selection with 4" diameter.

Edit > Fill
Choose Black.
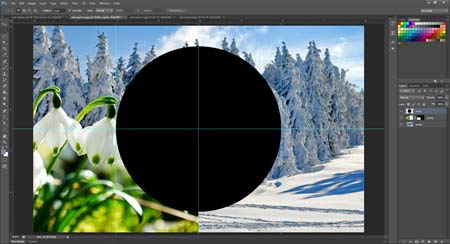
This is what it should look like now.
Deselect.

Open and drag image 3.

Open and drag image 4.

Name layers summer and fall.
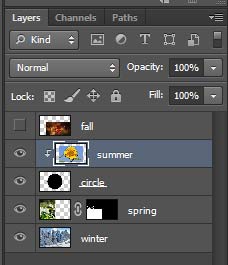
Hide fall layer.
Select summer layer.
Layer > Create Clipping Mask
Now summer and circle layers are a clipping group. The lowest image in the group acts like a "cookie cutter" for all layers above it (within a group).
The lowest layer shape should be solid black.

With the summer layer selected, use Move tool to adjust the position of the sunflower in the circle opening.
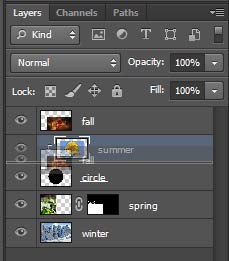
Make fall layer visible.
To add it to the clipping group - drag in between the circle and summer layer.

Now fall layer is a part of the clipping group.

Move fall layer to the top now.
Now we are going to hide unnecessary parts of the leaves layer.

Drag a rectangular selection as shown:
The top edge should align with the horizontal guide.

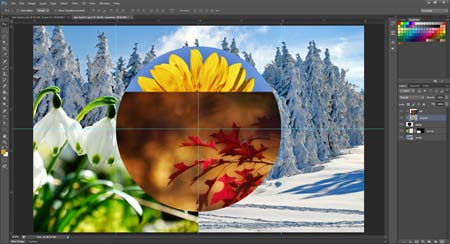
Create a Layer mask by clicking on the Mask symbol.

Once the layer mask is applied, we are going to reposition the leaves image inside the mask opening.

Unlink image and mask thumbnails.
Select image thumbnail.
Use Move tool and reposition the leaves for the best view.

Select winter layer.
We are going to edit its contrast (levels) without affecting the layer itself.
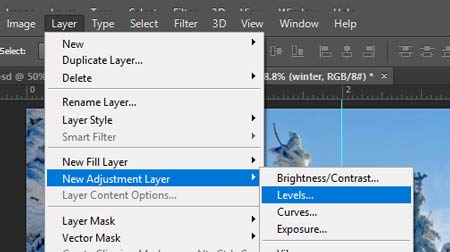
Layer > New Adjustment Layers > Levels...
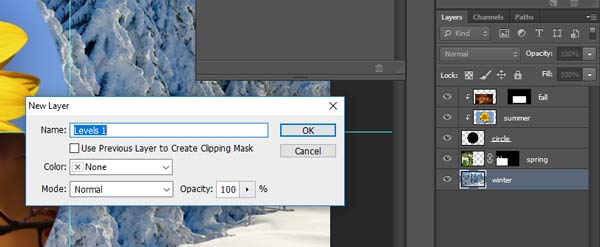
In the pop-up window:
Click OK.
Note: because winter layer is at the bottom, we do not need to check the "Use Previous Layer to create Clipping Mask" . If we had other layers below the winter layer, the editing effect would be also applied to all layers below winter layer.
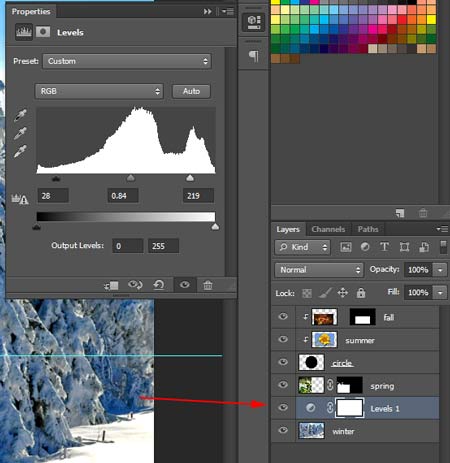
Adjust the levels in the Properties window.
Note a new Adjustment layer above winter image in the Layers palette.

Select spring layer.
Layer > New Adjustment Layers > Color Balance...
Check the button to link it with previous layer. This will apply the changes to one layer only.

Experiment with colors in the Properties palette.
I added more yellow and cyan colors to the spring layer.
Note new Adjustment layer in the Layers palette.

Select fall layer.
Layer > New Adjustment Layers > Hue/Saturation...
Check Previous Layer button. This will apply the changes to the entire clipping group, but nothing below the group.
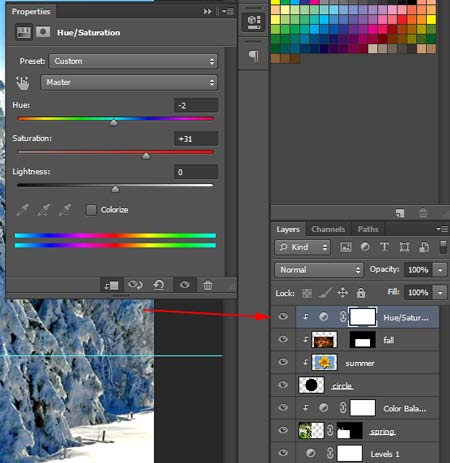
Increase Saturation setting to make colors of the clipping group more vibrant.
You can hide the Adjustment layers to see the original images.
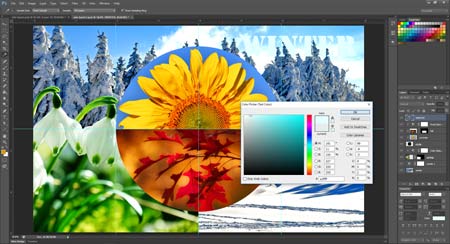

Choose Type tool.
Click (do not drag) and type: WINTER
Open Character palette (Window > Character).
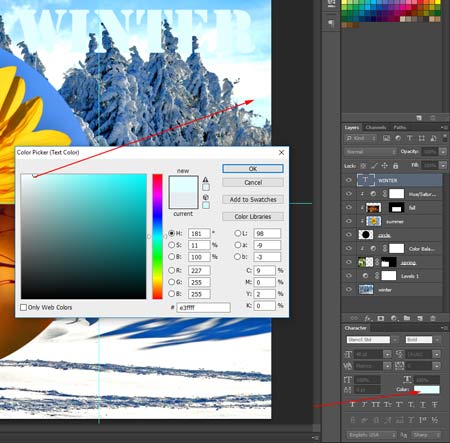
Choose font, font size, color
You can sample a color from the winter part of the image.
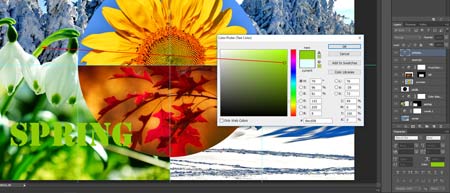
Click and type SPRING.
Sample type color from the spring part of the image.
Add SUMMER and FALL layers.
Pick appropriate colors.
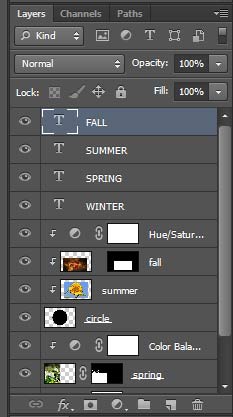
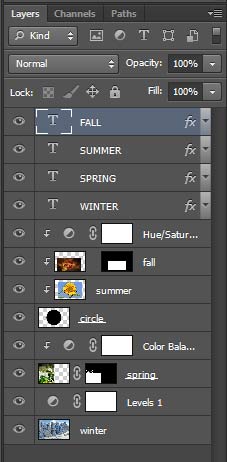
You should have four Type layers.
Have the top layer (FALL) selected.
We are going to apply some special effects to this layer:
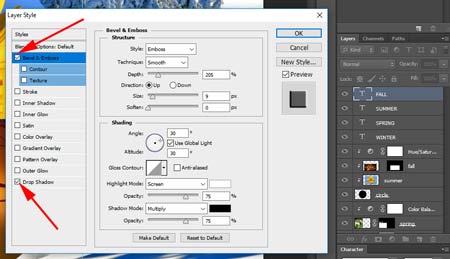
Layer > Layer Style
In the pop-up window:
select a few effects.
You can adjust settings for each effect.

Make sure you have Preview button checked to view the effects before you apply them.
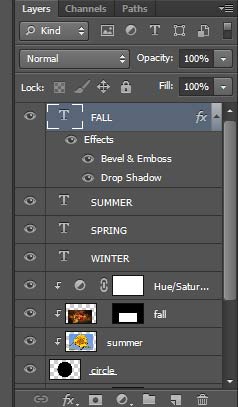
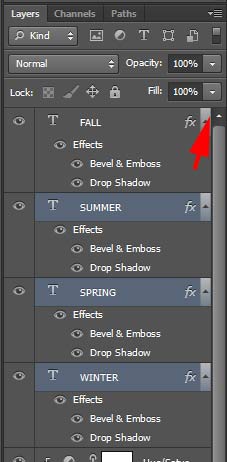
All effects will be visible in the Layers palette.
You can hide them or turn them back on.
You can delete them or edit the settings at any time. (Edit settings by double-clicking on a specific effect).
To apply the same effects and the settings to other layers"
Right click on the layer.
Copy Layer Style

Select the rest of the Type layers.
Right-click.
Paste layer Style.

The same Layer styles will be applied to all Type layers.
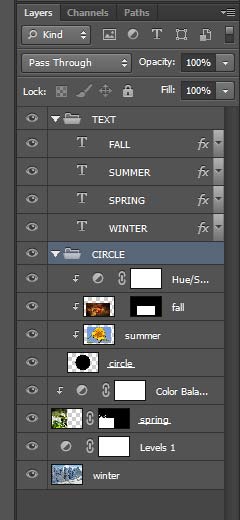
You can make your Layers palette look more compact by hiding the Effects lists.
You can also group the layers to navigate faster within the Layers palette.
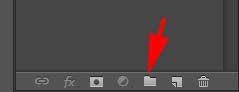
Create a new Layer Group.

Name it TEXT
Drag all Type layers into the Group folder.
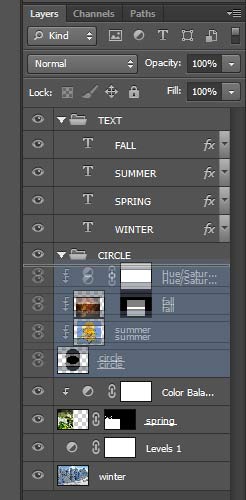
Create another group folder above your clipping group.
Name it CIRCLE
Select all 4 layers (including circle) and drag them into the folder.
Close the folders to maximize space in the palette.
You can hide the entire folder with all layers included by clicking on the eye icon next to the folder. You can also change the group Opacity, Blending mode, etc.


Compress/optimize it into a JPEG file and submit.
Credits: