julianna kunstler logo
silkscreen printing

single color process
Instagram icon
 

by JuliannaKunstler.com

Screen printing is a printmaking technique that creates a sharp-edged image using a stencil.

Stencil is made by exposing stretched silk, covered with photo emulsion, to light.

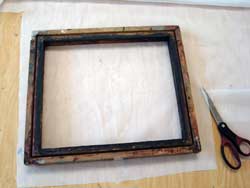
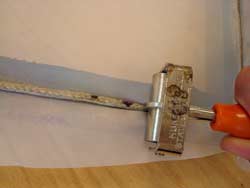
A screen is made of silk or polyester. It is stretched over a frame of aluminum or wood. Areas of the screen are blocked off with a non-permeable material to form a stencil, which is a negative of the image to be printed; that is, the open spaces are where the ink will appear.

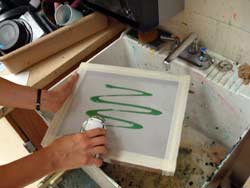
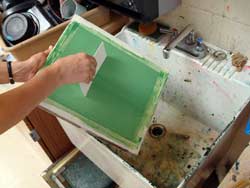
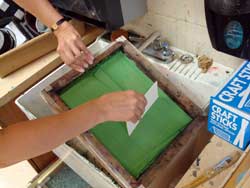
The screen is placed atop paper or fabric. Ink is placed on top of the screen, and a squeegee is used to fill the mesh openings with ink.

quick steps

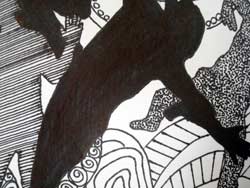
  • Draw a design. Use black&white imaging only (lines, solid black shapes, shadings: pointillism, hatching, cross-hatching)
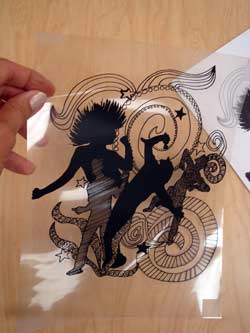
  • Transfer the design onto 2 sheets of transparency, tape them together for better light block.
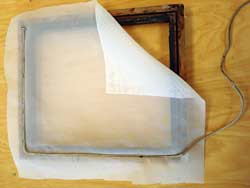
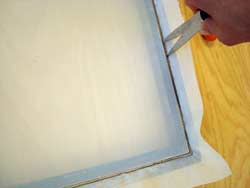
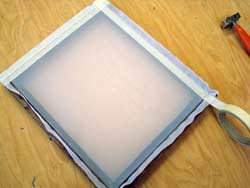
  • Stretch a piece of silk (or polyester mesh) over a frame.
  • Apply photo-emulsion. Dry.
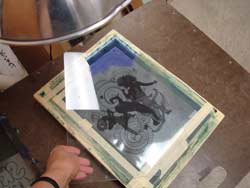
  • Place the transparency onto the frame and expose to light (to solidify exposed areas and block the drawn areas)
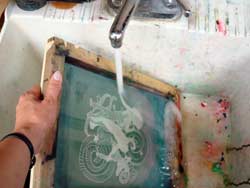
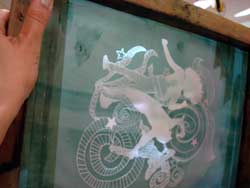
  • Rinse the silk to reveal the stencil. Dry.
  • Place the frame over a printing surface and squeeze ink through the stencil.


STEPS

silkscreen

Start with a drawing. There should be no shading in your drawing.

silkscreen drawing

Use pointillism, crosshatching or other techniques to show values:


Outline everything with a Sharpie.

silkscreen

Two copies on transparency sheets should be made.

Align them and tape with a clear tape.

silkscreen frame

Next step is to stretch the silk on a frame.

Cut a piece of silk that is larger than the frame by about 2" on all four sides.

Place it on top of the frame.

silkscreen

Lay the cord above the indent in the frame.

Push it in with your fingers.

Make sure there are no wrinkles on the silk and it is stretched tightly.

silkscreen cord

Use a cord roller to push the cord in.

silkscreen

Then use scissors or a screwdriver to further push the cord in.

It should be as tight as a drum.......

silkscreen

Cut the excess silk.

Use masking tape to cover the cord.

silkscreen emulsion

Now that the screen is ready - time to apply the photo emulsion. Keep in mind that it is light sensitive.

Over a sink, apply some emulsion over the screen.

silkscreen emulsion

Use a squeegee to distribute the emulsion evenly over the screen.

silkscreen

Flip the screen and use squeegee again.

The idea is to push the emulsion through the fabric's pores and have a solid thin layer of the emulsion. It should be of a uniform consistency with no dripping marks.

Take it to a dark room and let it dry.

silkscreen light

Time to transfer your drawing onto the screen.

Place the screen on a table in a dark room

Place the transparencies (mirror image) on top.

Place a piece of glass over it to hold the transparencies close to the screen.

silkscreen light

Turn on the light above the screen.

IMPORTANT: Timing is really important. Note time when you exposed the screen to the light. It should take between 12 to 15 minutes before you turn the light off.

silkscreen rinse

Take the screen to a sink.

Turn on cold water. Wash the screen on both sides.

First, you'll see how your drawing is appearing on the screen

Keep washing. You need to see light through the drawing:

Let it dry.

silkscreen

Now you are ready to print!

...