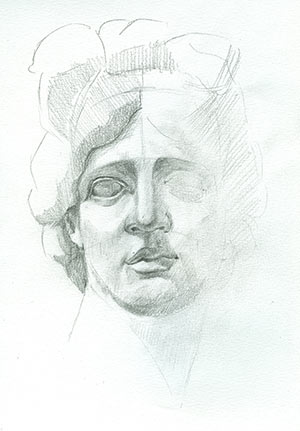
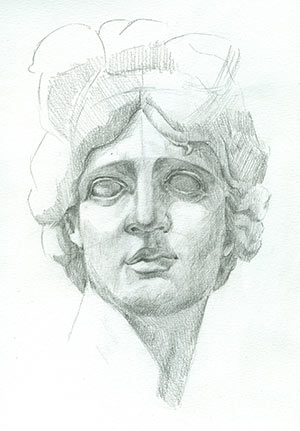
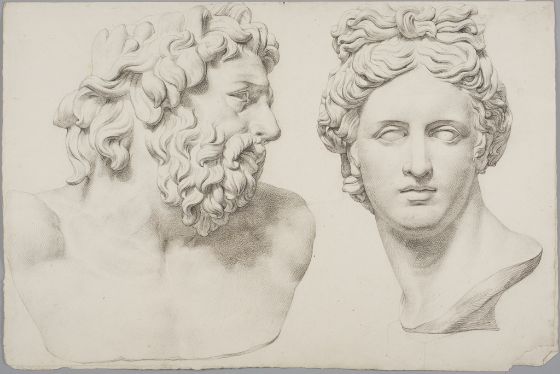
julianna kunstler logo
classic facial proportions

how to start a portrait
Instagram icon
 

by JuliannaKunstler.com

antiques

Unidentified Artist
Studies of the Head of the Apollo Belvedere and Head of Laocoön
Property of Harvard Art Museums

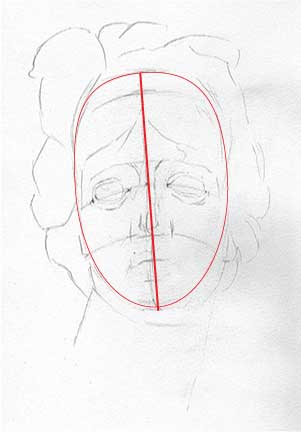
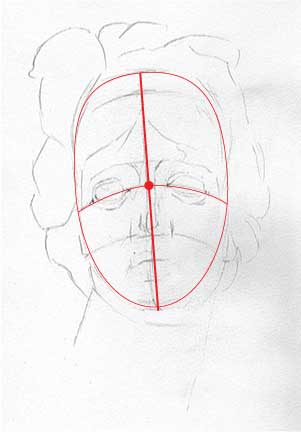
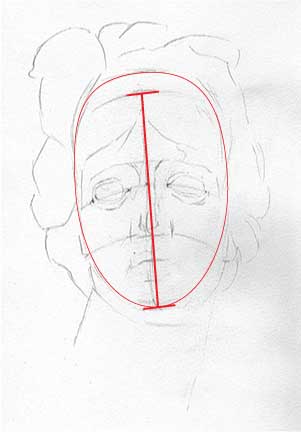
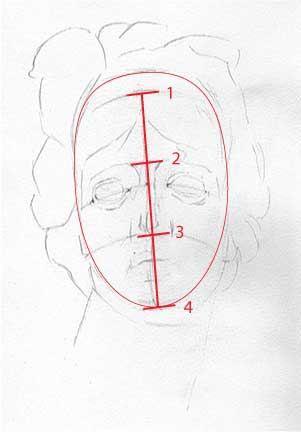
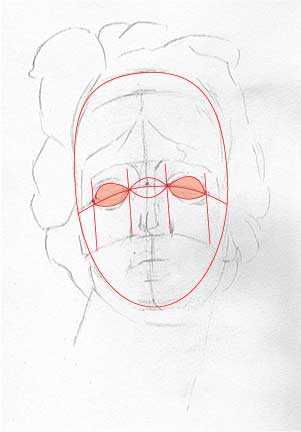
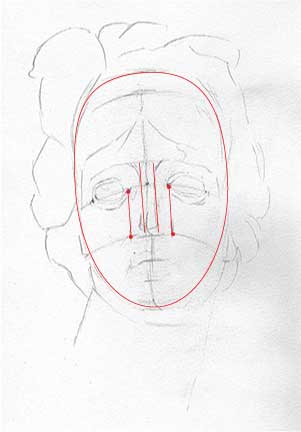
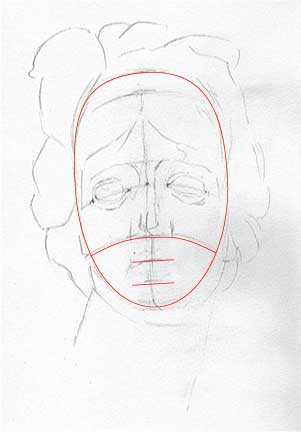
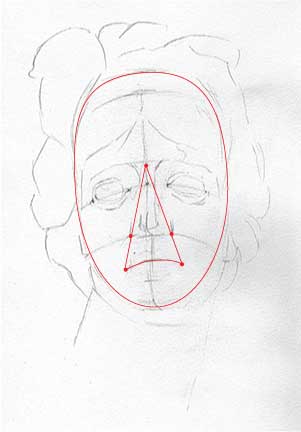
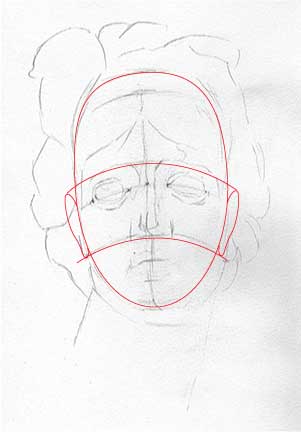
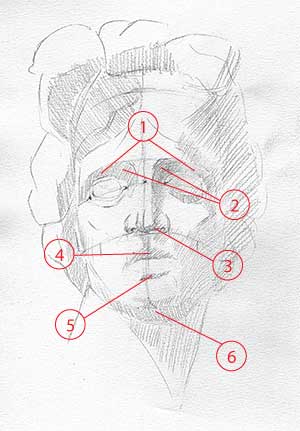
Proportion refers to the relationship in size and placement between one object and another.

When creating realistic portraits, it is important to get the facial proportions correct. True, there is a formula for positioning facial features. This formula should be used to help you see and compare.

Classic facial proportions are the "ideal" proportions, that were developed in antiquity.
In real life these measurements vary from face to face - that's what makes us all different - these variations is the tool for "likeness" in a portrait..


Apollo Belvedere

appollo

A simple way to study classical proportions - is to study antique statues.

GALLERY

apollo drawing

STEPS

facial proportions

1. Start with drawing a head shape.

Please note: head is not a ball – it’s more like an egg.

Use #2 pencil or harder (H or HB). Hard pencils are better for light value and detailed shading.

facial proportions

2. Draw a line through the middle of the face.

If the head is tilted – this axis should reflect it.

facial proportions

3. Find the center point and draw a horizontal line through it.

This is your “eye line”. Eyes’ corners will be placed on it.

facial proportions

4. Face is defined by a hairline at the top and a chin at the bottom.

Divide face into three equal parts.

antique proportions

1 - hairline

2 - eyebrows

3 - nose base

4 - chin

facial proportions

5. Place eyes onto the “eye line”. The space between the eyes equals the size of an eye. Think this: “you could fit another eye in between your eyes”.

You can also fit an entire nose into this space. The inner corners of your eyes are aligned with the outer corners of the nose.
facial proportions

6. A nose has 3 sides: front, left, and right.

They take equal space.

Divide the nose area into 3 parts.

facial proportions

7. Placing a mouth line is easy.

Divide the bottom third of the face into three equal parts. The mouth line will go through the upper third mark.

The lower third – is your chin.

facial proportions

8. To position the mouth corners – draw straight lines from the middle of the “eyebrow” line through the corners of the nose.

Mark the mouth corners where these lines cross the mouth line.

portrait drawing

9. The ears fit precisely within the middle third of the face.

portrait drawing

10. There are few areas in a face that are typically darker as they get less light:

1 & 2 – under the brows, especially in the corners
3 – under the nose
4 - Upper lip
5 – under the bottom lip
6 – under the chin

The rest of the values vary based on the light source.

portrait drawing

11. Start working on details now. Use your pencil as a measuring tool for correct proportions.

Draw facial features carefully - pay attention to the forms and shadings.

facial proportions

12. Use a variety of values. Note where the lightest areas are (highlights) - and leave then white. Note where the darkest shadows are.

The rest of the values - is a range of greys.

Remember:
Face is divided into three equal parts: hairline to eyebrows, eyebrows to the bottom of the nose, bottom of the nose to the bottom of the chin.
The eyes are halfway between the top of the head and the chin.
The bottom of the nose is halfway between the eyes and the chin.
The mouth is one third of the distance between the nose and the chin.
The distance between the eyes is equal to the width of one eye.
The corners of the mouth line up with the centers of the eyes.
The top of ears line up slightly above the eyes, in line with the outer tips of the eyebrows.
The bottom of the ears line up with the bottom of the nose.
The width of the shoulders is equal to two head lengths
...