julianna kunstler logo
mandala

mixed media
Instagram icon

by JuliannaKunstler.com

sand mandala

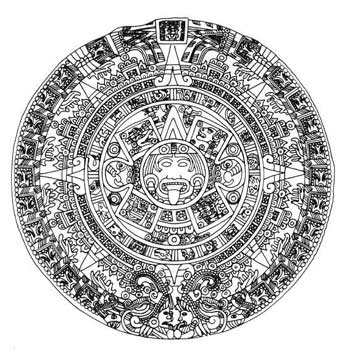
By The original uploader was Colonel Warden at English Wikipedia. - Transferred from en.wikipedia to Commons by SMasters using CommonsHelper., CC BY-SA 3.0

WI State Standards:

  • AA Cr11h
    Plan: Formulate original concepts by practice, experimentation, and revision. (planning/experimentation)
  • AA Cr12h
    Make: Create works of art that introduce students to media, care of tools, and basic craftsmanship skills.
    (skills)
  • AA Pr10h
    Develop Meaning: Curate a body of work incorporating personal, historical and contemporary art to communicate one or more points of view.
    (aesthetics / communication)

Learning targets:

  • Use planning (sketching) to develop a unique outcome
  • Create an original artwork
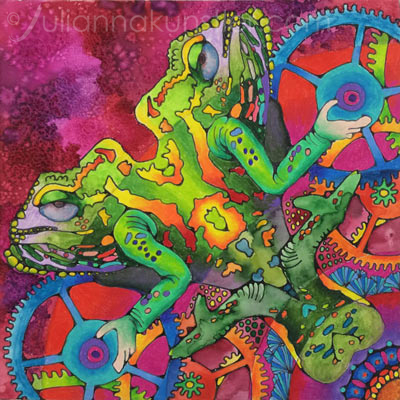
  • Combine multiple media to achieve an aesthetic effect.
  • Learn about mandala art form
  • Create a mandala and make it personal
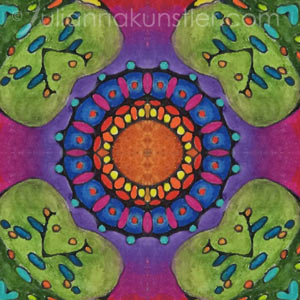
  • Use shape contrast: organic shapes vs. geometric shapes
  • Line stylizing
  • Image transfer
  • Composition balance: circular design
  • Exercise and demonstrate use and mastery of the elements of art
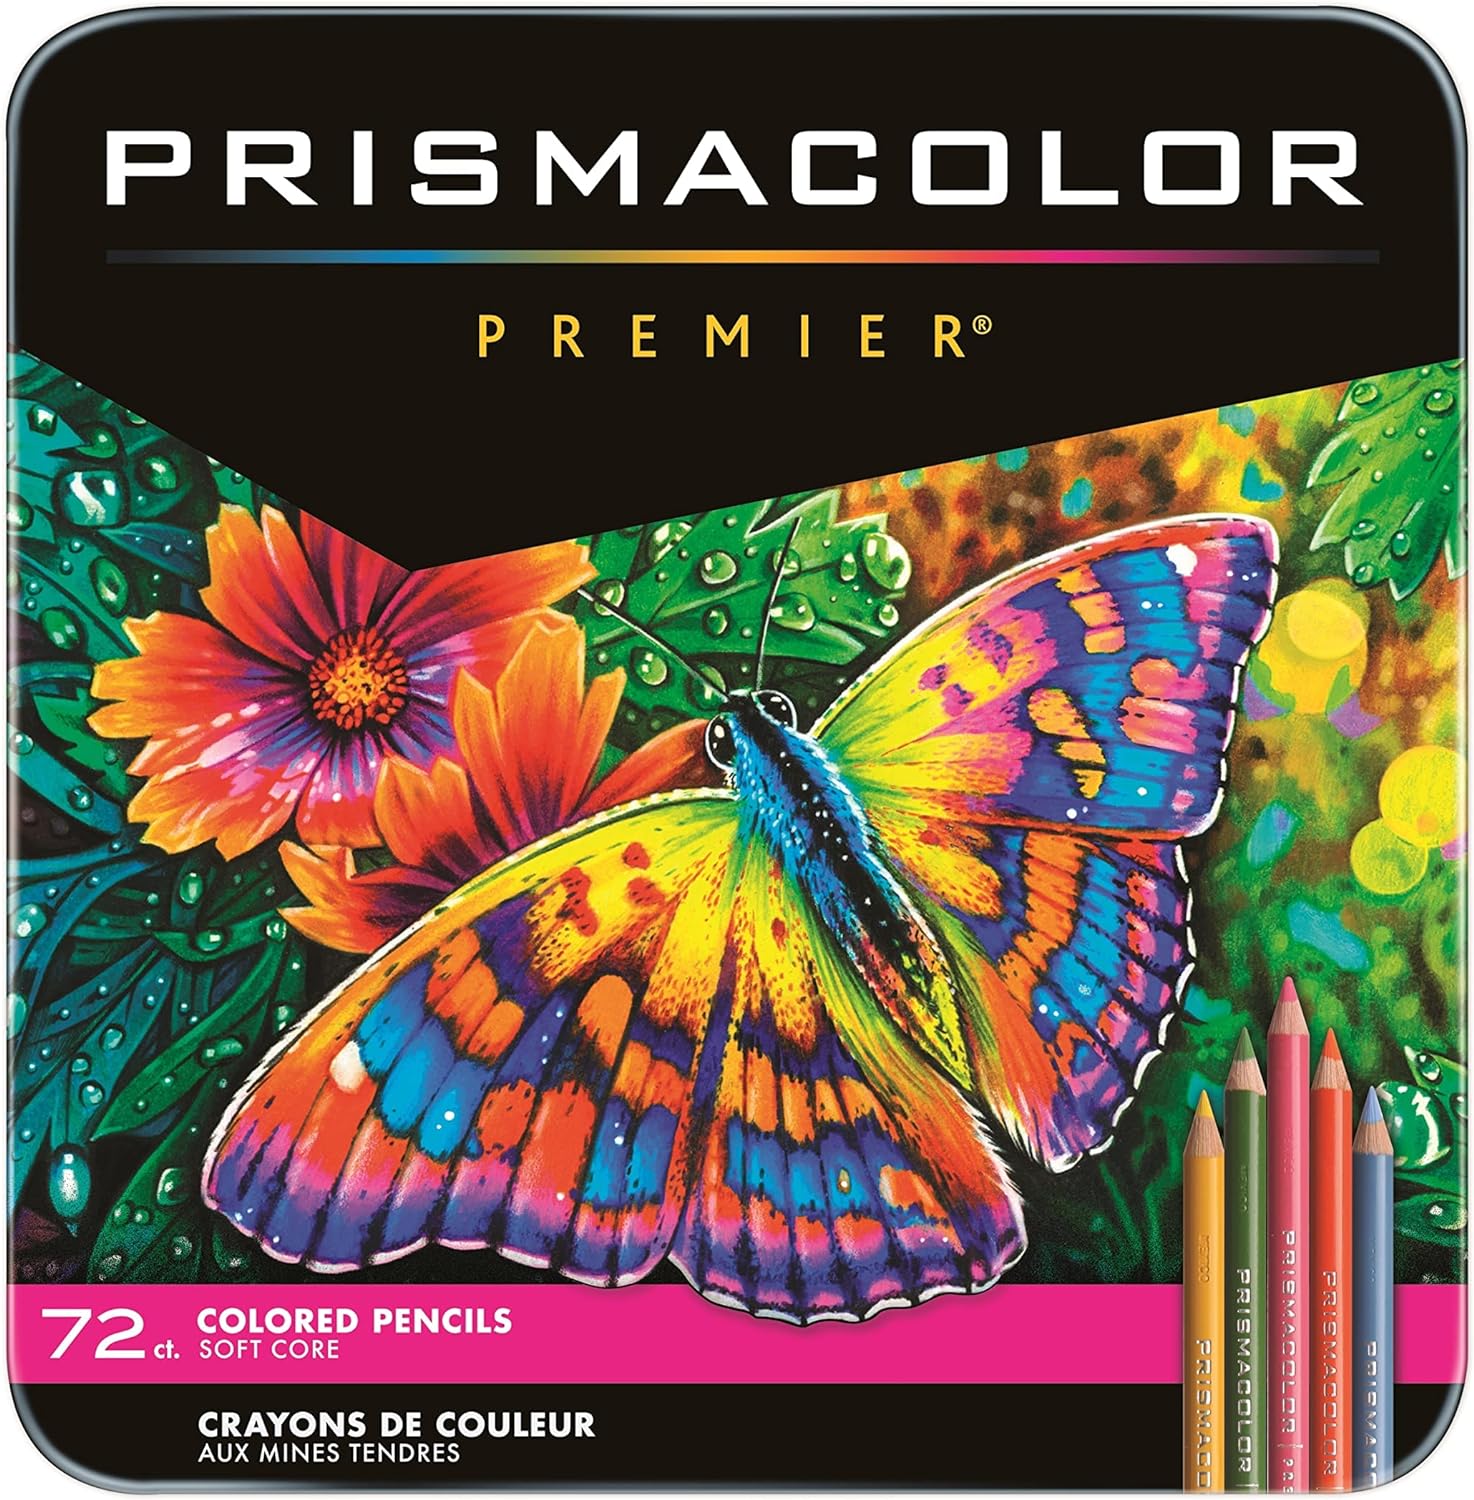
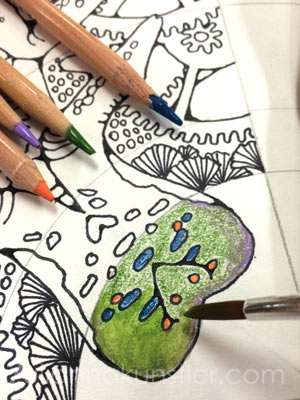
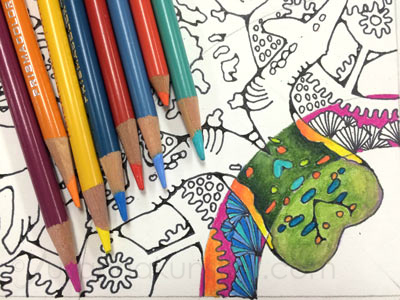
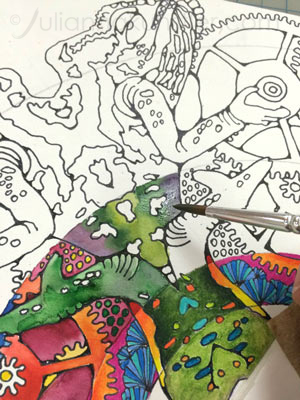
  • Exercise and demonstrate use and mastery of colored pencil drawing and shading techniques
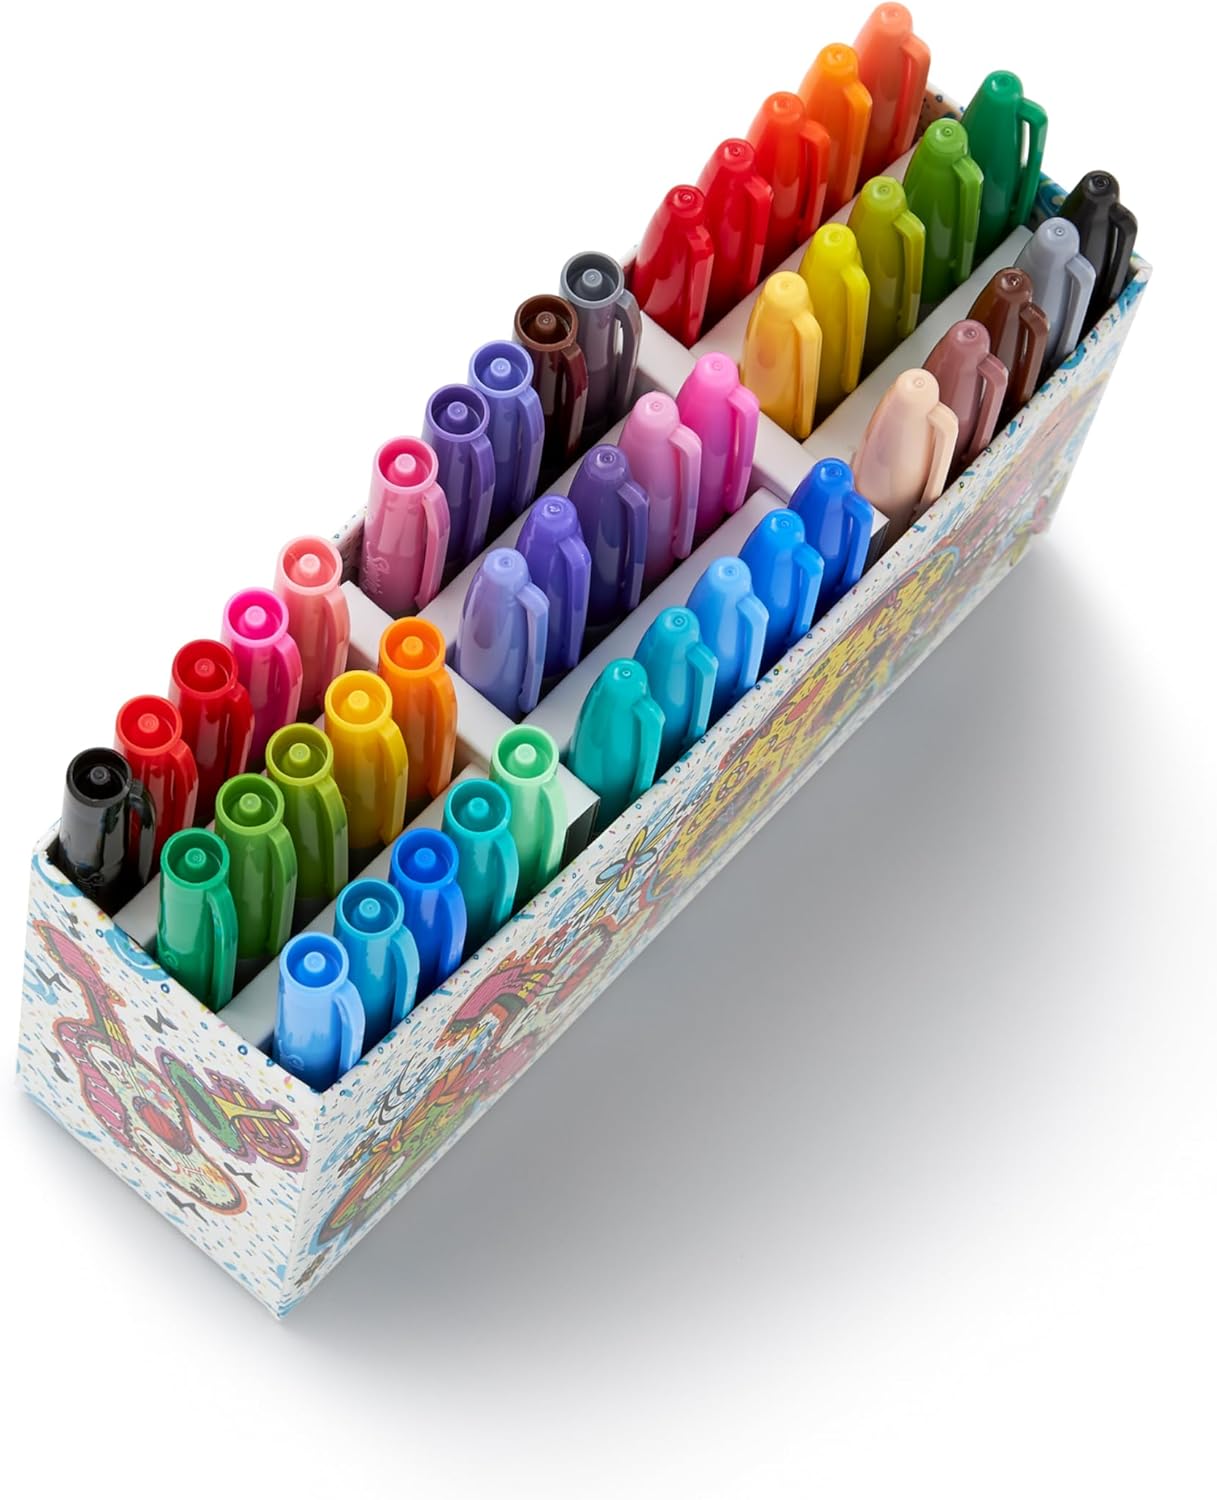
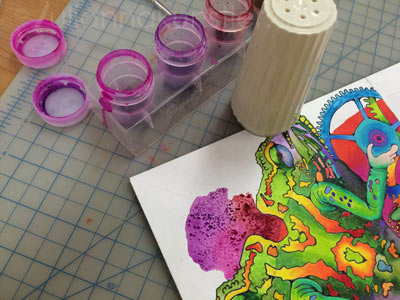
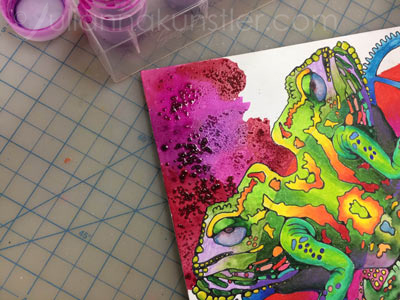
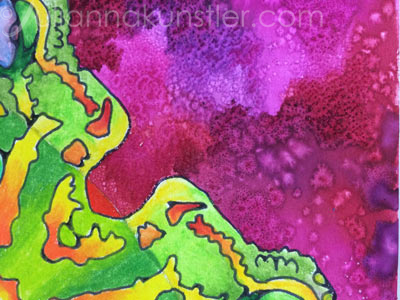
  • mixed media color application:
    • colored pencils
    • watercolor pencils
    • watercolor
    • concentrated watercolors and salt
    • optional: gel pens .

in a nutshell

1. Standard AA Cr11h (planning/experimentation): Research and prep work.

2. Standards AA Cr12h (skills): Tracing, drawing, stylizing, and coloring skills

3. AAPr10h (aesthetics/communication): complexity, craftsmanship and the message of the mandala.
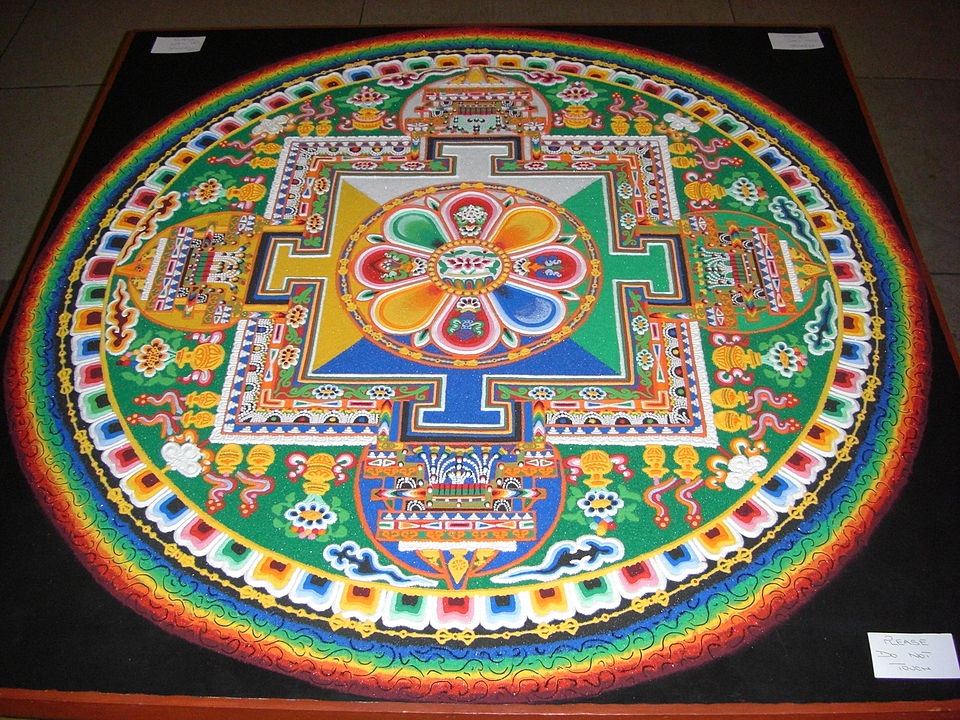
history of mandala

tibet
A mandala is a devotional, sacred sand painting done by Buddhist Monks of Tibet.

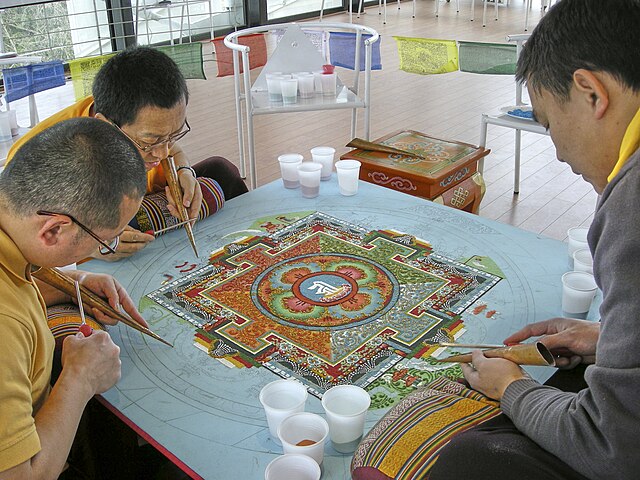
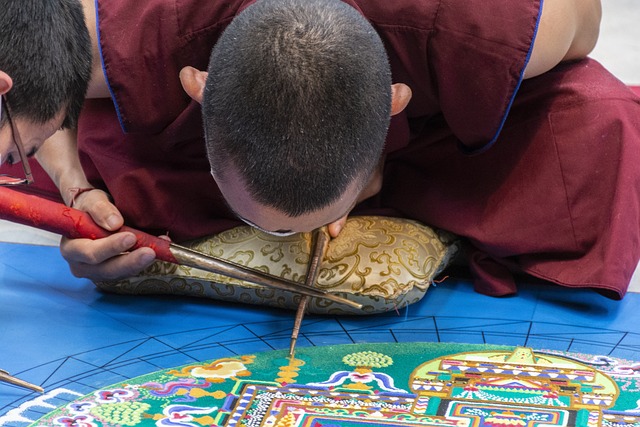
The monks use millions of grains of brightly colored sand to create the sand painting.

The ceremony of creating a mandala takes nine days.

The mandala represents the world in its divine form. It also represents a "map" by which the minds of people can be transformed from an ordinary mind into an enlightened mind.
After the mandala is completed the monks who created it, destroy it.

The destruction of the mandala is important to the ceremony because the destruction of the mandala symbolizes the temporariness of life.

tibet

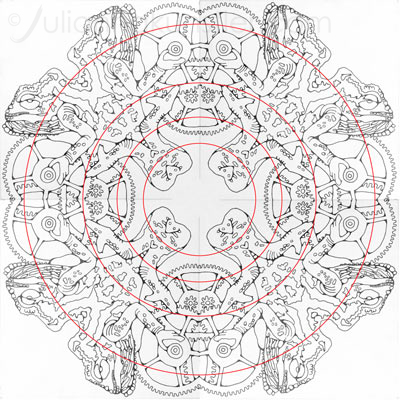
The basic pattern of the circle with a center is found in nature and is seen in biology, geology, chemistry, physics, and astronomy.

mayan mandala

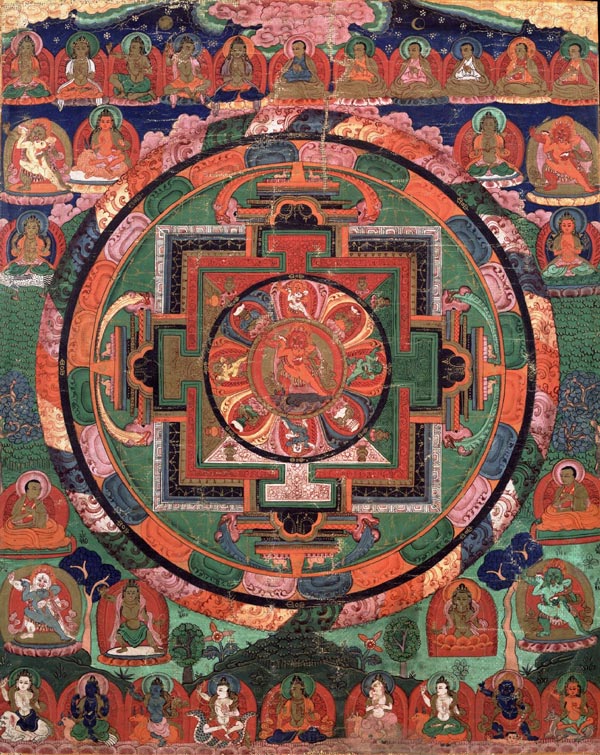
Mandala is a graphic, mystic symbol of the universe.

It is typically in the shape of a circle enclosing a square or a square enclosing a circle.

A mandala often bears symmetrically arranged representations of gods or deities.

mayan mandala

Many cultures embrace the mandala as a “circle of life” symbol, but in many cases it is often merely decorative.

quick steps:

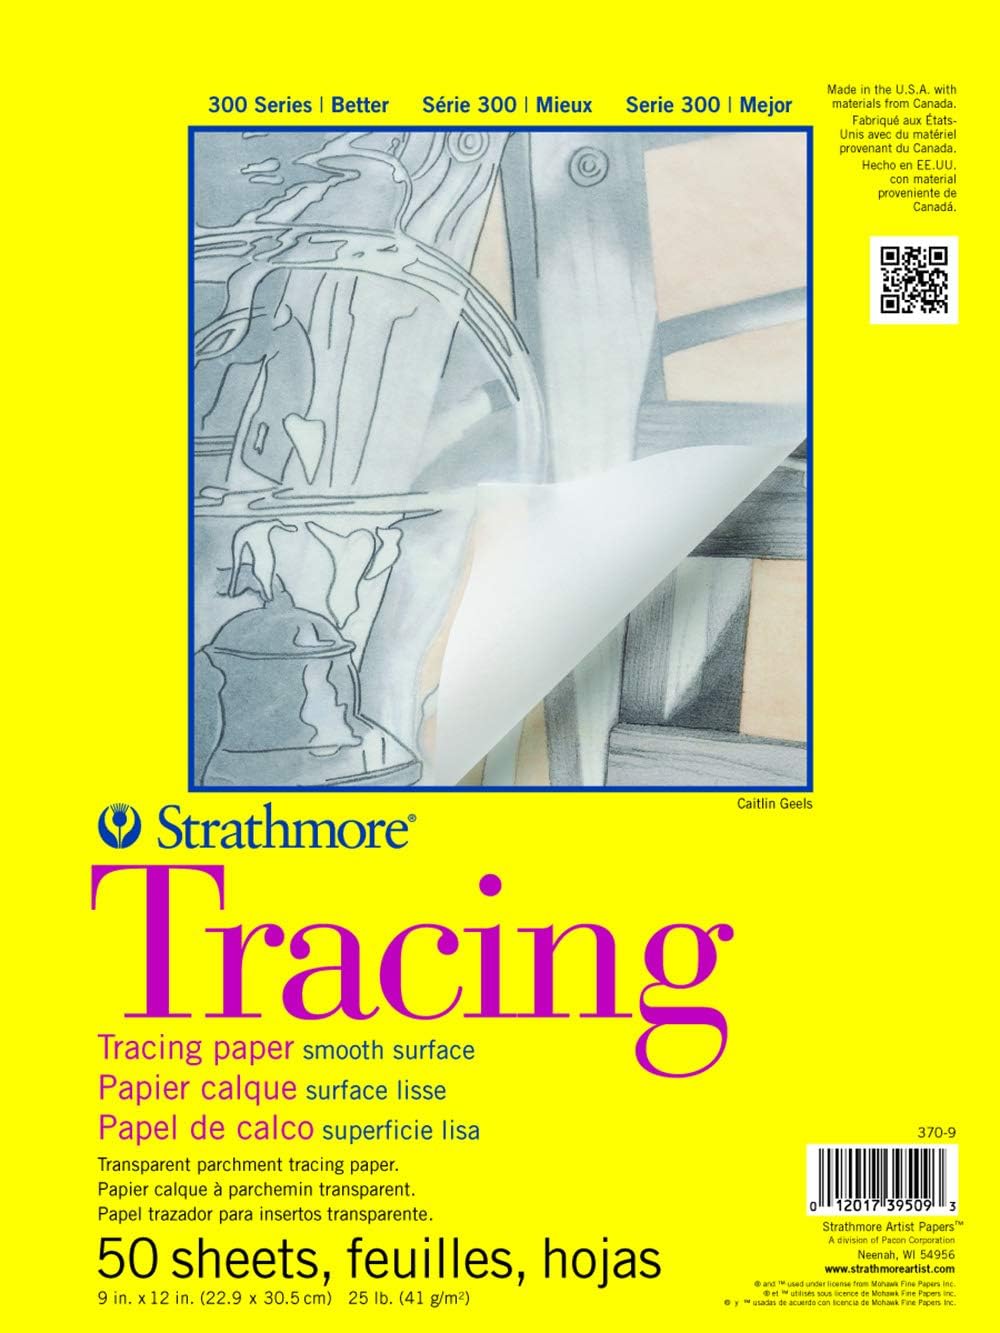
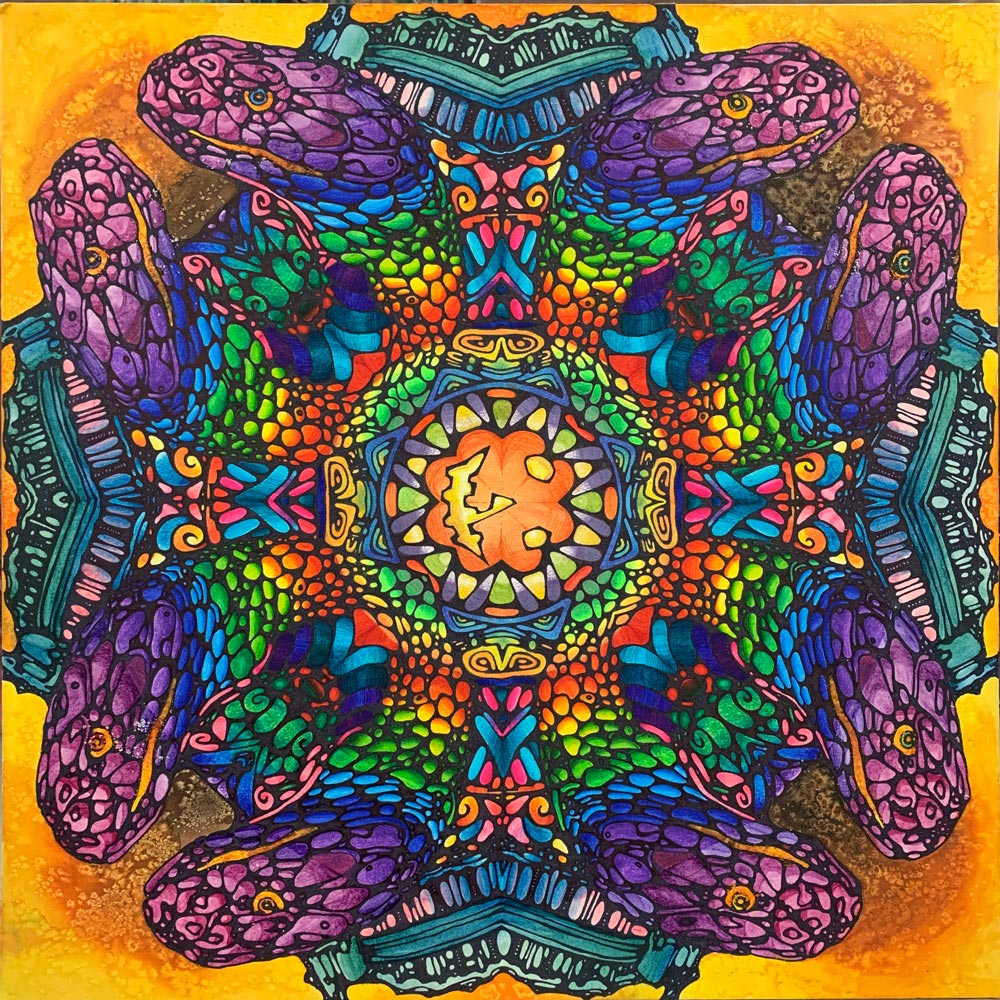
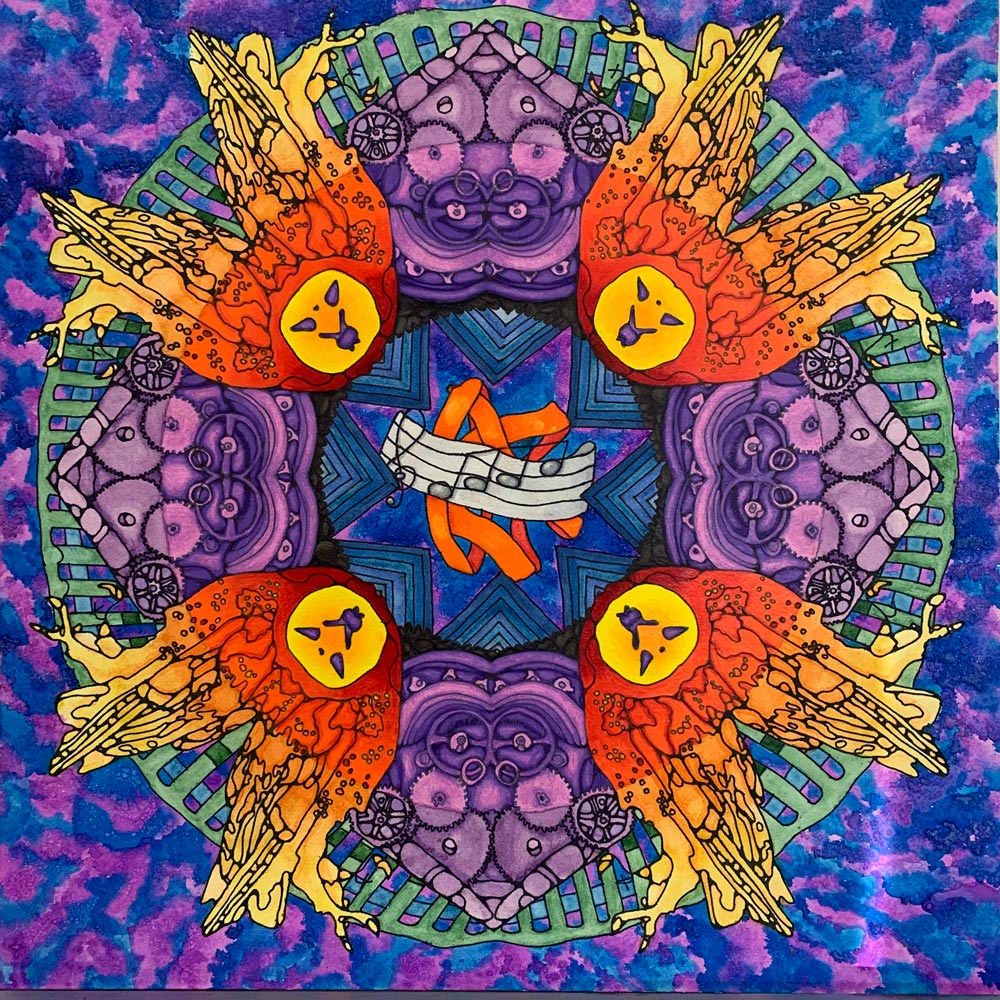
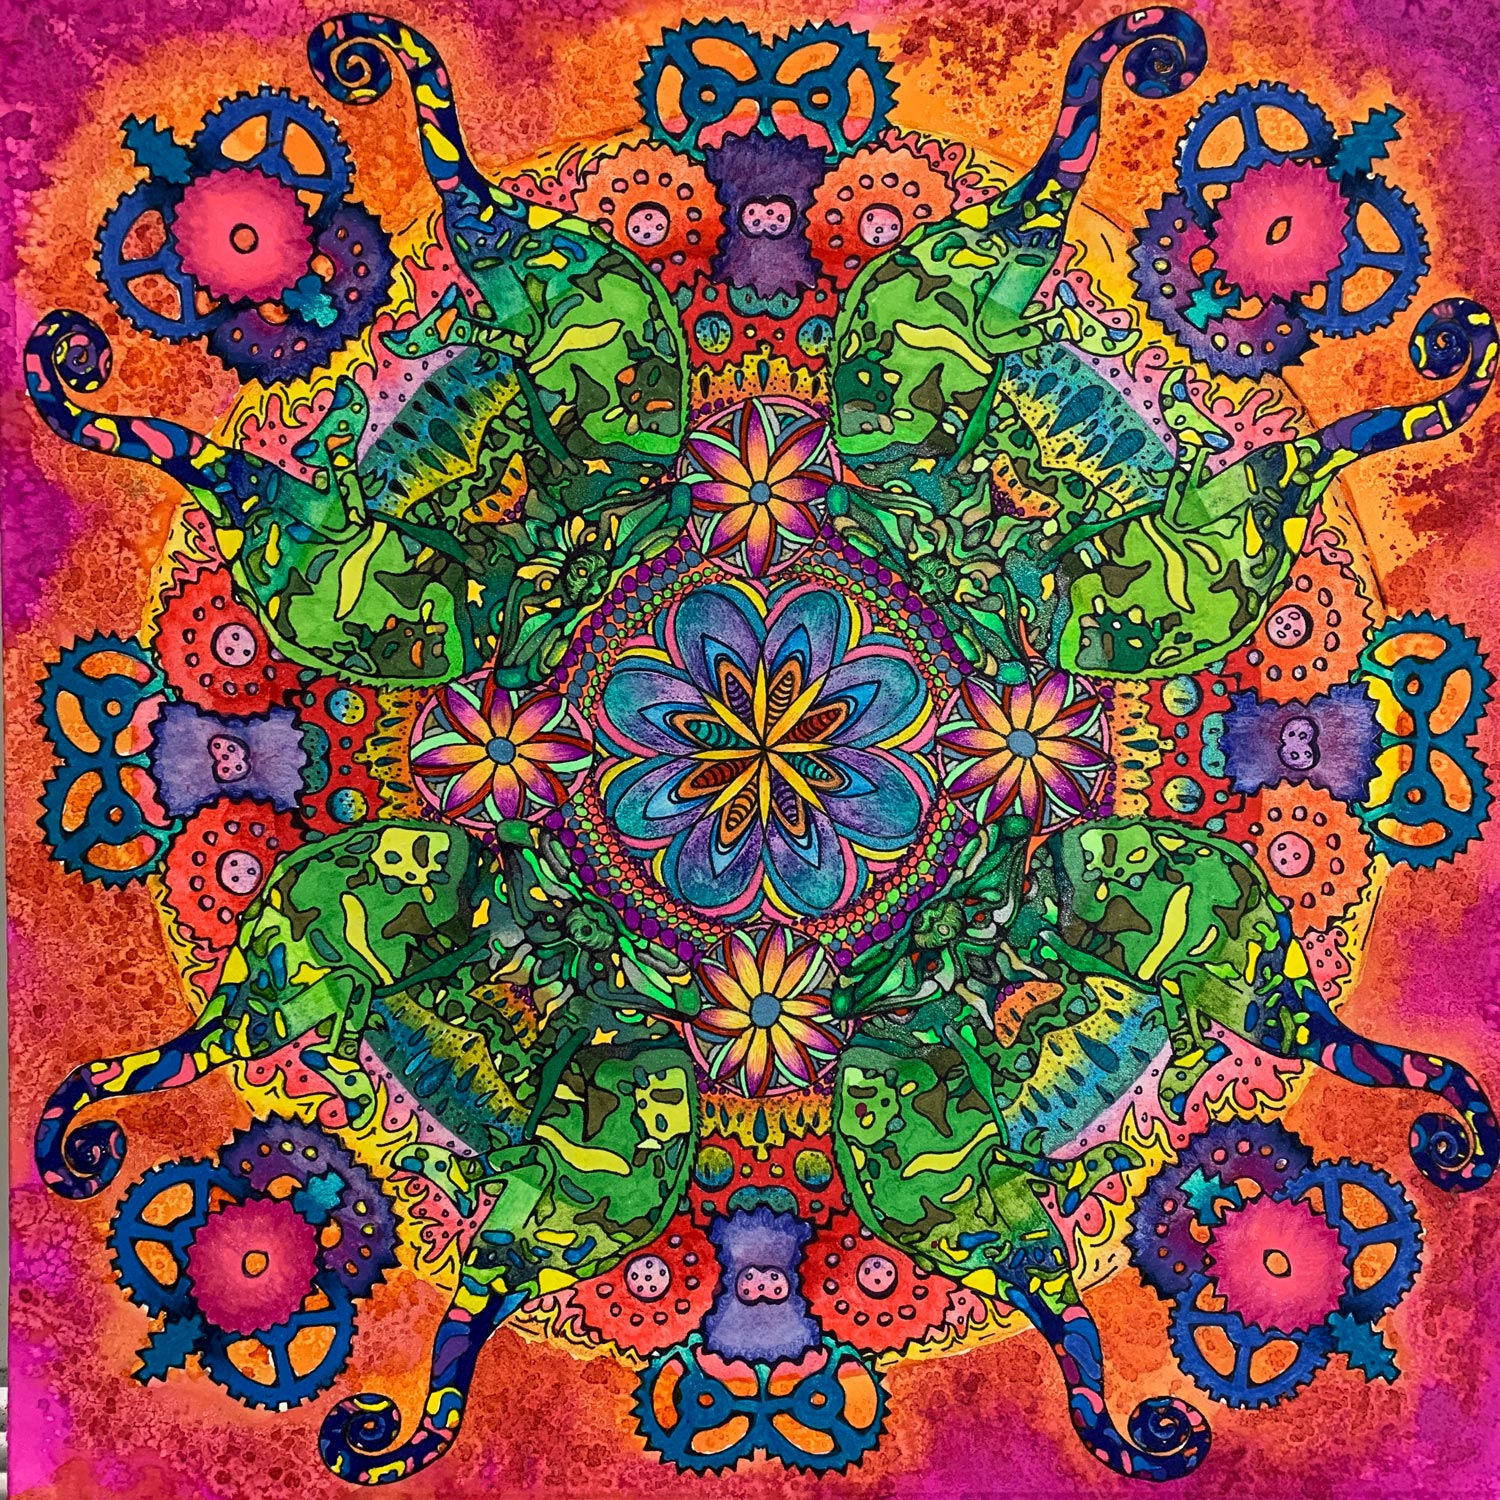
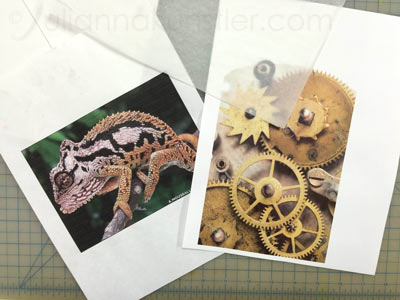
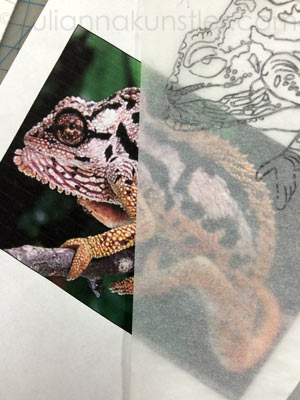
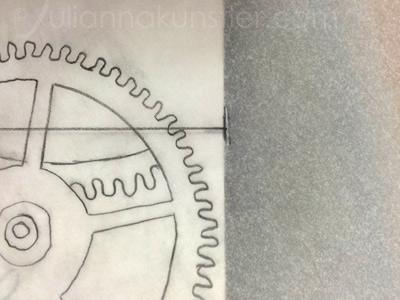
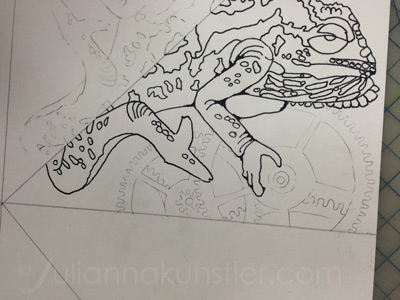
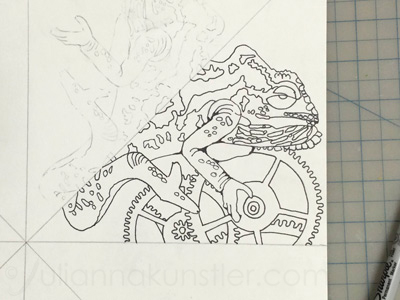
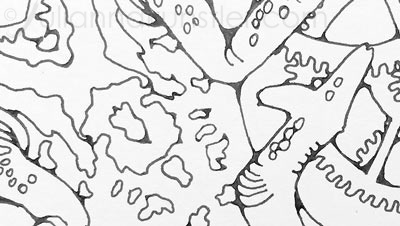
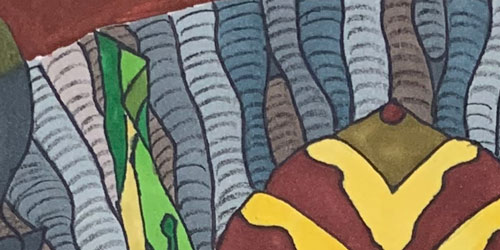
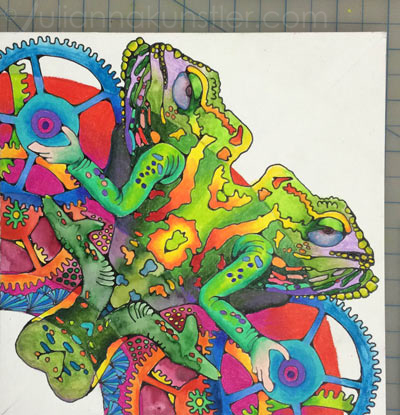
1. Research reference images (one organic (animal) and one geometric (mechanical))

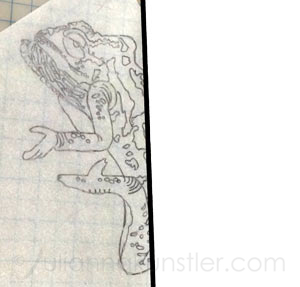
2. Trace onto tracing paper

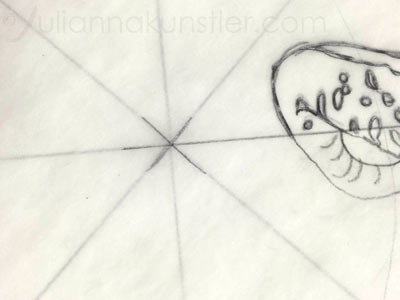
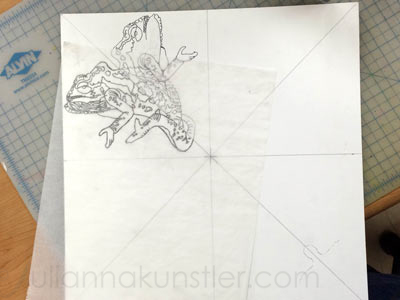
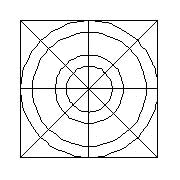
3. Divide illystration board

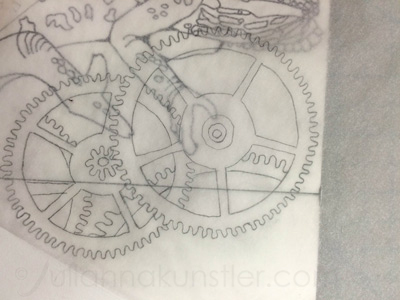
4. Divide both tracings using a mirror

5. Trace organic design with a reflection (4 times) using diagonal lines

6. Trace geometric design with a reflection (4 times) using vertical and horizontal lines

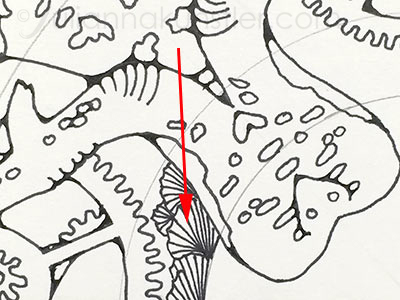
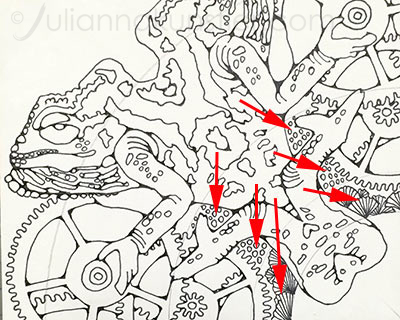
7. Outline with a marker

8. Stylize lines in the corners

9. Draw 4-5 circles

10. Fill in the center and the negative space

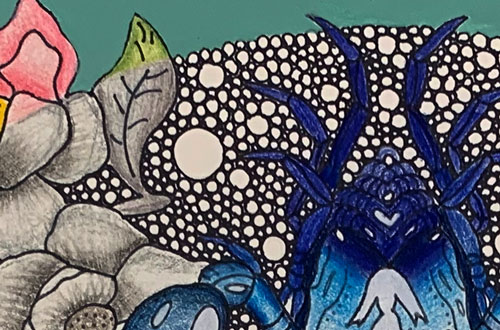
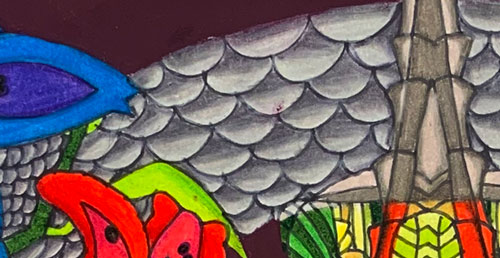
11. Color circles (colored pencils, watercolor pencils, watercolor paint, gel pens)

12. Complete the background

materials used

paid links

tracing paper

illustration board, 30 ply

Sharpie ultra fine point

professional set 36

color markers

watercolor pencils 24

Prismacolor premier 72

liquid watercolors

GALLERY

STEPS

1. find images

find images

1. A picture of an animal - at least a size of your hand

2. A picture of a man-made object (mechanical part, clock, car parts, etc) - at least a size of your palm.

2. trace images

Trace your images on a piece of a tracing paper.

Include as many details as you can.

3. grid

You are going to use a square 15"x15" board to create a radial design.

Divide the board as shown.

Important: use a cold press, double thick (30-ply) board for better results with watercolor techniques.

4. divide images

Then use a mirror to find the most interesting reflective shape for this particular image.

The image should have as many details as possible.

Use the mirror to draw the axis.

Trace the image onto the board (only one side - the one you used to preview in the mirror).

5. transfer organic image

Align one of the diagonals on the board with the "cutting" line on the traced image.

Mark the center of the design on your tracing paper for a better alignment.

Flip the tracing paper and trace the mirror image.

Make sure center is aligned.

Repeat the steps 3 more times.

6. transfer geometric image

Trace your other image.

Position it to fill in the space around the animal.

Use a mirror to draw a cut off line

Mark the axis for alignment.

Trace the object carefully.

Do not trace over the animal - just the negative space - background.

7. outline

Trace with an extra fine point Sharpie

Repeat the steps.

8. stylize lines in the corners

stylizing

Stylize each corner in the design by filling them in and rounding them up (like you did in a practice worksheet)

stylize

This will add a “stained-glass” effect to your design.

9. divide design with circles

divide mandala

Divide the board into 4-5 circular areas.

mandala

10. fill in negative space and the center

background

Fill in the negative space with designs/shapes between the circles.

background patterns

Change the design as you reach the circle.

11. color

watercolor pencils

When it’s time for coloring – you will have to use at least three different coloring media:

  • colored pencils
  • watercolor pencils
  • watercolor paint

Once you cross the circle line you need to switch to a different media.

Use the variety of colors. If you have a large area of the same color – use different shades and tones of that color to make the design more interesting.

Watercolor pencils:

Shade lightly, use multiple colors, small strokes. Blend with a wet watercolor brush.

colored pencils
Colored pencils:

Blend colored pencils, create gradients.

watercolor
Watercolor paint:

Mix and blend different colors within larger shapes.

Stay inside the outlines

mandala coloring

Continue with coloring.

In my example (starting in the center section):

  • w/c pencils
  • colored pencils
  • w/c
  • colored pencils
  • w/c pencils

Remember, craftsmanship counts!

12. complete the background

liquid watercolors
Concentrated liquid watercolors

Fill in background of the last section with small areas of paint, then - while the paint is still wet!!!! - sprinkle some salt over that area.

paint with salt

Continue with painting more areas and sprinkling salt.

mandala

Do not touch the surface until the paint is completely dry.

mandala center

Fill in the center of the mandala with a design or an image.

Outline with Sharpie, stylize corners.

Choose your favorite coloring/shading technique and medium.

mandala part

Repeat the steps for the rest of the design.

mandala

GRADING

WI standards Grading Rubric
standard no evidence beginning emerging proficient advanced

Cr.11

planning / experimentation

Assignment does not show enough evidence or is missing

No evidence of careful planning.

Reference images we not carefully selected

Reference images were properly selected

Tracing and transferring process was not accurate

Does not demonstrate effort and attention to details.

Line stylizing is limited

Artwork demonstrates accurate planning, effort, attention to details.

Tracing and transferring process was accurate

Student practiced line stylizing and coloring techniques

Student displayed an outstanding effort in regards to application and understanding of the content.

Artwork shows individual style, careful planning, multiple revisions and attention to details.

Design is intricate and creative

Cr.12

skills

Assignment does not show enough evidence or is missing

Student somewhat followed the process. Some steps are skipped or incomplete.

Work requires major improvement.

Student mostly followed the process.

Work shows some skills and basic/partial understanding of the process.

Designs are colored with multiple media

Student followed the process exactly as the instructions specified.

Work shows proper use of skills and techniques

Every coloring and drawing step is carefully performed

Shape alignment

Lines are solid and stylized

Coloring steps and coloring quality fit the requirements

Student followed the process exactly as the instructions specified and, in addition, the piece exhibits evidence of creative experimentation beyond the required task.

Coloring skills show additional effort and creativity

Craftsmanship and attention to details are flawless;

Pr.10h

aesthetics / communication

Assignment does not show enough evidence or is missing

The artwork communicates little effort and personal emotional involvement in the process.


Student tried using elements and principles of art to solve the aesthetic task.

Design is simple

Some areas need improvement.

Artwork shows individuality and effort.

Design details are complex, shapes are intricate

The artwork displays a clear meaning and style of the assignment.

Negative space is filled with patterns

The center design communicates about artist's personality

Student went above and beyond in the use of Art Elements and Principles to convey a clear message, showed understanding of the task, and solved the task in the most creative way.

Artwork shows individuality and emotion involvement.

...