
by JuliannaKunstler.com
example
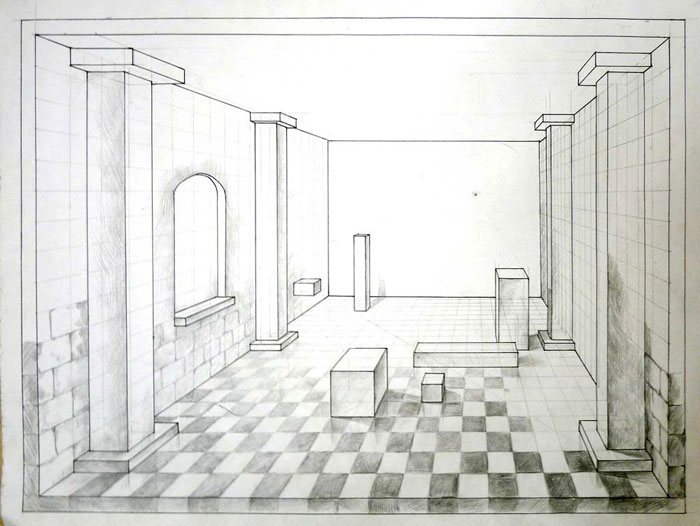
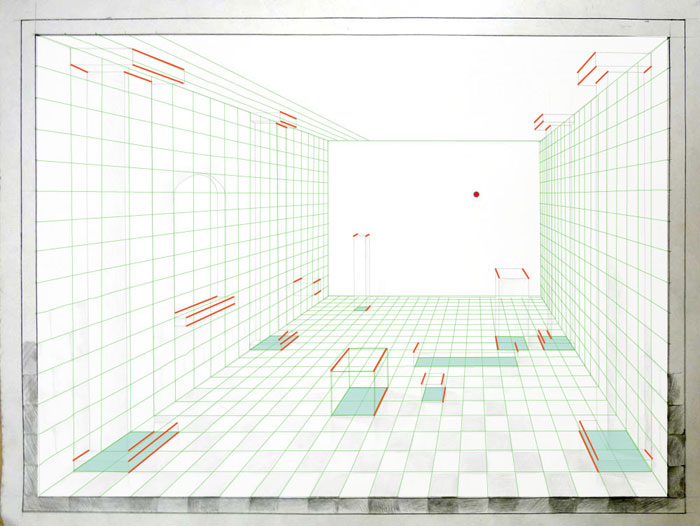
STEPS
Start with creating a grid in perspective. Once you have a grid in place - it will make more sense to where and how to place other objects.
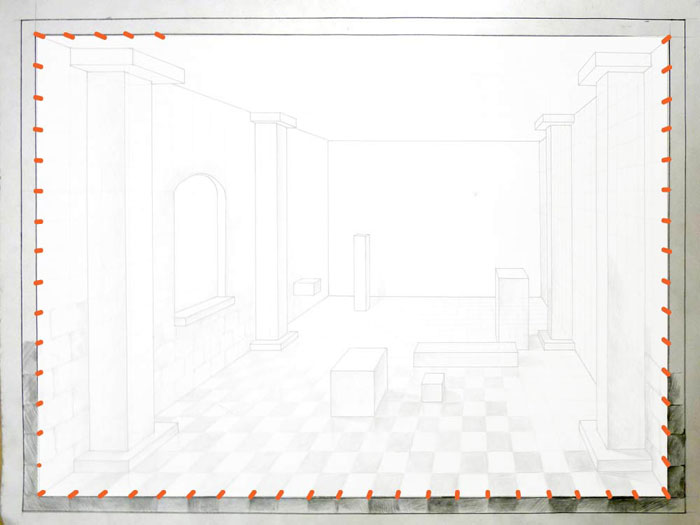
Remember, you can do all your measurements on the picture plane.
1 point perspective basics here
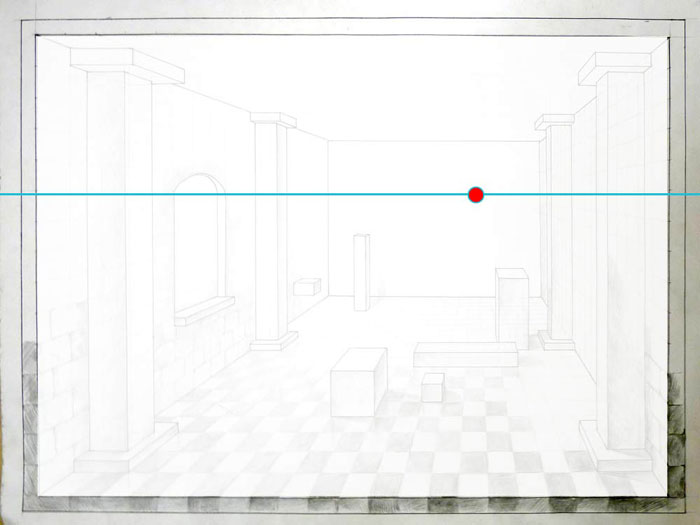
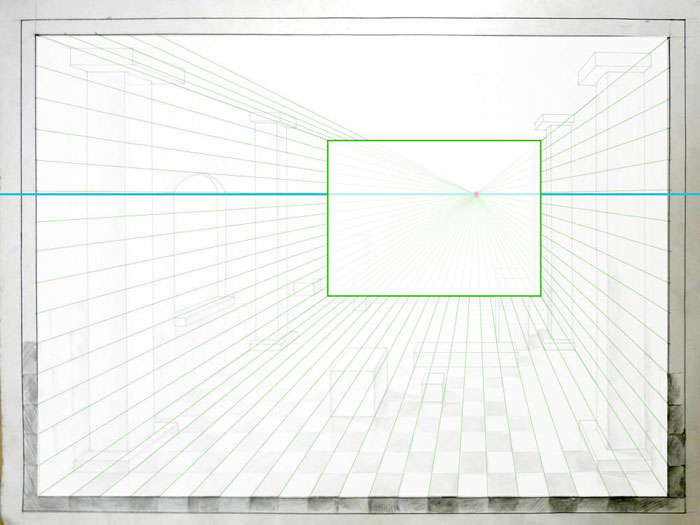
Place a HORIZON LINE with
a VANISHING POINT on it.
Remember, that this is your eye level - so don't put too high (unless you are a giant) or too low (unless you are a mouse).

Connect all your marks to the vanishing point.
The lines should be super thin and light. Remember: these are help lines - you don't want them to overpower your drawing.
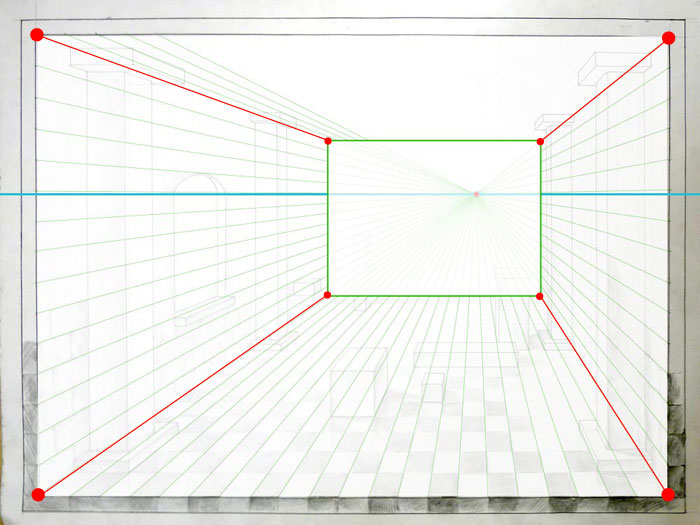
Decide where you want to place the "back" wall.
Important:
A corner mark on your picture plane should go into a corner on your back wall.
Back wall should be a rectangle.
Remember: all surfaces that are parallel to your picture plane do not get distorted in 1 point perspective!
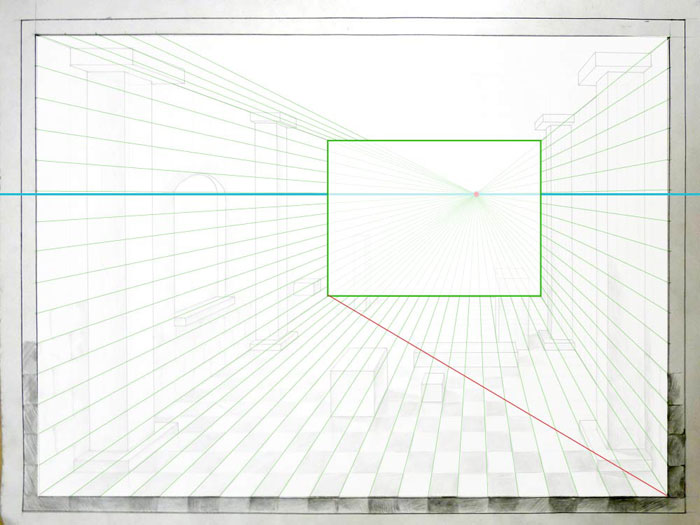
Use "checkerboard method" to divide the floor into tiles.
Detailed instructions are here
Draw a diagonal line from one corner to another
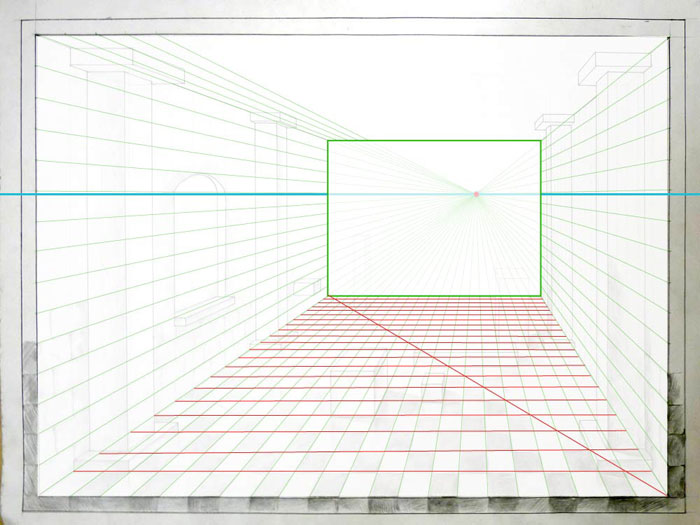
Draw a horizontal line through every point where diagonal crosses the receding lines.
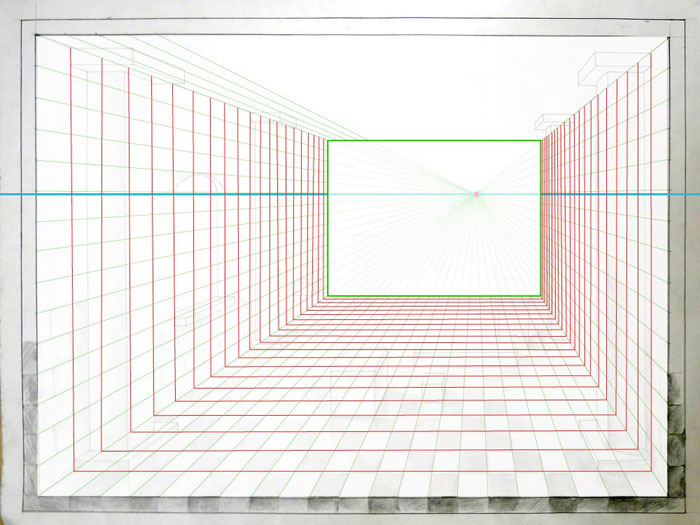
Draw vertical lines for the walls grid.
Start at the bottom corners.

Once the grid is done - think of what you want to place inside the room: architectural details, columns, windows, doors, tables, etc.
It always helps to sketch the ideas.
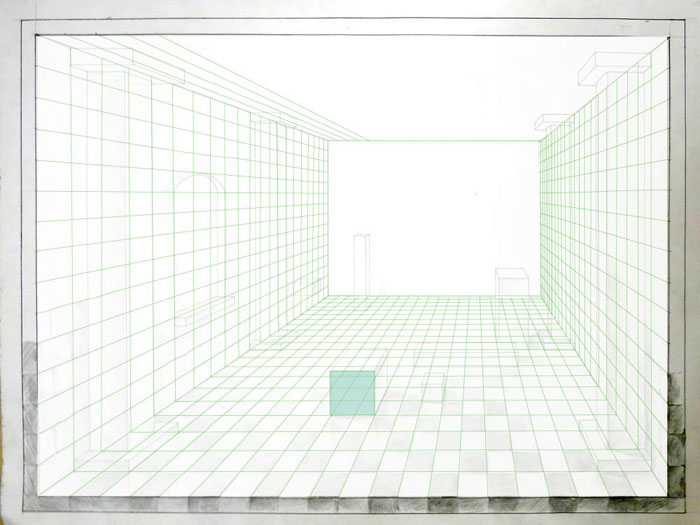
To place a basic form - cube - start with the front side.
Use floor tiles for corners.

You can slightly shade the floor area to define the size of the cube.
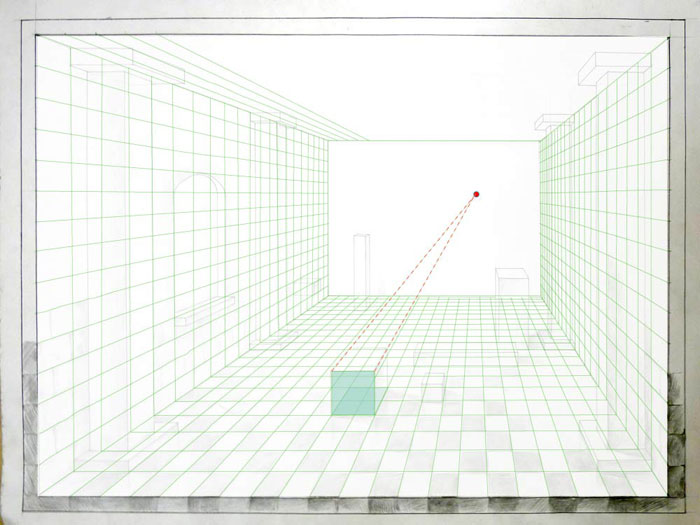
Connect the top 2 corners with the vanishing point.
You do not have to do that for the 2 bottom corners because..... you have a floor grid.... and you already know what the bottom dimensions are.

Complete the rest of the sides.
If you are getting confused at this point - check the 1 point perspective basics here again!
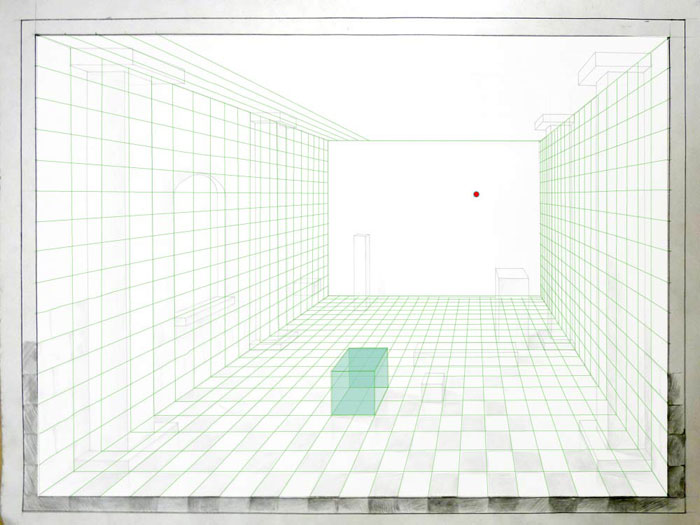
Here is your cube

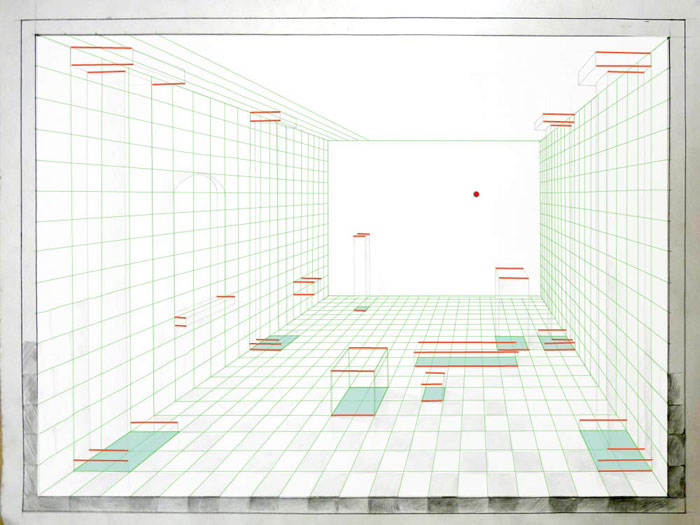
Use the grid to place other objects and details.
REMEMBER:
In your entire picture
all horizontal lines, that are parallel to your picture plane - stay horizontal.

All vertical lines stay vertical!
All lines, that are parallel to the sides of the room (in real life) - become receding lines and go to the vanishing point.
No exceptions!!!!!
Continue adding details and shadings.
Have fun with it!