Symbols will let you create complex movies at smaller file size.
Symbol is a reusable object that serves as a master from which you can create copies (instances).
Symbols are stored in the Library palette.
You can edit symbols and its instances.
GALLERY
STEPS
You will create 3 sets of graphics:
1. Background photo image.
2. Individual layers for each bubble: 4 total.
3. Fish layers: 2 total.
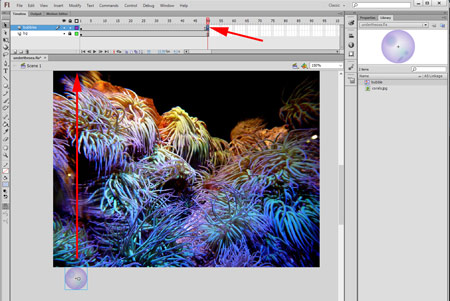
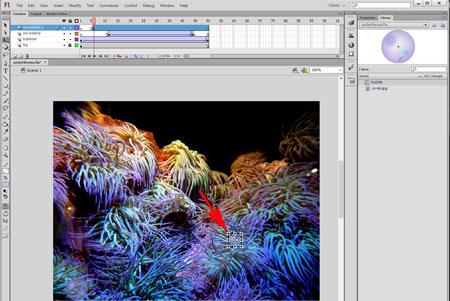
Create background
Start with importing a bitmap image for your background.
Find a nice photo, save it as a .jpg image in your folder.
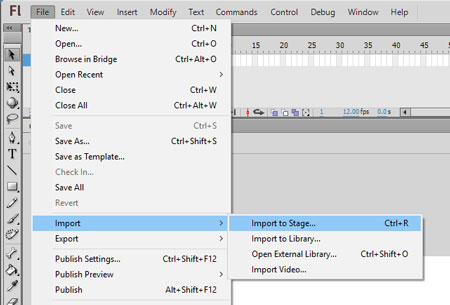
Go to File > Import to Stage
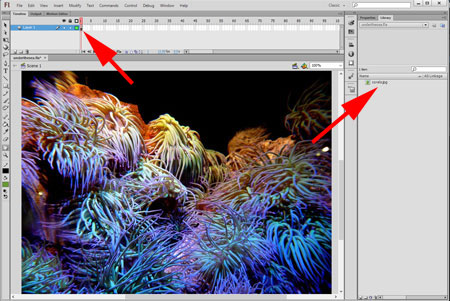
This will place this photo in the Library as a bitmap, and onto stage.
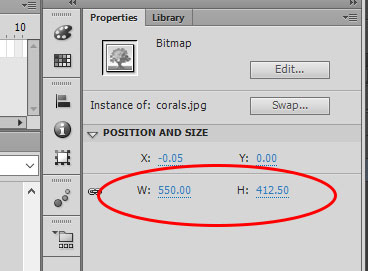
Resize bitmap to match the largest dimension of the stage size.
Make sure the link is on to constrain proportions of the image..
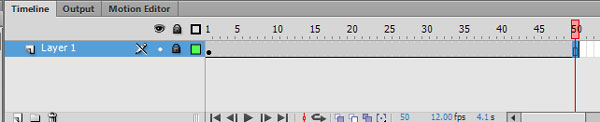
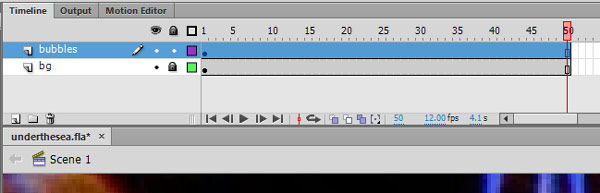
Let's have out movie last for about 50 frames.
Click on frame 50 and press F5 on your keyboard. It will add frames to your background layer. This is going to be a static layer, so no keyframes are necessary.
Lock the layer.
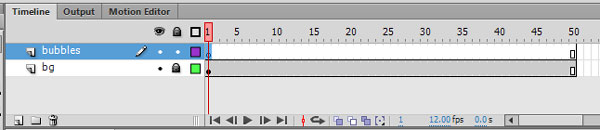
Add bubbles
Add a new layer above the background.
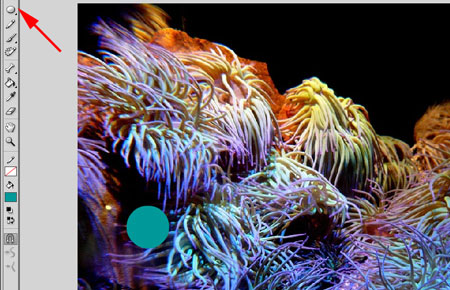
Use an Oval tool to draw a circle.
Choose "no Stroke" option.
Select "Object Drawing" option before you do.
Double-click on the circle with Selection tool to open Object Editing Mode.
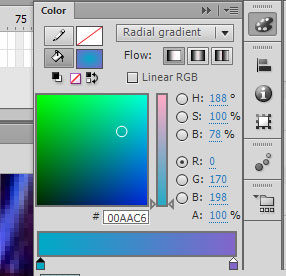
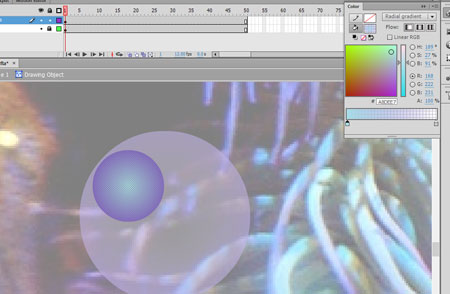
Open Color palette and select a Radial Gradient for fill option.
Choose two colors that you think would fit for a bubble (based on your background).
Select the first color slider. It represents the center color.
Double-click on it.
Change color opacity to 20% (in Flash it is called Alpha).
This will make the middle of the circle translucent.
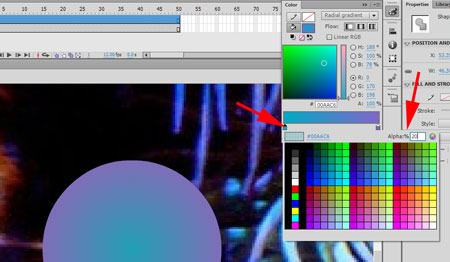
Double-click on the second slider.
Change Alpha setting to 60%.
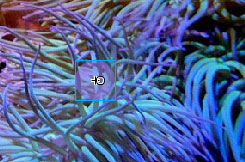
This is how my bubble looks now when it is deselected.
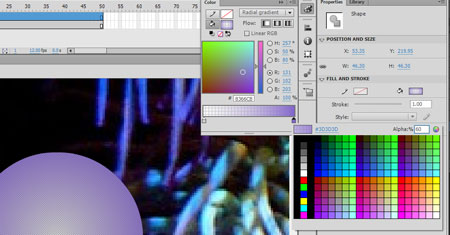
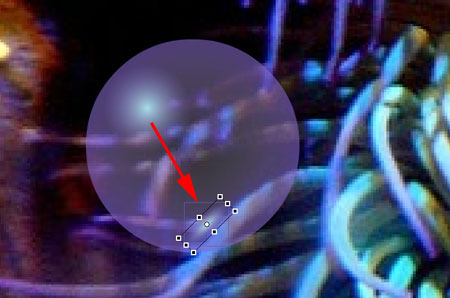
I am adding another circle (object) to show a light reflection.
I chose a light blue color for the gradient.
First color: about 30-40% Alpha
Second color: 0% Alpha.
This setting will make the highlight gradually fade.
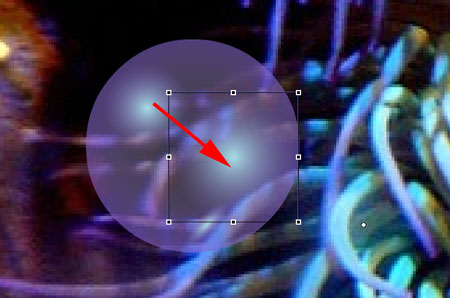
I duplicated the reflection circle, resized and rotated it.
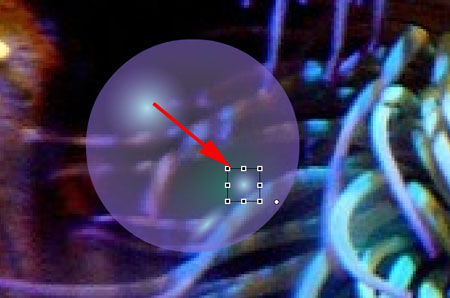
Duplicate the reflection again.
Resize it.
Change gradient color to darker color scheme.
The last time you duplicate the reflection.
Make it tiny.
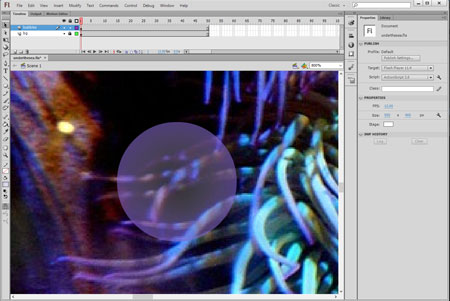
These are all circle objects that form a bubble.
Now think: to make a lot of animated bubbles - you'll have to draw A LOT OF circles.
Each one of them will require some file space.
What if you want to add a hundred of bubbles?
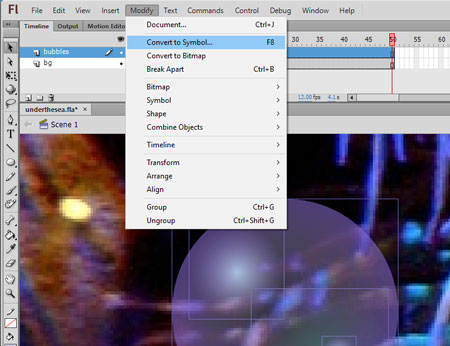
That's why we are converting our bubble into a symbol.
Modify > Convert to Symbol.
Choose Graphic type.
Give it a name.
Click OK.
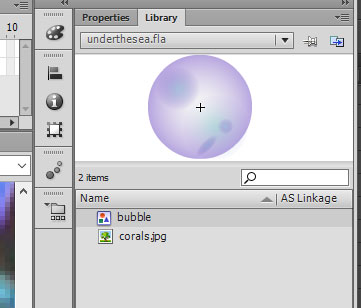
Your new symbol is in the Library.
Go to frame 50 of your bubble layer.
Insert a keyframe (F6).
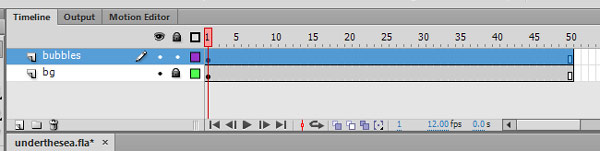
Return to frame 1 of the bubbles layer
Move the bubble instance below the scene.
Insert a keyframe at f.50.
Move the bubble up.
Have it go off stage.
File > Save.
Now click anywhere between the two keyframes
Right-click.
Choose: Create Classic Tween
(Shape tweening works only for shapes.)
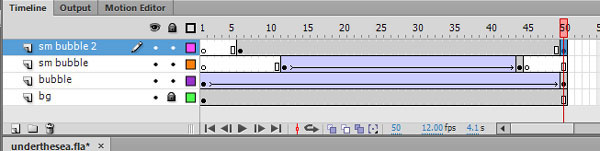
If you did everything correct, the frames will turn light purple, and the two keyframes will be connected with a solid arrow
Now let's add another bubble.
Create a new layer.
We are going to animate a smaller bubble.
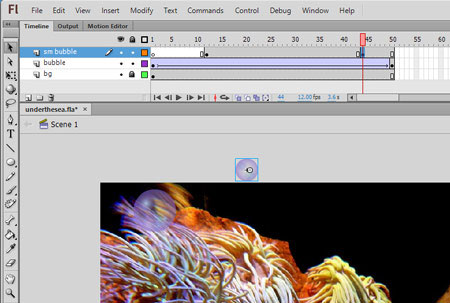
But we are going to delay the animation for a second.
So go to frame 12 and Insert a blank keyframe (F7).
Open the Library.
Drag a bubble instance to stage. See? We are using the same symbol!! That will not increase the file size (much)!
Now it's time to resize the instance..
Click on the instance. Well, it should be selected to be edited... Dah...
Choose Transform tool, hold SHIFT and resize the instance.
Resizing an instance does not affect the symbol itself. (But resizing a symbol will affect all instances).
We are going to animate this bubble at a faster rate.
Insert a keyframe at fr.44 or thereabouts.
Move up the bubble instance.
Create Classic Tween between the keyframes.
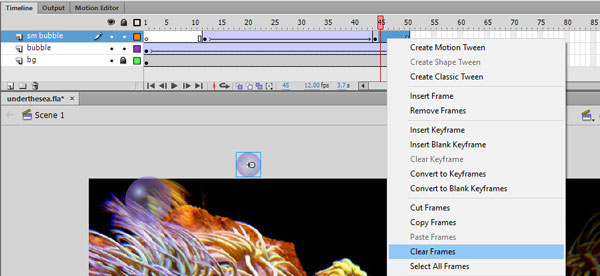
We can remove the last 6 frames - we remove frames in timeline when we want an image to disappear.
The last visible frame should be a keyframe.
Select the frames to remove, right-click, Clear Frames.
After you clear unwanted frames - a Blank Keyframe will be placed after your last Keyframe.
Add another layer for one more bubble.
Place a Blank Keyframe in f.6.
Drag symbol's instance onto stage.
Resize it.
Keep the instance selected!
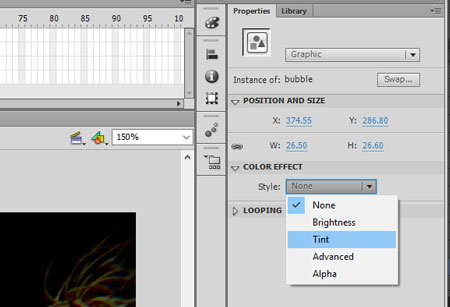
We are going to modify the colors of the instance.
In Properties panel choose:
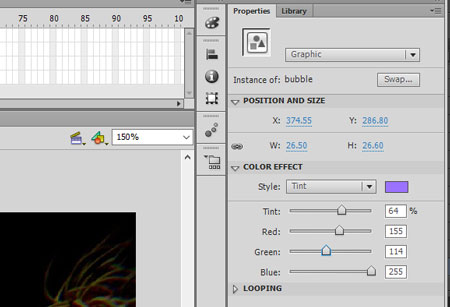
Color Effect > Tint
Adjust the colors input.
Place keyframe at f.50.
Move the bubble up.
Tween.
Create another layer.
Place a bubble instance.
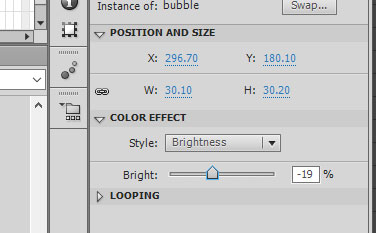
With the new instance still selected, go to Properties panel.
Choose Color Effect > Style> Brightness.
Darken the instance by sliding the brightness bar to negative setting.
Place a Keyframe at f.50.
Move the bubble up.
Tween.
You can also change the bubble's opacity.
Select the instance at frame 50.
Go to Properties panel.
Color Effect > Style > Alpha
Alpha id opacity setting in Flash.
Change Alpha setting to 50 or 60%.
Now if you test your movie - you will see as this bubble not only goes up, but also becomes gradually more transparent.
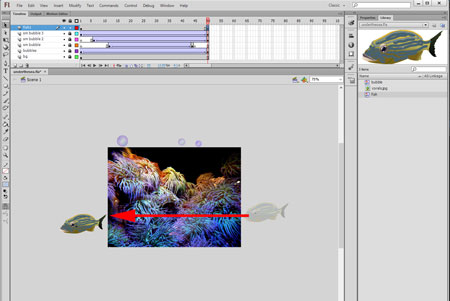
Add swimming Fish
Create a new layer for a fish to swim across the scene.
Name it "fish".
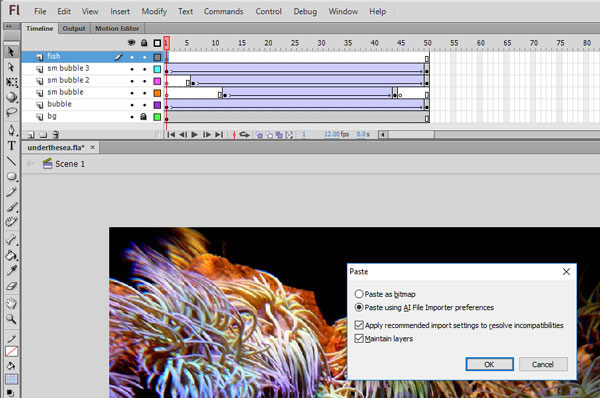
You can draw a fish using Flash drawing tools or... create it in Adobe Illustrator and paste it onto the layer.
Convert the fish into Graphic Symbol.
Move the fish off the scene.
The new symbol will appear in the Library panel.
Insert Key Frame at f.50.
Move the fish across the scene.
Tween.
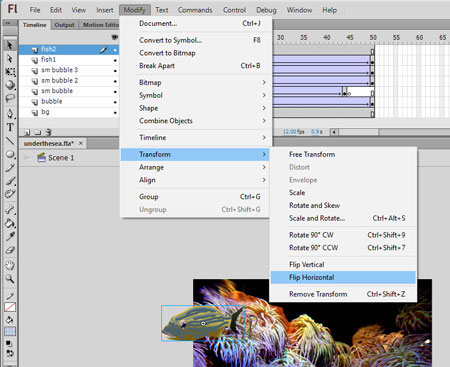
Create a new layer for the 2nd fish.
Insert a Blank Key Frame at f.12
Place fish on the left side of the stage.
Modify > Transform > Flip Horizontal
Resize the fish to make it appear further away.
Make this instance darker (change brightness) or more transparent (change alpha setting).
Insert Key Frame at f.50.
Move the fish off the stage.
Resize it to make it bigger.
Restore alpha setting to 100% and brightness setting to a lighter value.
Tween.
Now the fish will gradually become bigger and more bright as it swims across.
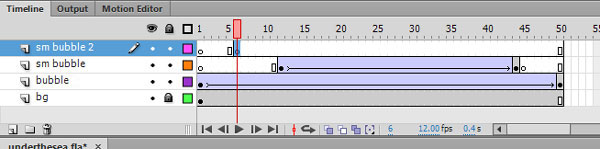
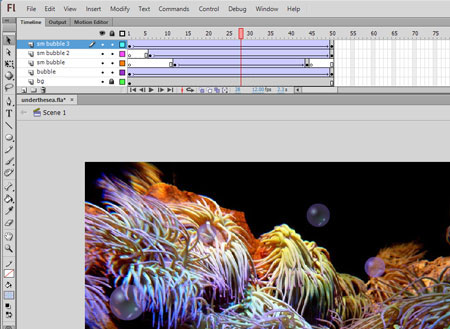
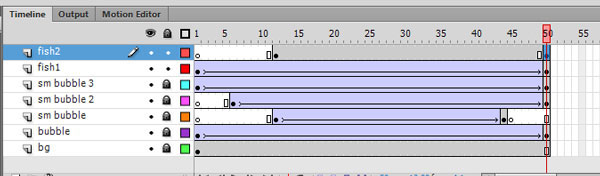
Manipulate the Timeline
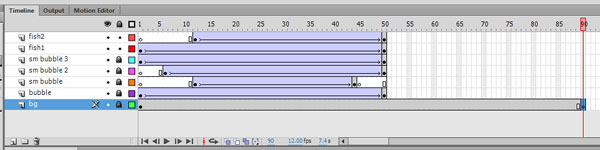
Extend the background layer by selecting frame 90 and hitting F5
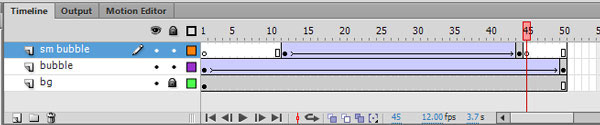
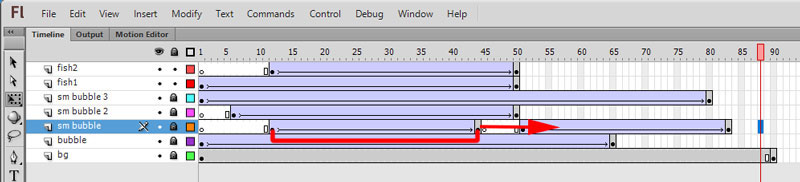
Click and drag the last keyframe of the first bubble to frame 65.
Select all frames in layer "small bubble".
Alt (Option) drag the frames to duplicate them. This way you will repeat the bubble animation in this layer.
(If it does not work - insert a Blank Key Frame right after the last keyframe. Then repeat the steps above.)
Then extend the animation for bubble 3 layer to f.80.
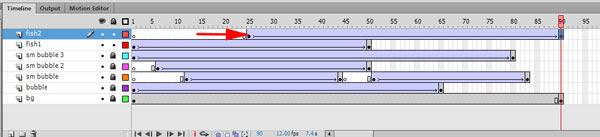
Move the first keyframe of fish 2 to f.25.
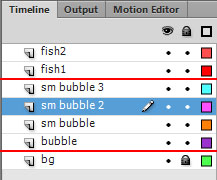
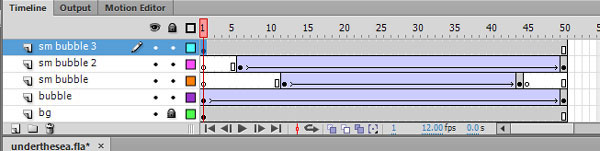
Look at the timeline below.
Duplicate another bubble animation.
If you end up with extra frames that extend past frame 90 - select them, right-click, Remove Frames.