starting

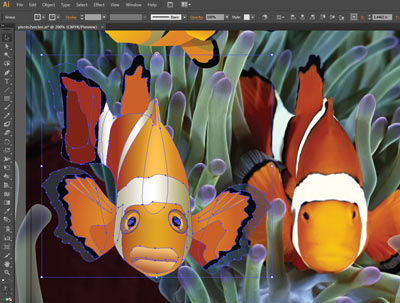
Once you found and saved a photograph - open it in Adobe Illustrator.
Set the artboard to fit the image you want to redraw.
Use Artboard tool.

You can use just a part of the photograph.
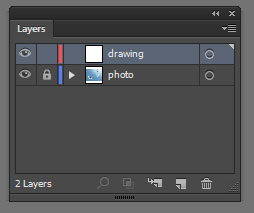
In Layers palette:
Lock the photo layer
Add a new layer to draw on
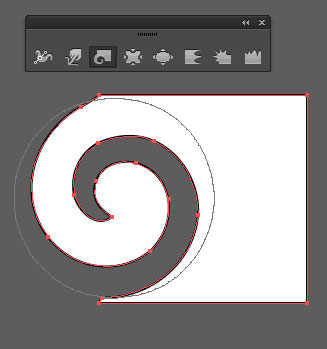
Analyze the shapes.
Have a plan before you start drawing.
What are the big shapes?
What are repeating elements?
Do you need multiple layers? Well, you probably do. This way it is easier to edit details.
color settings
Decide what type of color fill you are using for each shape. Most shapes will most likely have some type of Gradient fill. Smaller shapes van be solid color.
important:
If you are planning to use Gradient Mesh for a shape - you need to make sure you create a copy of the shape before you apply the mesh setting. Once a shape becomes a gradient mesh - it looses some shape editing options.
helpful tools:
There are few editing tools you might want to try to save some time.

Blob brush tool - use for free-hand drawing.
Creates enclosed shapes.
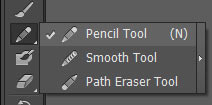
Pencil tool - use for free-hand drawing.
Creates paths (lines).

Warp tool - molds objects with the movement of the cursor.
Use to push shape in or out.
Twirl tool - creates swirling distortion within an object (and within the brush size cursor).
Pucker tool - deflates an object by moving control points towards the cursor.
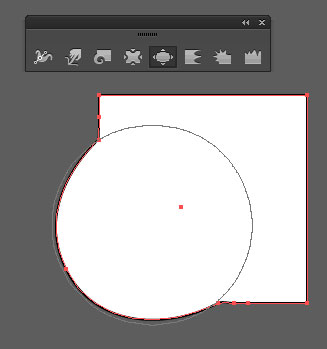
Bloat tool - inflates an object by moving control points away from the cursor.
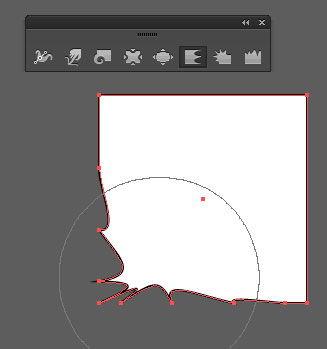
Scallop tool - adds random curved details to the outline of an object.

Crystallize tool - adds random spikes.
You can use it for "fur" effect.
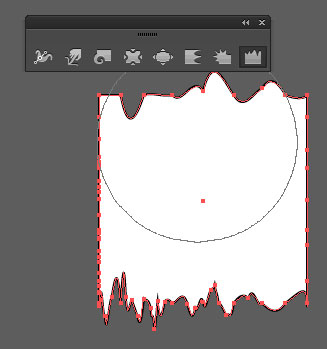
Wrinkle tool - adds wrinkle-like details to the outline of an object.
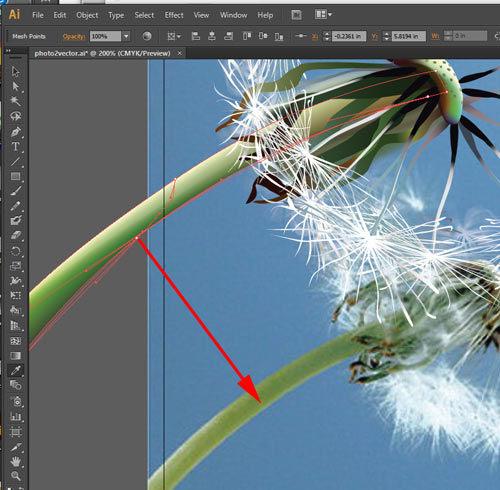

You can use the actual colors for gradient mesh points.
Once you created your drawing - move it aside to reference the original colors.
Eyedropper tool does not pick up gradients from bitmap images, but the color of a pixel. So you will need to create custom gradients yourself.
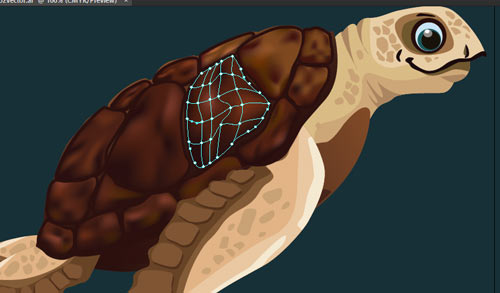
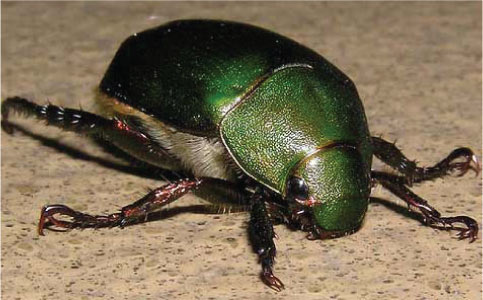
To speed up mesh coloring - select the entire mesh shape, them apply the dominant color.
In this case it is dark brown.
Then select a few points to apply darker or lighter values.

You can change the appearance of a shape by changing its opacity and blending mode.
Open Transparency palette to do so. Or you can do it directly from the menu bar.