You are going to create an old-style animation using still shots as frames
by JuliannaKunstler.com
GALLERY
STEPS
Start with sketches and a storyline. Remember that this is a part of the overall grade. Don't skip it!!!!
1. The first thing you do is develop a character (or two). Anything can be used as a character: a toy, Lego pieces, everyday objects, etc…. You can also make your very own character using Sculpey. Hey, that’s why it is called “claymation” to start with!!!
2. Once the character is done – think about the backdrop for your scene(s). You can use construction paper, you can paint it or you can use whatever you want in terms of materials to make it work for your idea. If you want – you can just use a table or a floor.
3. Storyline!!!!! There should be some plot in your claymation. Even if you just animating a bunch of paper clips – they should do something. Plan on what noises or narratives you want to add to your story. So…. Sketch a storyline! Turn it in! It is part of your overall grade!
4. Set it all up now. Place the lighting. Make sure you have enough time to make all the shots. You will need about 100 of them. How we calculate this? The frame rate that we are going to use in 12 frames per second. So… 100 frames will run for about 8 seconds.
5. Set up the camera on a tripod!!!! Using a tripod will make your animation smoother. Please bring your own camera. Digital, of course….
6. Now it’s time to take shots. Move your character a little before every shot. Have fun with it!
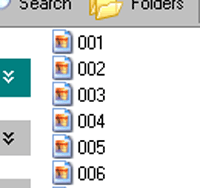
7. The next step is to save all the images in one folder.
Optional: rename the files in order: 001; 002….. etc.
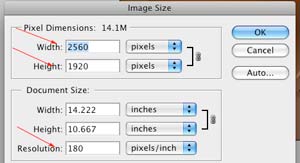
8. Open your first file in Photoshop. Go to Image > Image size
Look at the dimensions of the photograph. Most digital cameras create high resolution large images. We need to reduce the dimensions of the images and decrease the file size for the animation to run smoothly.
9. Do NOT close the image.
10. We are going to use one of the AUTOMATE options to change the image size of ALL images in the entire folder. We are going to record all steps that we want to apply to the images and then make Photoshop apply all these steps to the entire Claymation folder.
11. Open Actions palette.


12. Click "New Action" button
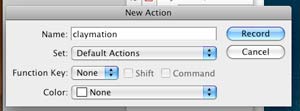
13. Give the Action set a name: claymation.
Click Record

14. The red button will indicate the start of recording.
Don't make any unnecessary steps now.

15. Change resolution to 72 (after all we are going to watch the animation on the monitor).
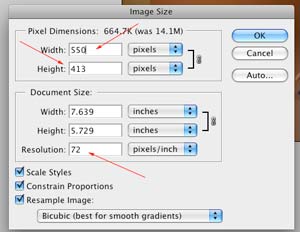
16. Make sure "Constrain Proportions" option is checked.
Then change the width to 550 pixels. The height will automatically adjust to appropriate value.
Remember both values or write them down.
17. File > Save for Web.
Save the optimized image in a new folder.
18. Close. Do NOT save the original file!!!
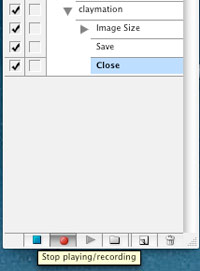
19. Stop ACTIONS RECORDING by clicking on the "square" button at the bottom of Actions palette.
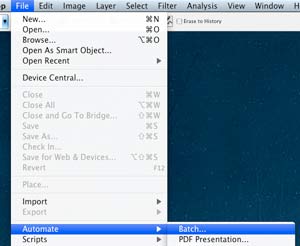
20. Now it's time to apply the recorded actions to the rest of the images in your folder.
File > Automate > Batch
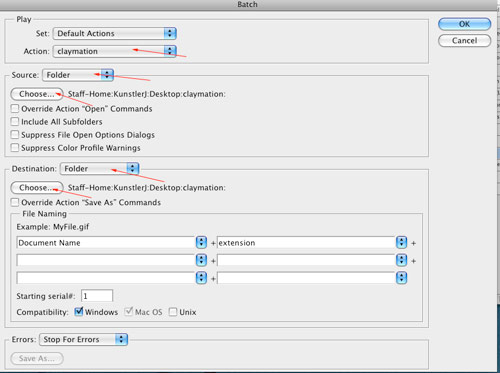
21. Select "claymation" action to play
22. Select your Claymation folder as a source
23.Select the new folder as a destination
24. OK
25. All you have to do now is wait and watch the Photoshop work.
26. Close Photoshop when the process is done.

27. Now it will take you only a few minutes to animate it. Open Flash.
Open a new File (Flash ActionScript 2). Save it as claymation.fla
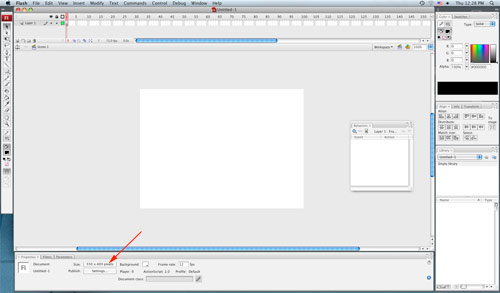
28. Set the "stage" dimensions to the size of your images (in my case it is 550x413)

29. Click on Size option in Property Inspector and change the values:
30. Now it is time to upload the images:
Go to File > Import > Import to Stage

31. Choose your folder where you saved all the photos. Click on the first image and wait. Flash will recognize the sequence of images and will ask you if you want to import all of the images in the sequence. Click "Yes".

32.Flash will automatically place your pictures onto separate frames in the order you specified. Take a look at the Timeline. Each cell is a frame. Inside each frame is an image.
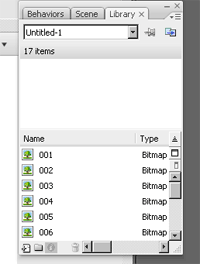
33. All images are STORED in the Library palette. Go to Window > Library (or CTRL L on PC; Apple L on Mac on the keyboard). See the images in the Library? Good. Library is the Storage Place for your movie content. Even if you delete an image from stage (the image window), you will be able to reinsert it just by dragging it from the Library. Library is where the original bitmap stored. What you see on stage is an instance (or a copy). You can delete a copy and it will not affect the bitmap in the Library. But if you delete an item from the Library, all copies will be gone too. So be careful!
34. Want to see the animation? That’s easy.
Make sure the playhead is on frame 1.
Press ENTER
Cool?

35. Now it’s time to add sounds. You can download sounds from the Internet. A good site to go is www.flashkit.com click on SoundFX. Preview sounds and download the ones you like onto your FlashDrive. Save them as .WAV or .MP3 files.
36. Those of you who want to record the sounds yourself – use Audacity program. Just click the RECORD button and speak to the microphone all you want. You can later cut out the fragments or even change the pitch of the voice to make it more “cartoonish”. Save the Selection or Save the entire soundtrack as .WAV or .MP3 file on your FlashDrive.

37. Before you add sounds to your animation You need to check the Publish Settings:
Go to File > Publish Settings
38. In the window keep only Flash (.swf) type checked. Uncheck everything else.
39. What you just did – you made Flash automatically create an additional file for your animation. This file will have the same name as your original file, it will be in the same folder as your original file, but it will have a different extension: .SWF
SWF files are movie files that would play in a Flash Player and do not require the actual Flash software. You cannot edit SWF files. That’s why we are keeping our original .FLA file. To Publish the SWF file – just click PUBLISH button. Done.
40. Every time you make changes to your original file you need to update the SWF file to reflect these changes. You can do it two ways:
Go to File > Publish. (It will automatically update the file) or…
Go to Control > Preview Movie (It will open a new window with an updated SWF file for you to preview. That means every time you preview your movie – it updates the SWF file).
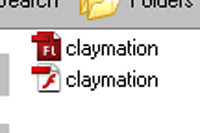
41. Time to add the sound. Make sure your Library palette is open.
42. Go to File > Import > Import to Library
Choose your sound files.
Import
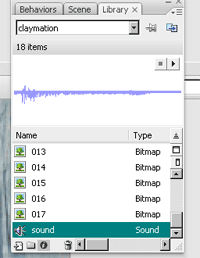
43. Look at the Library palette. You should see your sound files there. File>Save (just in case…)

44. Adding sounds.
If you look at the Timeline – you’ll see that is also has layers. We need to add a layer to put the sounds on. Click on “Add Layer” button and name it “sounds”.
45. Now go frame by frame to find the exact time to place the sound. Once you found it press F7 on your keyboard. It will insert a blank keyframe.
Frames can be keyframes and just frames. Keyframes are frames where changes occur. All our images are in keyframes in our Timeline. You can tell it’s a keframe because it has a small circle. If the circle is white – the keyframe is empty. If it’s black – there is something on this layer at this particular frame.

46. Click to select the blank keyframe you just created (on “sounds” layer).
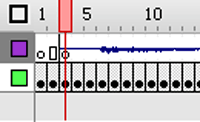
47. From the Library drag the sound file right onto stage (image). Once you release the mouse you should see the sound is added to your timeline
48. To check it out (and to update the SWF file you need what? Right. Control > Test Movie. Close it when you’re done).
If the sound is too long and you want to stop it at a particular frame or at the end frame - click on this particular frame and insert a BLANK KEY FRAME (F7) - then add an ActionScript to this frame:
From Actions panel: Global Functions > Timeline Control > StopAllSounds (double-click)
49. Add more sounds where needed. You can use the same layer or, if sounds overlap, add more sound layers.
50. Test Movie when done.
51. Did you notice that movie goes on and on? Lets make it stop at the last frame
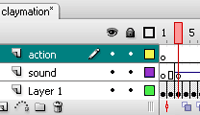
52. Create another layer on the top of all other layers. Name it “Action”
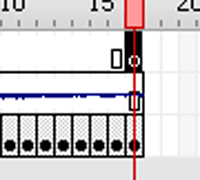
53. Insert a blank keyframe at the very end (press F7)
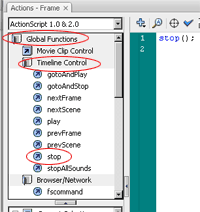
54. Click on the frame to select it.
55. Go Window > Actions
56. In Actions palette:
Click Global Functions, then on TimelineControl
Double-click “Stop”
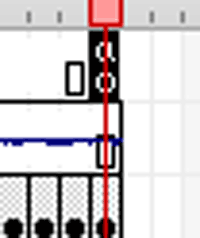
57. You just inserted your very first ActionScript.
Congratulations! You are done!
58. Control > Test Movie
