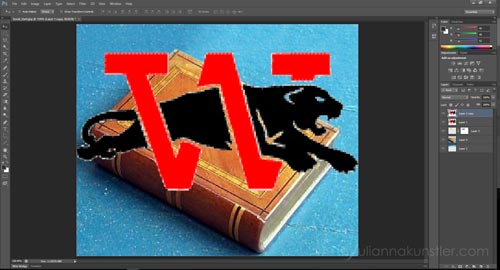
Distorting objects.
You are going to use distort filters to
- bend a logo to match the curved surface of the book binding
- distort the logo in perspective and place it onto the book cover
- distort text

by JuliannaKunstler.com
You are going to use distort filters to

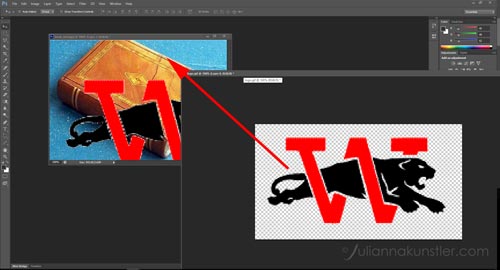
Download both files and open them in Photoshop.
Place the image windows side to side.
We are going to:
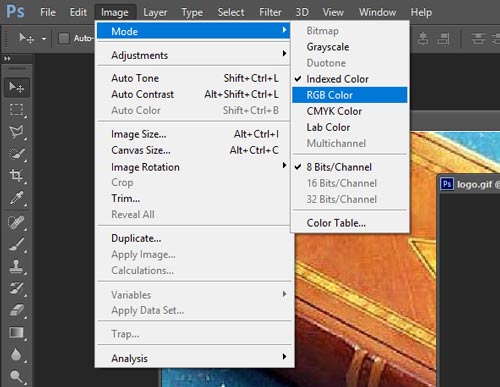
To drag one image onto another, you need to ensure they both are in the same color mode.
To check color modes: Image > Mode
Both images need to be in RGB mode.
Make sure you change that setting for the logo file.
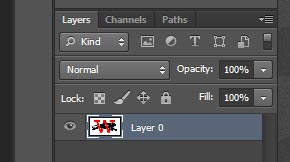
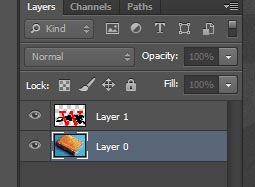
Convert Logo's background layer into a regular layer.
Double-click on it in the Layers palette.
We need that change for the layer's transparency.
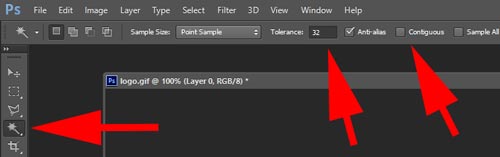
To remove a solid white color background you are going to use a Magic Wand tool.
Set Tolerance option to 32.
Uncheck Contiguous option to select all white pixels.
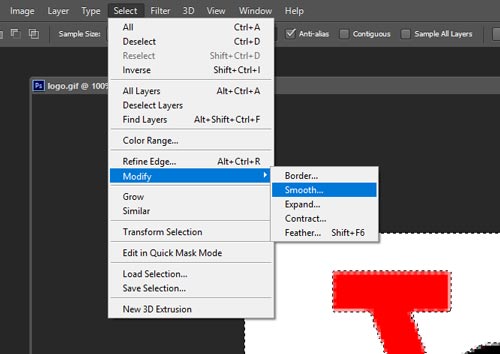
Click on any white area to select it.
As the image is not the best quality, the selection is not very smooth. You can smooth the selection edge by going to the menu:
Select > Modify > Smooth

Radius of 1 or 2 pixels should be enough
Press DELETE or File > Clear to remove the background.
Use Move Tool and drag the logo onto the book file.
Convert Book's background layer into a regular layer (double-click)

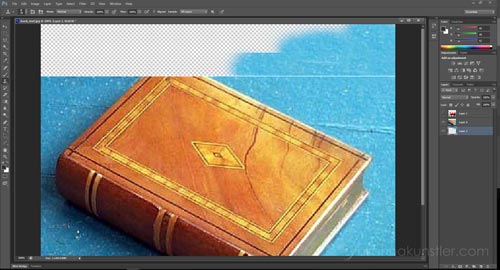
Add more space at the top of the image:
Image > Canvas Size
Increase height by 1 inch.
Anchor image to the bottom of the image window. This setting will add 1 inch to the top.
Hide Logo Layer.

Your image should look like this now.
Next steps are:
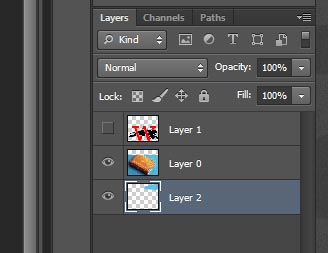
Create a New Layer.
Drag it under the book layer.
Keep this new Layer active.
Select Clone Tool.
You are going to clone the blue background onto the new blank layer.

Uncheck Aligned option - this will allow you to clone pixels from your chosen area without re-sampling it.
Choose All Layers option - this will enable you to stay in the New Layer and sample from the book layer.
Make sure you stay in the new layer.
Continue cloning the background.

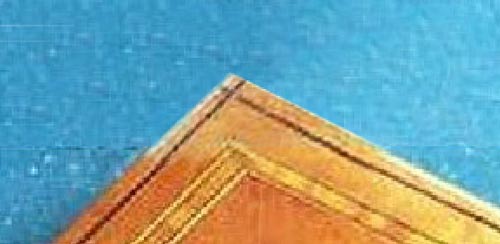
One final touch:
You can see a light line at the top of book layer.
You need to remove it.
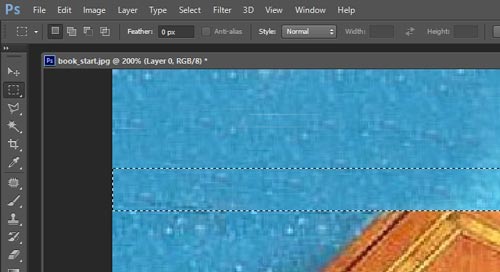
First thing - go to book layer.
Second - use Marquee tool and select a rectangle that will include the light line.
Hit DELETE.
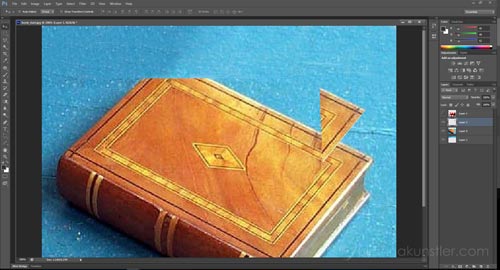
Let's copy one of the existing corners!
Use Polygon Lasso Tool and select a corner. Make sure you are still in the book layer.
Edit > Copy
Edit > Paste
Pasting will create a new layer with the copied selection.
Your corner is in a new layer now.
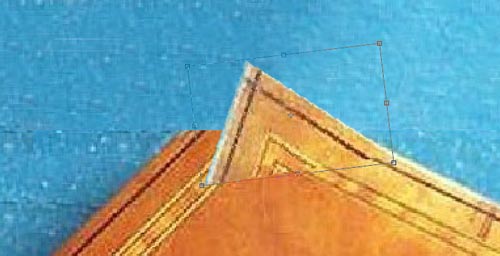
Move the corner to the top of the book.
Align one side to the book edge.
Edit > Transform > Distort
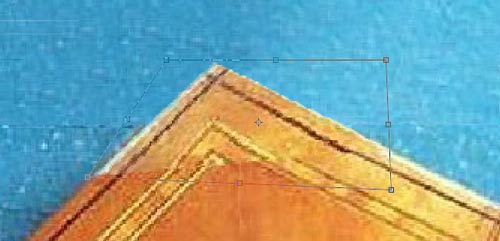
Distort the corner to fit with the rest of the book.
Use Layer Mask to soften the transition for the corner.
Use Burn and Dodge Tools to darken or lighten the corner for better color match.
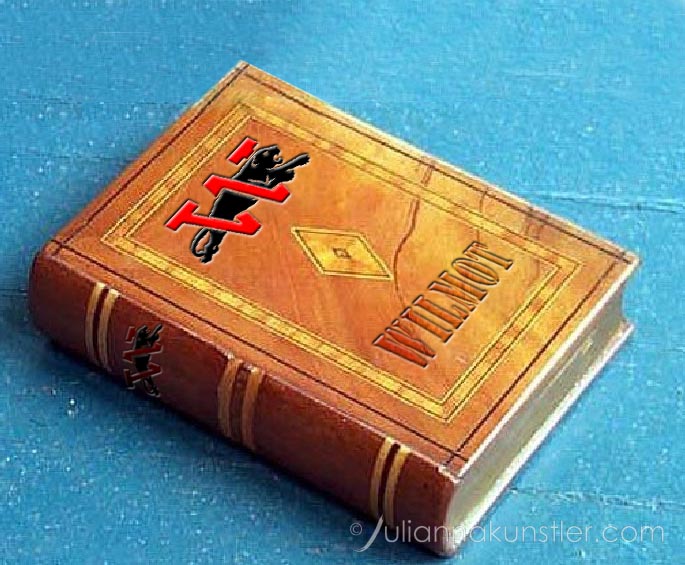
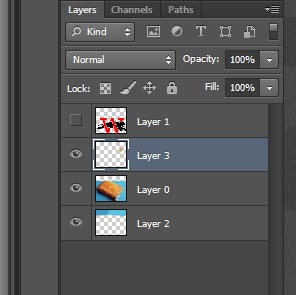
Make Logo layer visible.
Duplicate the logo layer.
One logo will be placed on the cover, another one - onto book binding.
Hide one of the layers for later.
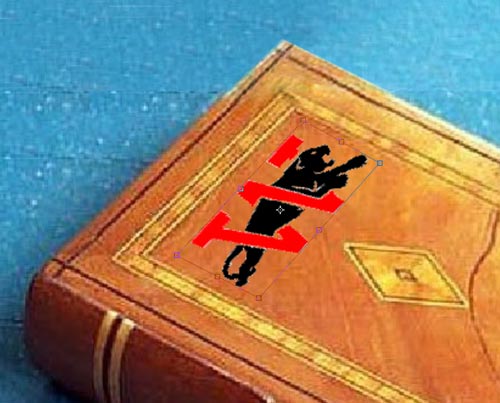
Edit > Free transform
Resize, reposition and rotate the logo.
Edit > Transform > Distort
Shape the bounding box to match the book border.
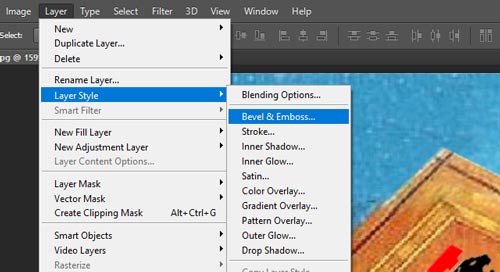
To add emboss effect:
Layer > Layer Style > Bevel & Emboss
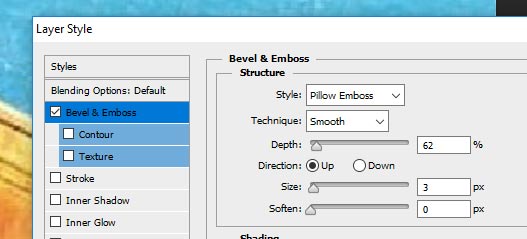
Choose Pillow Emboss style

Select the second Logo layer.
Free Transform it to resize, rotate, and move.
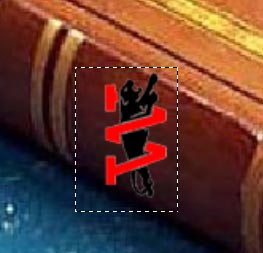
Use Marquee Tool to draw a selection around the logo.
Make sure you have extra space at the right to have room for the logo to curve.
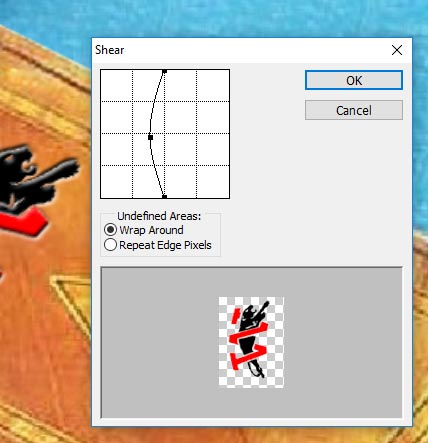
Filter > Distort > Shear

Change Layer blending mode to Multiply

This will blend the side logo nicely into the book texture.
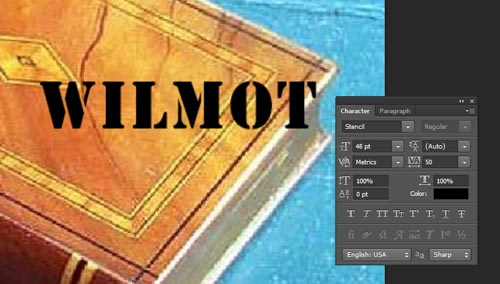
Use Type tool for the title.
Open Character palette (Window > Character) to select a font and font size.
Keep the font color Black.

Change the blending mode to Overlay.
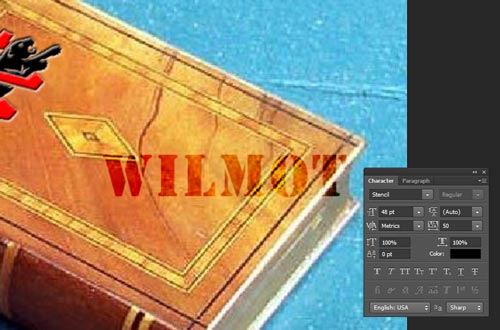
Overlay mode will pick up the texture from the layer below it.
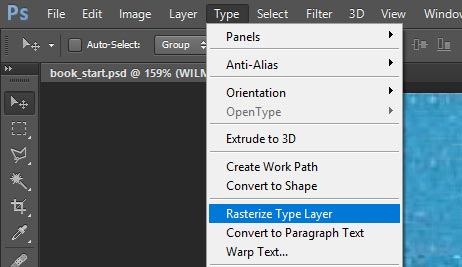
To reshape the text, we need to convert type into pixels.
Type > Rasterize Type Layer
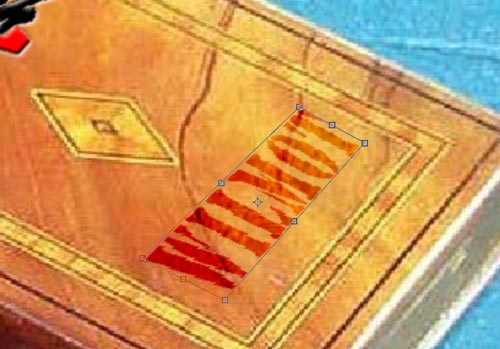
Now you can reshape the text.
Edit > Transform > Distort
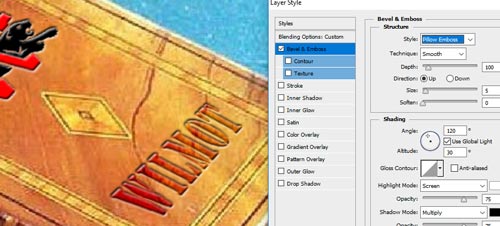
Let's add Pillow Emboss as a final touch.
Layer > Layer Style > Bevel & Emboss
Done!