julianna kunstler logo
Adobe After Effects

basics
Instagram icon

by JuliannaKunstler.com

Introduction to Adobe After Effects. Lesson plan for beginners. Computer Graphics assignment.
Adobe After Effects

There is so much you can do with After Effects!
We will start with basics.
So what is it that AE can do?
AE is an animation software. It is not a traditional hand drawn frame-by-frame software (Like Adobe Animate) - but it's great for:

  • key-frame animation - bringing in parts and animating them separately, like puppet animation;
  • great for motion media (non-character animation) - credits, commercials, kinetic typography;
  • compositing - group (team) work on a project - one animator works on a main character, another - on backgrounds, another - on secondary characters, etc. A compositor will take all these pieces and put them together into a movie. AE is great for layering these animations, correcting colors, adding effects;
  • you can add special effects not only to a 2-D animation, but to a 3D or a video (fire, snow, dust, etc);
  • animatics - when you take your storyboard and do a slideshow. The camera ability will allow you to go through scenes, change panes, etc.

AE has limitations. It relies on other applications to create graphics and sounds. It is not a “drawing” software. You can still create some basic graphics though (simple geometric shapes, but you cannot draw a character).

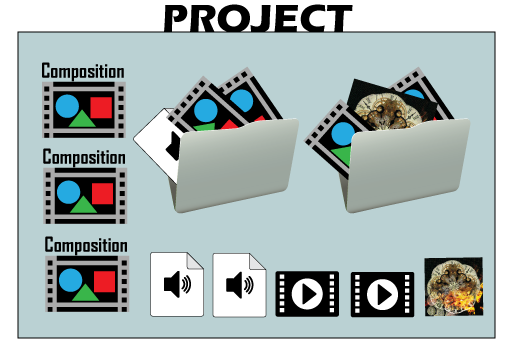
project structure

adobe after effects project structure

Your After Effects project file (.aep) is a composite file that holds all video and animation footage (compositions), audio files, still images (photos and graphics), external videos, etc.).

Project file can contain numerous items - all necessary files and links, that are used in this particular project.

Think of a project file as a book.

A composition - is a chapter in this book.

Each additional linked file - is a reference.

interface

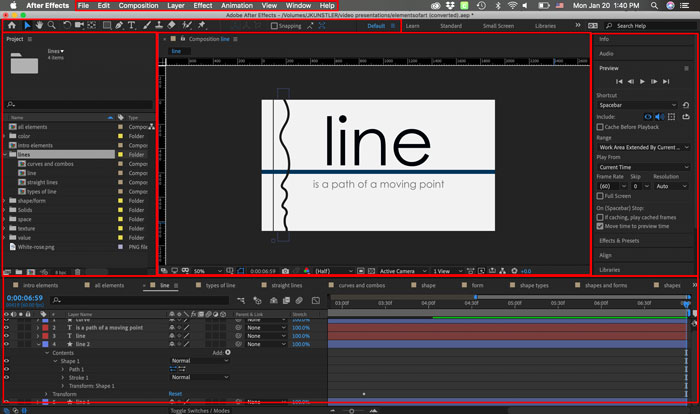
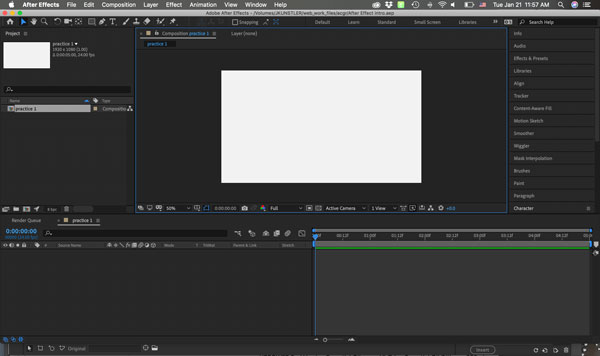
The main window of a program is the application window.

Panels are organized in this window in an arrangement called a workspace.

intro to Adove AfterEffects

You can drag panels to new locations, move panels into or out of a group, place panels alongside each other, and undock a panel so that it floats in a new window above the application window. As you rearrange panels, the other panels resize automatically to fit the window.

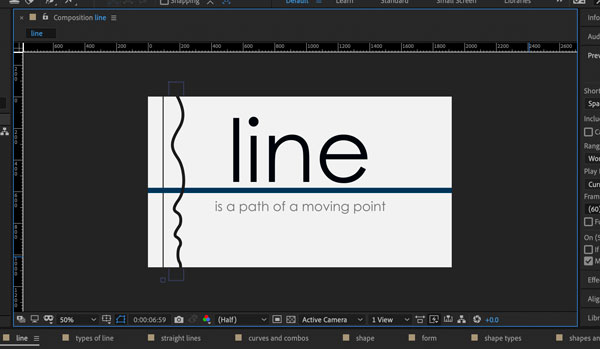
Composition window

intro to Adove AfterEffects

This is your work area. You see the current composition.

Timeline

intro to Adove AfterEffects

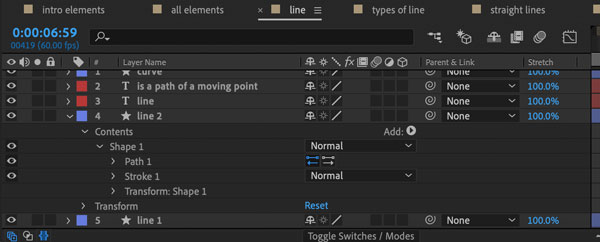
Most of the actual work will be done in your Timeline panel.

intro to Adove AfterEffects

This is where the Layers are.

This is where you will work with graphic elements properties: color, size, placement, opacity, etc.

intro to Adove AfterEffects

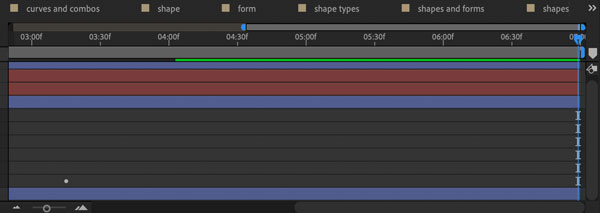
This is where you will create keyframes and animate your graphics, add effects, etc.

Project panel

intro to Adove AfterEffects

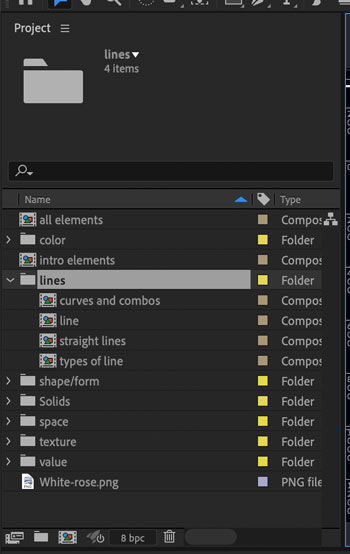
This is where you will be able to see all the files that you have imported in After Effects for this project, all compositions that you have created, images, sounds, etc.

Panels

intro to Adove AfterEffects

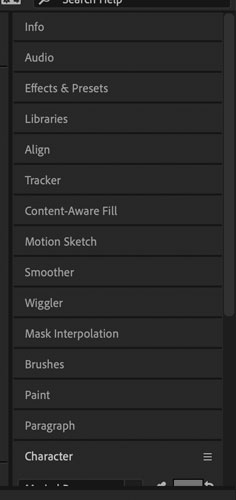
This panel holds sets to panels.

You can control the panel set through the Window menu in the Menu bar.

Tool Bar

intro to Adove AfterEffects

Tool bar houses all tools that you will use to work on your project.

home button

Home button

Return to home screen

selection tool

Selection Tool

Select, edit, and move graphics and text using its bounding box.

hand tool

Hand Tool

Navigate in the Composition Window.

zoom tool

Zoom Tool

Zoom in on your object in the Composition Window.

rotation tool

Rotation Tool

Rotates selected object.

Unified Camera Tool

Allows you to set up the position of your camera.

pan behind tool

Pan Behind (Anchor Point) Tool

Moves the anchor point of the selected object.

rectangle tool

Rectangle Tool (+ more shapes)

Creates a rectangle-shaped object.

pen tool

Pen Tool (+more)

Draw a path

type tool

Type Tool (+ more)

Add text

brush tool

Brush Tool

Paint a path

clone tool

Clone Stamp Tool

Duplicate an item within the layer

eraser tool

Eraser Tool

Erase a part of your composition or of a layer

roto brush tool

Roto Brush Tool

Define the foreground and background of your layer.

puppet pin tool

Puppet Pin Tool

Add pins to a layer for animation.

Let's try!

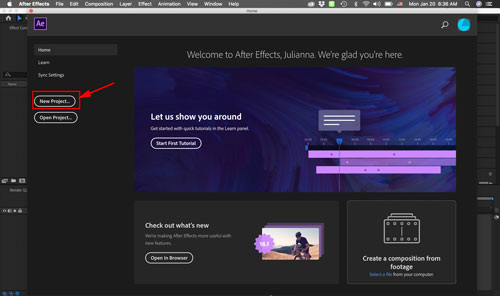
The Home screen assists you to get started quickly with After Effects. You can use the following options on the left hand side:

  • Home: Click this tab to open the Home screen.
  • New Project: Creates a project in After Effects.
  • Open Project: Opens an existing project.
  • New Team Project: Creates a Team Project.
  • Open Team Project: Opens an exiting Team Project.
intro to Adove AfterEffects

Create a New Project.

intro to Adove AfterEffects

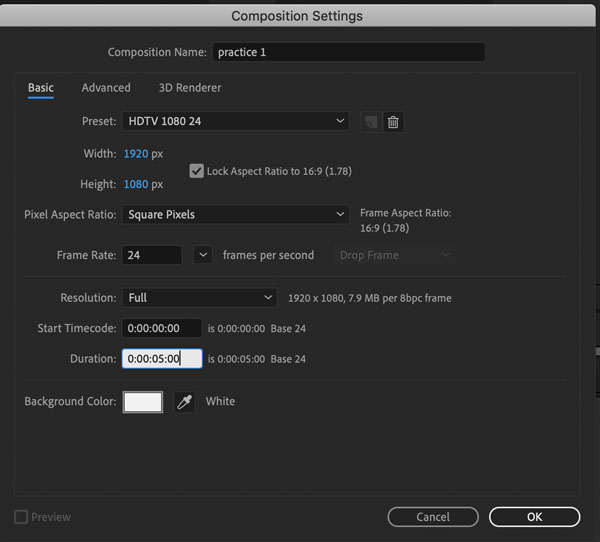
Create a new composition.

This is like creating a chapter in a book.

intro to Adove AfterEffects

In the New Composition Window:

Composition name: give your "chapter" a name

Preset: Choose a format that you intend to use your video in.

Width & Height: set the dimensions of your video. Use 1920x1080 if you intend it for YouTube videos (16:9 ratio)

Frame Rate: how many frames your video will play in one second

Duration: the length of your video. (This can be adjusted if you need to extend your video later). Duration is calculated based on your Frame Rate. Foe example: Five-and-a-half seconds = duration 0:00:05:12 (because 12 is a half of a 24 fps rate).
Background color: color of your working space.
intro to Adove AfterEffects

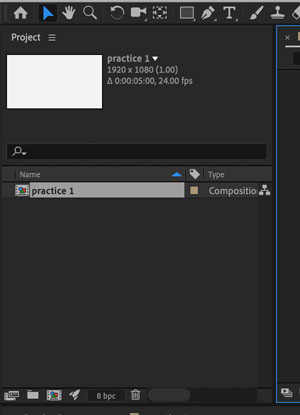
Your Project Panel will show your first asset: the first composition that you just created.

It also shows you the type of the asset - "Composition".

In the Preview part of the panel you will see the selected file.

Layers

intro to Adove AfterEffects

Layers are a bit more complex in After Effect comparing to other Adobe applications.

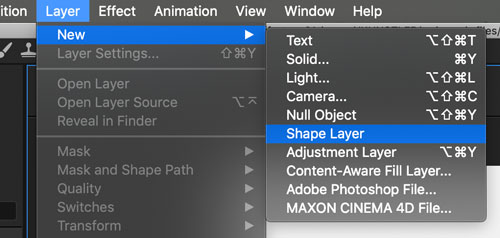
To insert a shape (or more complex graphic object) - use Shape Layer.

intro to Adove AfterEffects

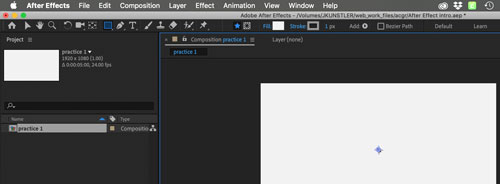
Once a new Shape Layer created - you will see:

  • Shape Tool is selected
  • Fill and Stroke options are available in the Options Bar
  • An Anchor Point appears on the layer
intro to Adove AfterEffects

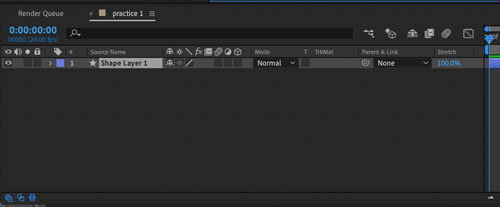
You will see a new layer in the Layers part of your Timeline panel.

Note:

A new Shape Layer will be automatically added to your Layers when you select a Shape tool and start drawing.

intro to Adove AfterEffects

Once you add a shape, you will be able to modify it in the Options Bar.

intro to Adove AfterEffects

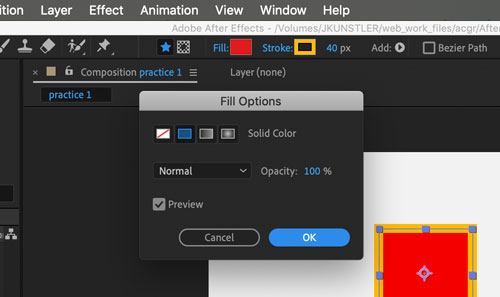
You can change the type of fill and stroke and its opacity by clicking on Fill or Stroke links.

intro to Adove AfterEffects

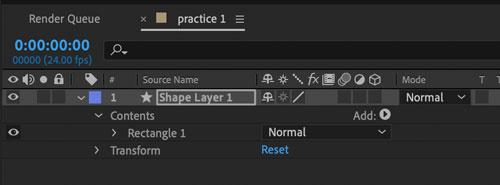
Once you have a shape created, you will be able to modify it and animate it in the Timeline Panel.

Your Shape layer will now have options available to do so.

Note:

To rename a layer - right-click on it and choose "Rename"

Anchor point

anchor point

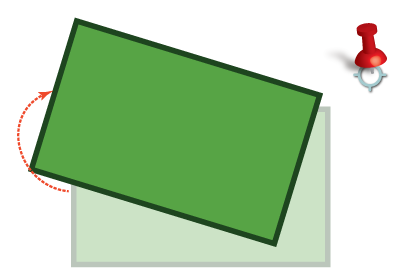
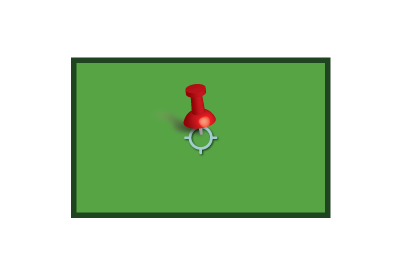
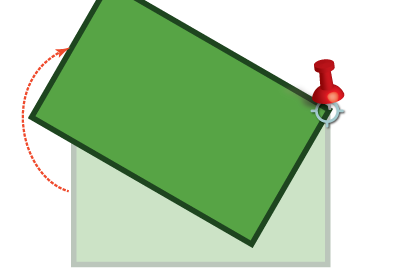
Anchor point in After Effects is the point in which all transformations are manipulated from.

anchor point

anchor point

anchor point
pan behind or anchor point tool

By default, object's anchor point is positioned in the center of the layer.

But you can place it anywhere in your composition by using Pan-behind Tool (shortcut: Y).

If you need move the anchor point in straight lines:

  • hold SHIFT

If you want the anchor point to snap to a corner of the object:

  • Hold Ctrl or Command

If you need to center the anchor point in the object:

  • Hold Ctrl or Command

Timeline

intro to Adove AfterEffects

Timeline Panel holds the layers and timeline for animation.

Each layer has options to modify the object and its properties:

  • Contents (how the object looks: shapes it's made of, colors, fill and stroke properties, other options for each shape (path) of the object)
  • Transform (object animation)

intro to Adove AfterEffects

The timeline part shows frames of your footage.

01:00f = 1 second

01:12f = 1.5 seconds (for 24 fps rate)

...