- Type layer attributes
- Typewriter effect
- Text path
- Animate attribute

typography
After Effects
by JuliannaKunstler.com
STEPS

New composition:
600x338
29.97 fps
4 sec. long.
There are two ways to add a text to your animation.
Select the Type tool.
Click on the screen and start typing. This is a "one line text" approach. Not like you cannot hit Enter and add more lines to the text, but it is more commonly used for one-liners.
If you continue typing, the text line will go forever.
If you choose to resize this text - the font size will be scaled as well.
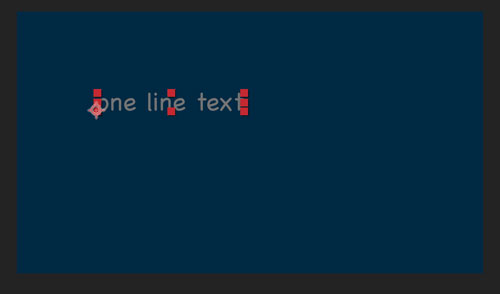
As you click on the screen - the text anchor point is placed there.
Text baseline starts at the Anchor point.

If you change paragraph alignment to Center or Right - the anchor point will stay in place, but the text will shift.

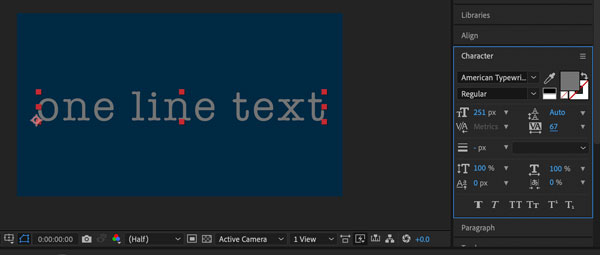
In Character palette:
Change Typeface, Font style, color, size, spacing, kerning, and tracking.
Other options are available as well.

Type layer has standard Transform menu.
It also has specifically Type options.
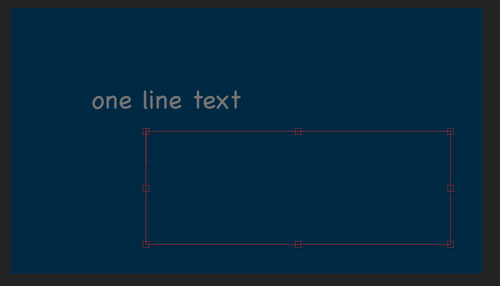
The second text entering approach - is creating a text area.
You create a text area by clicking and dragging with Type tool. This will define the bounding box - text container.
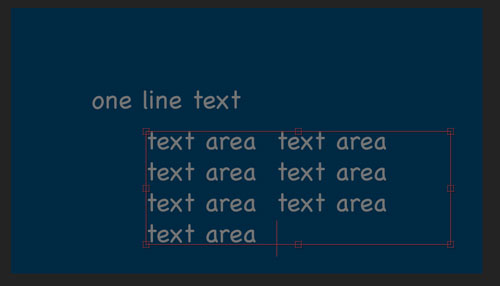
The text you type will appear inside the box. It will automatically shift to the next line as it reaches the box edge.
You can resize the bounding box without affecting the font scaling.

Both text layers look the same.
They reflect the actual text as the layer name.
Hide the Text Area layer.
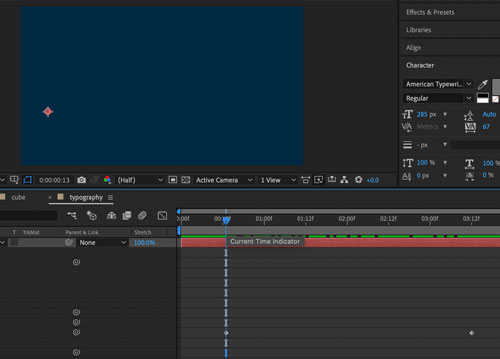
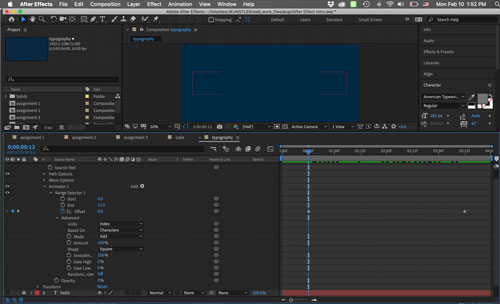
Typewriter effect
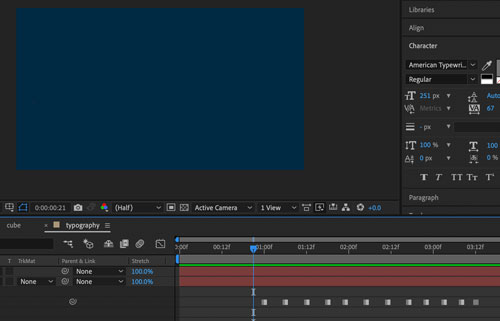
Select the One Line Text layer.
Increase the font size to fit the screen.
You are going to create a typewriter animation effect.
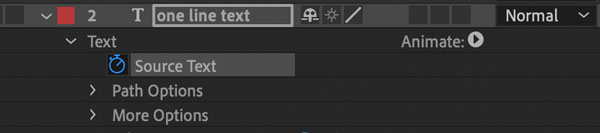
Open Text menu
Source text option allows you to change the actual text that was typed.

Move Time Indicator to 3 and a half second mark.
Place a key-frame for Source Text (click on stopwatch).
You will see that the key frame looks different from what you used to. Instead of a diamond shape, it is a square. That is because this is not technically a key-frame. It's a "hold key".
Hold key does not support animation between the two of them. Hold keys just hold the information.

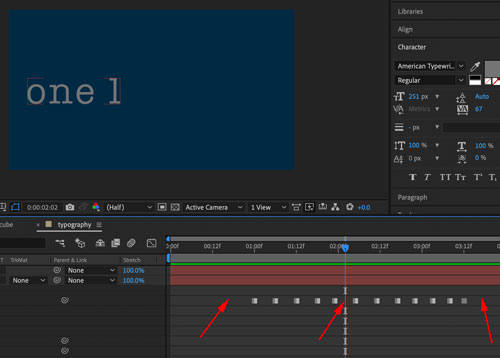
Move the Time indicator a few frames to the left.
Delete the last letter.

A new hold key will appear in the timeline.
Continue deleting a letter every few frames.
Your last hold key will not have any letters.
Play the animation now.
Next step is to remove all hold keys.
It is important where you position the Time Indicator before you remove hold keys (or key-frames for that matter).
If you place it past you last key on the right - you will end up with the full text
If you place it somewhere in your animation - you will end up with partial text
If you place it before the fist key - you will have a blank text layer.

So place the time indicator past your right frame.
Click on Stopwatch icon.
All hold keys are gone now. We are ready for the next step.
Moving on path text

Select your text.
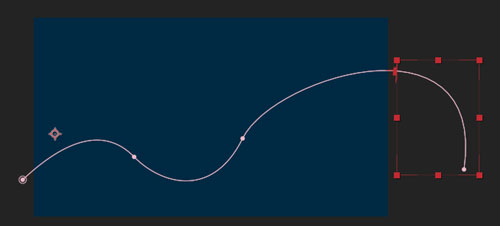
Then use Pen tool and draw a wavy path for the text to follow.
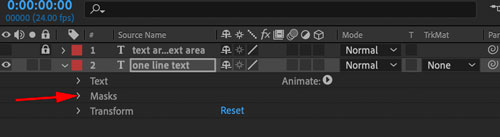
A Mask attribute got added to the layer.
If you open Masks menu - you will see Mask 1 - the path you just drew.

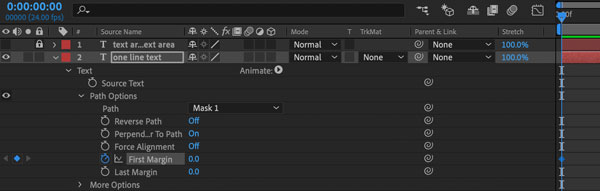
Text options:
Open Path Options.
Select Mask 1 as you text path.
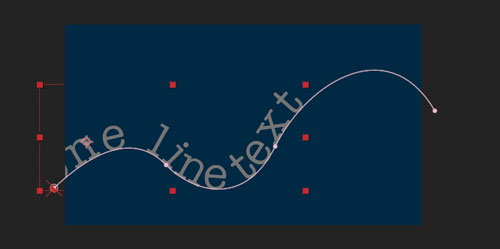
Text Anchor point will snap to the path (to the first path point that you placed).
The baseline is now your path.
Change font size to a smaller value.
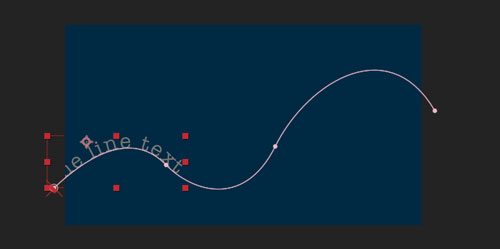
Now let's animate!
Place timeline indicator to the start of the video.
In Path Options:
Place key-frame (real key-frame!!!) for First Margin attribute.
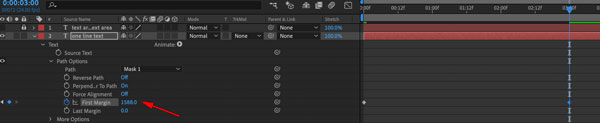
Move time indicator to 3 and a half sec. position.
Increase the First Margin value until the text reaches its far right position.
You now see another key-frame added.

Preview the video.
The text should move along the path.
 As the text rises up the path, I think it needs to slow down a little.
Place the time indicator at that mark.
Add key-frame.
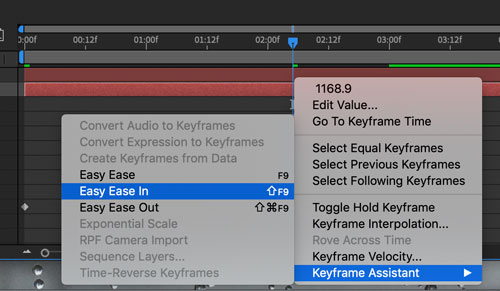
Next step is to convert this key-frame into a "slow down" mark.
Right-click on it.
Keyframe Assistant > Easy Ease IN.

Keyframe changed to Ease-In-frame.
You can change the path, text, text attributes if you need to.
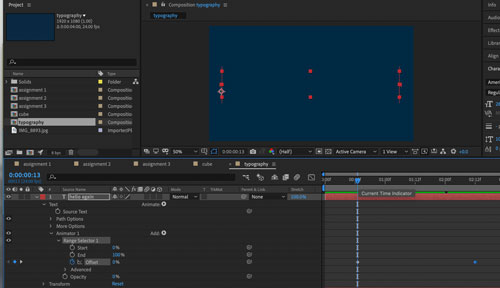
Growing letters
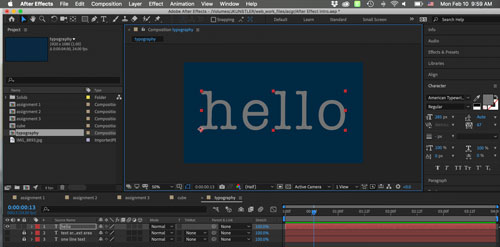
Hide all layers and start a new Type layer by typing "hello".
Increase the font size.
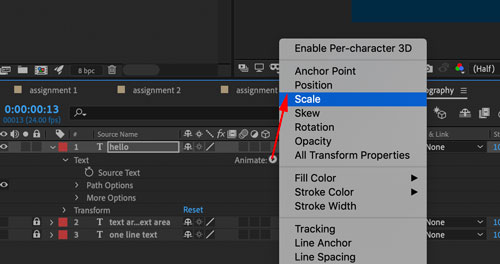
We are going to use Animation property to make each letter "grow" one by one.
In "hello" layer open text properties.
Click on a menu button next to Animate.
Choose "Scale".
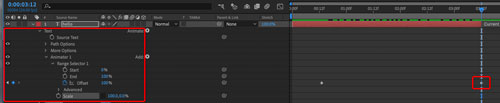
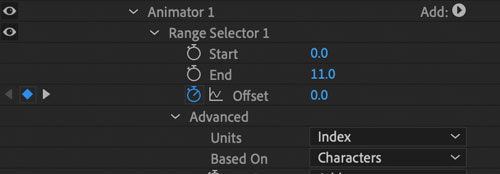
In Text properties open Animator 1 menu.
Open Range Selector 1 menu.
Start animation at 10-15 f. by clicking on the stopwatch next to Offset option.
Them move the timeline indicator to 3 10-15f.
Place a keyframe.

At 3 15 frame:
Offset value is set to 100%
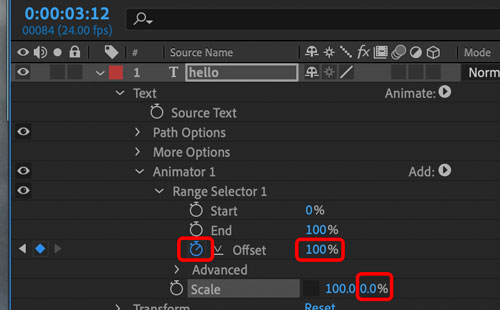
While you're there:
Change the Y value for Scale to 0%
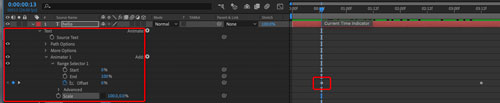
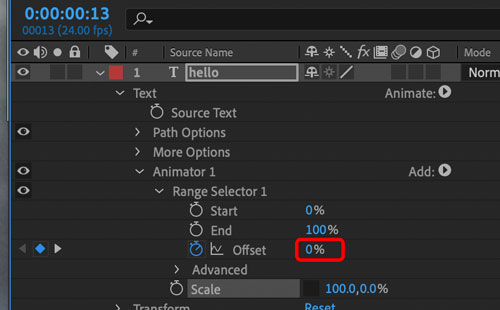
Return to the beginning of the animation and set the Offset value to 0%.
Now play the animation and see the letters grow!
Fading letters
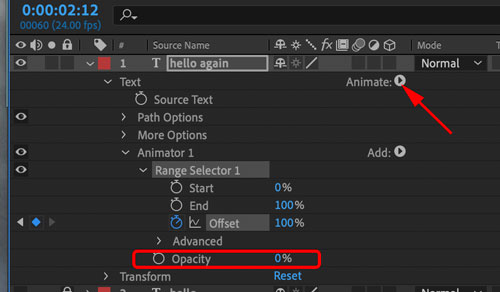
Hide all layers and create a new layer by typing:
hello again
Add Animate property - Opacity.
Set opacity value to 0%
Start animation at 15f.
Place a keyframe with Offset value 0%
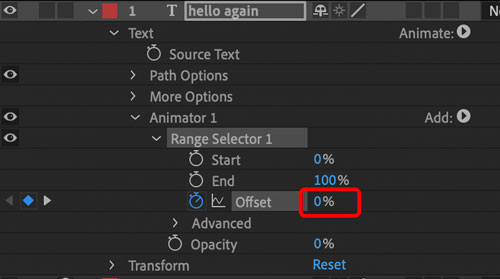
End animation at 3 15f
Insert a keyframe.
Set Offset value to 100%
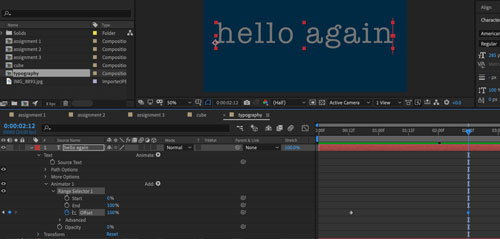
Play the animation
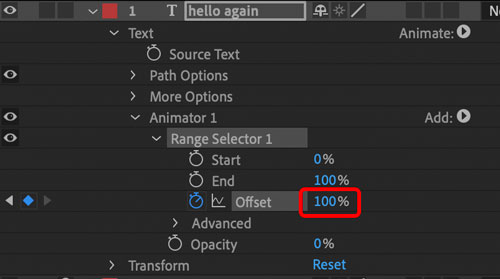
Typing with offset
Duplicate the last layer "hello again" by Copying and Pasting it in the Layers panel.
Instead of a gradual fading in the previous step, this will be a more defined fading by each letter.

Keep Opacity at 0%.
Remove Offset keyframes by clicking on the stopwatch.
Keep Offset value at 100%
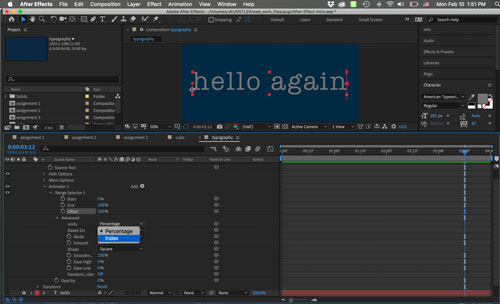
Then open Advanced options for Animator 1
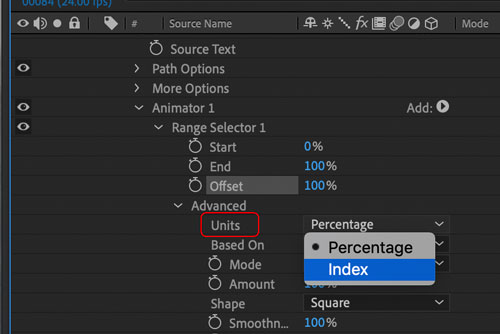
Change units to Index.

At the end of the animation at 3 15f:
Insert a keyframe with Offset value 11
This number is based on the number of characters in the text (letters and spaces).
Move timeline indicator to the beginning of the animation, frame 15
Insert a keyframe
Set value to 0.
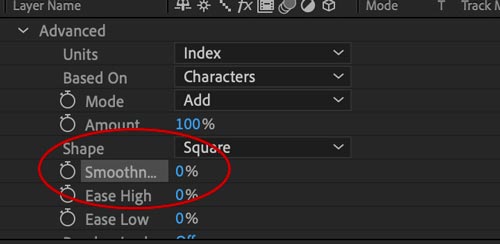
Set Smoothness setting to 0.
Done!
Play the movie!
...