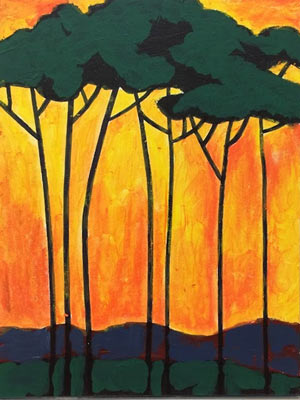
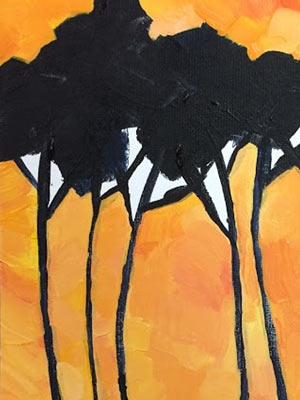
advanced method
step 1
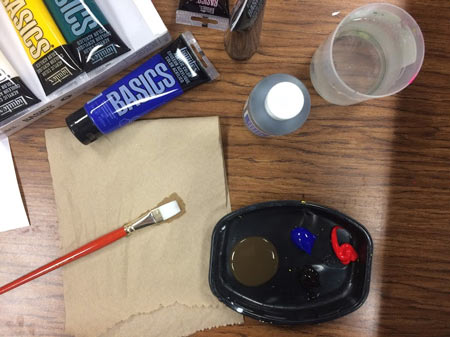
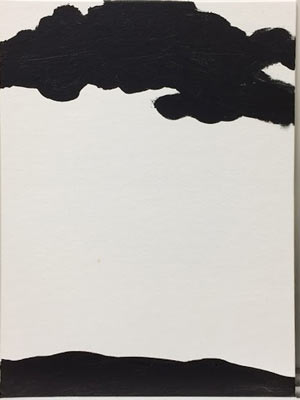
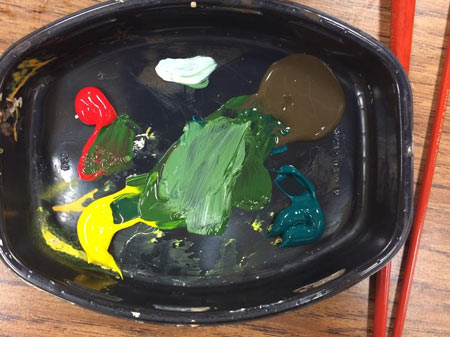
Set up your work area.
You will need: canvas board, acrylic paint, water, big brushes, paper towel, craft sticks (for paint mixing), and mixing tray.
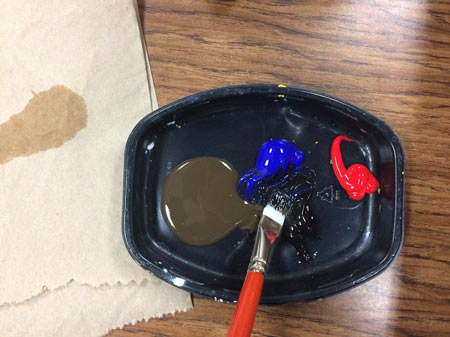
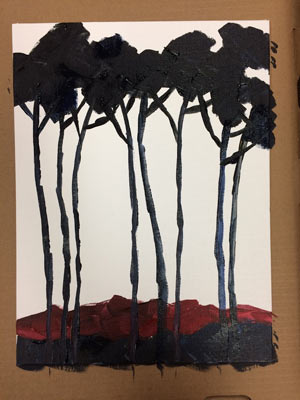
Premix a dark shade of acrylic paint.
I used very dark purple.
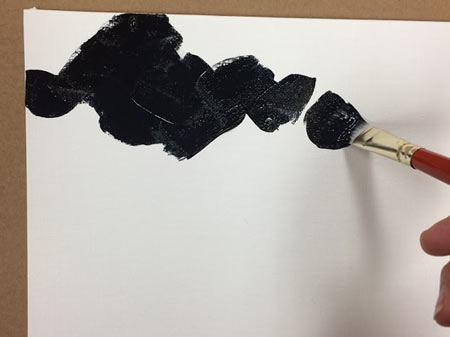
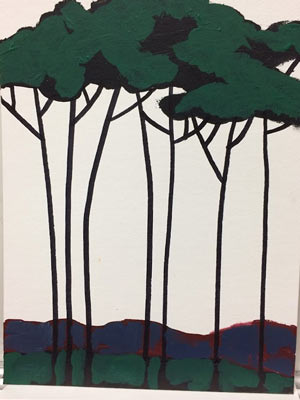
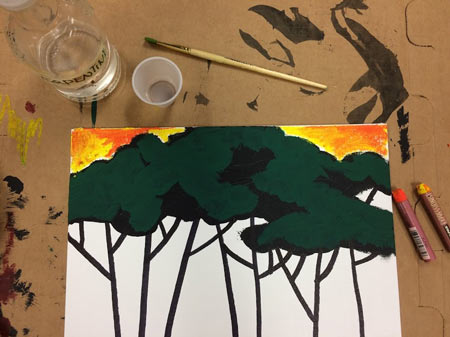
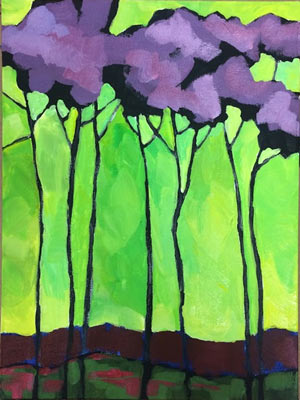
Apply a free-form shape at the top of the canvas. This will be the trees crowns.
Use loose wide brush strokes.

Keep it within the top 1/4 of the composition.
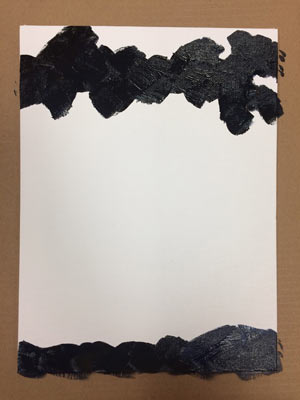
Use the same paint to draw the shape at the bottom of the canvas. This will be the ground.
Keep it thin enough.
Let these two shapes dry.
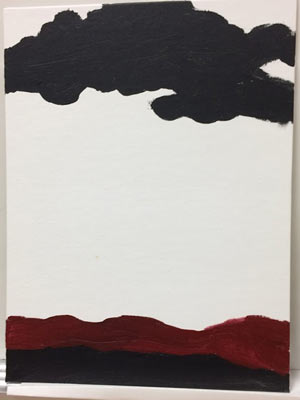
step 2
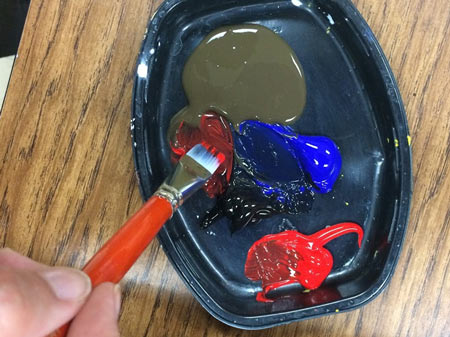
Premix dark-red paint.
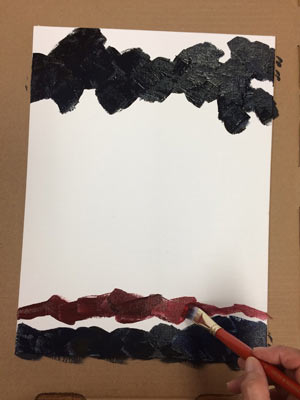
Paint a free-form stripe for background trees.

Let it dry.
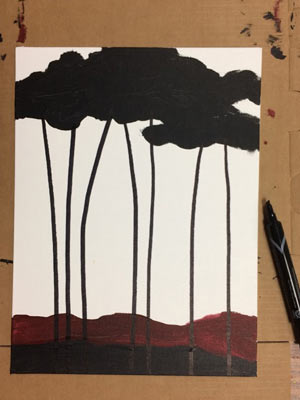
step 3
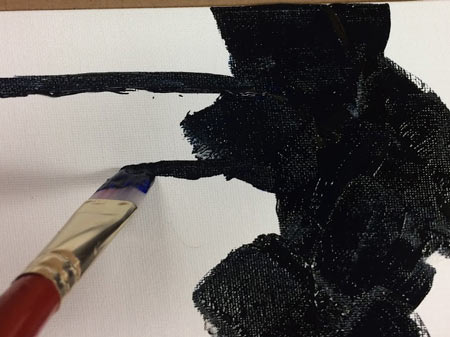
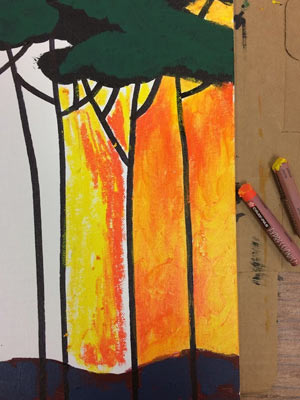
Paint 5-9 thick lines from trees crowns to the bottom of your canvas.
Hold flat brush sideways.
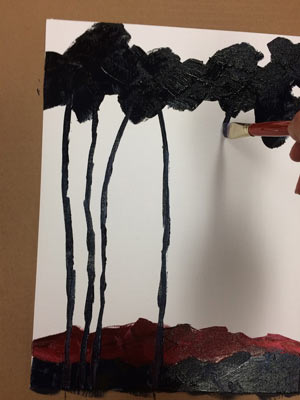
Use same paint that you used for tree crowns and ground.
Group some of the trees.
Have the lines bend a little.
Add a few branches.
Let it dry.
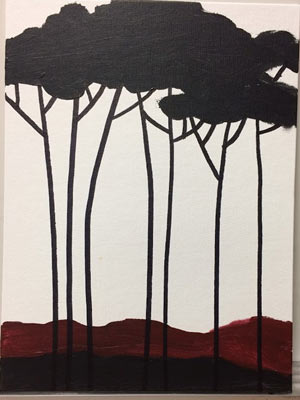
step 4
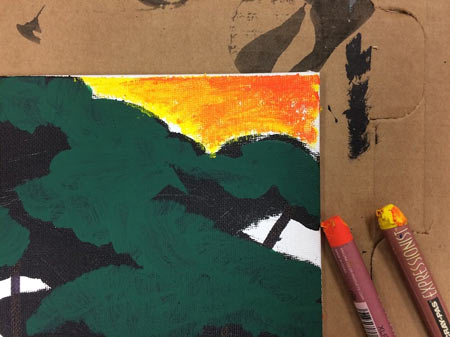
Choose colors for the sky.
Use at least 2 colors plus White (White is needed to cover over the dark spots).
Start painting with loose brush strokes.
Do not blend colors - you want to see some color variations.
Strokes should be short enough.
Fill in all negative space.
Use paint to fix some imperfections of the trees. You can make adjust thickness of some trunks and brunches for more variety and interest.
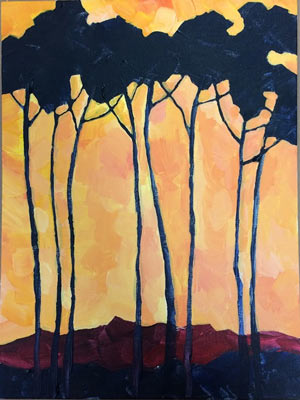
Let it dry!
step 5
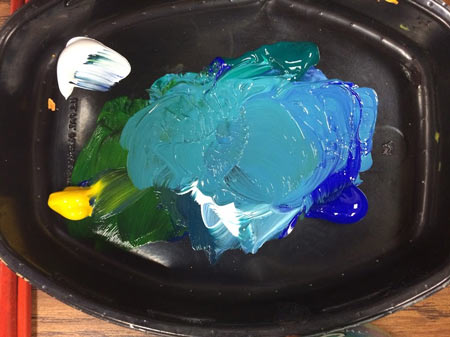
Choose a color for the tree tops and background shape (trees in a distance).
Use at least 2 colors + White
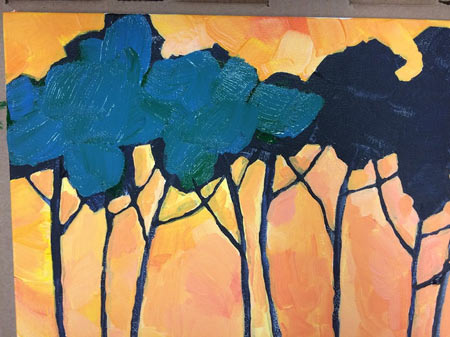
Start painting loosely.
Leave some of the underpainting visible. Especially the edges.

Use parts of underpainting as shadows.
Loosely paint background. Use slightly lighter shades. Leave gaps for the trees.
Leave some under painting visible (dark red in my example).
Let dry.
step 6
Pick colors for the ground shape.
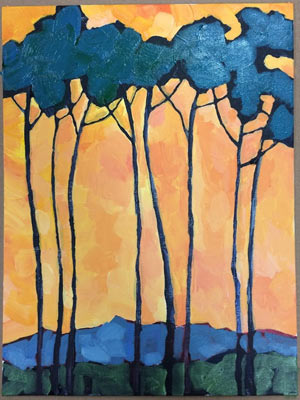
Paint the bottom shape.
Leave gaps for the trees. Leave some underpainting visible.
Let it dry.
step 7
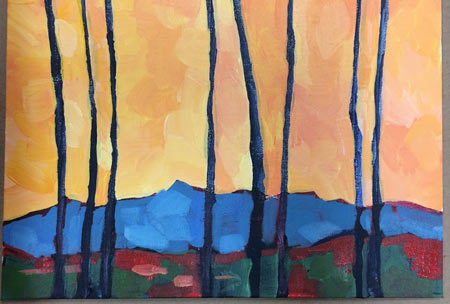
Add a few random strokes of other colors to the ground shape.
step 8
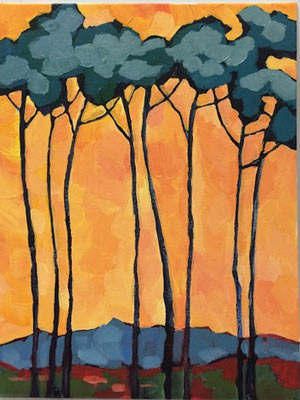
To add depth to the painting - you can add lighter shades of the trees color.