julianna kunstler logo
sketching effect

convert photo into drawing
Instagram icon
 

by JuliannaKunstler.com

The settings may vary for different images.

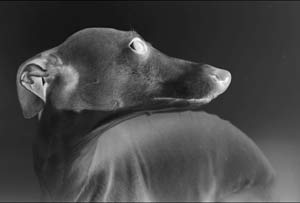
Photoshop offers a number of special effects filters designed to create pen, pencil, and paintbrush effects, but none of them creates a really satisfactory pencil sketch.
The best pencil sketch effects are achieved through Photoshop's very coolest feature -- Layer Blend Modes. It's easier than you think.

Here's one way to do it:

GALLERY

STEPS

1)Duplicate the image layer. (you'll keep layer 1 as a backup).

2) Remove The Color
(If you're starting with a black and white photo, you can skip this step.) Create a new adjustment layer, by selecting menu:
Layer > New Adjustment Layer > Desaturate

3) Duplicate The Photo On A New Layer

4) Invert The Colors Of The New Layer With the new layer selected, press Ctrl+I to invert the colors in the photo (or Image > Adjustments > Invert).

Your photo will look like a negative, which it is.

5) Set The Mode To Color Dodge.
Change the blend mode of the new, inverted layer, by choosing Color Dodge from the blend modes drop-down list at the top of the Layers palette.

Dodging lightens the underlying image; the lighter the upper layer is, the more it lightens the bottom layer. Because the two layers contain opposite versions of the same image, they cancel each other out. The results will be pure white, or nearly so.

6) Apply Gaussian Blur To get some interaction going between the layers, you blur the inverted, Color Dodge layer slightly.
I prefer Gausian blur in almost all things and it usually gives me the best results here, too.

Select menu: Filter > Blur > Gaussian Blur.

As you drag the slider to change the blur amount, the pencil sketch will begin to appear. The amount of blur you need depends on your particular image.

The greater the blur, the wider and darker the lines and shadows will become.

The Motion Blur, Radial Blur, and Blur More filters give nice results too. It depends largely on the image at hand and your personal tastes.

At this point, you can try changing the layer blend mode from Color Dodge to Linear Dodge. It's up to you which looks best.

7) Select the top two layers..

Merge them together

8) Adjust the levels (Image > Adjustments > Levels)

to darken the gray strokes and increase the contrast

Content for class "step" Goes Here

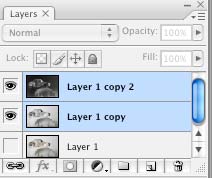
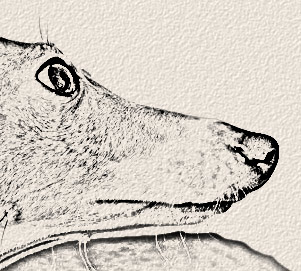
9) Add a background color.
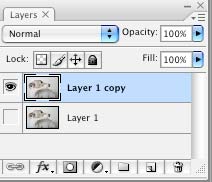
Insert a new layer.

Fill it with a nice color (light brown or tan)

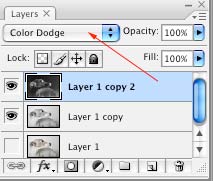
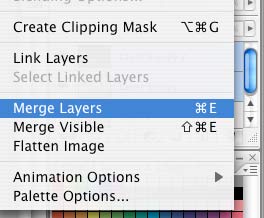
10) Change the dog's layer mode to Multiply.

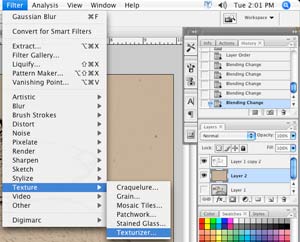
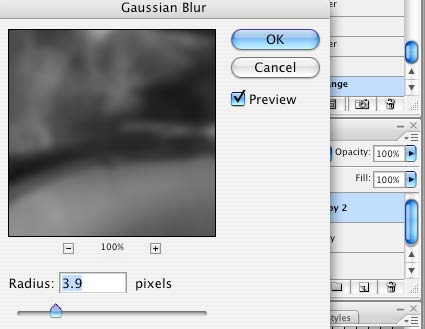
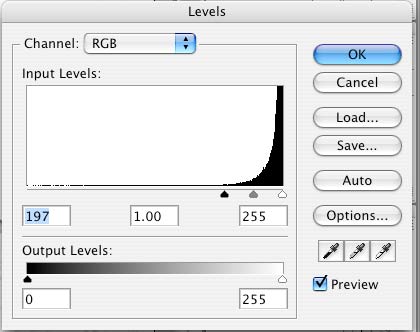
11) Apply a texture filter to make it look as a drawing paper:

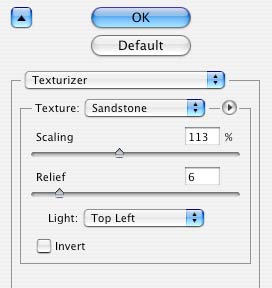
Filter > texture > Texturizer

Choose Sandstone as texture.

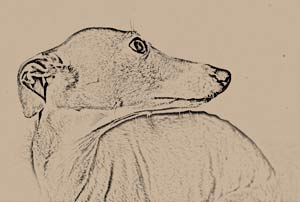
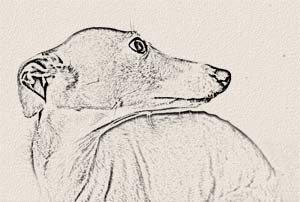
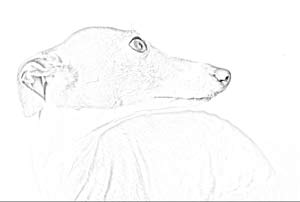
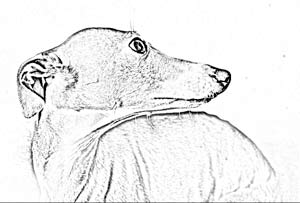
The layer should look like this.

12) Change the Opacity of the paper layer so that it is not too intense.
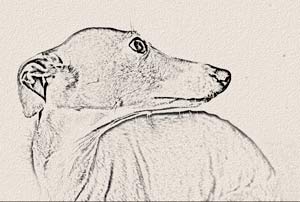
Done!


...