
by JuliannaKunstler.com
GALLERY

STEPS
1. In the tool box: Switch the color swatches to make background black and foreground white.
2. Open a new document in Photoshop:
6"x4", Resolution 100
Background Contents: background color
3. Go to Image > Mode
Make sure the image is RGB color at 8 Bits
4. Create a new layer.
5. Filter > Render > Clouds
6. Filter > render > Difference Clouds. Keep applying this filter until your image is very contrasted (about 8 - 15 times)
7. Image > Adjustments > Invert
8. Image > Adjustments > Levels
Slide the Gamma point slider (Grey slider) to the beginning of the histogram to make midpoint greys lighter.

9. Image > Adjustments > Curves
Black point has been moved into the dark gray area and an S curve has been added to the curves to give the background some contrast.
10. Filter > Add Noise
Amount: 4.8
Gaussian
Check Monochromatic
11. In Layers Palette:
Click on Adjustment layer icon. Select Solid Color
Color Picker opens. Set the color to R-171,G-101,B-44 Layer Blend Mode to 85-90%
12. In Layers palette:
Change blending mode to Linear Burn, Opacity to 85-90%
13. Layer > Flatten image
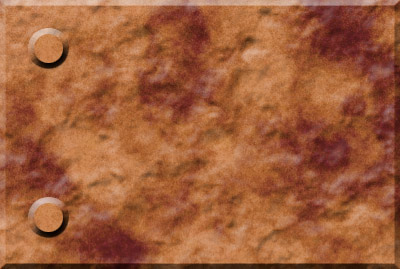
14. To make it look 3D:
15. In Layers Palette:
Make Background a Layer 0 (by double-clicking on the layer)
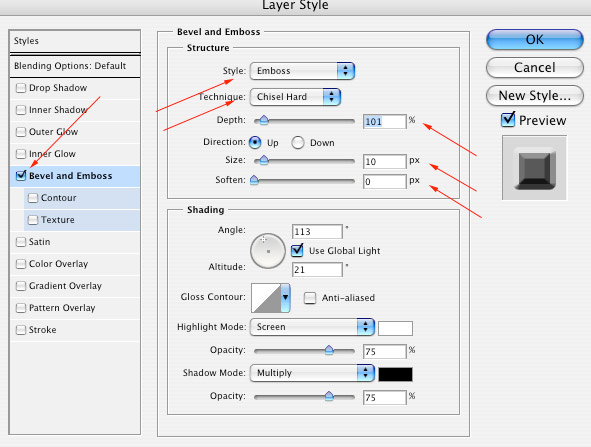
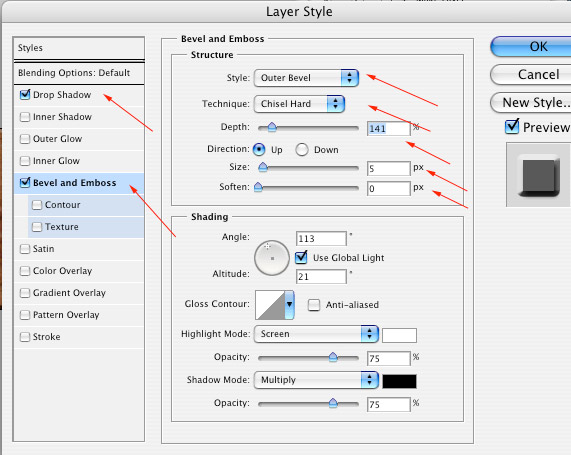
16. Layer > Layer Style > Bevel and Emboss.
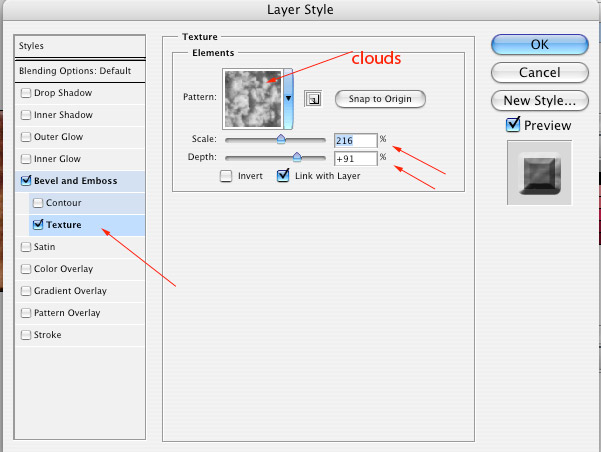
17. In the left pane: check Texture
Then double-click in it to open the window:
18. Click OK
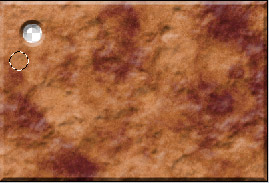
19. If you make a selection and move it (or delete it) the layer style will be applied to an empty spot:
20. If you make a selection, then Edit > Copy, Edit > Paste - you will have your selection placed on a new layer.

You can apply 3-D effect on this new layer:
21. Click OK
22. Now you can duplicate this layer (if you need to...)
That's it!!!