julianna kunstler logo
Out-of-Focus Images

how to fix
Instagram icon
 

by JuliannaKunstler.com

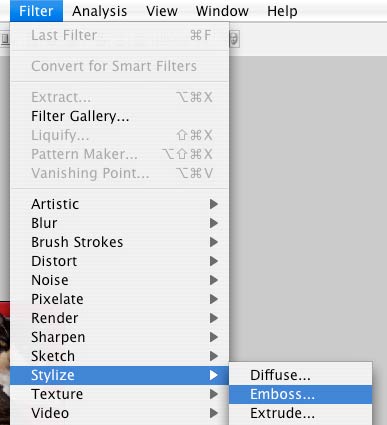
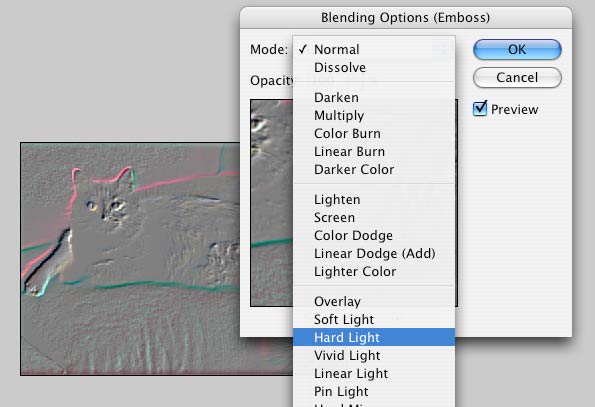
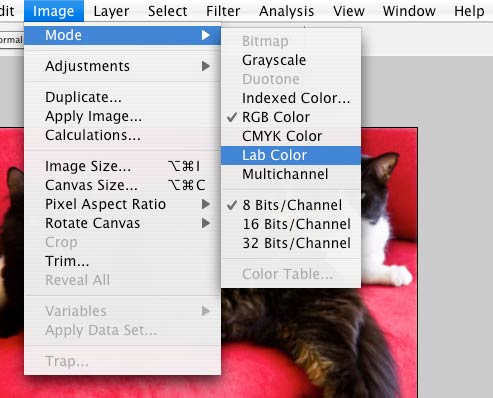
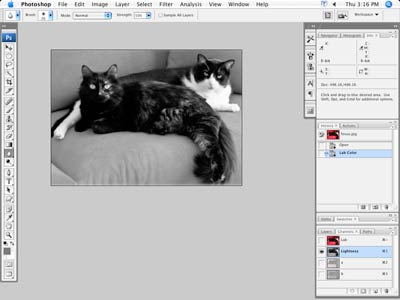
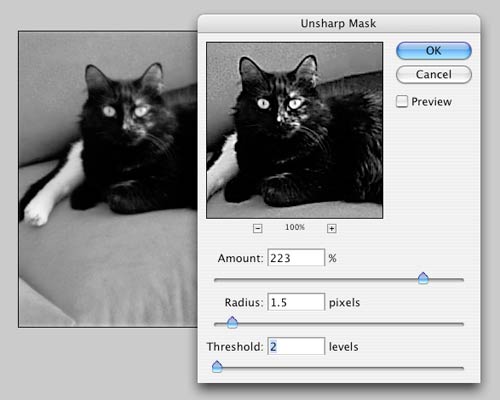
There’s no magic fixer-upper that can take an out-of-focus image and make it look like it’s really in focus. That is, except for the Emboss filter. Technically it’s not really fixing the image and making it sharp, it’s merely bringing out the edges that are already there, which makes the photo look sharper than it really is.

start..............finish

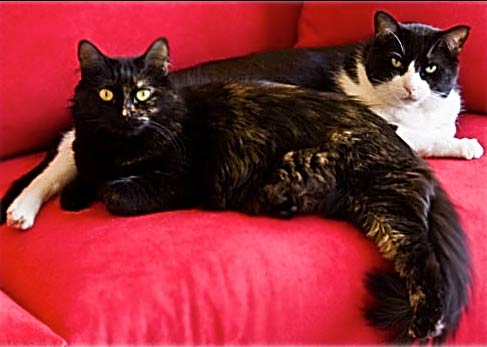
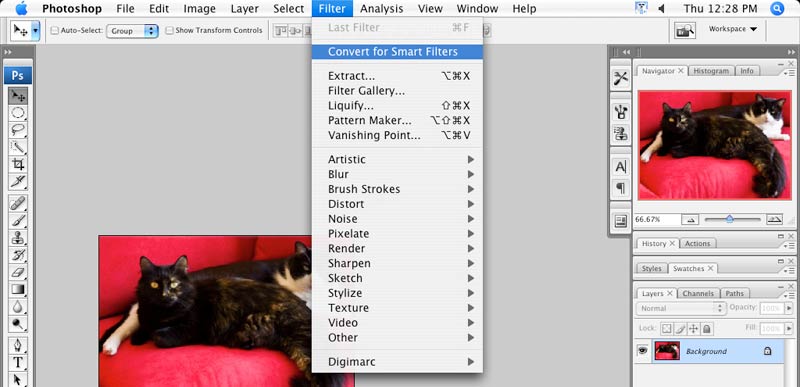
You don’t want to do this on professional images that you sell, of course, but if you’ve got one in your personal collection that needs saving, here’s how to do get it done:

GALLERY

focus

STEPS

Step 1:

Open the offending image and choose Filter > Convert for Smart Filters. This step makes the filter run on its very own layer, and lets you fiddle with filter blending options and opacity.

Click OK

As soon as you select the menu item, Photoshop slaps the Smart Object "badge of honor" onto that particular layer, plus it’ll also unlock it if it’s a Background layer.

Step 2:

Choose Filter > Stylize > Emboss.

In the resulting dialog, leave the angle, height, and amount settings as they are—that’s right, don’t touch them.

Your image will look gray and the edges of your subject will be brightly colored (as shown below), but that’s exactly what you want. In the next couple of steps you’ll use a blend mode change to make the gray bits disappear.

TIP: To make sure the Emboss filter dialog settings are truly the default settings, press Option (Alt on a PC) and the Cancel button will change to Reset.

Step 3:

Open the Blending Options for the Emboss filter. Over in your Layers panel, double-click the tiny icon to the right of the Emboss layer.

Step 4:

In the resulting dialog, change the blend mode pop-up menu to Hard Light, leave Opacity at 100%, and click OK.

The blend modes in the Overlay category add contrast to your image and they just so happen to ignore the color gray.

Since the Emboss filter turned your image gray and gave it brightly colored edges, this blend mode change makes the gray bit vanish leaving only the edges visible.

This makes them stand out more and appear sharper than they really are.

If you introduce a weird color effect around some of the edges...

...you can always hide that part by clicking on the Smart Filter’s mask (the white thumbnail you see above the filter name in your Layers panel), grabbing the Brush tool and then painting that area of the photo with black.

See the difference?

That's it!

Credits:
http://graphicreporter.com/tutorials/photoshop_outoffocus.html

Another method:

Open the original image again.

Look at the title bar to see what color mode of the image is.
If it is CMYK - leave it.
If it is RGB - convert it to LAB mode:
Image > Mode > Lab Color

Open Channels palette (look at the Channels tab next to Layers palette). If you don't have it - go to Window > Channels.

You are going to use black/white channel:

For CMYK - click on K channel to select it.

For Lab - click on Lightness channel

Your image will look black and white.

You are going to apply a filter to this channel (color channels will remain untouched to preserve all color information)

Go to Filter > Sharpen > Unsharp mask

Uncheck Preview button to see the changes as you apply the filter.

Move the sliders to achieve the sharpening result:

Amount - how strong you sharpen the radius.

Radius - how many pixels in and out from the edge you sharpen

Threshold - determines the edges.

Now click on the top channel.

Now you see the image in full color

Unfortunately, there are areas that have too much sharpening now - like the red background.

You are going to soften it.

Select the Lightness channel again.

Choose Blur Tool

Blur tool works like a brush. Make sure you have soft edges.

Blur the background. Don't overdo it!

That's it! Here is your final image:

...