In this tutorial, I will show you how to easily ’fake’ depth of field in Photoshop, rather than with your camera itself.

Depth of Field
imitation
by JuliannaKunstler.com
GALLERY
STEPS

Open up your photo, or use the one provided. If it’s your own, make sure you are in RGB mode, Image > Mode > RGB.
Click the Channels tab on your layer pallet (if not visible, Window > Channels). Click the small arrow, and select new channel. This will be your "Blur channel".
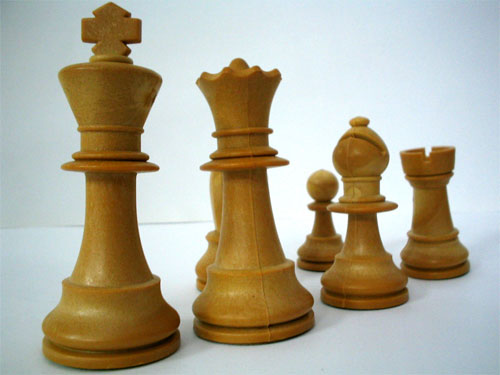
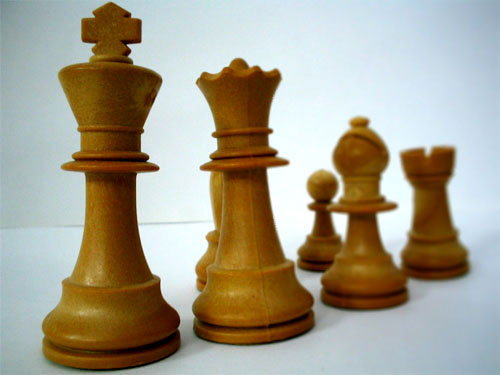
Now, with the gradient tool set to black and white linear, make a gradient so that the area you want in focus is roughly covered with black. In my case, I want the left King in focus - so I’ve used this

If you want to be more exact than using a gradient, feel free to just paint it on with a black brush (leaving white in the areas you want blurred). Use a soft edged brush though, otherwise the transition will be obvious when the blurring is applied.
Enable the RGB channel (Clicking the box where an eye will appear), you will see the area selected to blur as a glow. You can always hide RGB again to change your gradient.
Before you continue - make sure that the RGB channel is ’selected/highlighted’ in the pallet, the filter will not work if you have the channel you made selected!
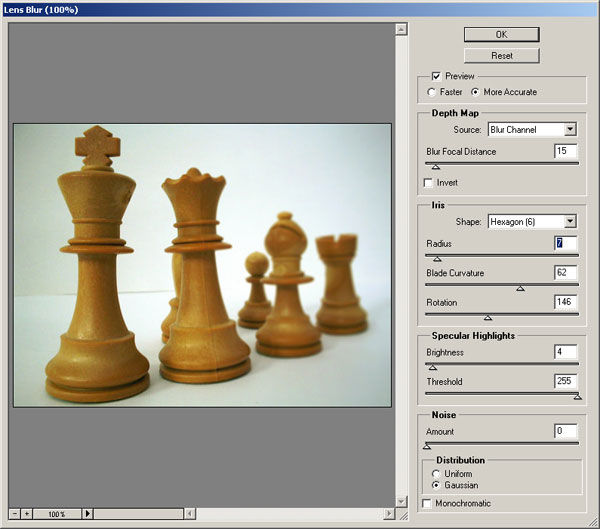
Filter > Blur > Lens Blur. These are the settings I’ve used, Make sure your source is set to "Blur Channel" or whatever you called the new channel previously. Blur focal distance can be used to change where the black appears to be, and all other settings are just for minor adjustments.

Finally, a Brightness and Contrast layer should be made, just because I love them so much.
Layer > New Adjustment Layer > Brightness & Contrast.
Increase contrast somewhat, and adjust brightness to keep it looking realistic.
That concludes the tutorial on faking depth of field with Lens Blur and Alpha Channels.
.
...