Learning objectives
- Control pressure while shading
- Value gradation
- Shading techniques (hatching, crosshatching, or blending)
- Manipulate value to achieve an illusion of depth
idea credit: link here

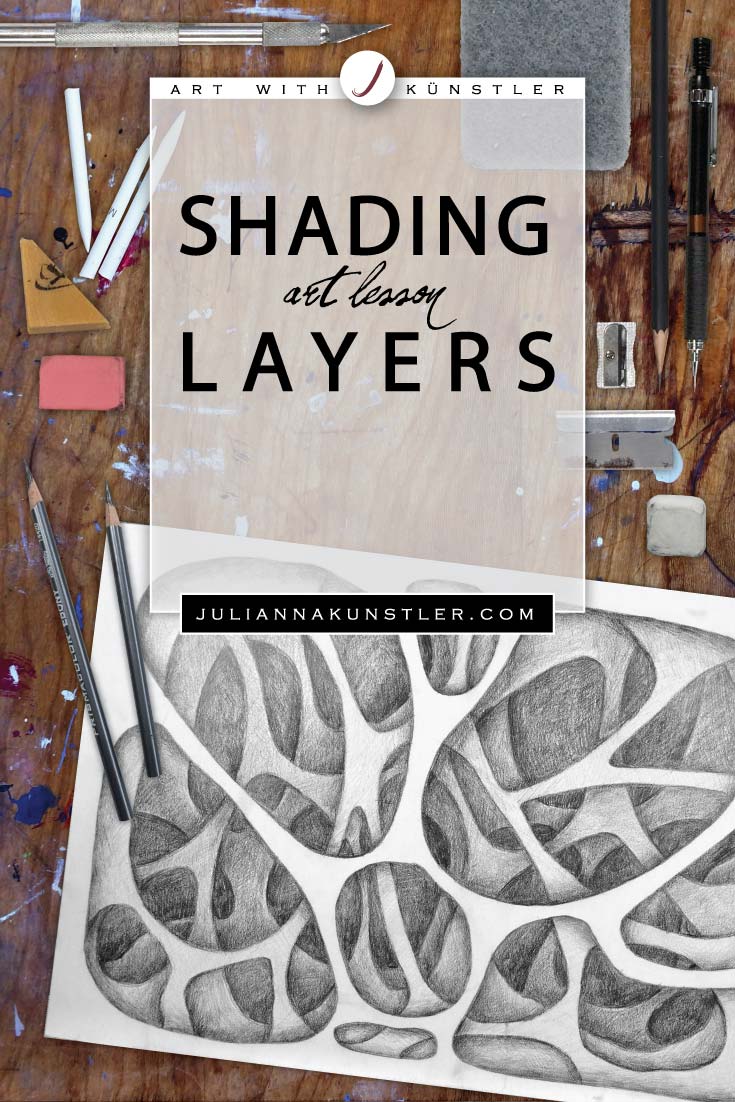
by JuliannaKunstler.com
idea credit: link here
illustration board, 14 ply
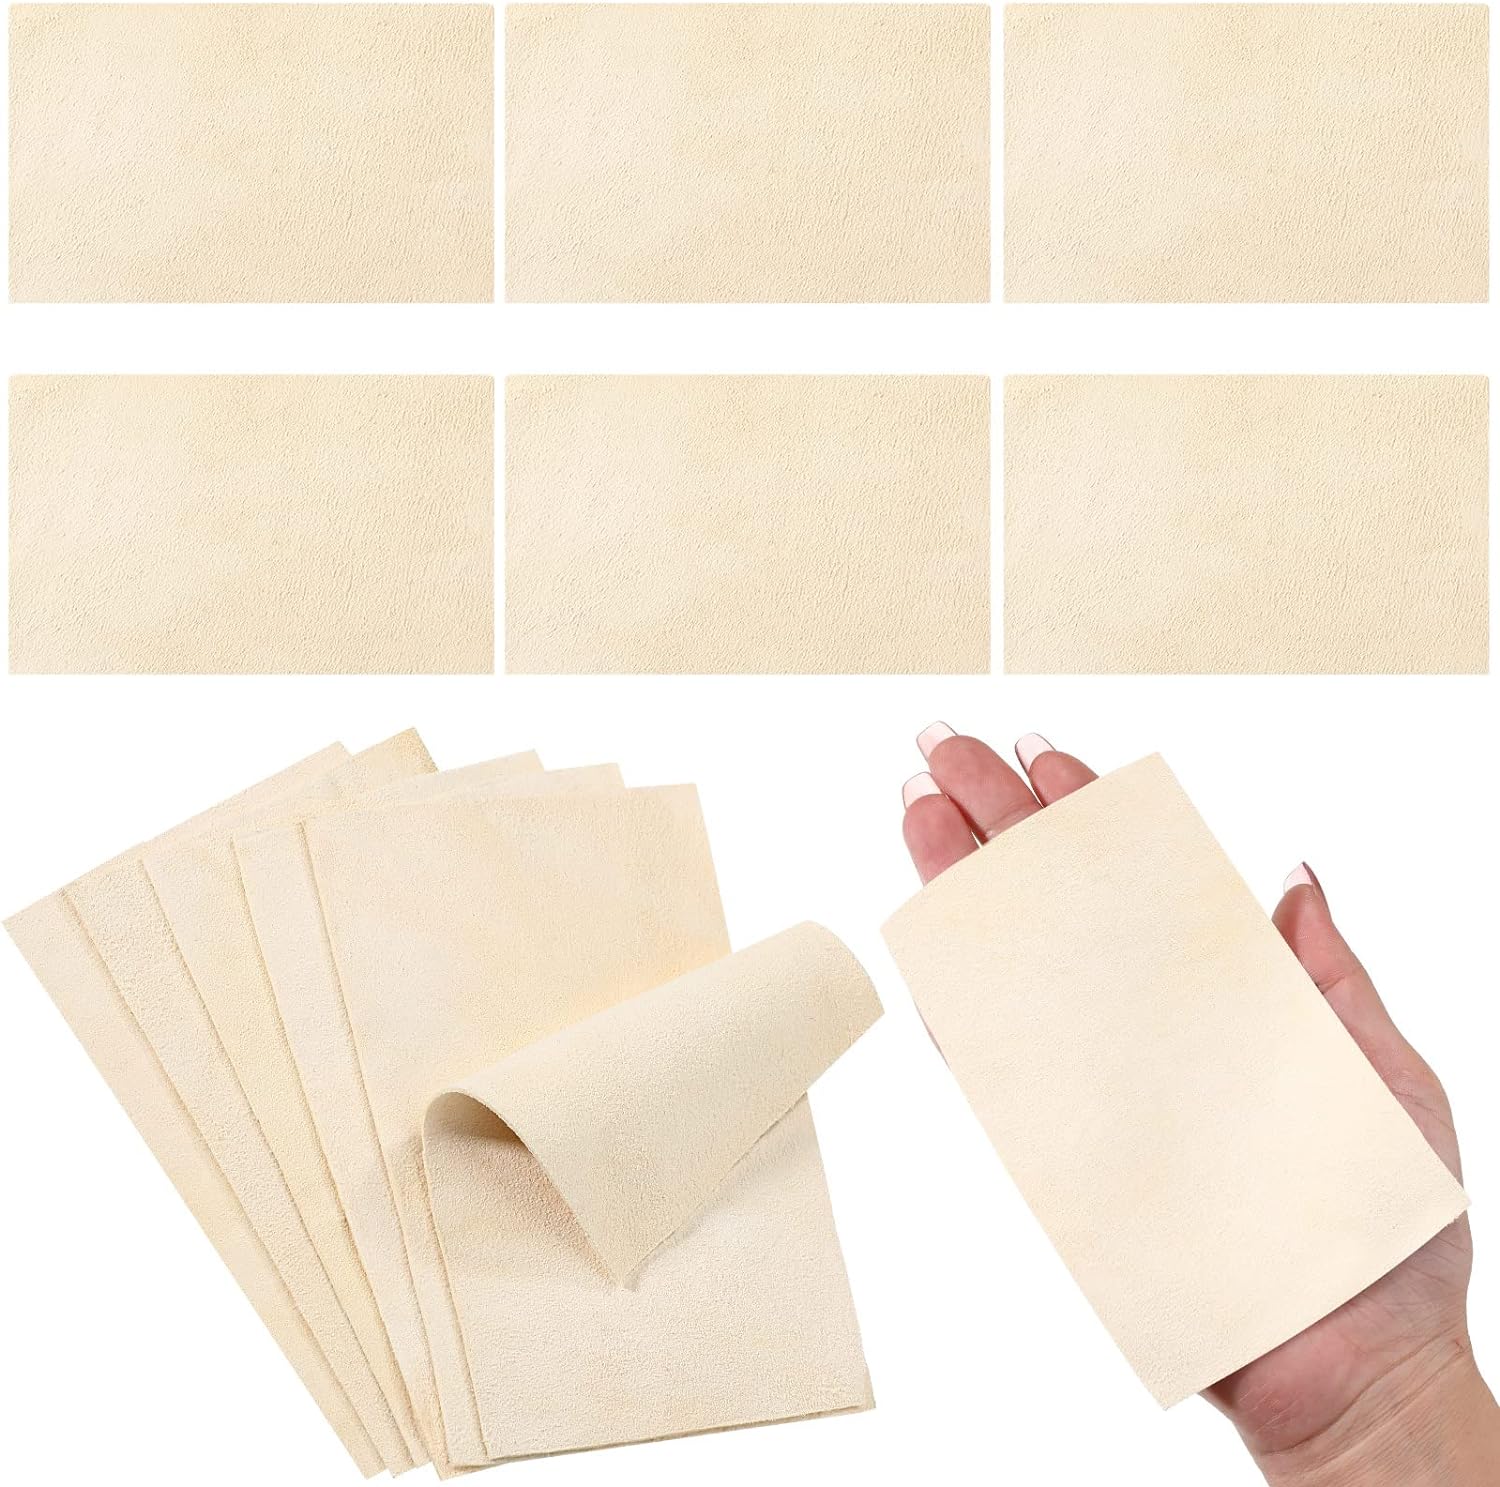
chamois

gum erasers

ebony pencil 12

drawing pencil B
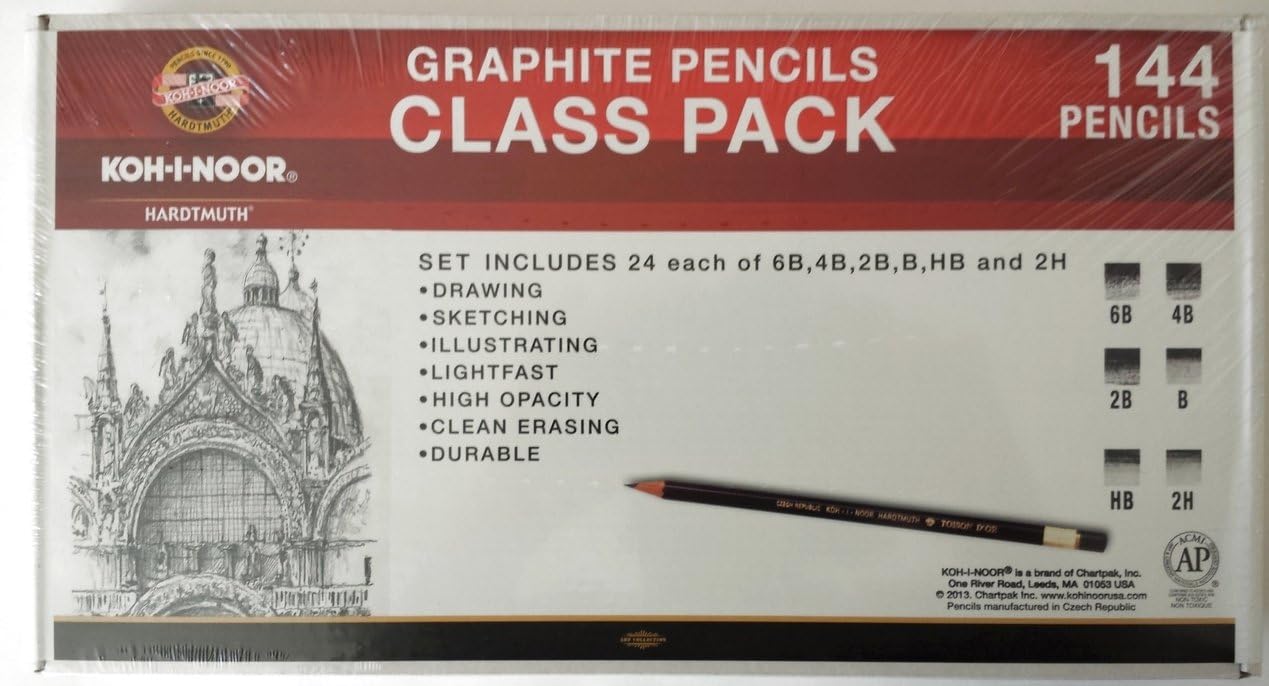
drawing pencils set
drawing pencils set

white erasers
cleaner
cotton swabs

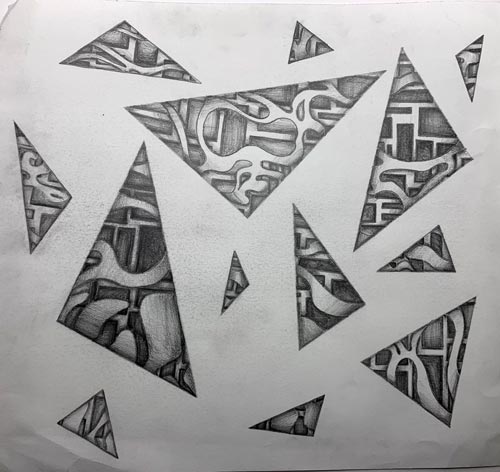

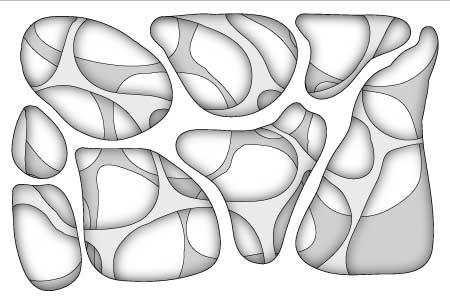
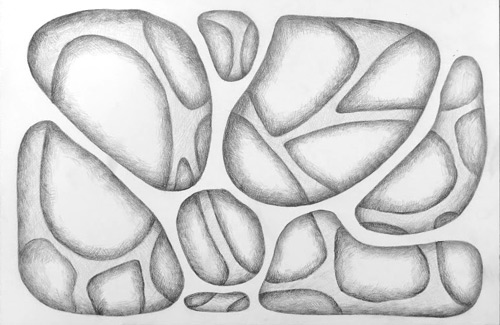
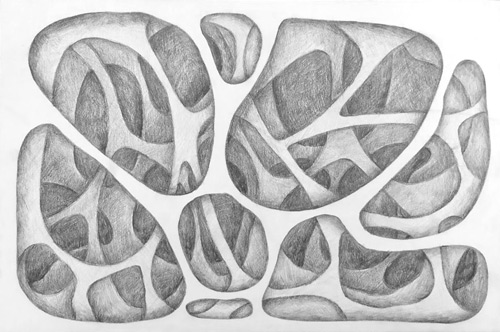
Create a 4+ layer abstract design with an illusion of depth by applying different values.
Think of a stack of 4 sheets of paper with large cutouts.
Each sheet (layer) creates its own drop shadow, each layer is slightly darker in value as you go from the top to the bottom
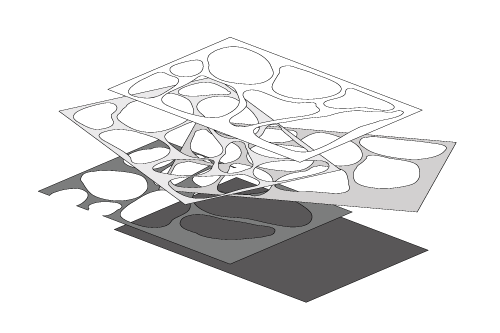
place 4 layers over a background
outline 1 layer cutouts
shade inside for drop-shadow effect
outline 2nd layer cutouts (layer is slightly darker)
shade inside for drop-shadow effect
outline 3rd layer cutouts (layer is slightly darker)
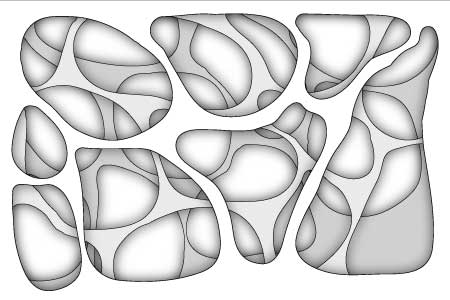
shade inside for drop-shadow effect
outline 4th layer cutouts (layer is slightly darker)

shade inside for drop-shadow effect
illustration board 15x10

tortillons (paper stumps)
soft eraser

Ebony pencil
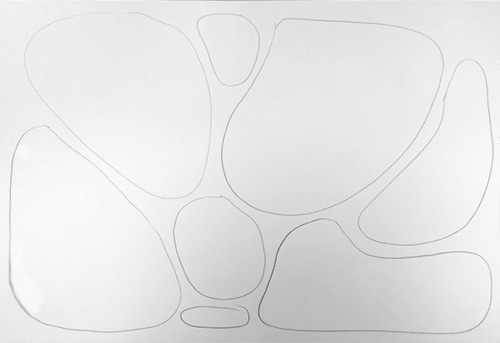
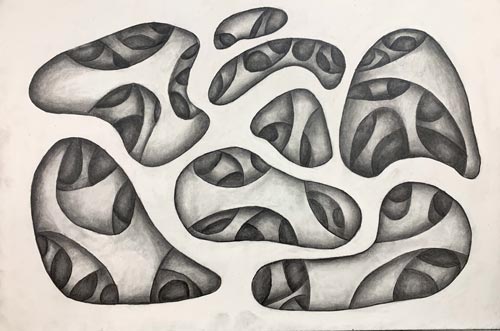
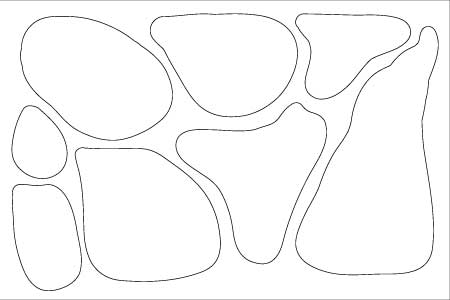
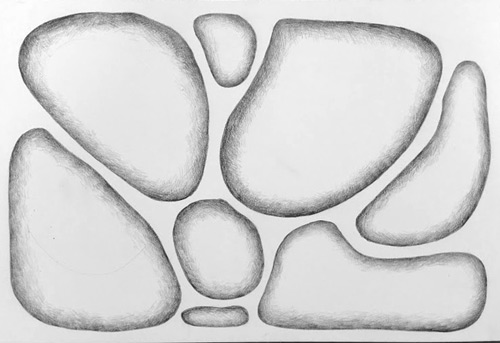
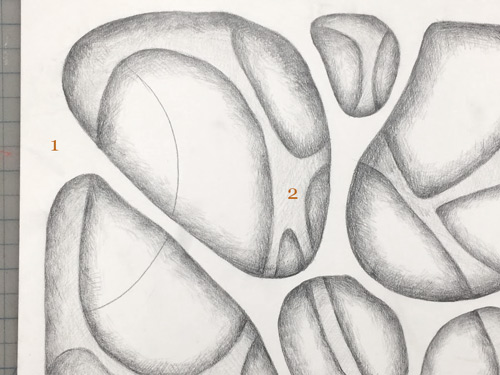
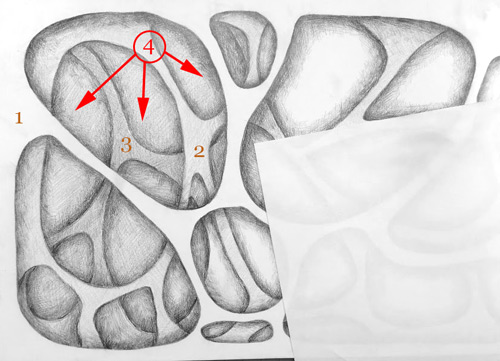
Start with drawing 6-7 organic rounded shapes.
Leave very little space in between the shapes.
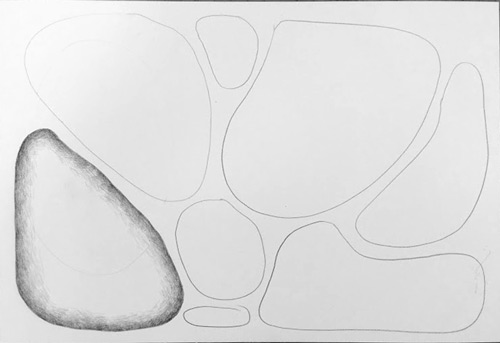
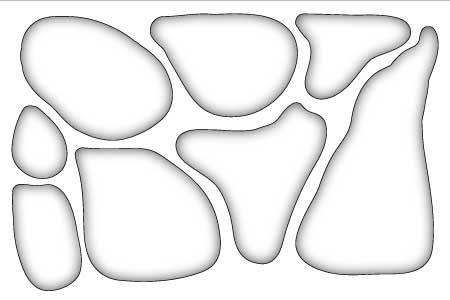
Shade inside each shape.
Start at the edge (incorporate the outline into the shading).
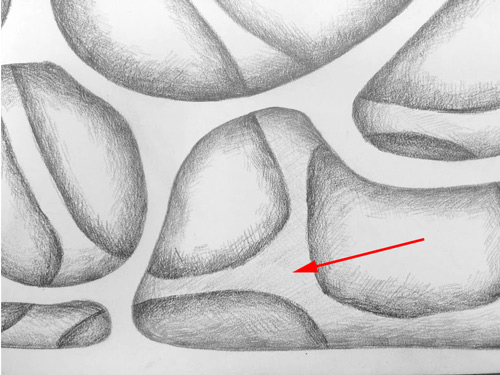
Value should be placed from dark (at the edge) to mid-value - to light - and to fade
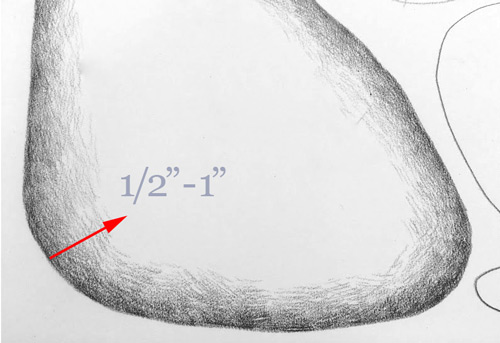
The transition from dark to light (fading or "drop-shadow effect) - should be between 1/2" and 1".
If you shade too dark - use an eraser to lighten the area>
Please take time!
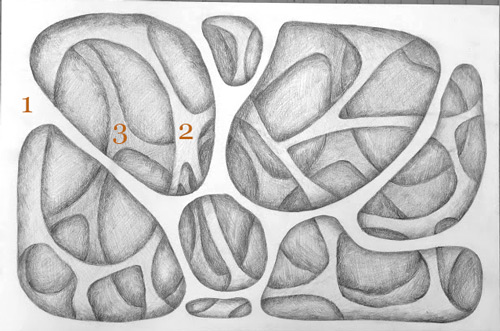
Fill in the rest of the shapes.

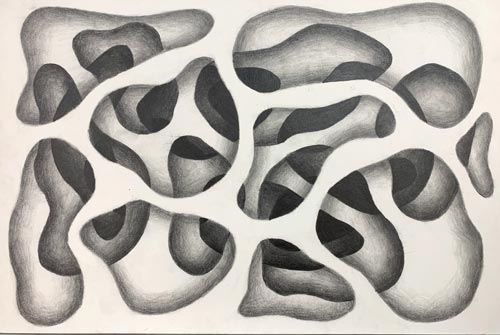
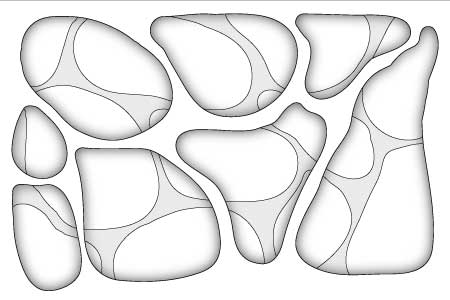
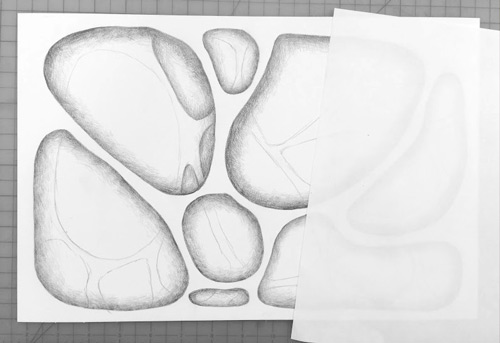
Start working on the 2nd layer.
Draw similar shapes (lightly) - breaking at the first layer's outlines.
Apply drop shadows to the 2nd layer's shapes in the same manner as you did on the first layer.
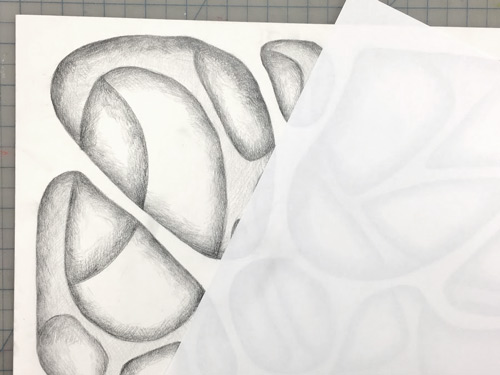
Use a piece of paper to cover a portion of you drawing to protect it from smudging.
Note:
2nd layer's shading should extend all the way to the first layer's outlines.

Continue shading the 2nd layer
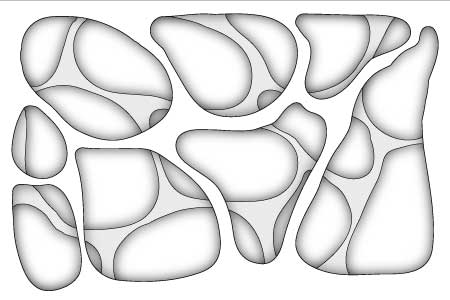
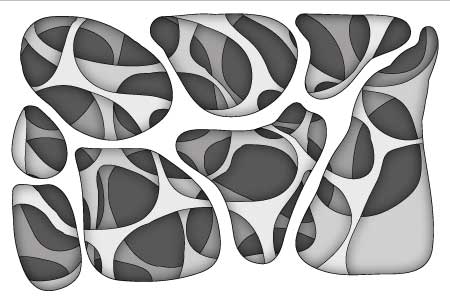
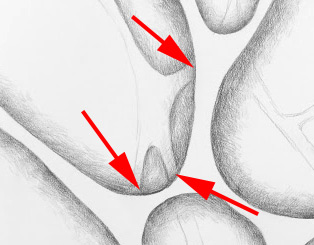
Now, that you are done adding the drop shadows, we need to make the 2nd layer appear a little further away.
The only way to do it is to change its value.
Shade the entire 2nd layer.
Now the 2nd layer is done.
move on to the 3rd.
At this point - start working with one cutout at a time - do not draw all cutout shapes for the 3rd layer - otherwise it might get too confusing...
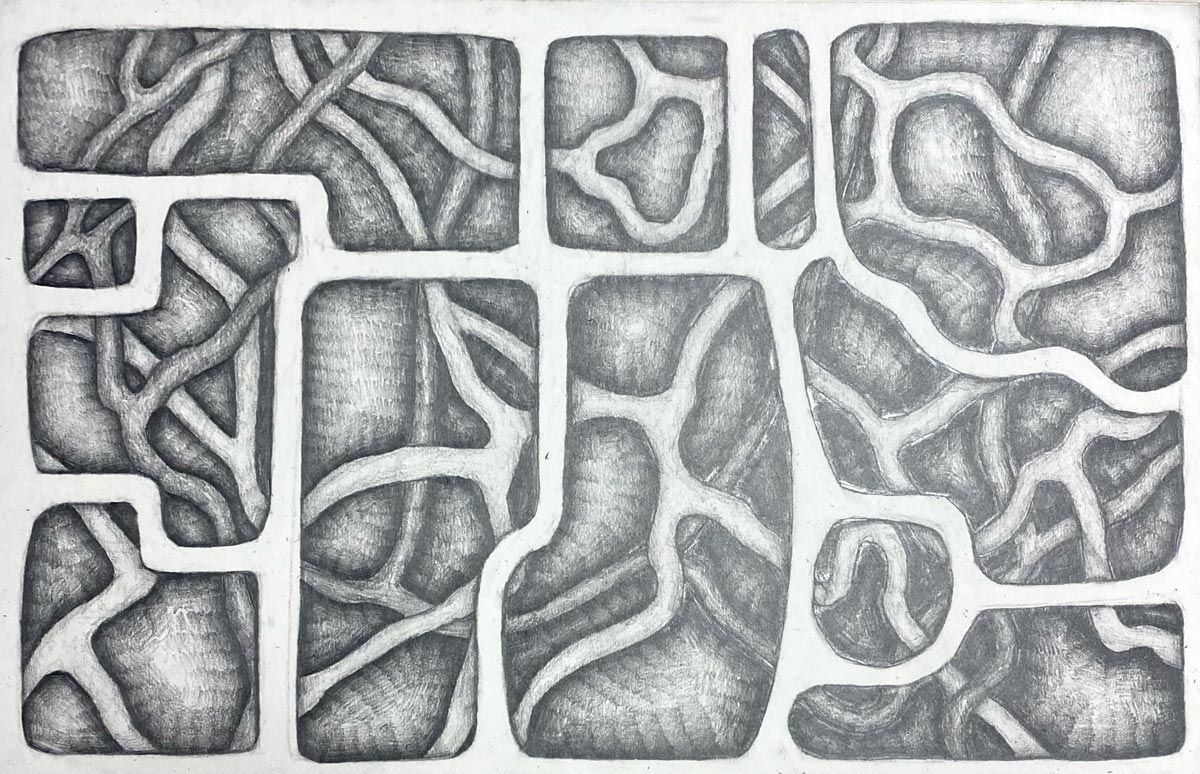
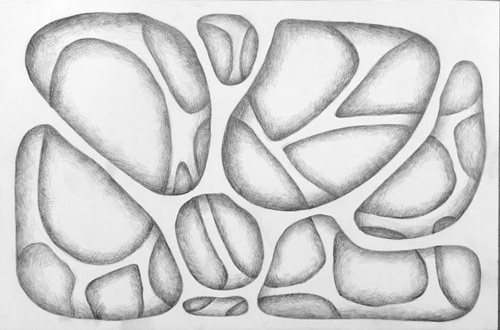
Layer 3 will go "behind" layers 1 and 2.
Shade inside the cutout shape.
 step 7
Shade layer 3 darker than layer 2.
(Compare layers 1, 2, and 3 at this time. There should be a distinct difference in values.)
You can shade layer 4 at this tome too.
Complete layer 3.
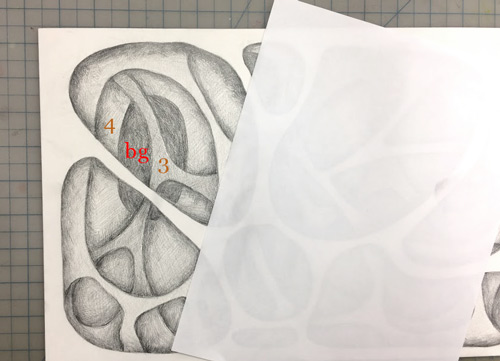
Draw cutout shapes on layer 4.
That will reveal a dark background.
Shade in the background.
Continue working with one shape at a time.
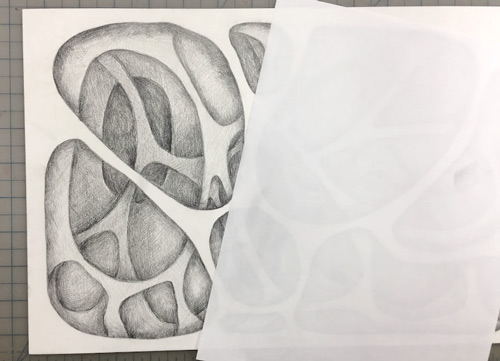
Again, double-check the layers values.
Complete layer 4 and background.
Now, that you are done - take a close look at the design.
Add more value where it is needed.
You might want to enhance the contrast of drop shadows near the cutout edges.
Clean (erase) the top layer to remove any spots and smudges.
Done!