julianna kunstler logo
2 point perspective

introduction
Instagram icon

by JuliannaKunstler.com

In this lesson you are going to construct multiple objects in a two point perspective.

Follow the instructions for the worksheet for the first object, then apply the same steps to solve the problem of how to draw the rest of them.

Grid background will help you to make sure all vertical lines are accurate.

Review the space presentation if needed.


Jump to the assignment details here

slides:

2 point perspective 2 point perspective 2 point perspective 2 point perspective 2 point perspective 2 point perspective 2 point perspective 2 point perspective 2 point perspective 2 point perspective 2 point perspective 2 point perspective 2 point perspective 2 point perspective 2 point perspective 2 point perspective
open in a new window

NOTES:

intro to 2 point perspective

Is one of the sides parallel to your picture plane? No....

Is one of the edges in your picture plane?

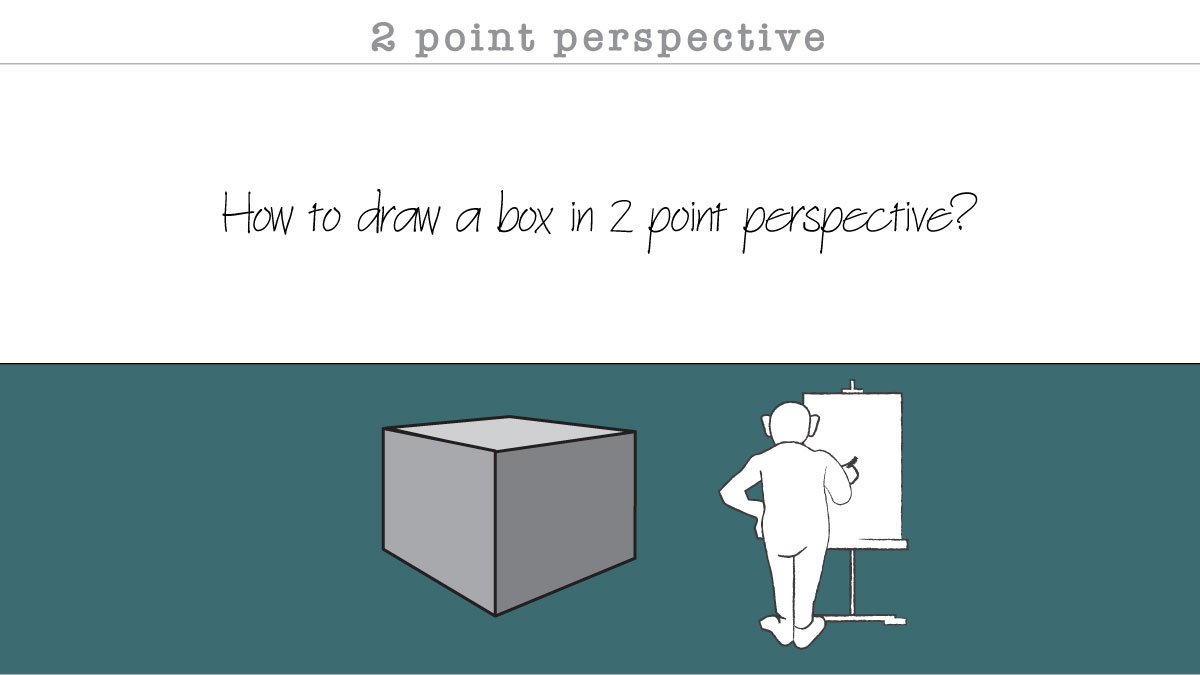
If yes - then 2 point perspective is your choice!

intro to 2 point perspective

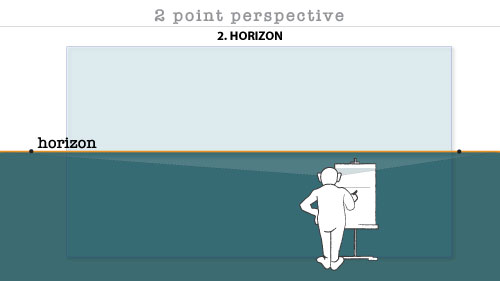
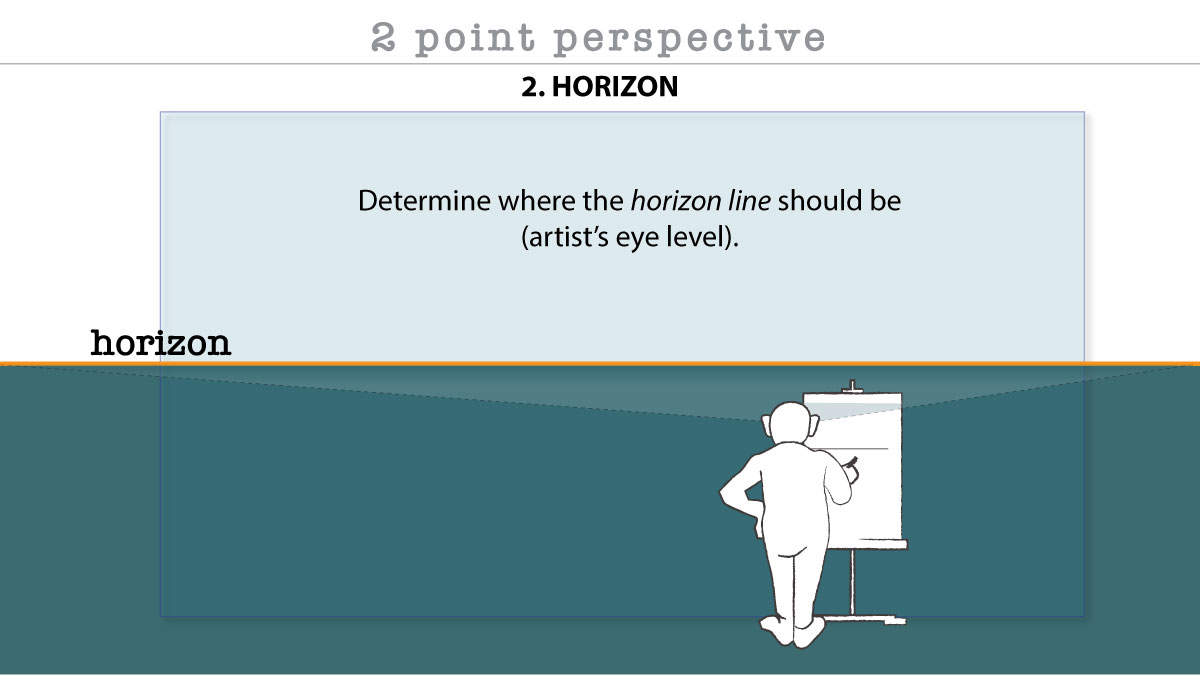
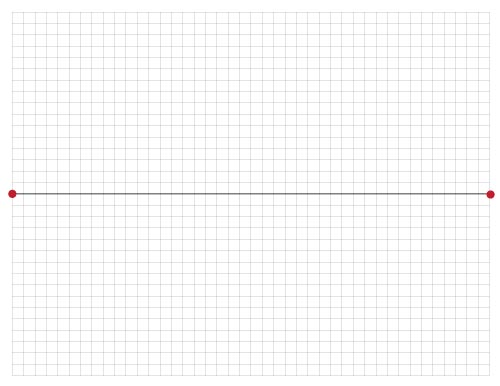
Determine where the horizon line should be (artist’s eye level).

Draw a straight line across.

intro to 2 point perspective

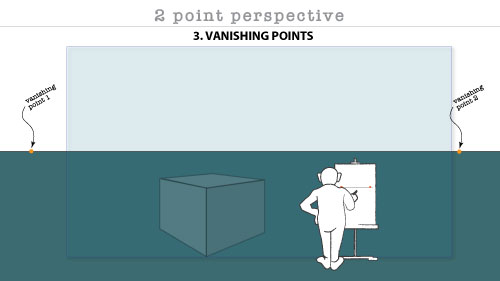
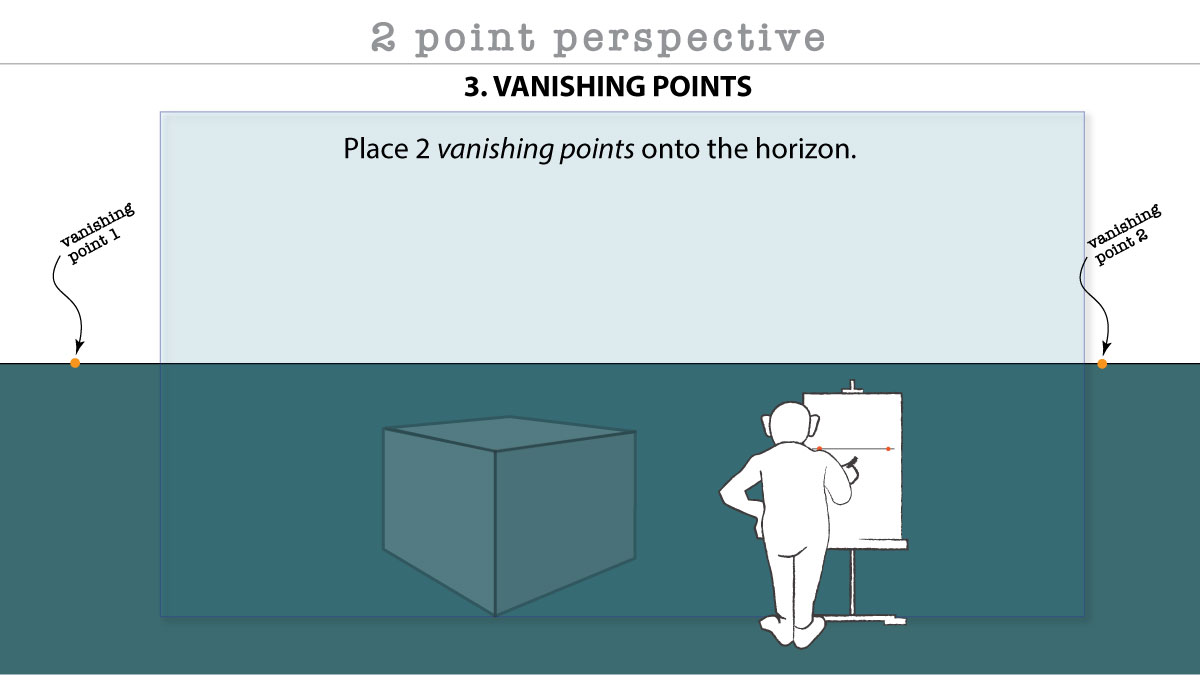
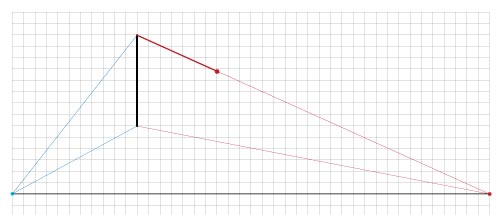
Place 2 vanishing points onto the horizon.

Draw them as far apart as you can.

intro to 2 point perspective

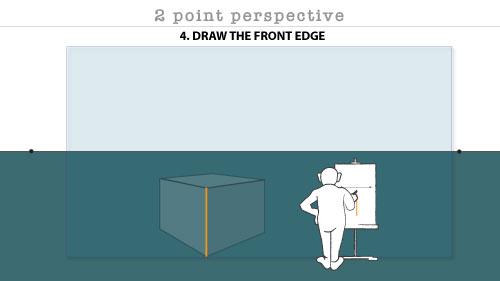
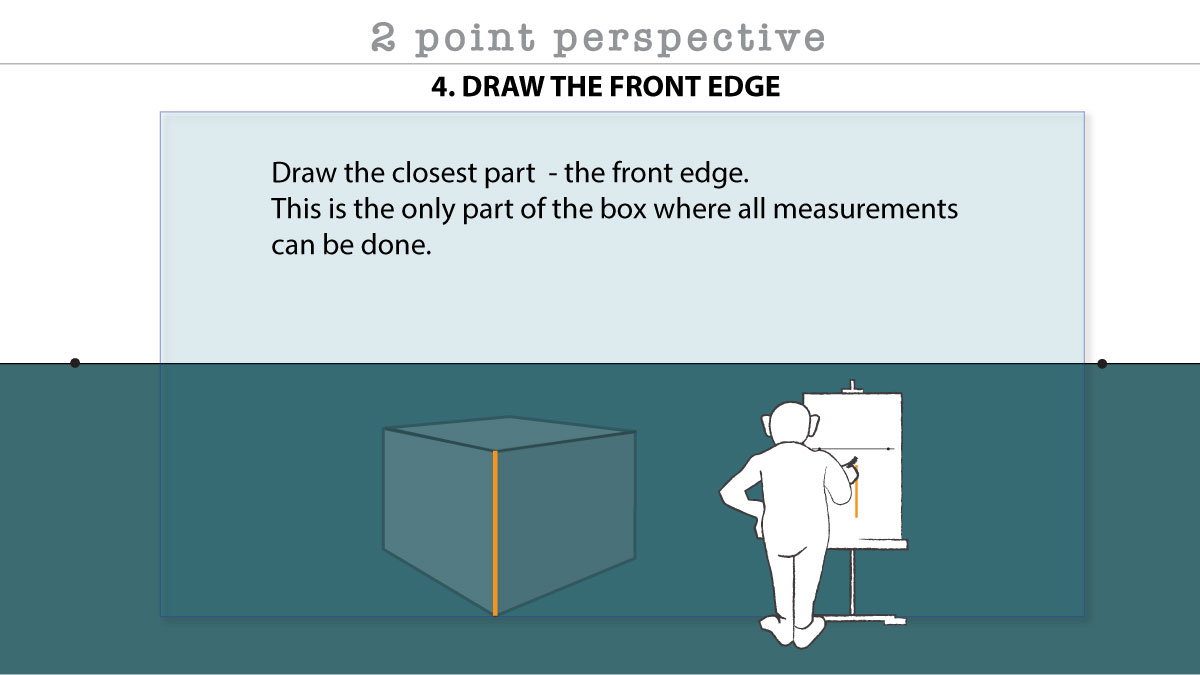
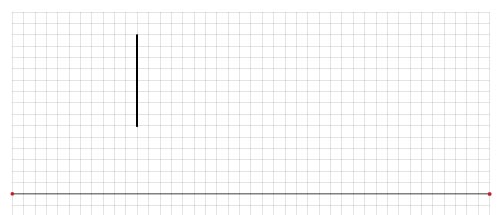
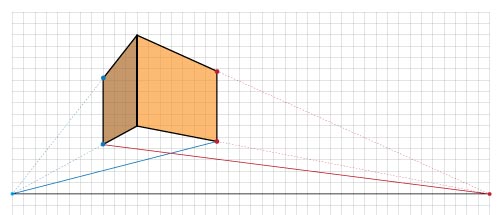
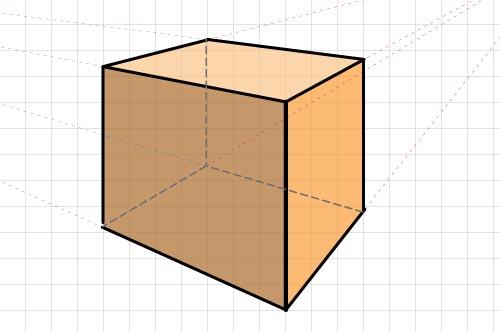
Draw the closest part - the front edge

This is the only part of the box where all measurements can be done.

intro to 2 point perspective

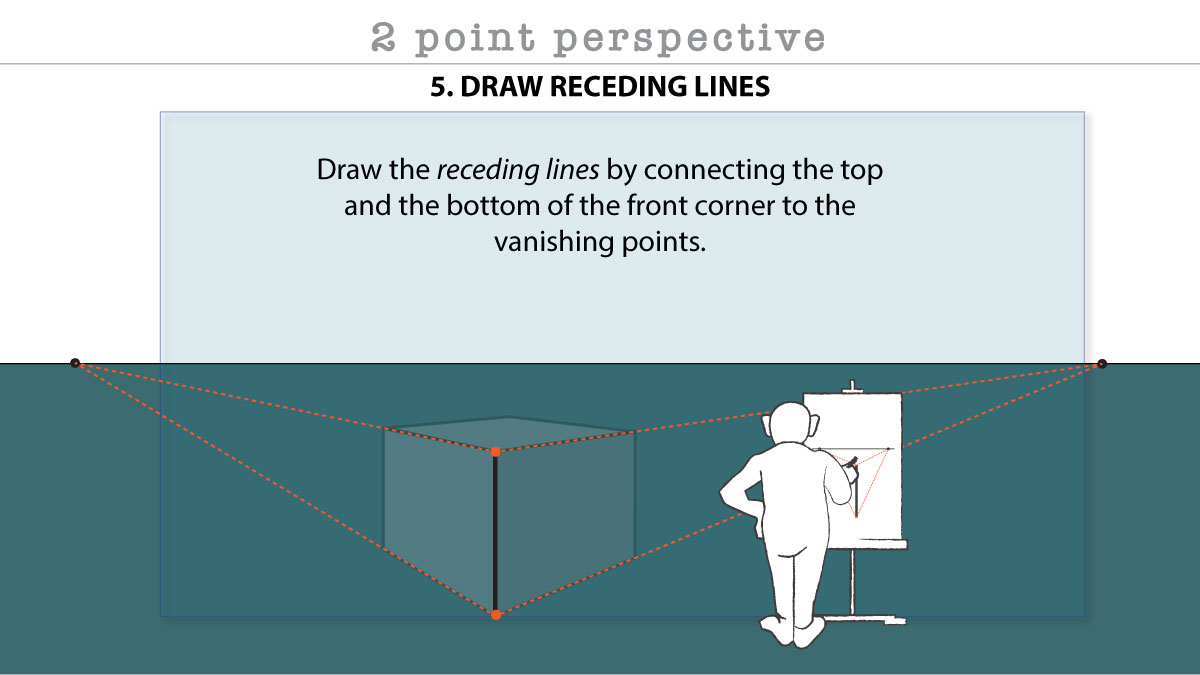
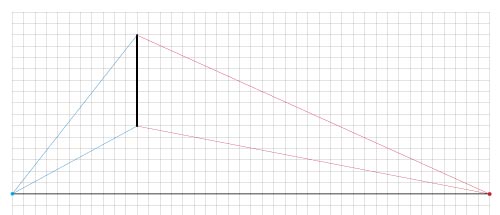
Draw the receding lines by connecting the top and the bottom of the front edge to the vanishing points.

intro to 2 point perspective

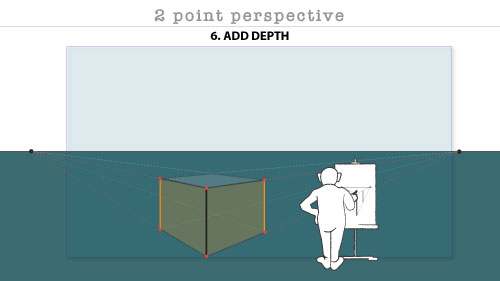
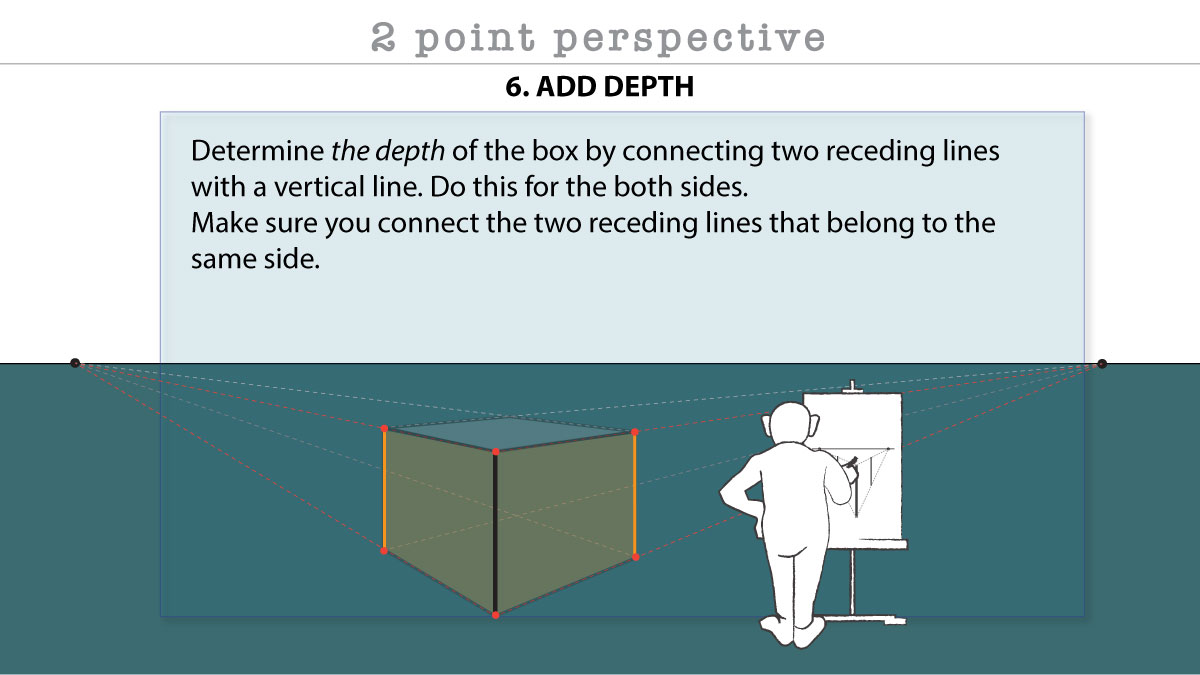
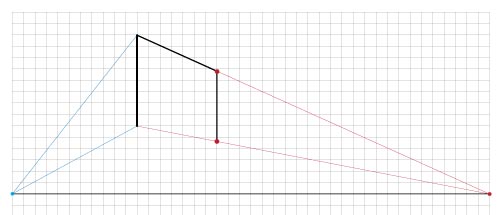
Determine the depth of the box by connecting two receding lines with a vertical line. This is a "guess" work.

Do this for the both sides.

Make sure you connect the two receding lines that belong to the same side.

intro to 2 point perspective

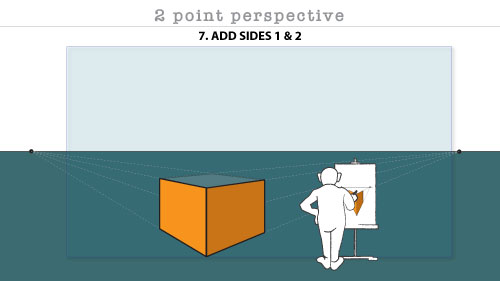
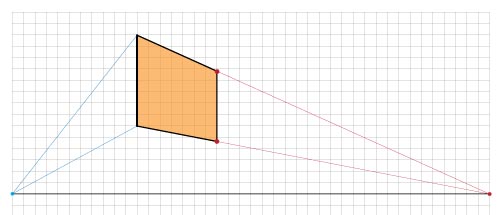
Your 1st and 2nd sides are done!

You can outline them now.

intro to 2 point perspective

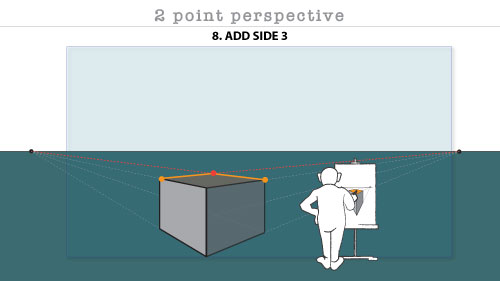
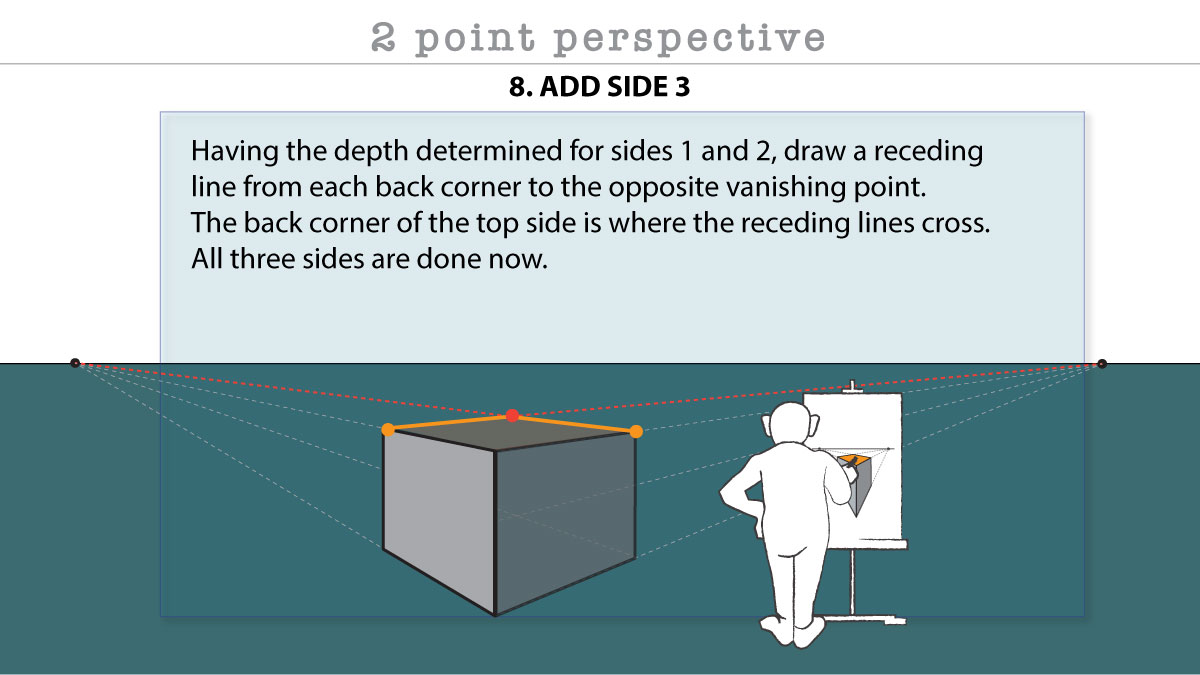
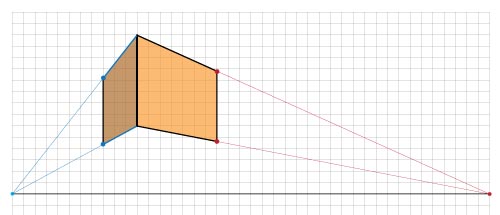
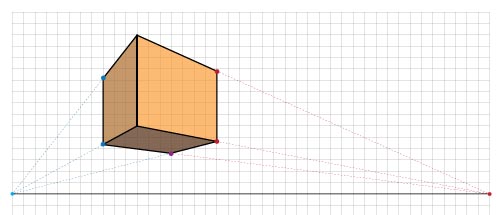
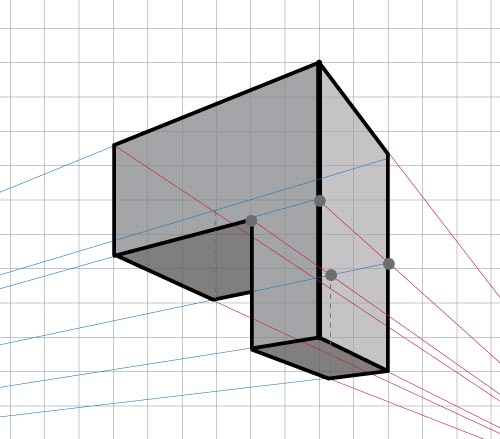
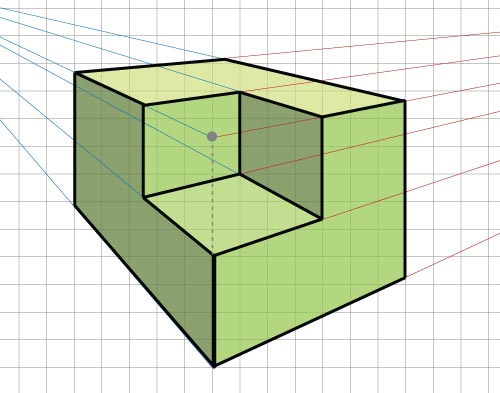
Having the depth determined for sides 1 and 2, draw a receding line from each back corner to the opposite vanishing point.

The back corner of the top side is where the receding lines cross.

All three sides are done now.

intro to 2 point perspective

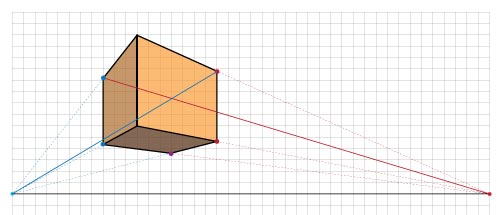
Complete the box by defining the back corner even though it is not seen from the front.

Adding the hidden sides and corners will assist you in shadow construction, adding other elements, and just confirming that your two-point perspective is accurate.

intro to 2 point perspective

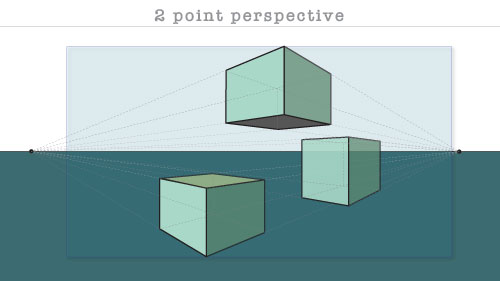
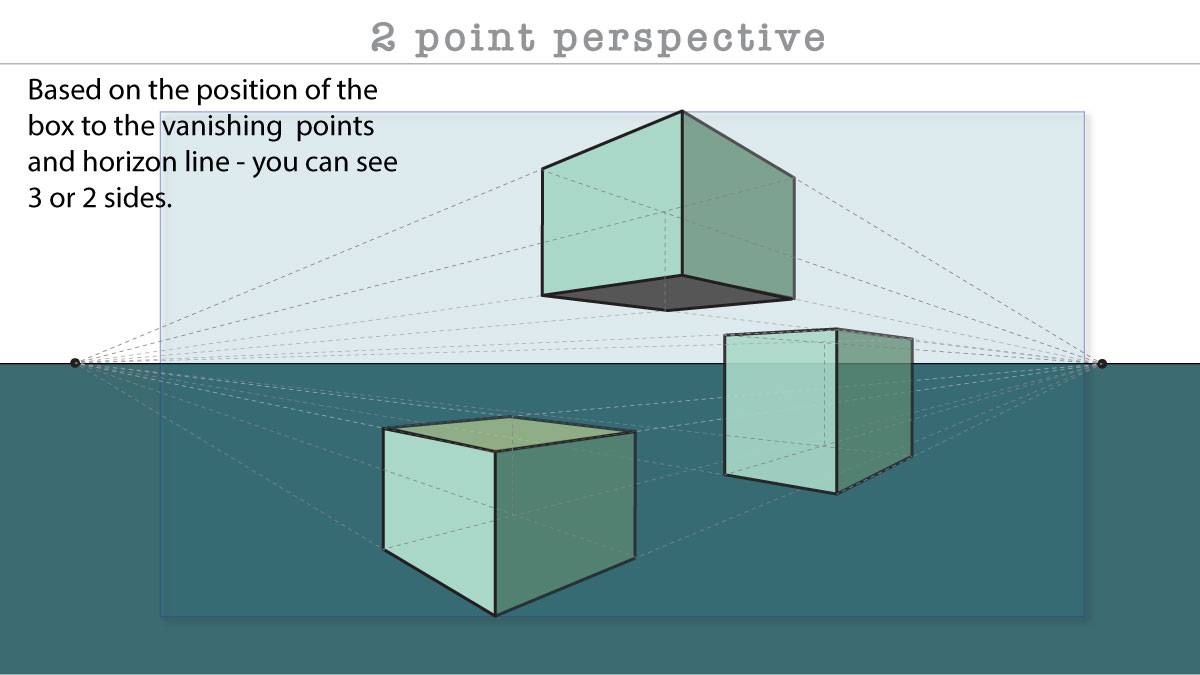
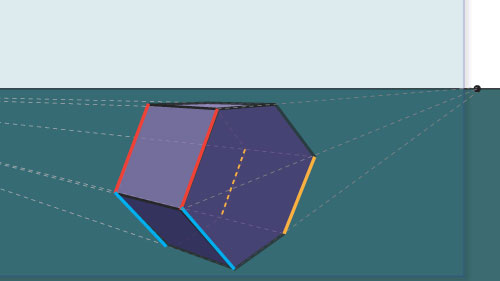
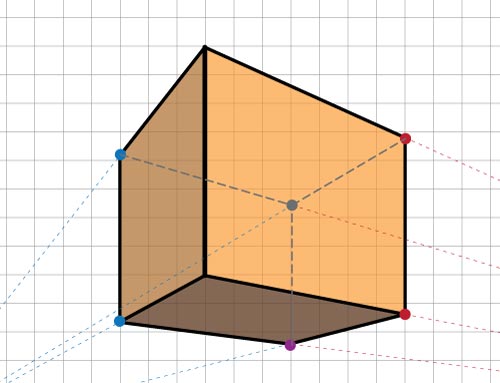
Based on the position of the box to the vanishing points and horizon line - you can see 3 or 2 sides.

intro to 2 point perspective

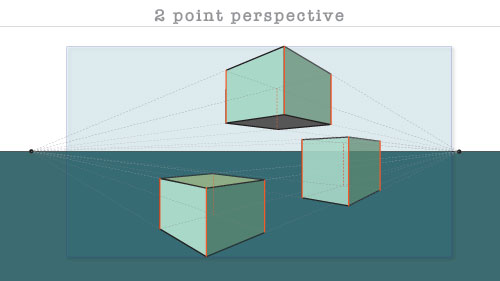
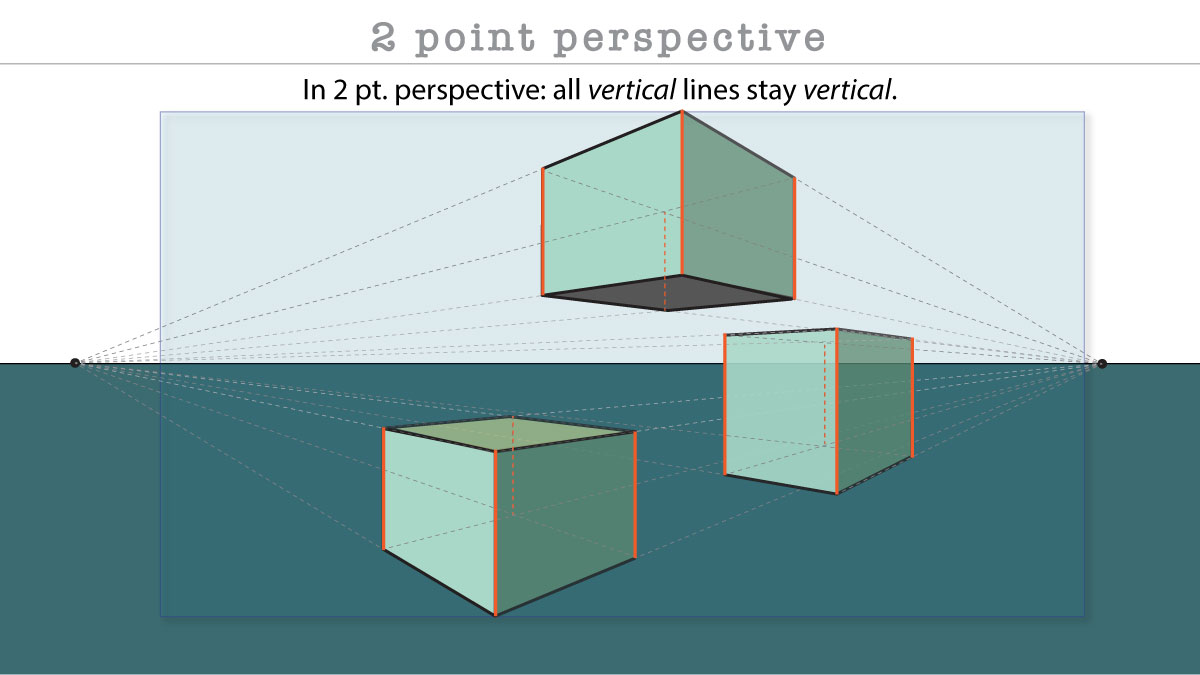
In 2 pt. perspective: all vertical lines stay vertical.

intro to 2 point perspective

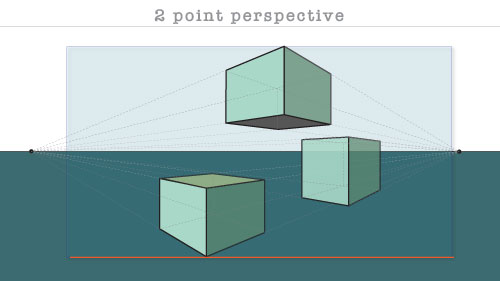
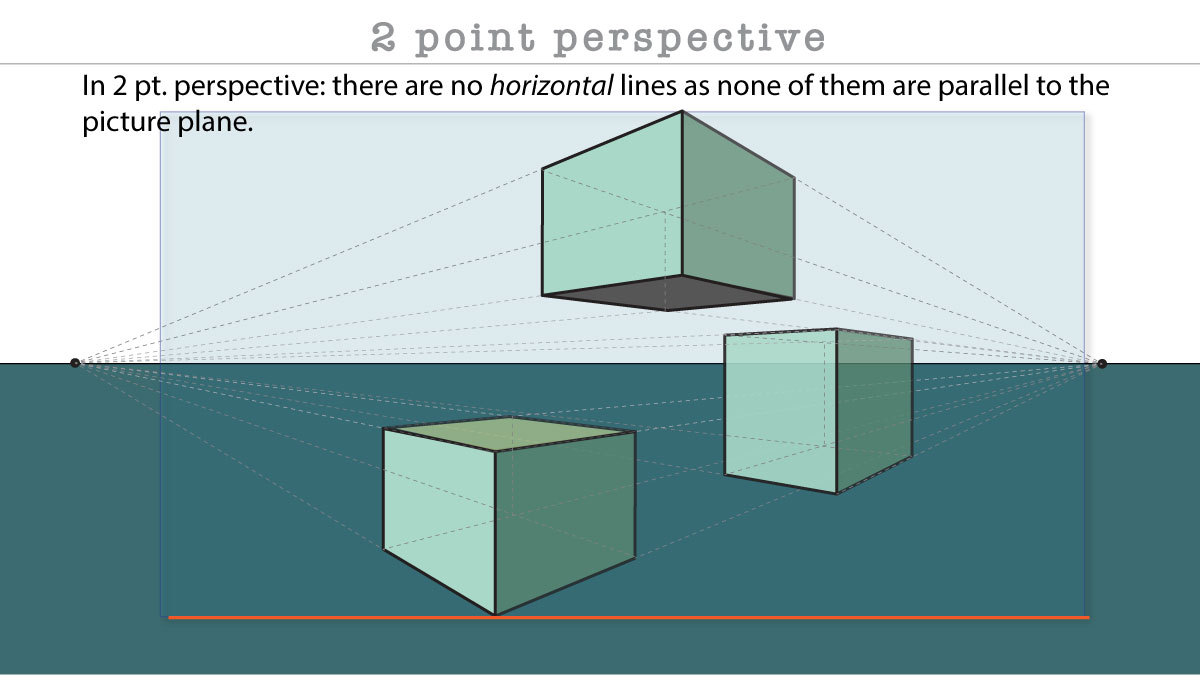
In 2 pt. perspective: there are no horizontal lines as none of them are parallel to the picture plane.

intro to 2 point perspective

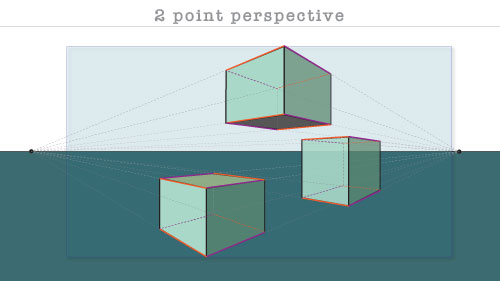
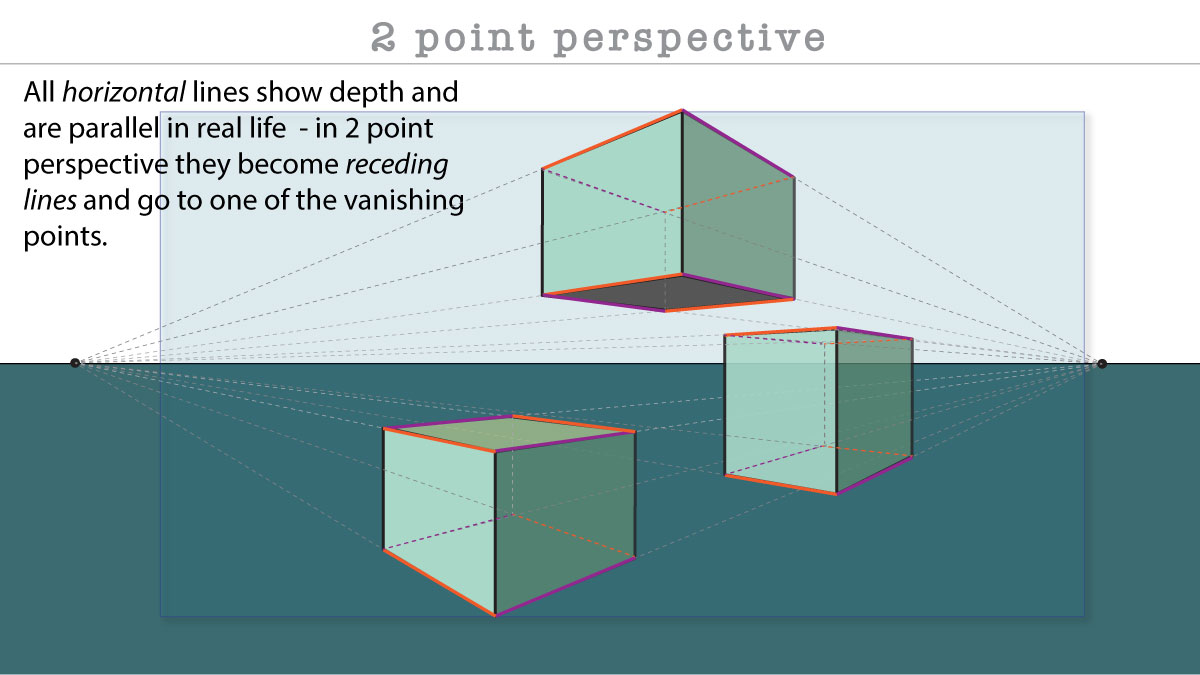
All horizontal lines show depth and are parallel in real life - in 2 point perspective they become receding lines and go to one of the vanishing points.

intro to 2 point perspective

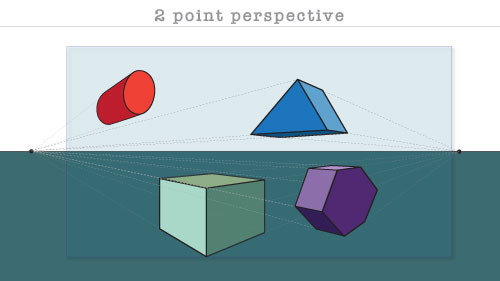
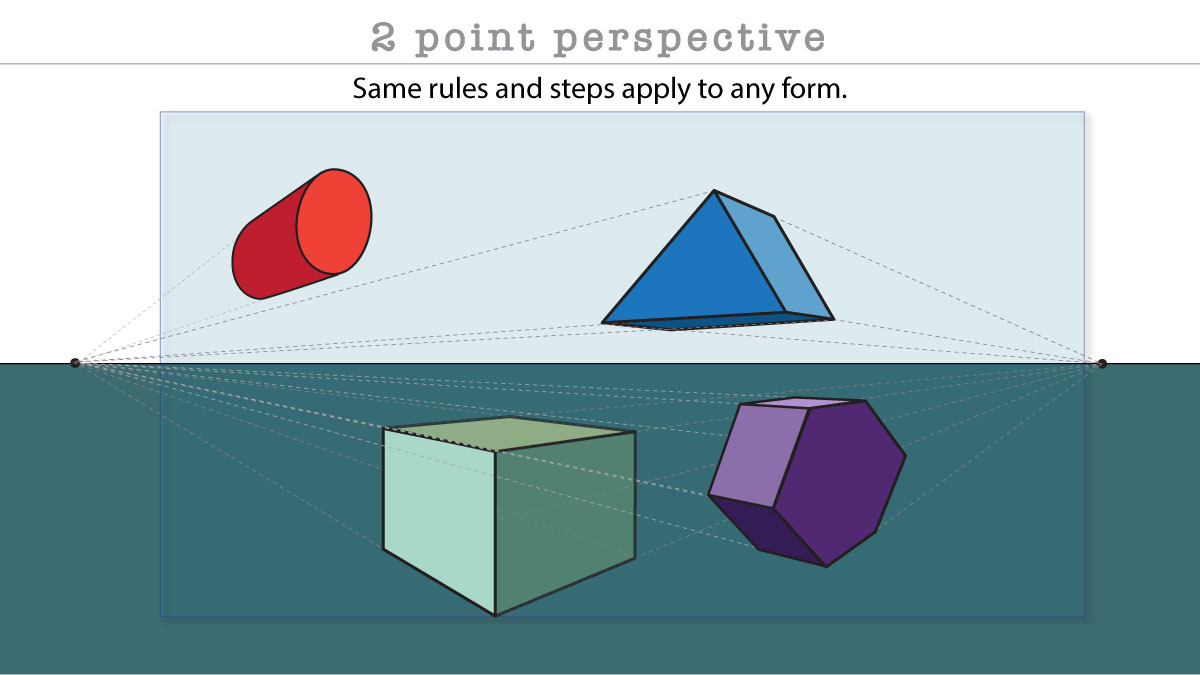
Same rules and steps apply to any form.

intro to 2 point perspective

WORKSHEET ASSIGNMENT

Steps 1, 2 & 3:

box in 2 point perspective

You are going to build a box in 2 point perspective.

Start with drawing a horizon line and placing 2 vanishing points as shown.

box in 2 point perspective

step 4:

Draw the front edge - the closest part of the box.

box in 2 point perspective

step 5:

Draw receding lines from each corner to both vanishing points.

box in 2 point perspective

step 6:

Guess the depth - place a mark on a receding line.

this mark is your far right corner.

box in 2 point perspective

step 7:

From the far corner draw a straight vertical line all the way down until it reaches the other receding line.

This line is your far right edge.

box in 2 point perspective

Now you have your right side done!

box in 2 point perspective

Repeat the steps on the left side:

Mark the depth (guess)

box in 2 point perspective

Now you have the left side done.

step 8:

box in 2 point perspective

Add a receding line from both far corners.

box in 2 point perspective

Their crossing point is the far bottom corner.

Now you have the last visible side done.

box in 2 point perspective

step 9:

Now is the time to complete the hidden sides.

Draw a receding line from both upper back corners.

box in 2 point perspective

If you did everything right - your box should look like this one.

box in 2 point perspective

rebuild the following forms:

Remember to start with the closest edge.

It is essential to draw the "hidden" sides to build the complex forms.

final image for shapes in perspective
box in 2 point perspectiveL shape in 2 point perspectiveform in 2 point perspective
...