


by JuliannaKunstler.com

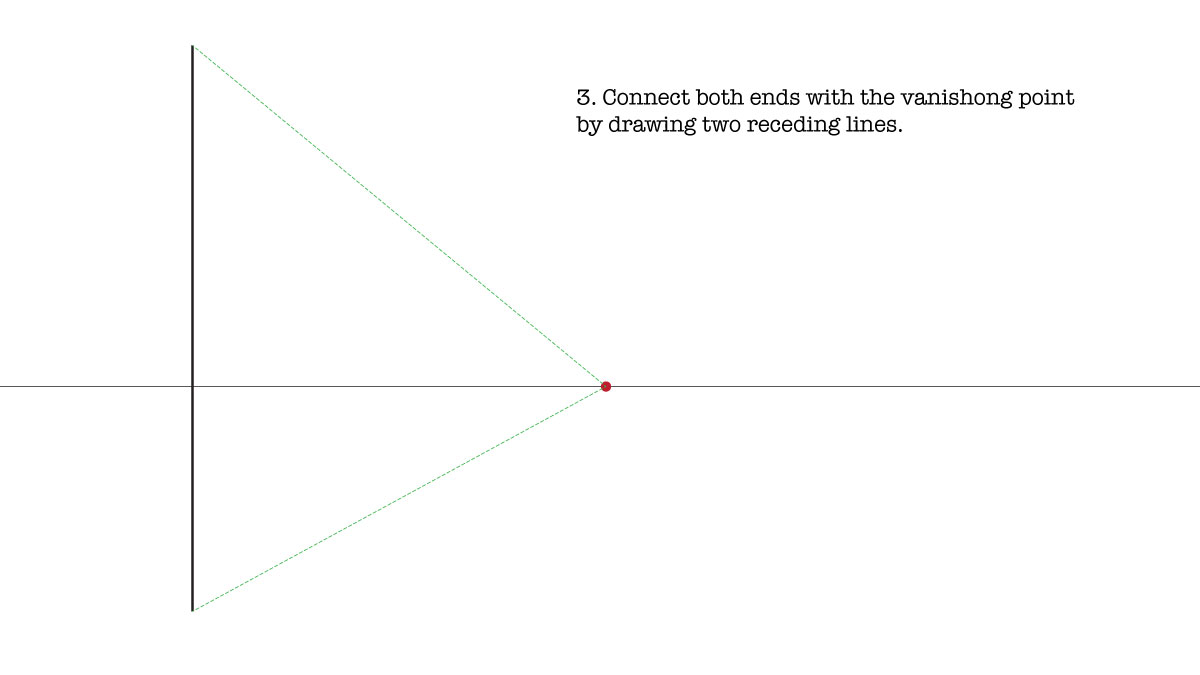
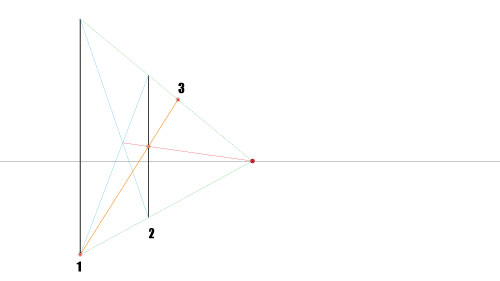
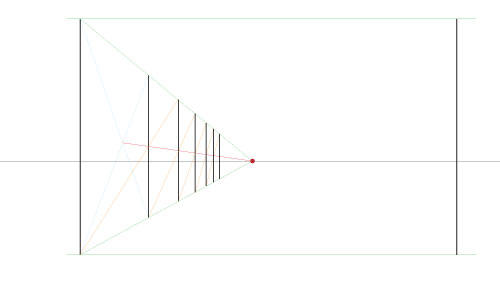
1. Draw a horizon line. Place a vanishing point.
2. Draw your first post.

3. Draw receding lines from the top and the bottom of the post. This will define the height limits for the rest of the posts
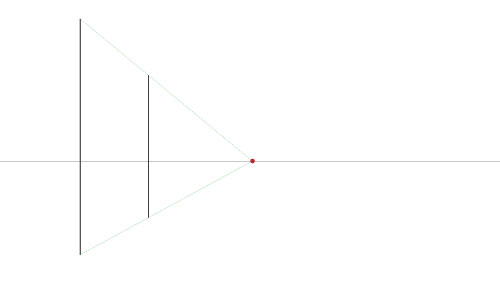
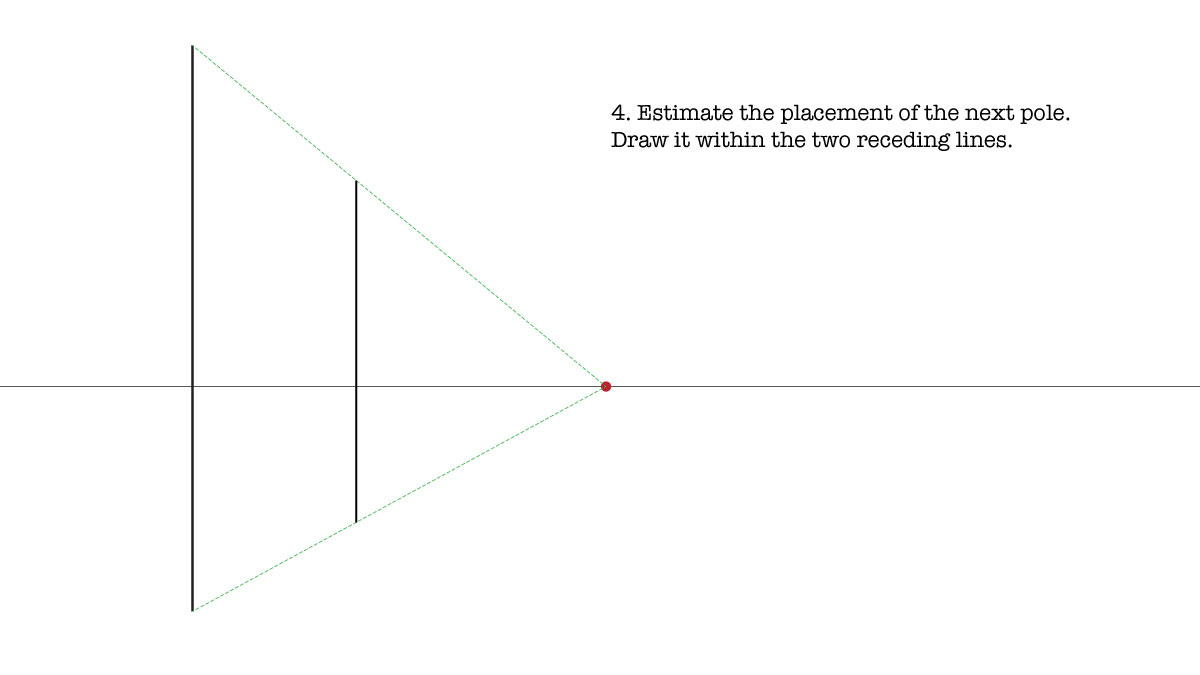
4. Estimate where the 2nd post will go.
Draw it within the receding lines. This is the only "guess work" that you can do.
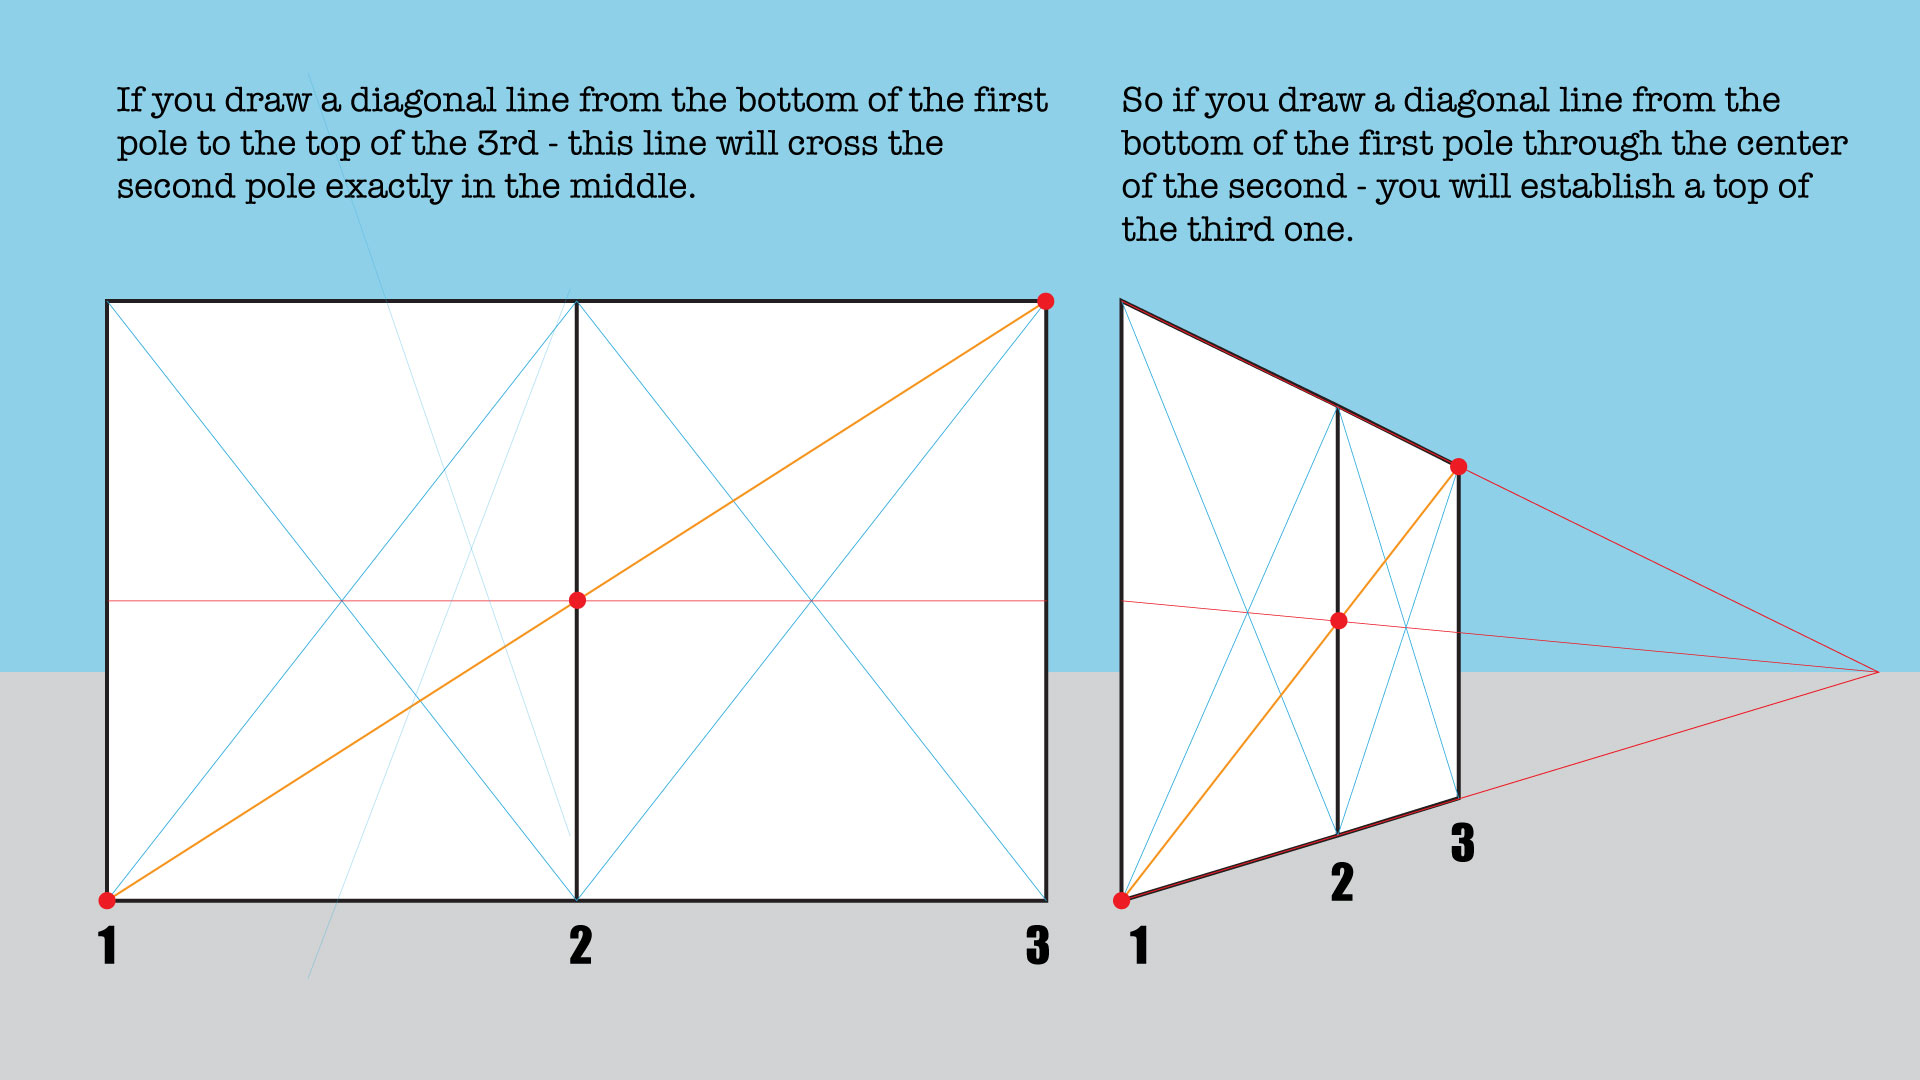
If you draw a diagonal line from the bottom of the first pole to the top of the 3rd - this line will cross the second pole exactly in the meddle.
So if you draw a diagonal line from the bottom of the first pole through the center of the second - you will establish a top of the third one.
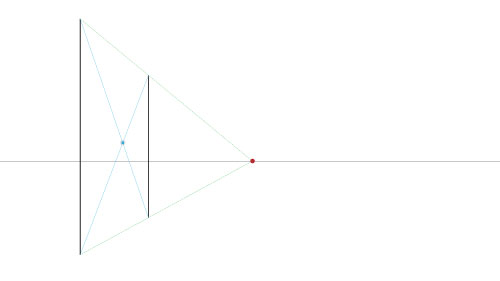
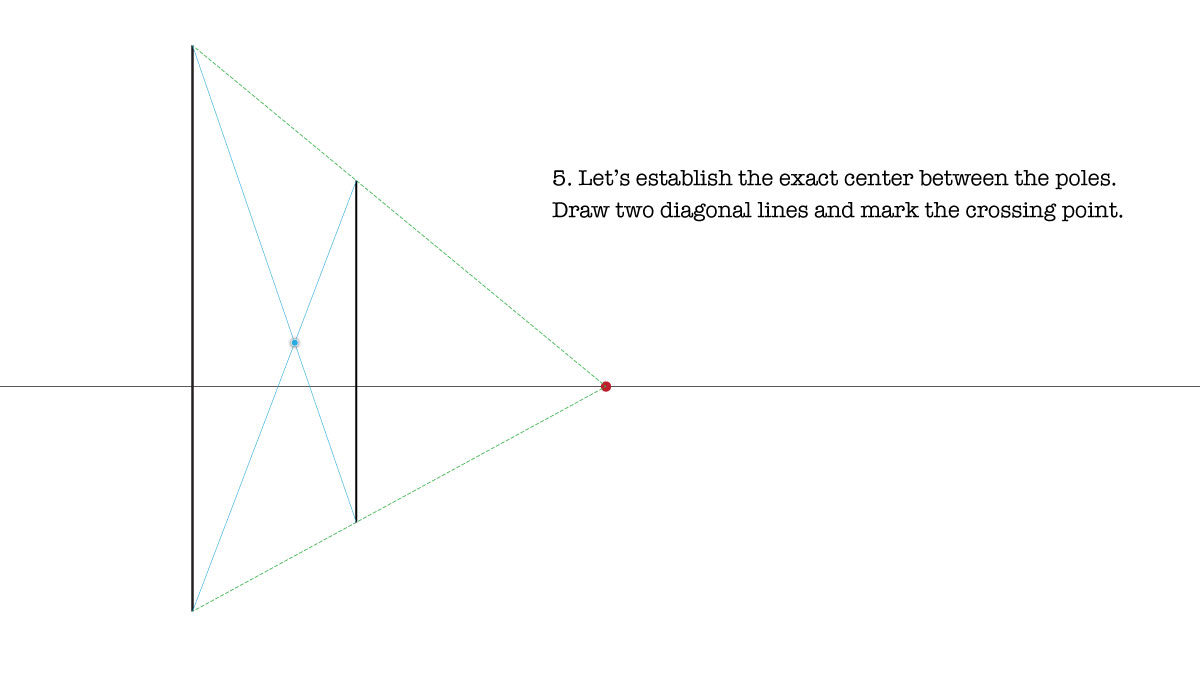
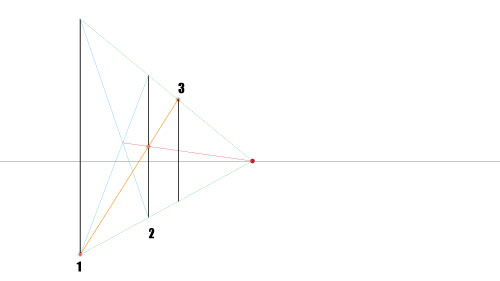
5. The next few steps are to establish the exact center of each pole. We cannot just use a ruler. We need to first find the actual center point between the two posts.
To do so, draw two diagonal lines between the posts.
Use light pencil lines. You are going to erase them later.
6. Draw a receding line from the center point.
This line will go through visual centers of all posts.
Mark the center point of the 2nd post.
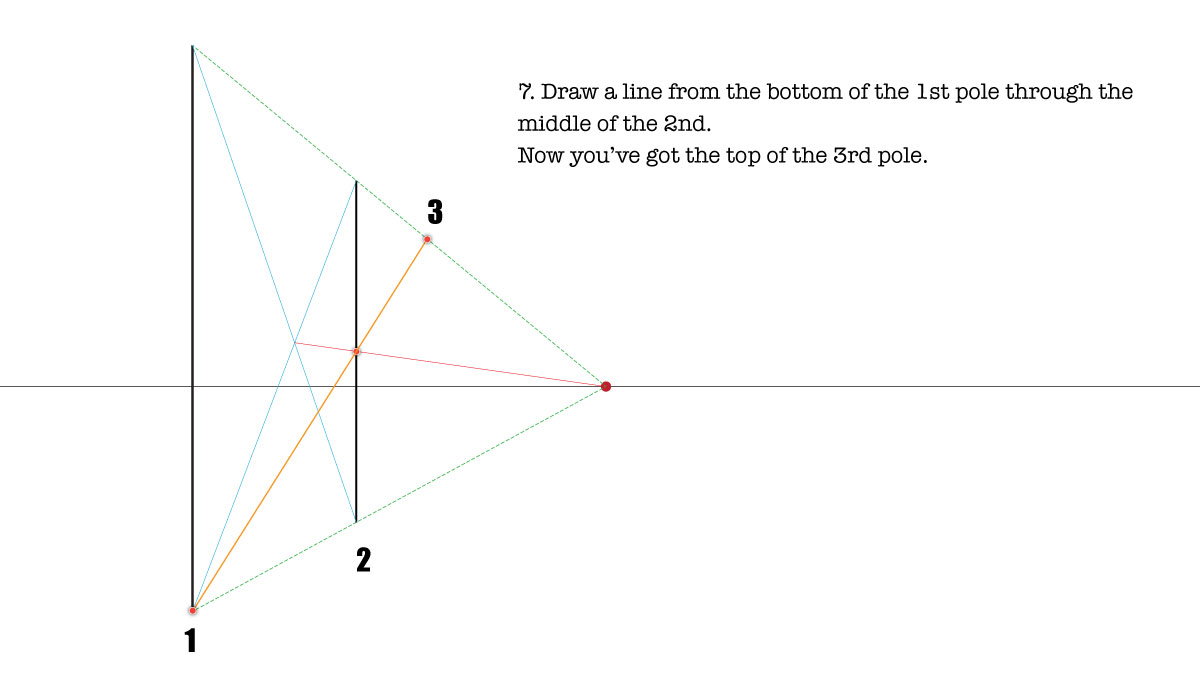
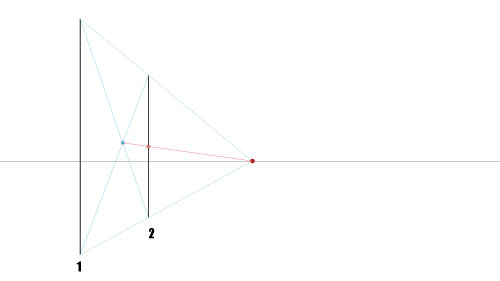
7. Draw a line from the bottom of the 1st pole through the middle of the 2nd.
Now you’ve got the top of the 3rd pole.
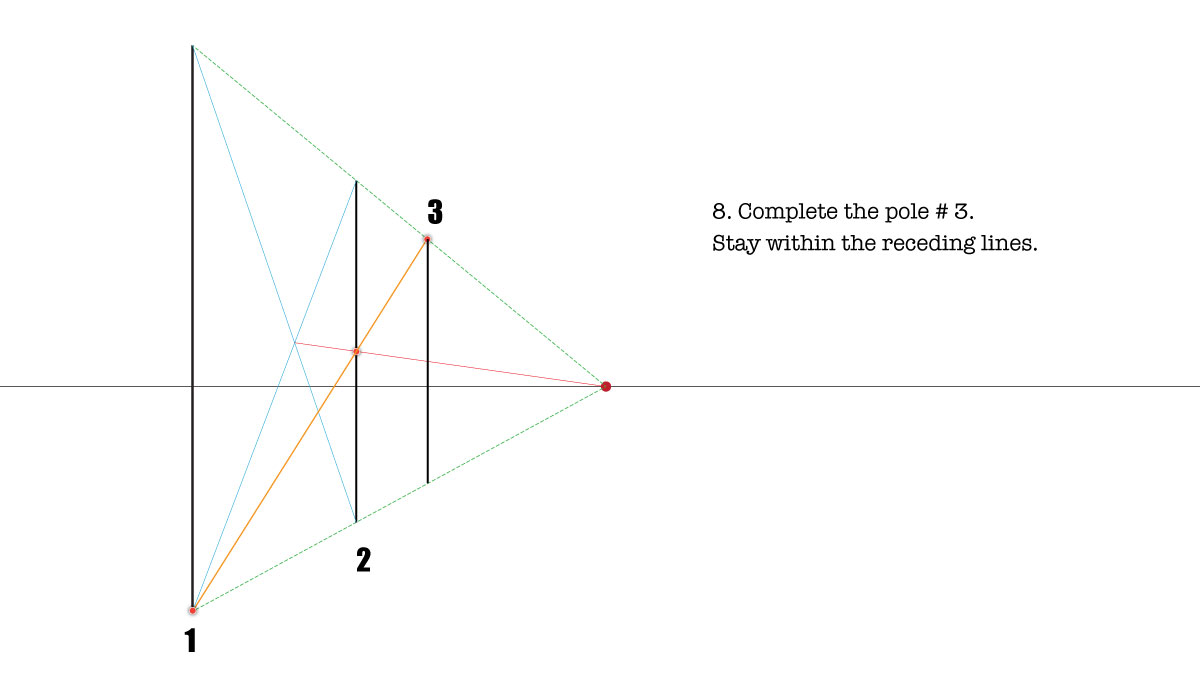
8. Draw a post at the mark point between the receding lines.

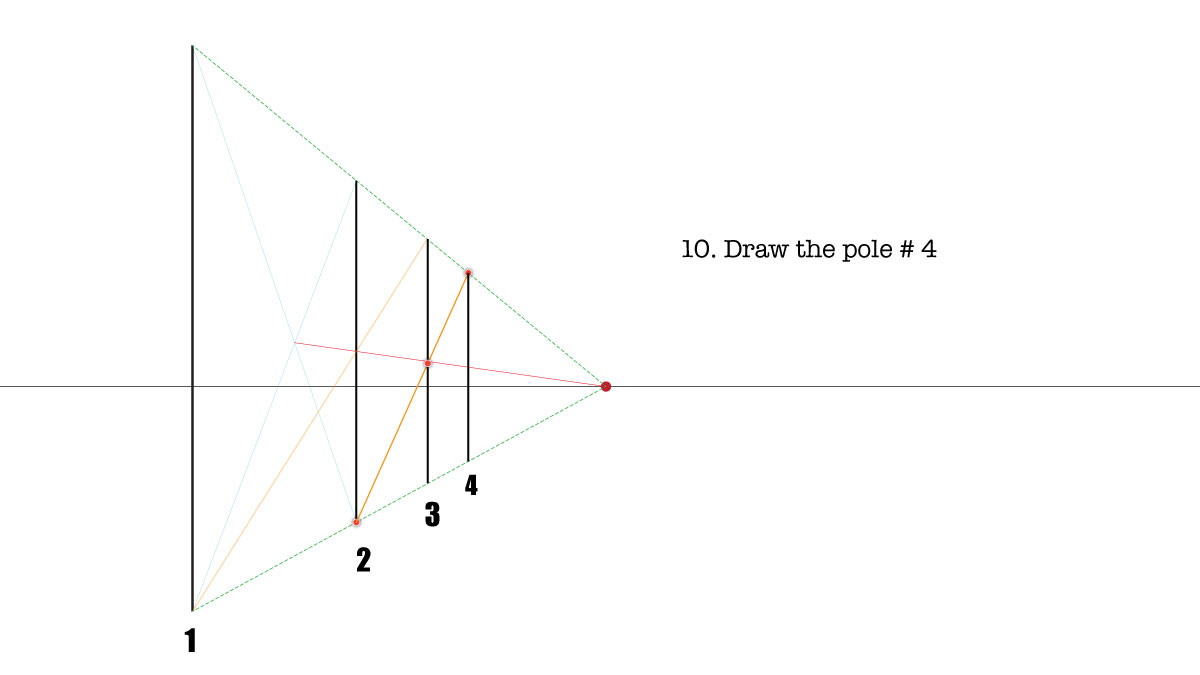
9. Repeat the steps to draw the rest of the poles:
...from the bottom of the 2nd
...through the middle of the 3rd
...you’ve got the top of the 4th pole.
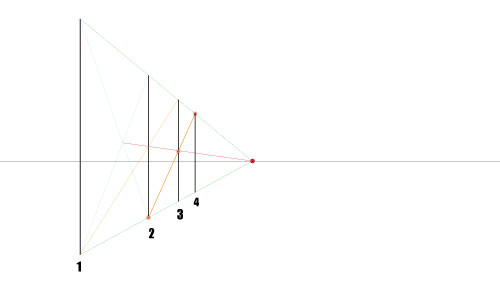
10. Draw the 4th post.
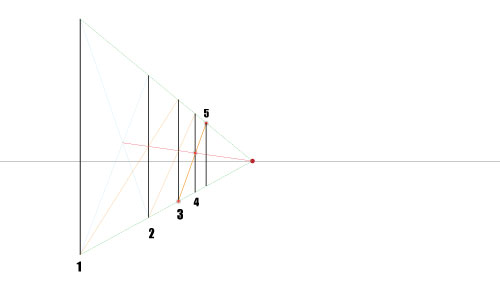
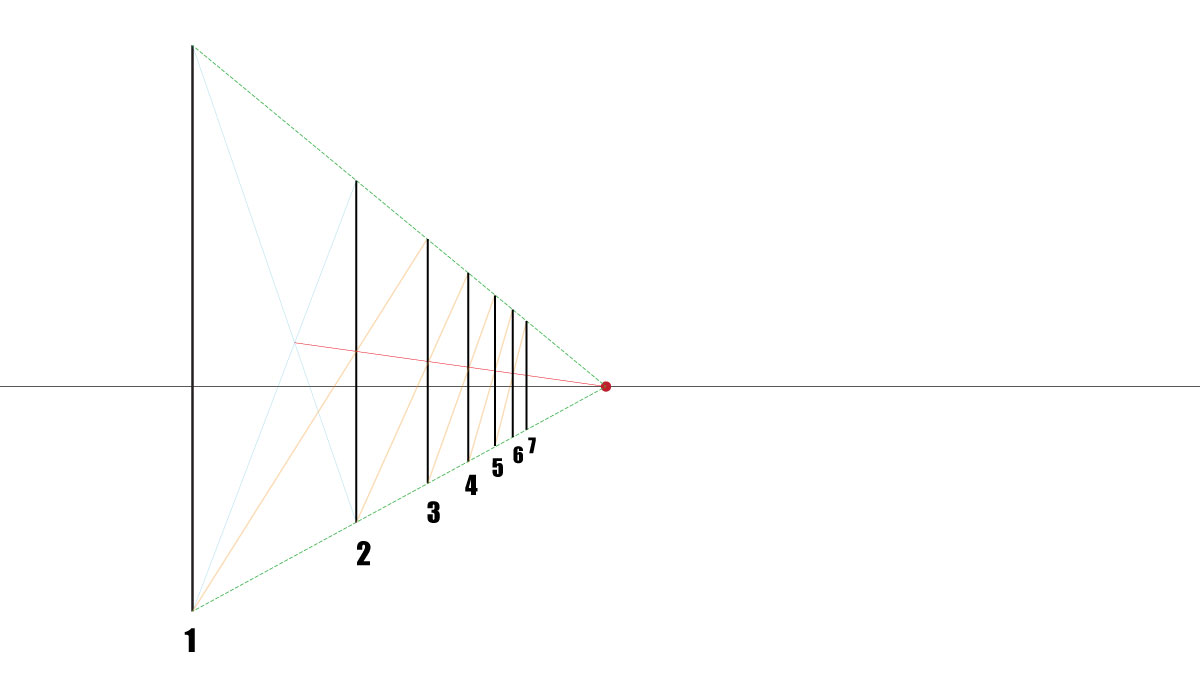
Repeat the same steps:

Continue to add posts until you have at least 7.

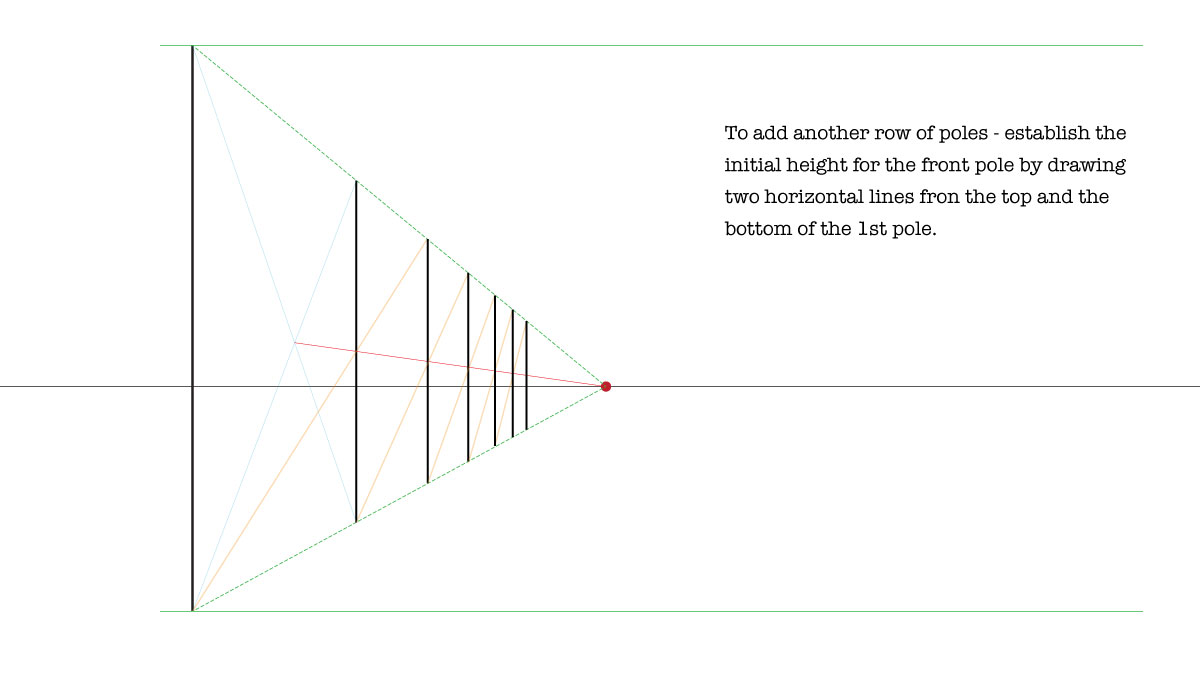
To add another row of poles - establish the initial height for the front pole by drawing two horizontal lines from the top and the bottom of the 1st pole.
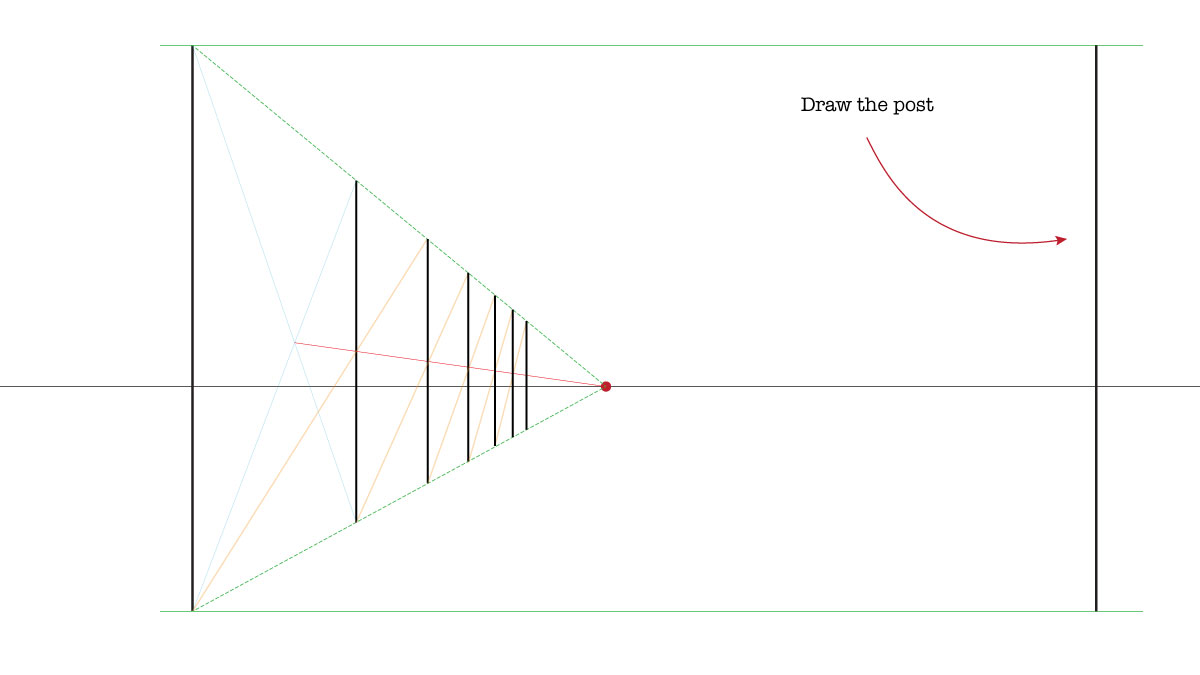
Draw the front right post.

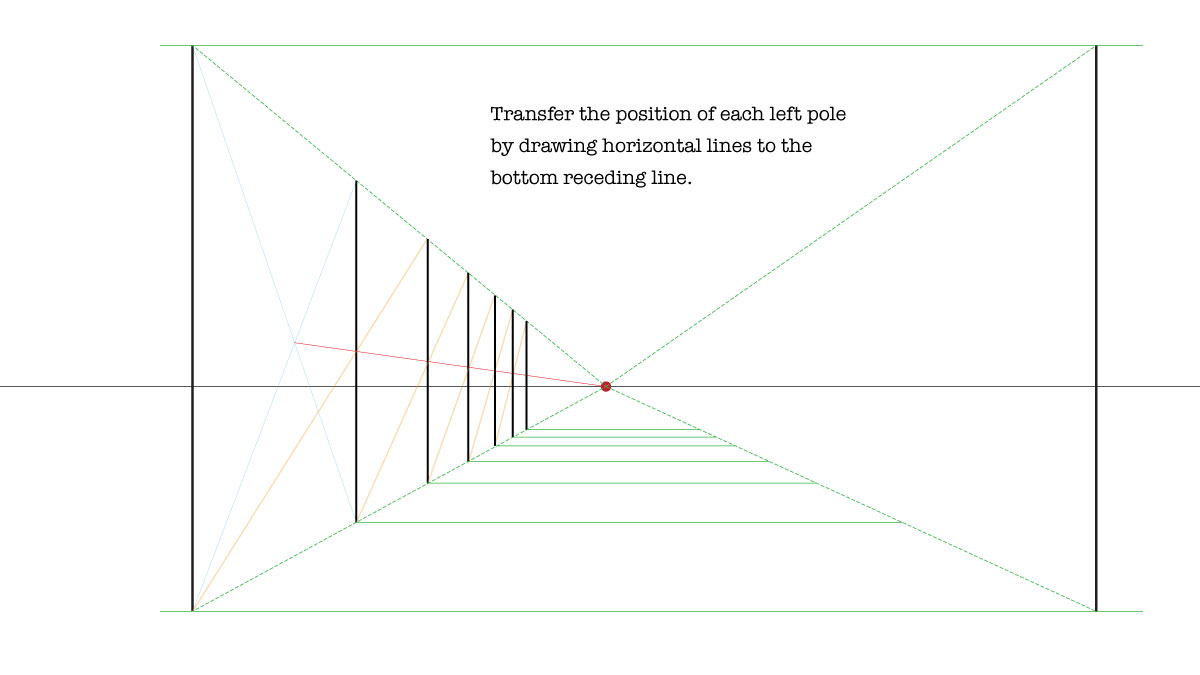
Connect the right pole to the vanishing point.

Transfer the position of each left post by drawing horizontal lines to the bottom receding line.
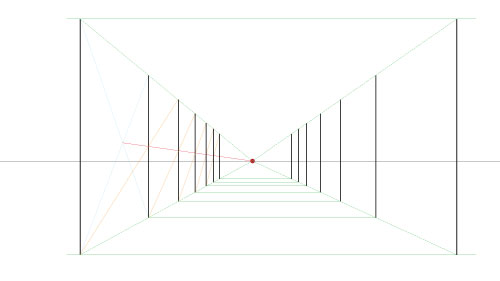
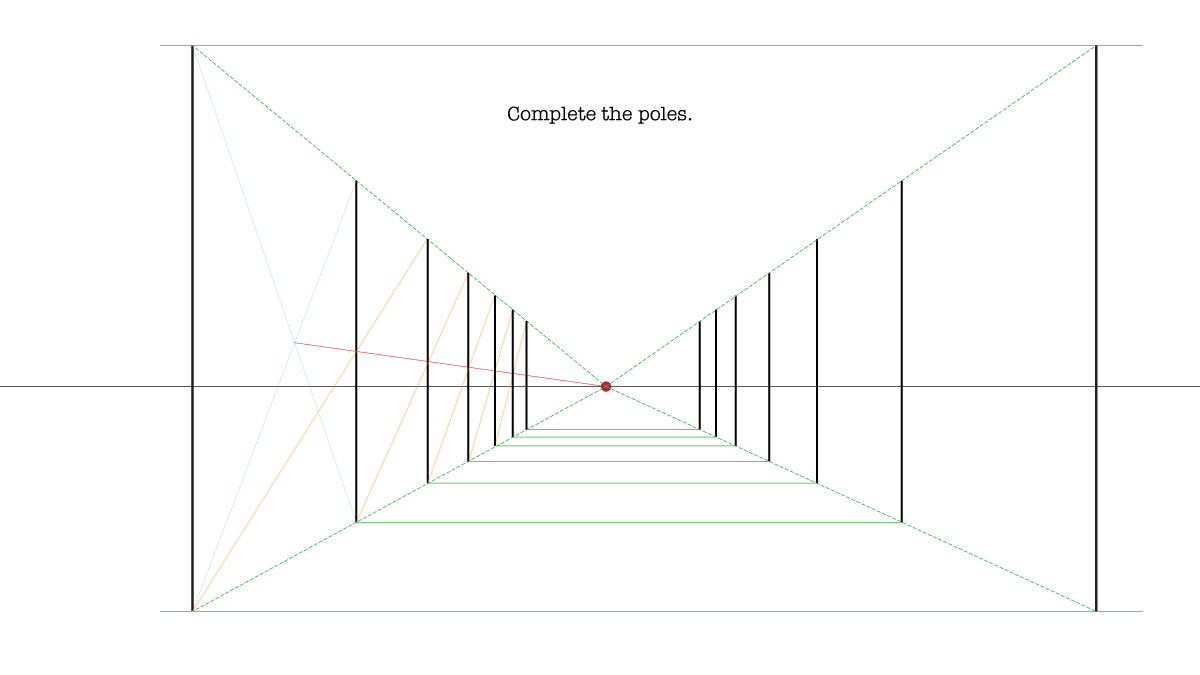
Draw right posts between the receding lines.

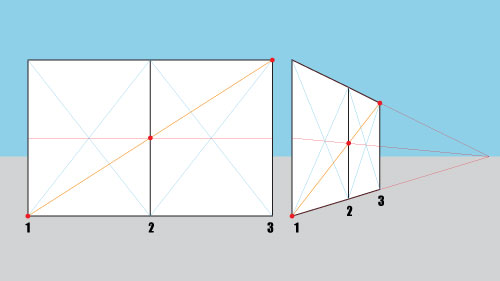
The "posts" method can be applied when you need to evenly space objects on a surface.
It can be applied to dividing a line into even segments.
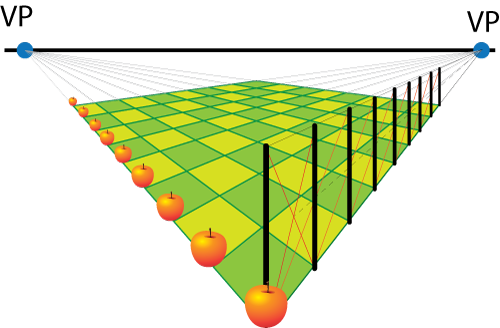
It can be used in a 2-point perspective to build a grid.
Grid can be used to place objects.
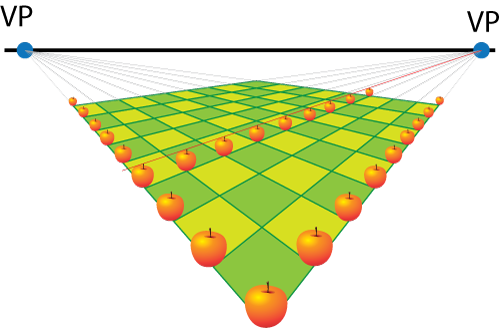
Placing objects on a grid - is the most accurate way to keep the proportions correct.
