You will need 6 slide layouts:
- Title slide
- Title + content
- Content slide (content with caption)
- 2 contents
- Image with caption
- Blank slide

You can get some ideas of slides types by checking existing templates and images.

Open a new file.
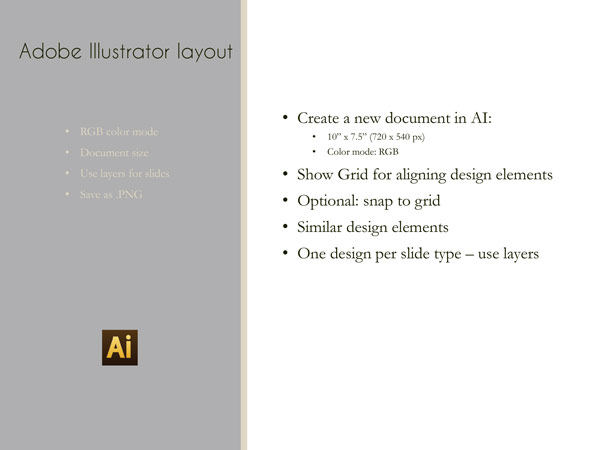
Default presentation size is 10 x 7.5inches (or 720 x 540 px, that is 4:3 aspect ratio).
Color mode should be RGB (as the presentation is viewed on a screen).

To keep all design elements aligned, add a grid view:
View > Show Grid
Gris will not be a part of your design - it's a tool

I recommend the following grid settings:
Every 1 in
Subdivisions: 8

Paste the color swatches from previous assignment.

In Swatches palette:
Create a new Color Group to keep your color scheme swatches.
(If you do not have swatches palette open, go to Window > Swatches).

Select Eyedropper tool and click on the first swatch.

step 1: Select folder
step 2: Click on New swatch button.

Double-check the color settings.
Click OK

Now you have your first color saved in the folder.
Always select the folder before clicking on New Swatch button

Save the rest of the colors.


Use Selection and Direct selection tools to move, resize, and modify the objects.
important:
- Background supports the content, not competing with it - make room for text and images in your design.
- Use only colors from your color scheme, you do not have to use all of them. White and Black are acceptable add-ons.
- Design should be consistent in all slides.

Use line tool for extra lines.
Hold SHIFT for horizontal, vertical, or 45 degrees lines.


Pencil tool is for free-hand path drawing.
Use Pen tool for custom shapes and lines.

Tools that you might use:
- Selection and drawing tools
- Fill / stroke color swatches
- Align palette
- Layers palette
- Swatches palette
Questions you should ask yourself:
- Background: solid? gradient? photo? design/pattern? combination?
- Title: position in a slide? alignment to other elements? size? font? color?
- Subtitle: needed? font properties? alignment? position?
- Do you have enough space for the actual presentation?
- So you want to add your signature/hallmark to slides?

Add a new layer for each slide graphics.
text
Use text fields for design reference purpose only to determine text placement, size, font, alignment, etc.
Remove from work area before saving the background as an image.

You can rename slides as you add them.
Close Layer visibility (eye icon) for all previous slides.


 Save each layer as an individual file: