julianna kunstler logo
photorealism

grid drawing
Instagram icon
 

by JuliannaKunstler.com

value drawing

Use the grid to copy and enlarge an image.

Grid drawing is a very old technique of transferring images (from sketches to a full size canvas or fresco, etc...)

Always make sure that the number of squares on the original picture and your working area are exactly the same. If the dimensions of the paper do not quite match the dimensions of the picture - cut the paper....

In this particular project you will have the exact dimensions of the board and a photograph to match the number of squares in the grid. Make sure you follow all steps below.

GALLERY

value drawing
photorealism
grid drawing
value shading
grid drawing
photorealism

STEPS

What is the plan?

  1. Find a reference photo
  2. Edit your image in Photoshop to remove colors and adjust proportions
  3. Print the image, attach the grid
  4. Draw a grid on the drawing board
  5. Copy the image's shapes inside each square of the grid
  6. Add value by shading the drawing

How I will grade:

These are the criteria that will be used to grade your drawing.

Please double-check that all requirements are completed before turning in the project.

REQUIREMENTS max. points
The piece is finished (looks like the original) 20
Challenging yourself:
Complexity of the original image - objects and backgrounds, value variety, details
10
Grid is not seen, no outlines in the drawing 5
Drawing quality
Drawing is detailed, contains all shapes as they appear in the original image
20
Shading quality (values)
Variety of values used, values match the original, objects look three-dimensional
20
Shading quality (technique)
Strokes are small, consistent, blending is optional
10
Craftsmanship 10
Studio work 5
TOTAL: 100

step 1 - look for a reference photo

Find a photograph that you like. Make sure its longest size is more than 500 px

Right click on the image > Save Image as.....

Save it in your folder.
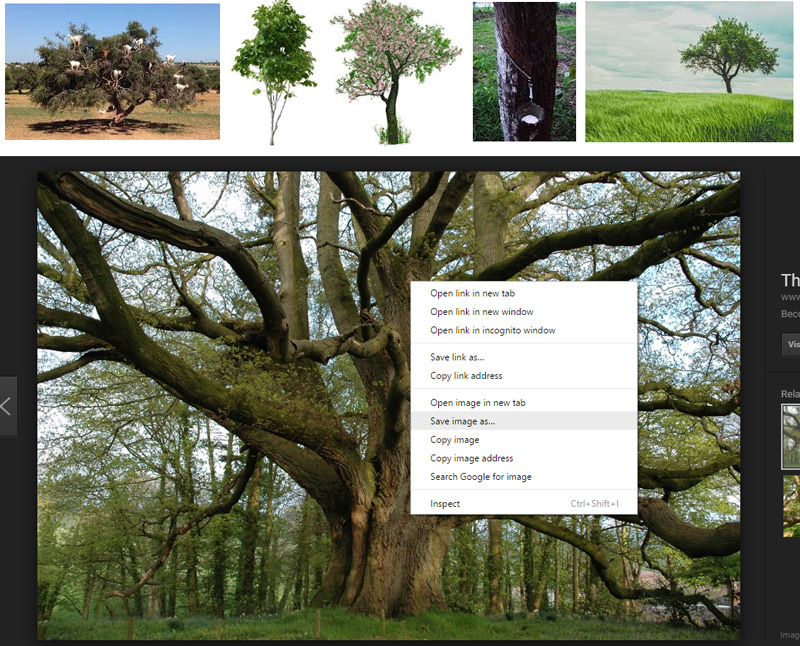
save photo

step 2 - edit Image in Photoshop

Open Adobe Photoshop.

File > Open.... navigate to the image that you just saved.

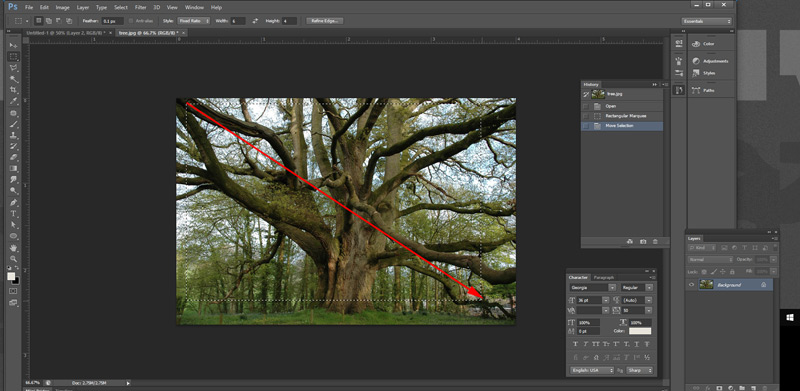
make a selection

In the Tool Box:

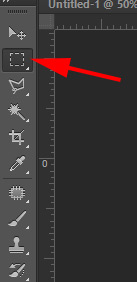
Select Rectangular Marquee tool

In the Options bar:

Choose Style as "Fixed Ratio"

Set width to 6, height to 4 (or the opposite if you saved a vertical image).

Click and drag to select the part of the image you plan on drawing.

If you made a wrong selection - click outside of it and reselect again.

Then you need to crop it: Image > Crop
remove colors

Image > Adjustments > Desaturate

This will make your photo Black and White.

remove colors

resize photo

Image > Image Size

In the pop-up window:

set the image to 6" x 4"

step 3 - print & grid

File > Print

Select the correct printer.

Set the layout to "landscape" if your image is horizontal.

Print 1 copy.

Save and close the file

place grid

Use a grid - printed on a copier transparency.

Align the picture with the grid. Attach them with a masking tape.

step 4 - illustration board grid

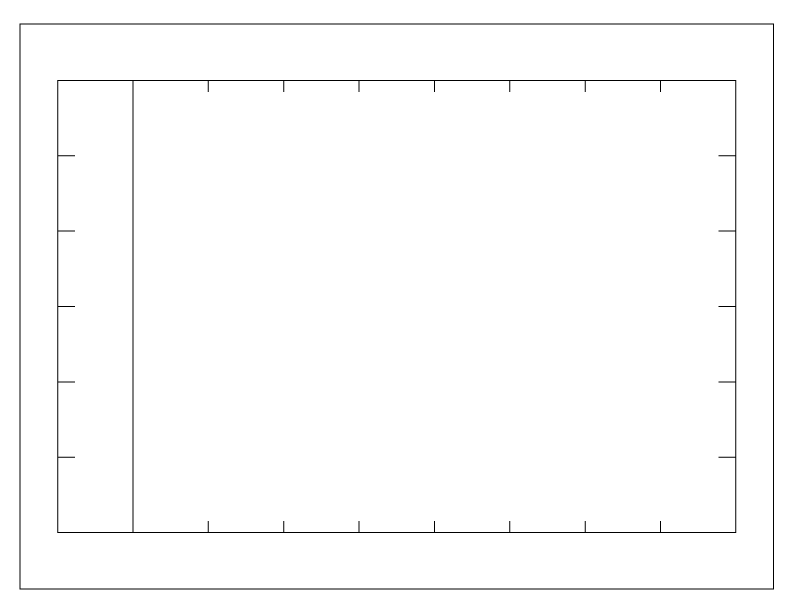
Start with a 20"x15" illustration board. Draw a border following the following measurements:
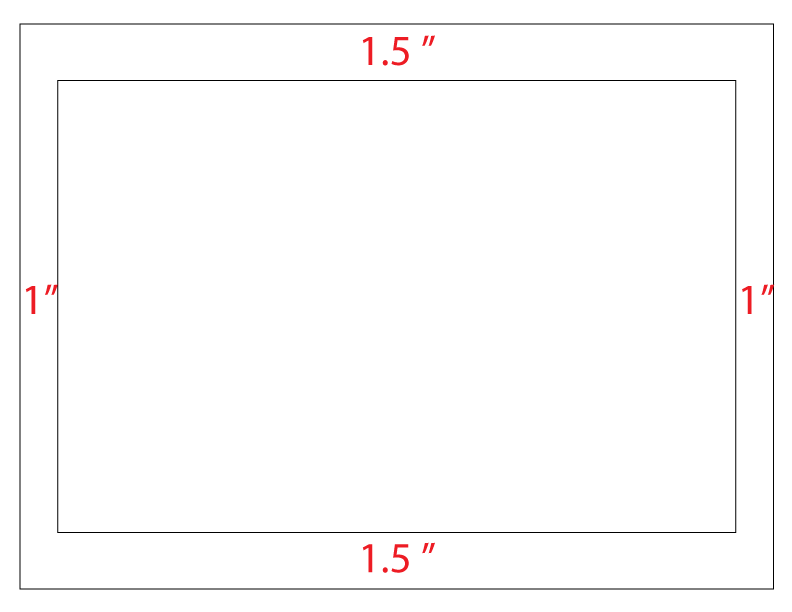
board

Place marks every 2 inches on the border lines.

Use VERY THIN LIGHT LINES!

draw grid

Connect the marks.

grid

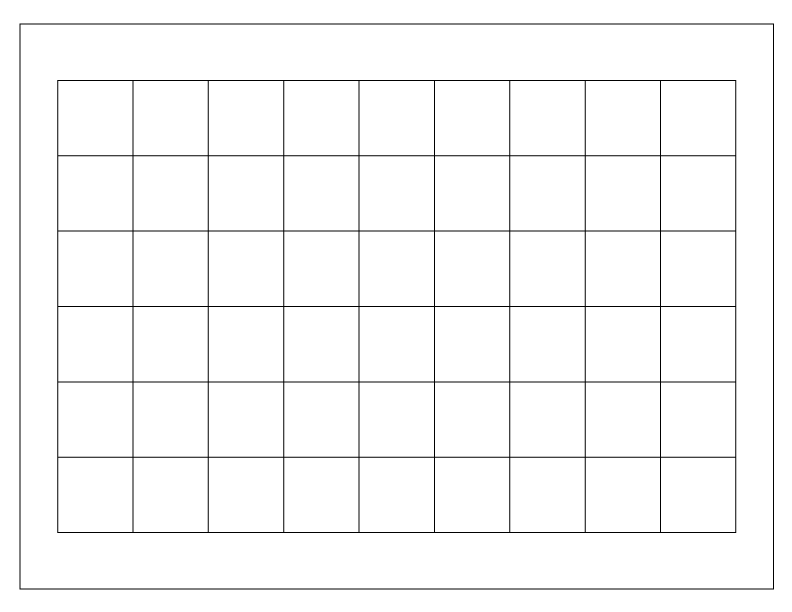
Complete the grid

grid on the board

step 5 - transferring the outlines

There are many shapes inside each square. Some of them are well defined, some are blurry. You'll need to copy them all.

Try not to think of what you are drawing - just copy the shapes accurately. Think that you are copying an abstract design.

It helps to cover the area around the square that you are copying at the time. Use sticky notes or just a few pieces of paper - that will help you to concentrate on just one square, without being distracted by others.

Start with square 1.

IMPORTANT: as you copying the shapes - DO NOT shade anything!!! Just outline the shapes!!!!

grid method

Start with big shapes first.

grid marking

Notice where the main shapes cross the grid lines.

drawing with grid

Mark that on your drawing board.

Think: "...this line crosses the grid about 1/3 of the square, or it crosses it right in the middle..."

Notice the outlines of the main shapes.

Copy these outlines.

Now - the secondary shapes. If they are not well defined - try your best to draw their outlines.

Work with one square at a time.

Copy everything you see. Forget the big picture. Just copy all the shapes that you see (even the blurred ones).

Next - connect these marks. Make sure the shapes match.

Do not shade. Use only light fine pencil lines.

Add as many details as possible. No rush!

Once you are done with one square - move to the next one.

Keep drawing.

When finished - erase the grid, especially in the areas of light values.

step 6 - shading

value shading

Take a careful look at the photograph. Find the most important / detailed areas. These are the areas you want to focus on.

Start shading with the darkest values first. Carefully shade all values and value transitions. Use small strokes.


The drawing should have as many value variations as the photograph. Have the strokes go in the direction of the texture (feathers, grass, fur...)


...