method 1

Open both images in PhotoShop.
Use Move tool to drag the face onto the superman image.
Close the face file.

Look at the Layers palette: you have a new layer.
Celebrate!!!!!!!
For this method - make sure this layer stays selected, because this is the layer that you are going to work on.

First you are going to resize the face.
Lower Layer opacity
Free Transform (Ctrl/Command T) to resize the super-face.
Hold Shift as you are resizing to constrain proportions.

Next step is to get rid of the background that came with the face.
Add a Layer Mask to the face layer.
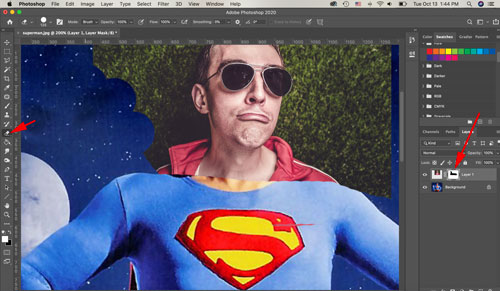
Use eraser tool to hide the unwanted areas.
Make sure you have the Layer Mask thumbnail selected.
 Change Eraser size and hardness as you go.
For the most part, I recommend hardness around 50%.
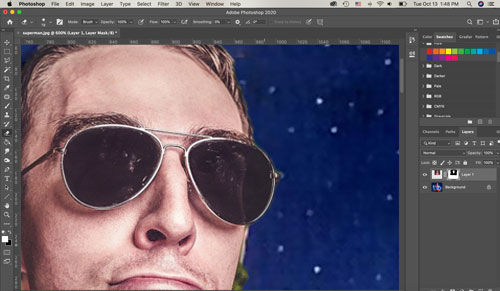
You can change the hardness as you go around well-defined objects like glasses.
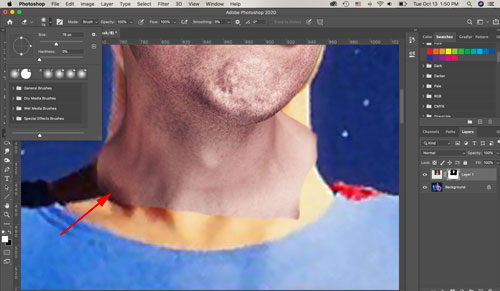
Choose larger Eraser with 0% hardness to fade the neck.

Now it's time to fix the colors for a perfect match.
Select the image thumbnail in the Layers palette.
Add an Adjustment Layer (Layers > New Adjustment Layer > Color Balance)
Important: check the "Use Previous Layer....." option.
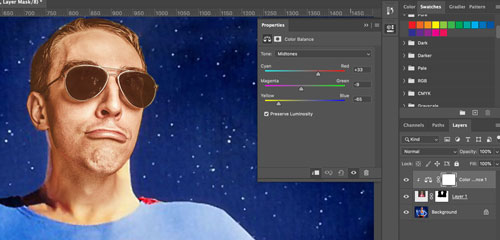
Adjust the colors to add more reds and yellows to the face.
Use your judgment!

Select the face layer again (not the adjustment layer!!!).
Increase contrast:
Image > Adjustments > Levels.
Match the contrast and the tones to the rest of the image. Use hands for color and tone reference.
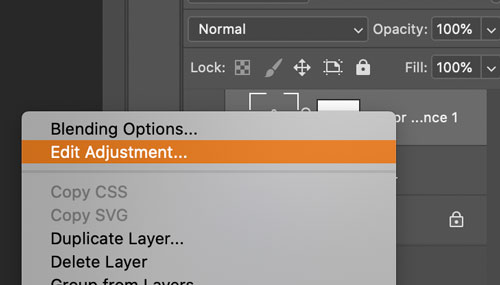
If you need to adjust the colors after you have fixed the Levels - right-click on the Color Balance adjustment layer and choose "Edit Adjustment".
 Double-check that everything looks great.
Save the image as a JPEG or PNG and submit!


 Change Eraser size and hardness as you go.


 Double-check that everything looks great.


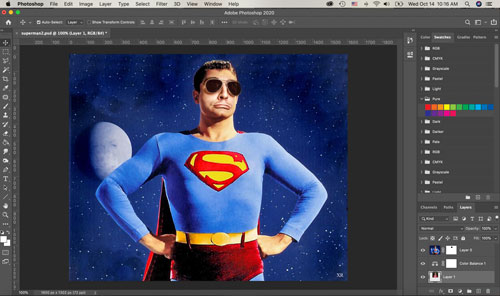 And it's done again!!!