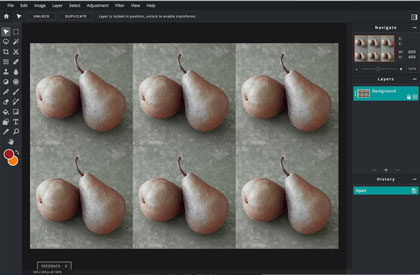
Open the image in Photoshop
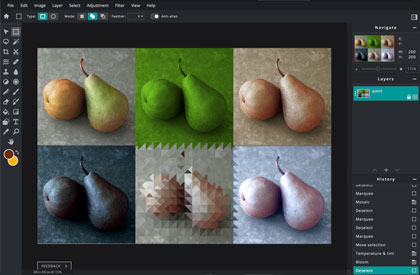
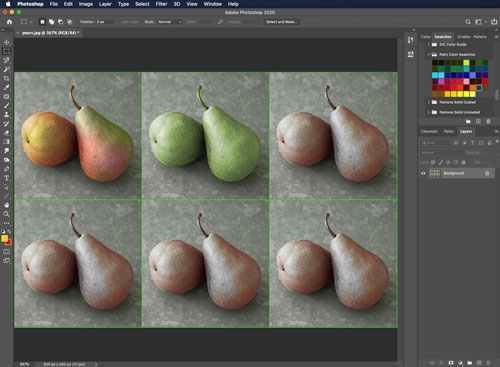
set 1
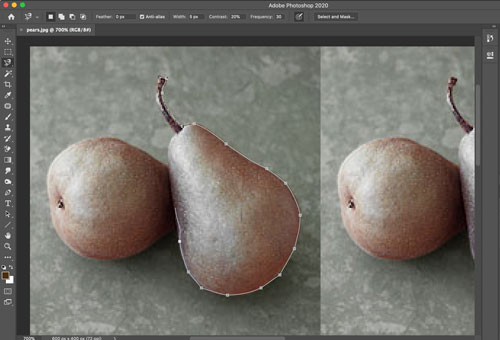
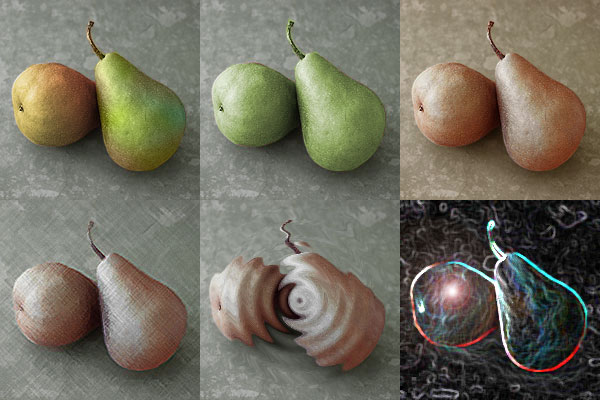
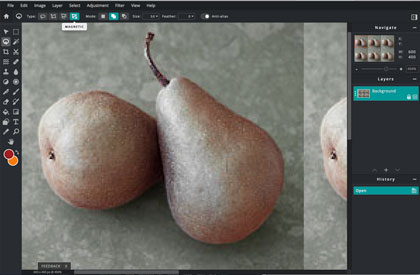
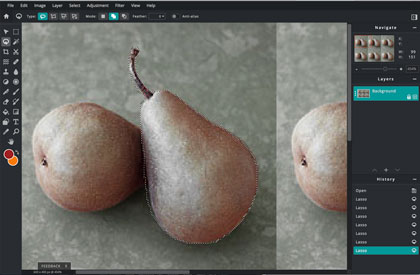
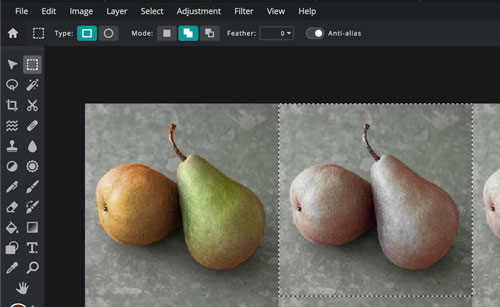
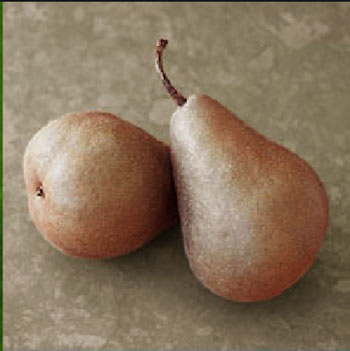
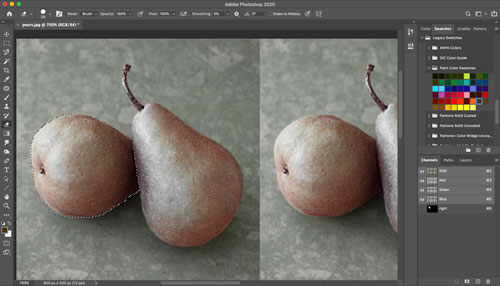
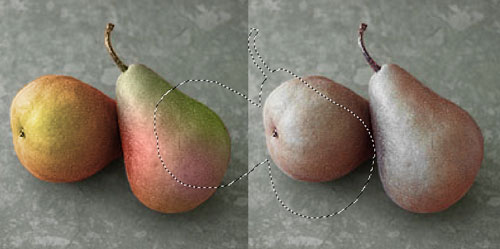
Zoom in the first set of pears.
We are going to color the pears.
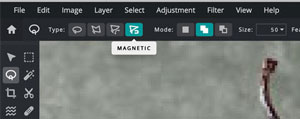
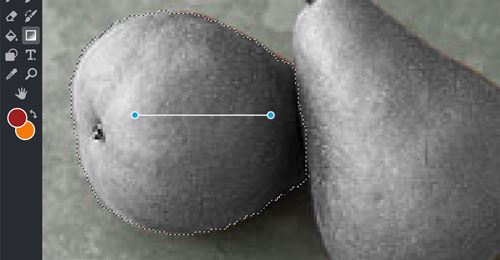
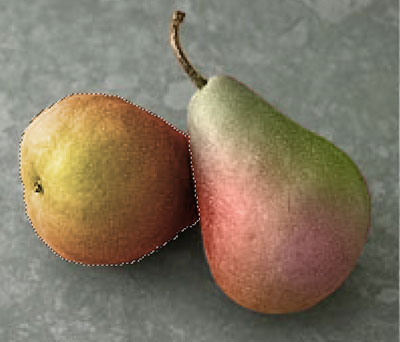
1. Use Magnetic Lasso tool to select the right pear.

2. Switch to Quick Mask mode to clean and fine-tune the selection.
3. Back to Standard mode.
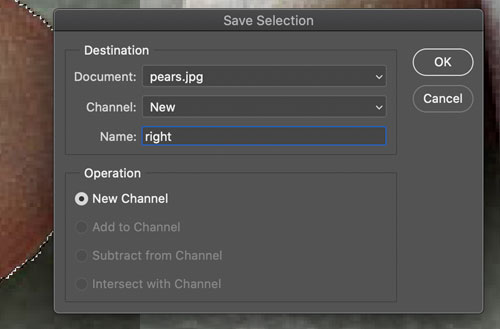
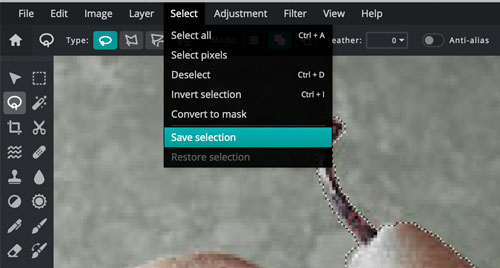
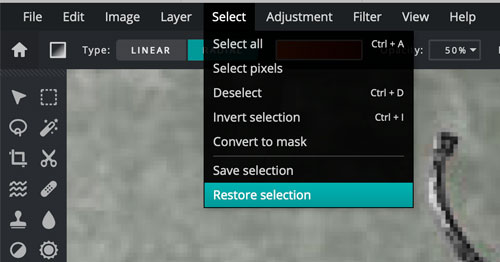
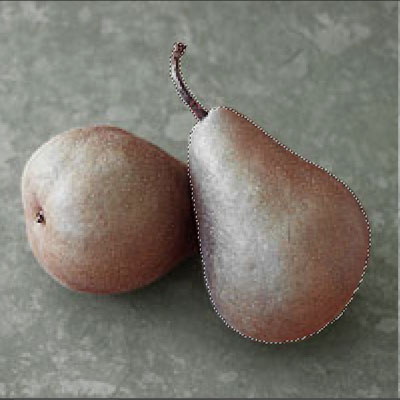
4. Save the selection:
Selection > Save Selection
name it: right
5. Deselect.
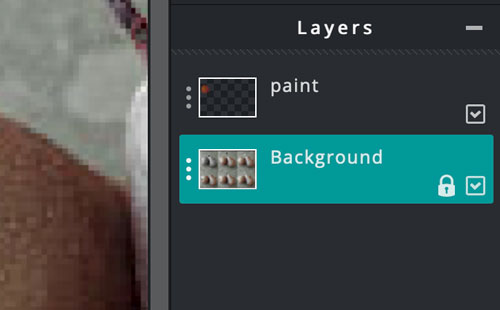
The selection is saved in Channels panel.
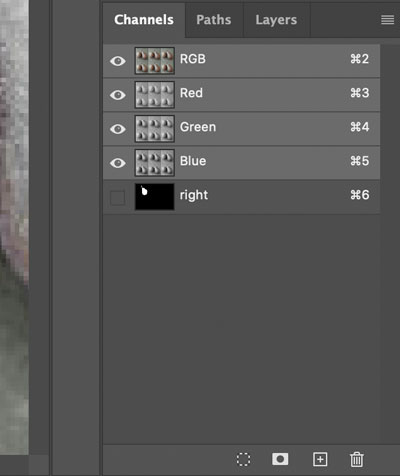
6. Select the left pear.
7. Save the selection as "left".
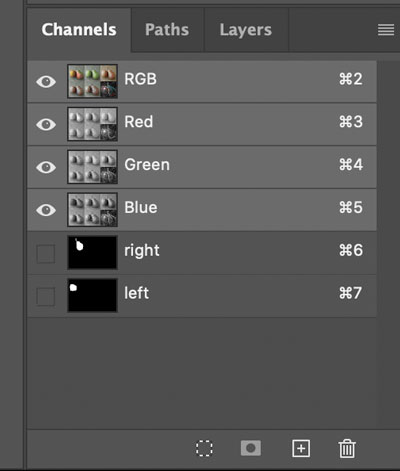
8. This is what your Channels palette should look like.
10. Load the "right" selection (Selection > Load Selection > right)
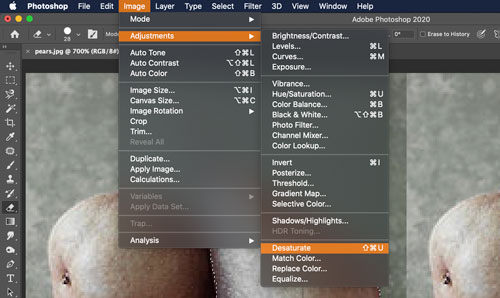
11. Before we paint over the pears, we need to remove any existing color information (make it black-and-white)
Image > Adjustments > Desaturate

12. This is what it should look like.
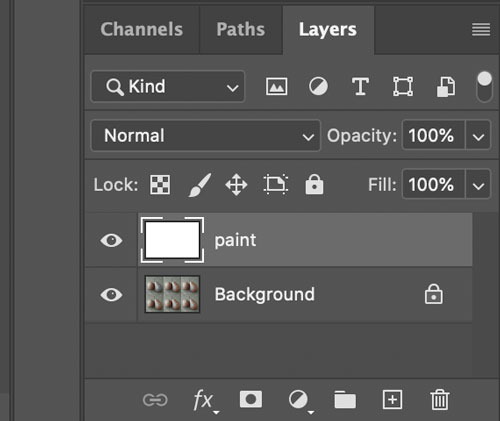
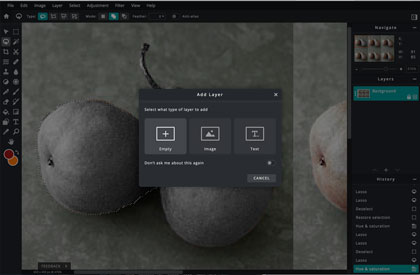
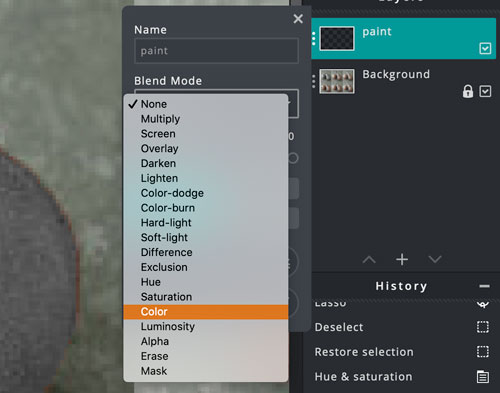
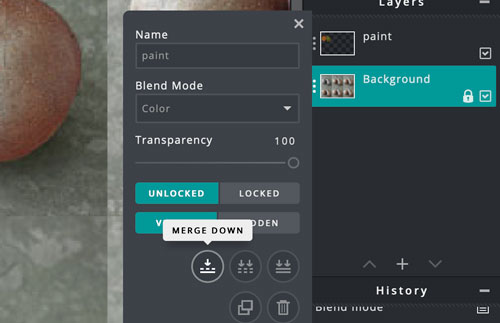
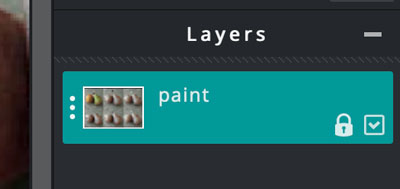
13. Create a new layer. Name it "paint".
14. Select the paint layer. This is where you are going to do all the painting.
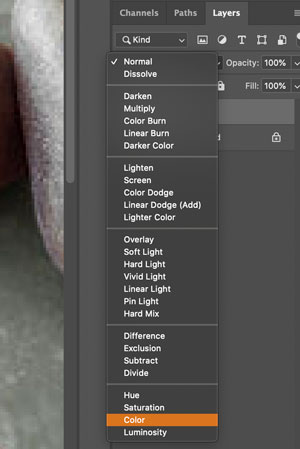
The default layer mode is Normal. If you start painting on the layer with Normal mode - the pear will not look realistic.
There is a special blending mode for coloring - Color
It blends the painting layer with the layer below.
Choose this mode.
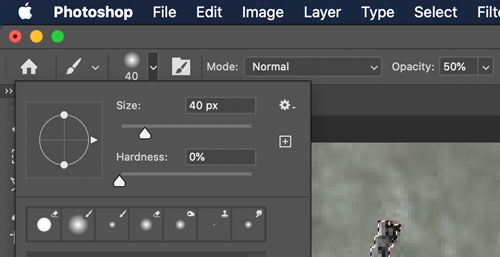
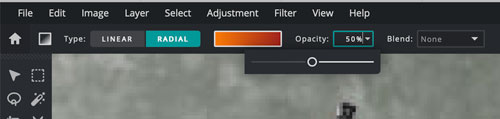
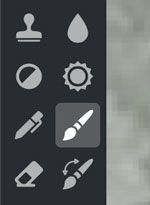
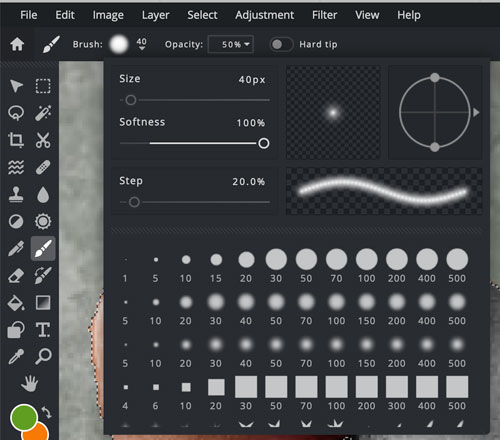
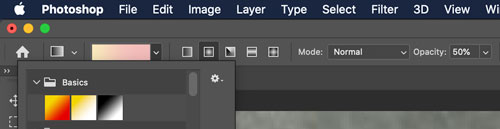
15. Select a soft brush.
Change Brush opacity to 50%
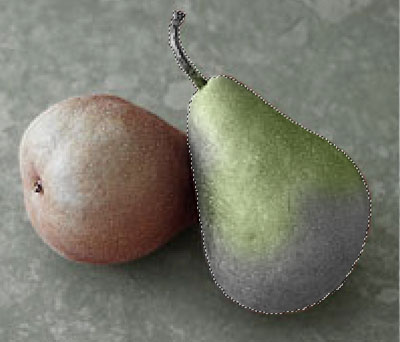
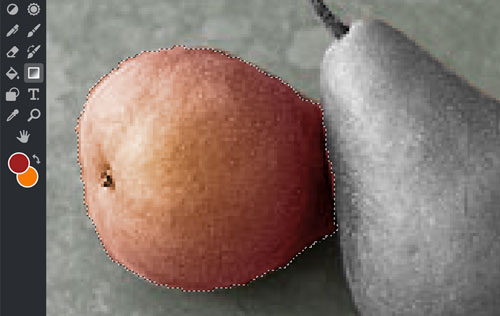
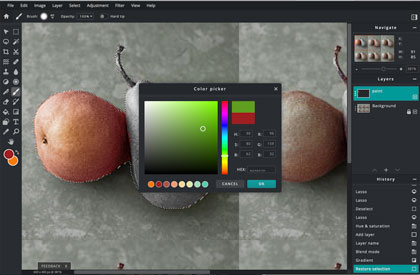
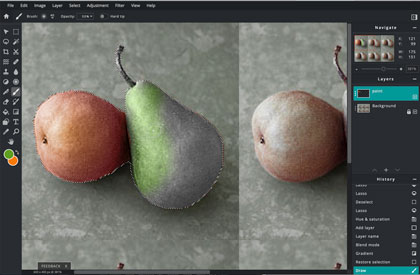
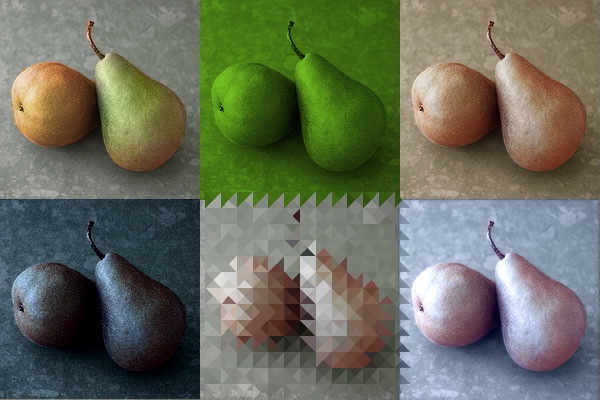
16. Choose a nice Green color and start painting.
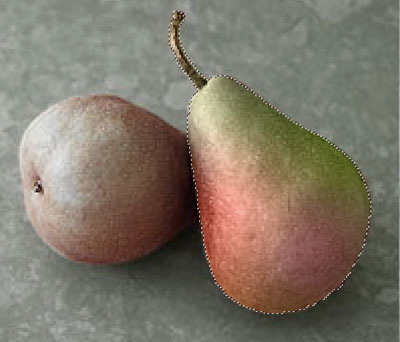
17. Select a pink color and add a few pink strokes to the pear.
18. When done - Deselect the right pear.
19. Load the left pear selection.
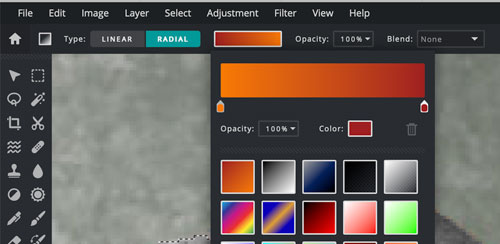
20. We are going to use Gradient tool to paint the left pear.
21. Go to the Tool box and choose Red color for Foreground and Yellow color for background.
22. Go to the Option bar and select "Foreground to Background" gradient type.
23. Click on "radial" gradient button.
24. On the paint layer, click in the middle of the selection and drag the gradient outwards.
25. Deselect.
26. Layer > Flatten Image ( it will merge both layers together)
set 2
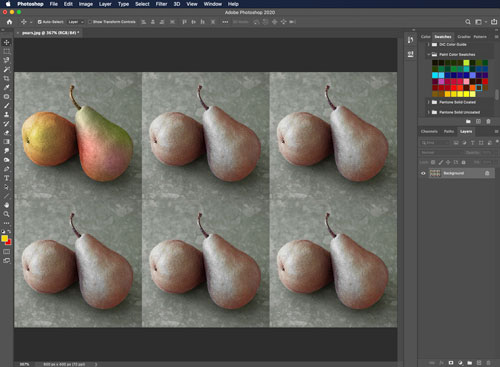
27. Zoom out (double-click on the Hand tool)
28. You are going to load both selections:
Select > load Selection > right

then go back to Select > Load Selection
select "left" check "Add to Selection"
OK
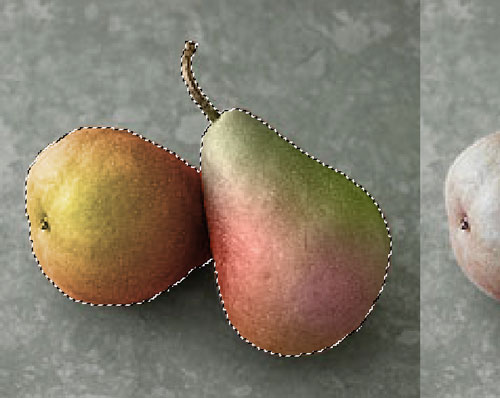
Now you have both pears selected.
29. Place the cursor inside the selection ( you should have any selection tool active).
30. Drag the selection over the next set of pears.
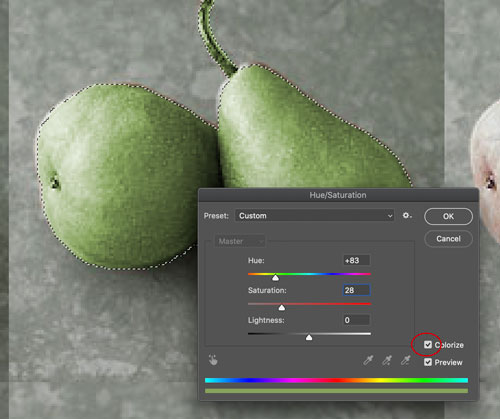
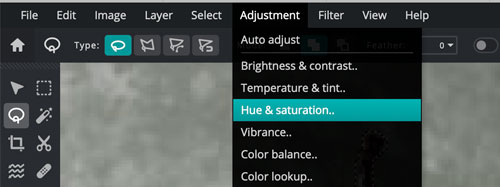
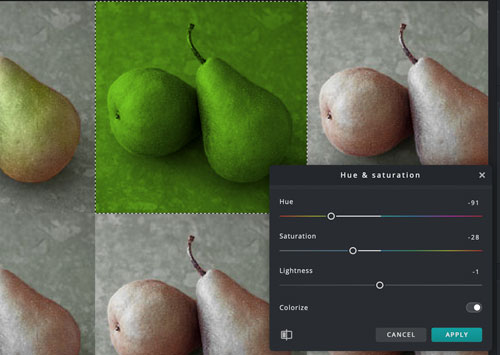
31. You are going to color the pears without painting them:
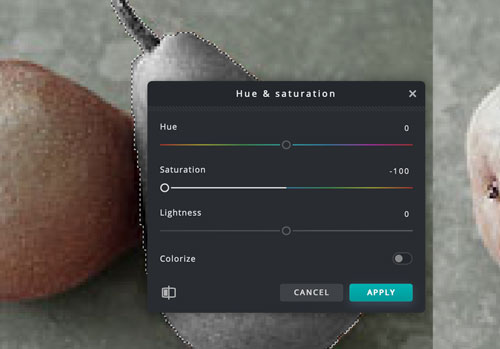
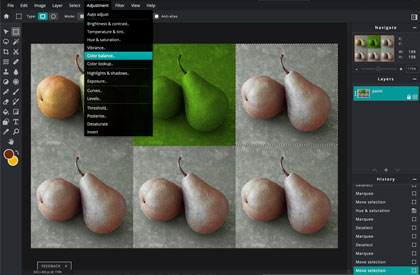
Image > Adjustment > Hue/Saturation
32. Check Colorize option
The Colorize option changes the nature of the Hue/Saturation control. When checked, it removes the color from an image and overlays the image with a tint of a single hue and saturation.
This option is unlike the Hue slider, which changes only individual pixels based on their present color values.
33. Move the Hue slider to the left to color the pears green.
34. Move the Saturation slider to the left to tone down the color.
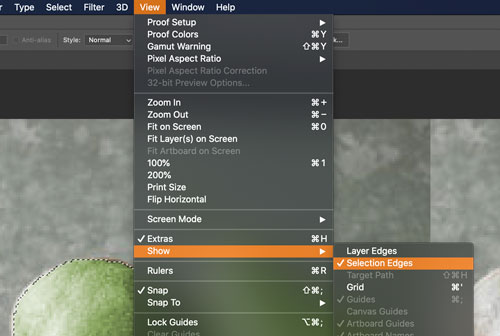
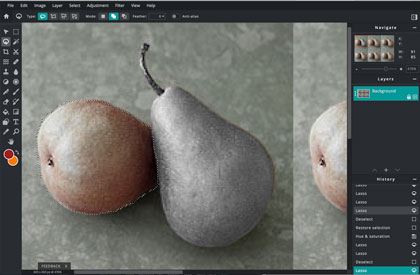
35. To hide the selection edges (to preview the result) - go to View > Show > Selection Edges
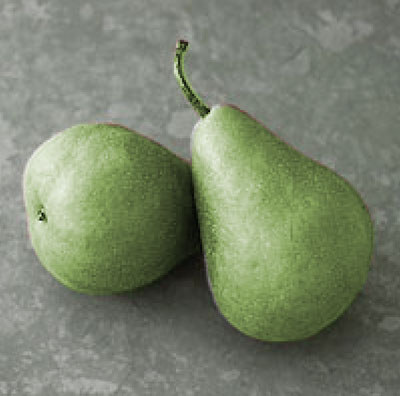
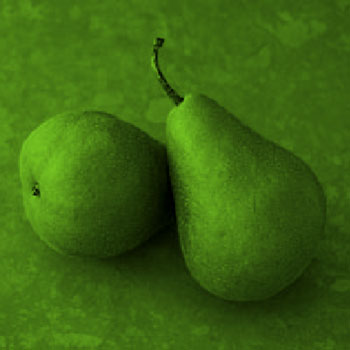
36. You will see the pears without the distraction of the selection's outline. (Pears are still selected)
37. Turn the Selection Edges back on!!!!!!!
set 3
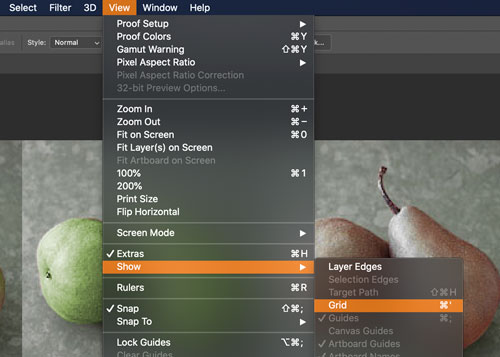
38. You will need a grid for the next set of pears.
Go to View > Show > Grid
39. You will see the grid over your image.
Now you need to customize the grid.
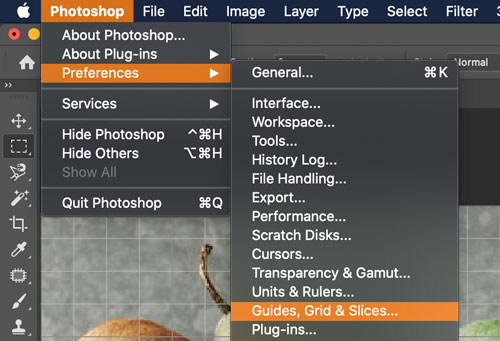
40. Go to Photoshop > Preferences > Guides, Grid, Slices & Count...
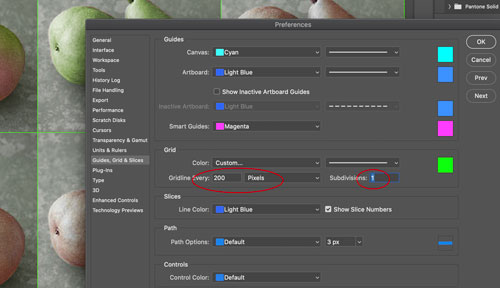
41. For this particular project, set the Grid options to:
Gridline every: 200 pixels (not 2 inches as shown, sorry)
Subdivision: 1
Choose a bright color for the grid.
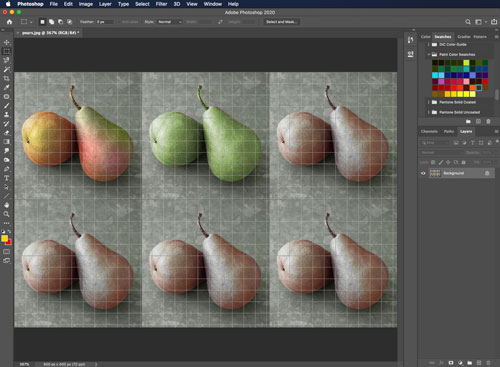
42. Now each set of pears is in their own cell.
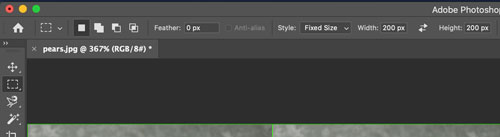
43. Select the Rectangular Marquee tool
44. Set the options: Fixed size,
200 px x 200 px
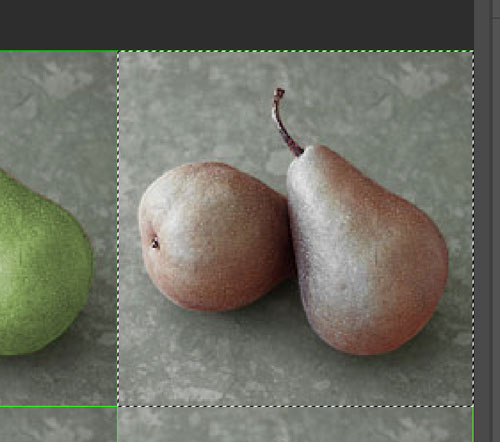
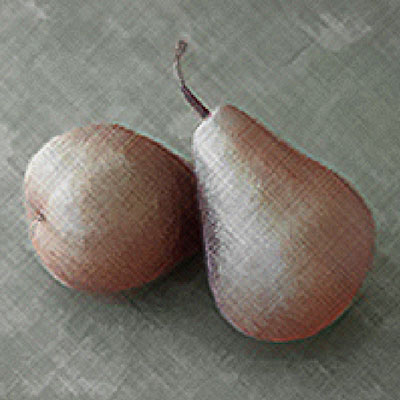
45. Click on the third set of pears.
The selection should "snap" to the grid.
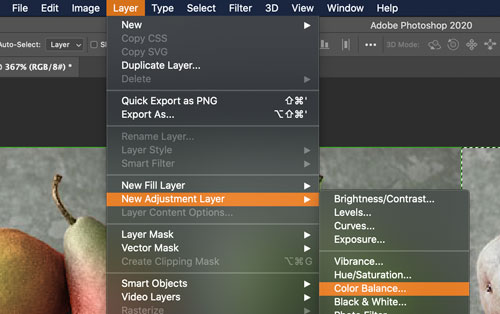
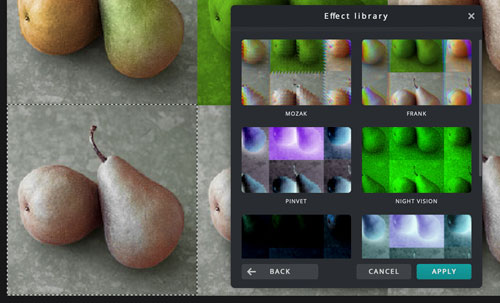
46. You are going to colorize this set in sepia tones (looks like an old photograph). You can do it directly on the Pears' layer, or you can add an adjustment layer, that can be easily removed or edited, if needed.
Layer > New Adjustment Layer > Color Balance

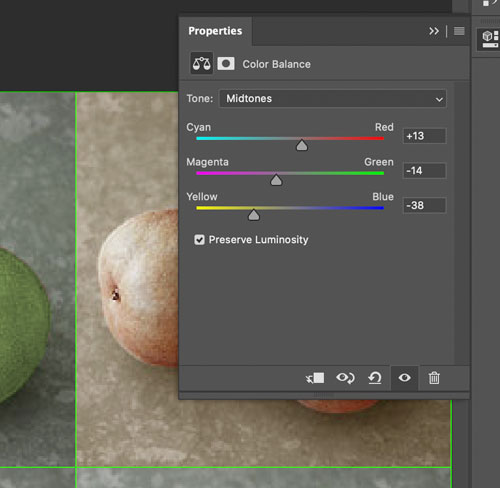
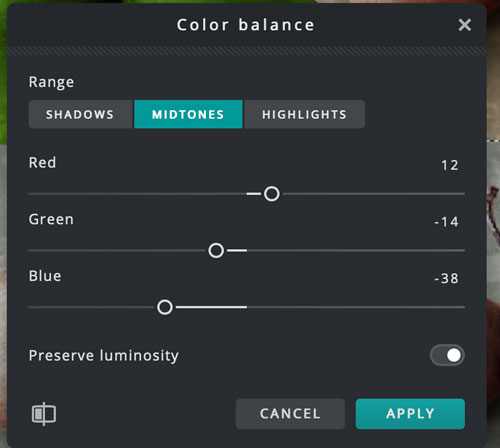
47. Set the color as you see on the picture (13, -14, -38)
48. Do you have the same result?
Deselect.
set 4
49. Select the forth set of pears (with Marquee tool)
50. You are going to apply a filter to the set:
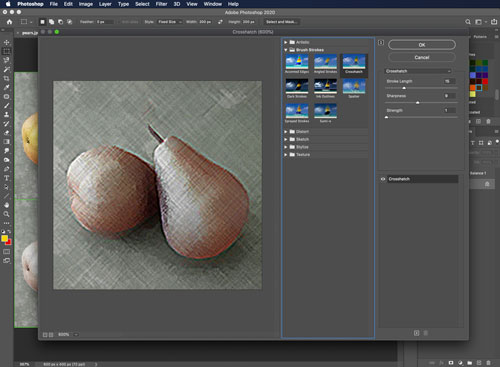
Filter > Filter Gallery > Brush Strokes > Crosshatch
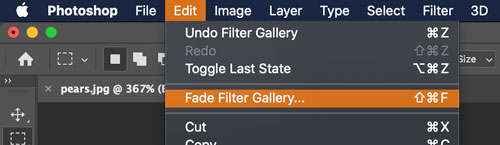
50. Chances are that the image is too distorted now (the filter is too strong). You can fix it by fading the filter: Edit > Fade Crosshatch.
This options works immediately after you used a filter!!!!
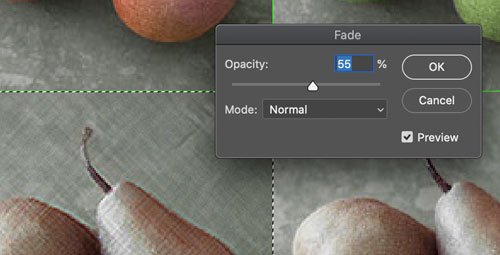
51. Change the opacity of the filter to about 50%
52. This set is done!
set 5
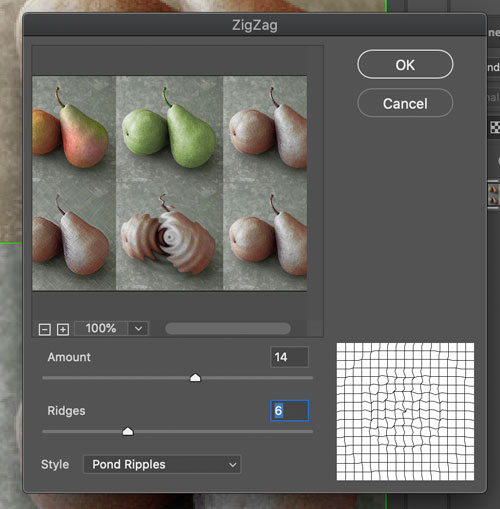
53. Select the next square.
You are going to apply a pond ripple effect to it:
Filter > Distort > ZigZag
Choose Pond Ripples Style.
You can play with the settings.
When done - click OK
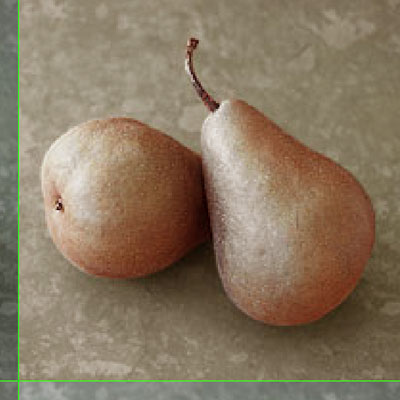
54. Looks something like this?
set 6
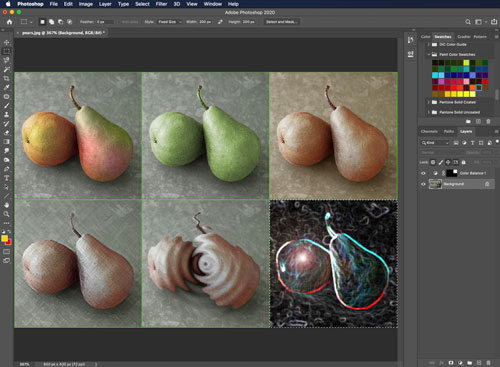
55. The last set of pears - select it and apply any filter you want, or a number of filters.
Experiment and have fun!!!