


buttons
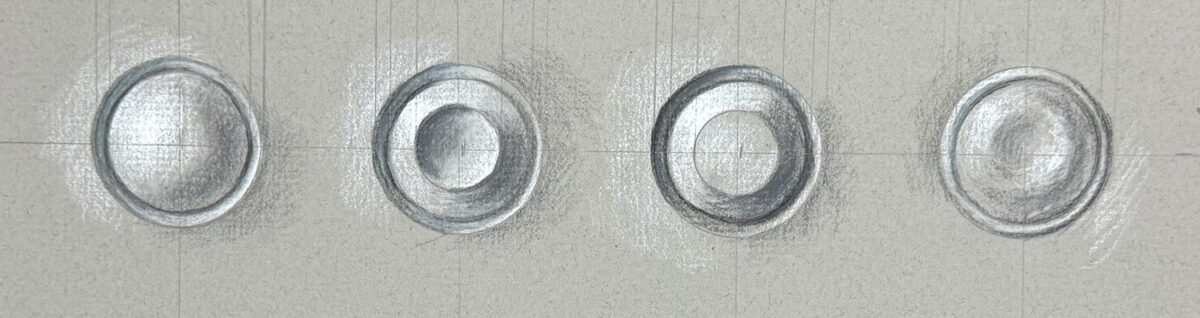
tonal drawing on colored paper
n this exercise, you will explore tonal drawing on colored paper using both dark and light drawing materials. Instead of allowing the white of the paper to represent the lightest values, the color of the paper becomes the middle value of your drawing.
You will work in two directions: adding darker values for shadows and adding lighter values for highlights. This allows you to build a much wider range of values and create forms that appear three-dimensional.
Objectives
Students will:
- understand how colored paper can function as a middle value
- identify highlights, midtones, shadows, and reflected light
- use both light and dark media to create a full range of values
- create the illusion of three-dimensional form through gradual tonal transitions
- practice controlling pressure, blending, and edges
- observe how light affects rounded and dimensional forms
Materials:
Neutral colored or toned drawing paper such as gray, tan, brown, or muted colors work especially well because they allow both the light and dark values to remain visible.
White color pencil – for light and highlights.
Mid-value color pencil – close to paper color – for blending and correcting mistakes.
Before You Start
Look at the color of your paper. That color is already one of your values, so you do not need to shade everything.
Think of the paper as your starting midtone.
- Dark pencil = shadows
- Paper = middle values
- White pencil = highlights
The goal is to allow all three to work together.
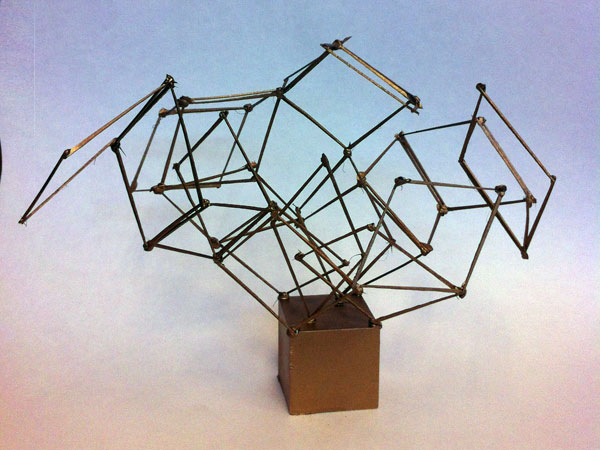
example:
steps
Step 1: Study the Light
Before shading, determine where the light is coming from.
Locate the:
highlight → light area → midtone → core shadow → reflected light
Do not simply make one side dark and the other side light. Look for subtle changes in value across the surface.
On rounded forms, values should usually transition gradually. On forms with sharp edges or steps, value changes may be more abrupt.
Step 2: Add the Dark Values
Begin with graphite and gradually develop the shadow areas.
Start lightly and build darker values in layers. Avoid pressing hard immediately. Increasing the pressure gradually will give you more control and produce smoother transitions.
Allow some areas of the original paper to remain untouched as your middle value.
Step 3: Add the Highlights
Use a white pencil to develop the areas receiving the strongest light.
Begin lightly and gradually increase the intensity of the white. Reserve your brightest white for the strongest highlights.
Avoid outlining everything in white. The white pencil should describe light hitting the form, not simply decorate its edges.
Step 4: Refine the Form
Move back and forth between dark and mid-tone colored pencils, the paper color, and white pencil.
Look for areas where the form appears flat. Ask yourself:
Does the value change explain the shape of the surface?
Strengthen darks where necessary, soften transitions on curved areas, sharpen edges where the form changes direction, and reinforce only the brightest highlights.
evaluation:
The finished drawing will be evaluated on accurate proportions and contours, effective use of the paper as a middle value, full tonal range, smooth value transitions, convincing three-dimensional form, controlled use of graphite and white pencil, and overall craftsmanship.
Parcourez les avantages proposés sur https://winouienligne.com/ et découvrez un casino pensé pour le public francophone.