


AP: images
Requirements and Recommendations
All images must be submitted in JPEG or PNG format (file name extension .jpg, .jpeg, or .png) and RGB color mode.
Note: If taking photos of your works using your phone, do not use Live photos (for Apple), Motion photos (for Android) or an equivalent. These images might not render correctly during scoring.
Recommendations for Naming Images
Before uploading your work in the AP Digital Portfolio, you’ll first need to save and name your images for easy reference when you’re ready to upload. Here are some tips you can follow to help keep your work organized.
Avoid special characters when labeling your work. Use the standard English alphabet (upper and lower case: A–Z, a–z) or numeric (0-9) values only.
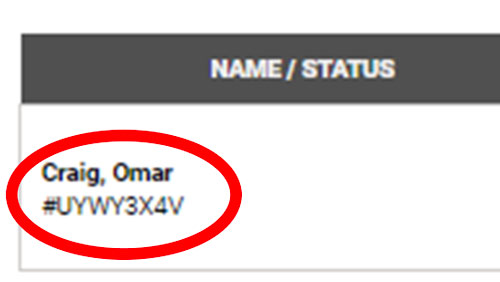
- Name the image with your AP ID and the sequence order of the image (e.g., XXXXXXXX_1, XXXXXXXX_2). Do not use your first or last name in your file name.
You can find your AP ID on the Class Summary / Overview page. It is in your Progress table, directly under your name. - Keep your labeled images in a folder you can easily find and use a name for the folder that you’ll remember (e.g., AP Art and Design Images).
Recommended Image Sizes
The maximum file size for uploaded images is 4 MB per image.
Images should not be smaller than 480 pixels in any direction for optimal viewing.
Free Disk Space
Based on the maximum file size of 4 MB and a total of 20 digital images, each student needs a maximum of 80 MB of free disk space per portfolio.
important links
preparing images
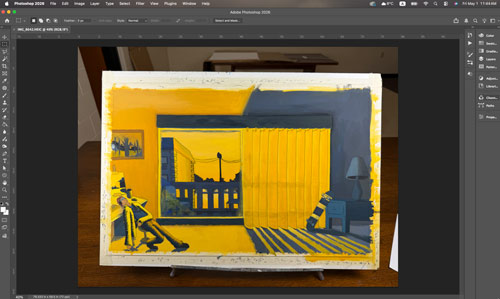
Open the first image in Photoshop.
Make sure the image is in RGB color mode:
From the top Menu Bar: Image > Mode… RGB Color should be checked.
helpful info:
- To rotate image: Image > Image Rotation > Clockwise (or Counter Clockwise).
- To undo: Ctrl Z
- To deselect: Ctrl D
- To select the entire image: Ctrl A
- To zoom in: Ctrl +
- To zoom out: Ctrl –
- Full view: Ctrl 0
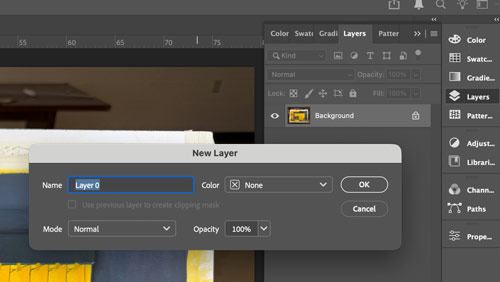
Open Layers panel: Window > Layers
Double-click on “Background layer”
In a new pop-up window just click OK. This will unlock the layer so you can adjust the outline of the artwork if it is distorted in your photograph.
Edges
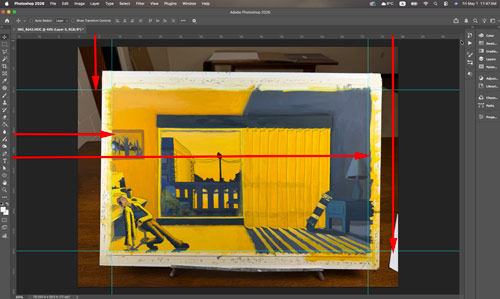
View > Rulers
Make sure it is checked so you can see the rulers above and on the left.
We need the rulers to drag guides to establish a perfect image dimensions.
Click on the ruler above and drag 2 guides to match the top and the bottom edges.
Then drag the right and left guides from the lest-side ruler.
If the guides are not perfectly matching the edges – we are going to address that next.
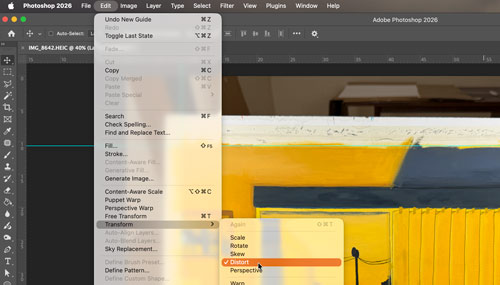
Edit > Transform > Distort
This will place a bonding box around the image that you can drag any corner to match the guides.
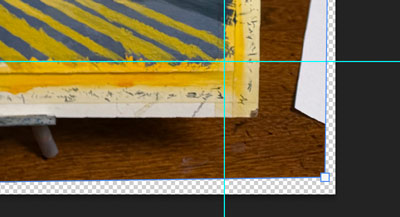
Just use the Selection tool and adjust the position of each corner if necessary.
Press Enter when done editing.
Contrast and colors
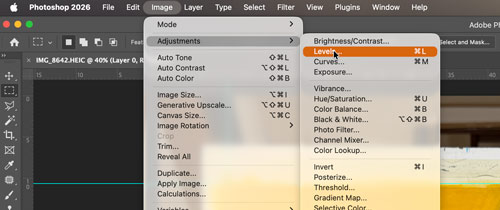
Image > Adjustments >Levels
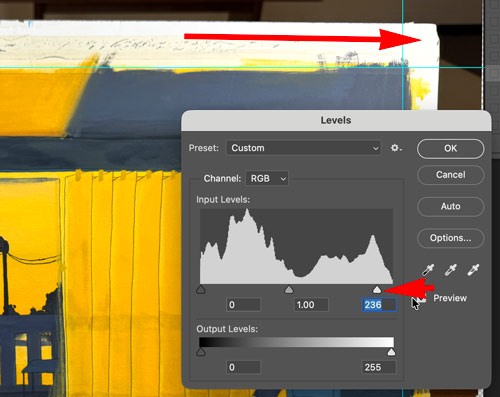
In the pop-up window use the right (white) slider to adjust the white values. Usually they are a little messed up in a photograph. Focus on a white spot in your photo and slede it to the left until white is white. Pay attention to the rest of the colors – do not go too far.
You can ajust half-tones and darks by dragging the other two sliders.
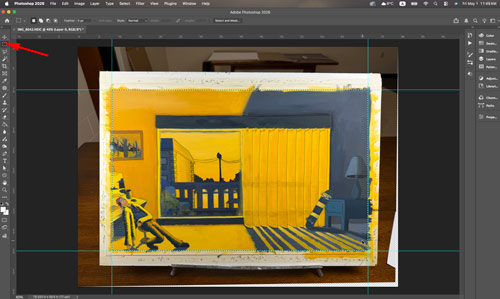
Use Rectangular Marquee tool and drag it arount the artwork edges. It should snap to the guides.
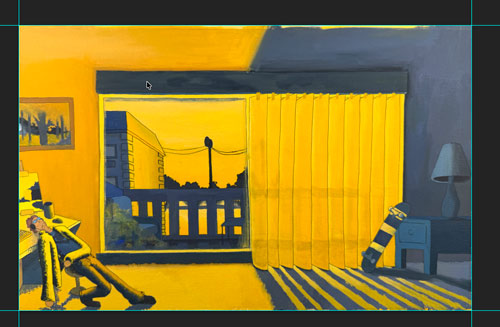
Image > Crop
Now your image is perfect.
optional step:
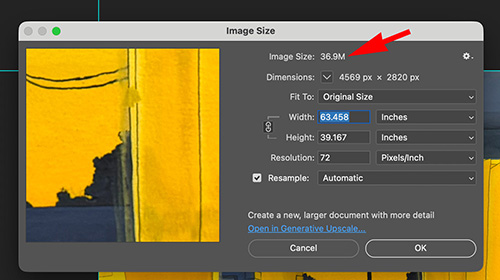
Check your image / file size: Image > Image Size
Remember, your image should be less than 4 MB
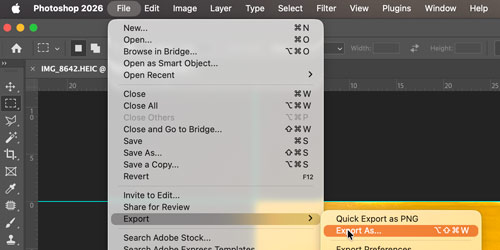
Here is how to minimize the file size.
File > Export >Export As…
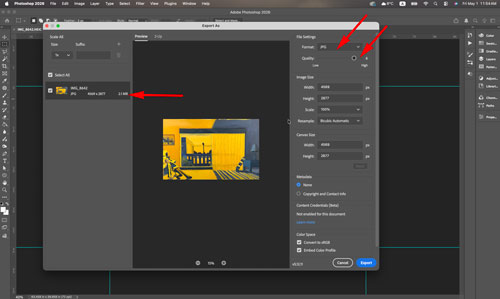
Make sure it is set to JPG format.
Adjust the quality slider and pay attention to the file size (max is 4 MB).
If you need to – you can reduce the image dimensions (min is 480 pixels in any direction).

Save
Name the file with your College Board AP ID number, then add the sequence order of the image.
Keep all images in the same folder.